In this article, we will make Linux set up and capture HTTPS (Hypertext Transfer Protocol Secure) packets in Wireshark. Then we will try to decode the SSL (Secure Socket Layer) encryptions.
Note that: Decryption of SSL /TLS may not work properly through Wireshark. This is just a trial to see what is possible and what is not possible.
What are SSL, HTTPS, and TLS?
Actually, all these three technical terms are interrelated. When we use only HTTP (Hypertext Transfer Protocol), then no transport layer security is used and we can easily see the content of any packet. But when HTTPS is used then we can see TLS (Transport Layer Security) is used to encrypt the data.
Simply we can say.
HTTP + (over) TLS/SSL = HTTPS
Note: HTTP sends data over port 80 but HTTPS uses port 443.
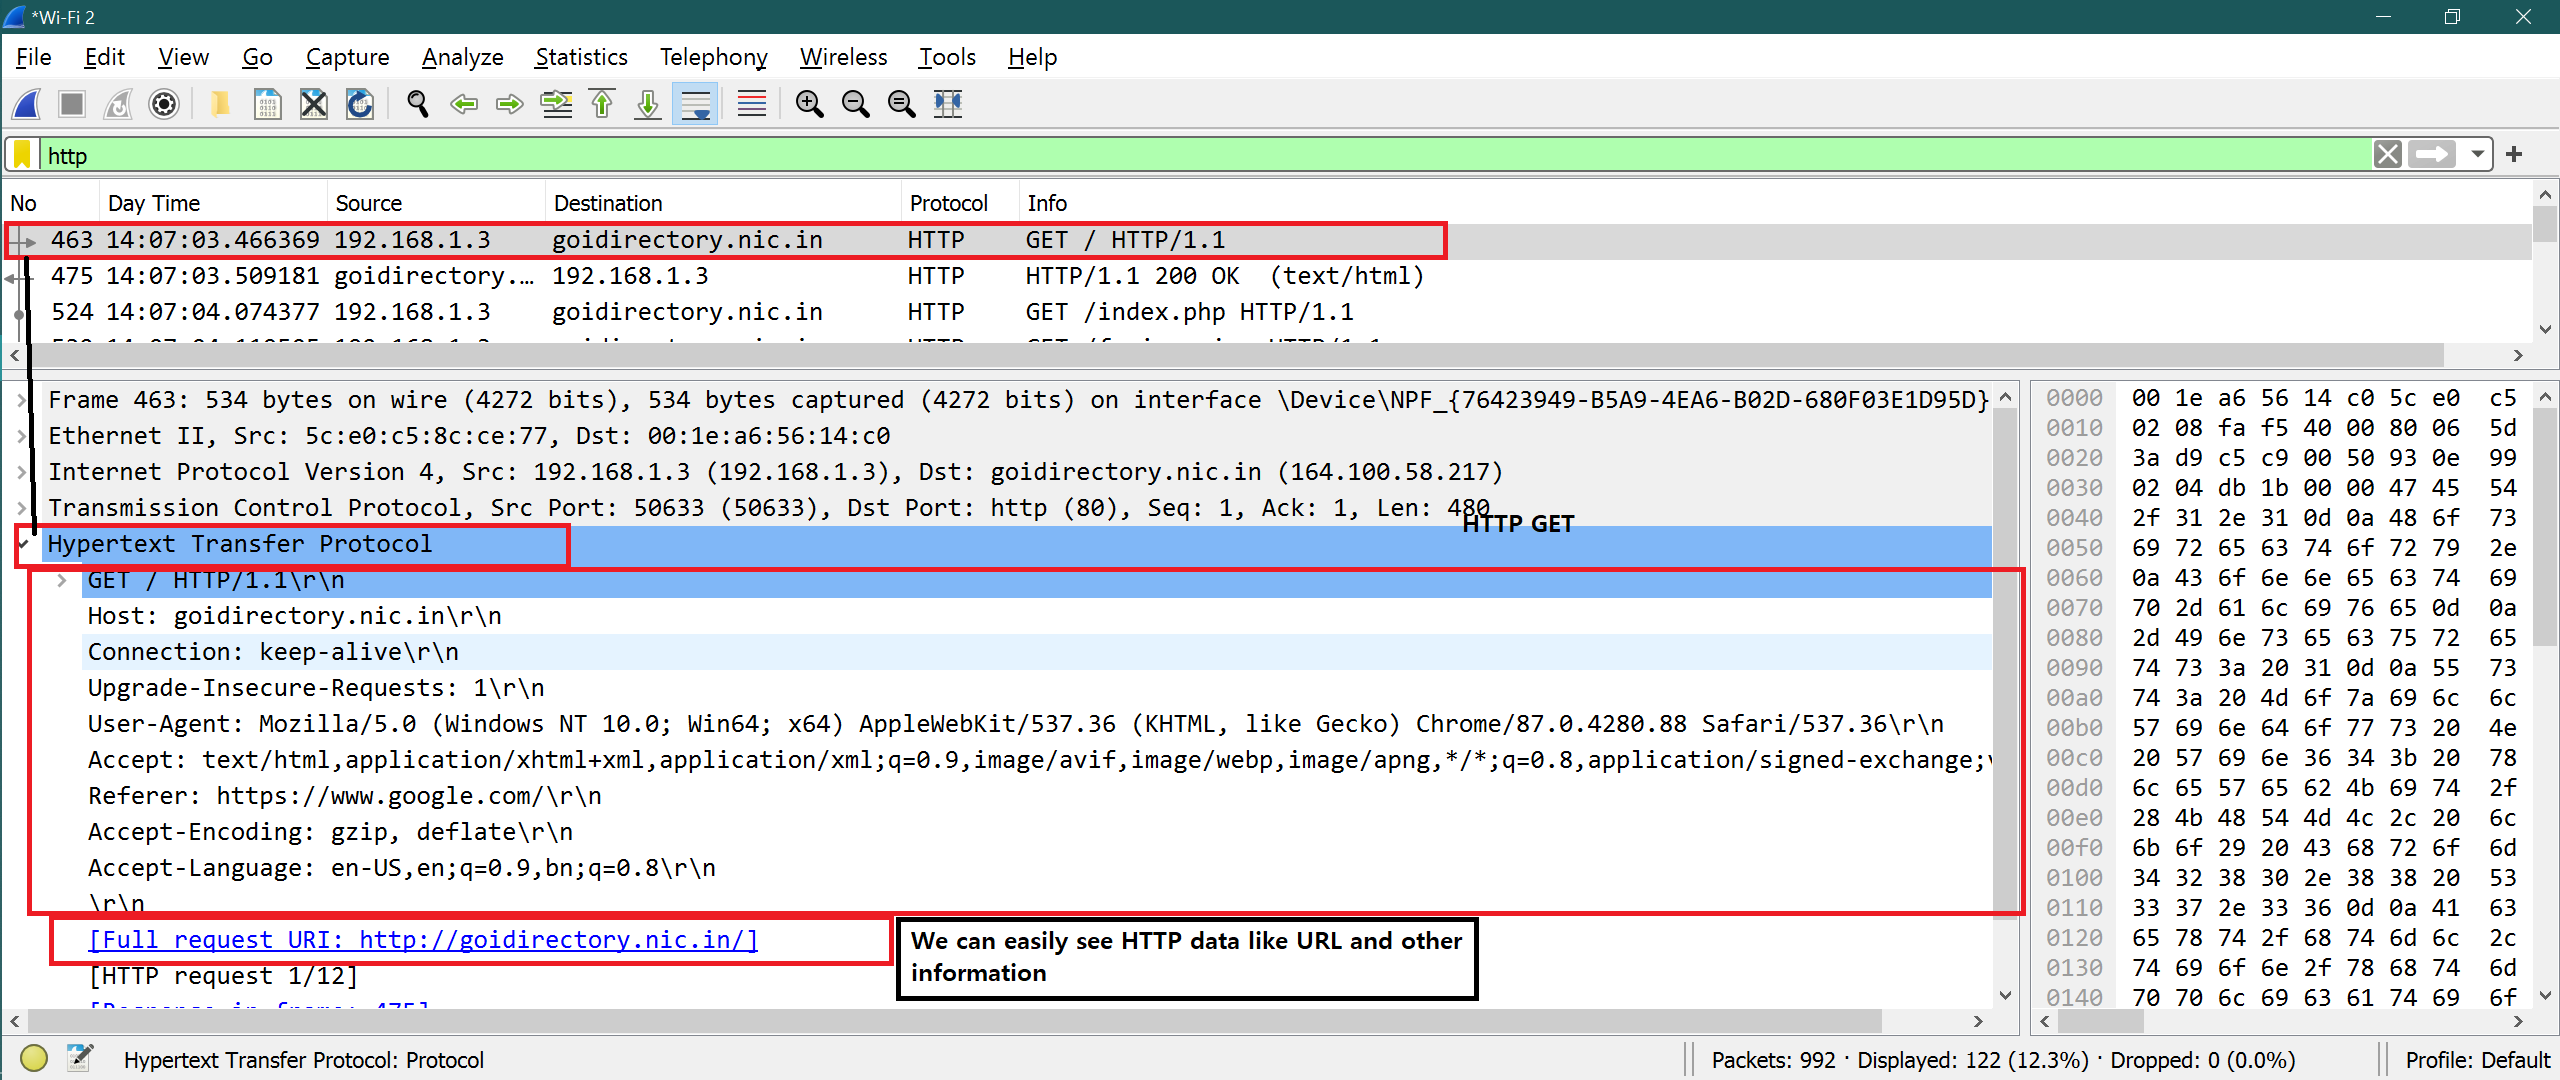
Screenshot for HTTP Data:
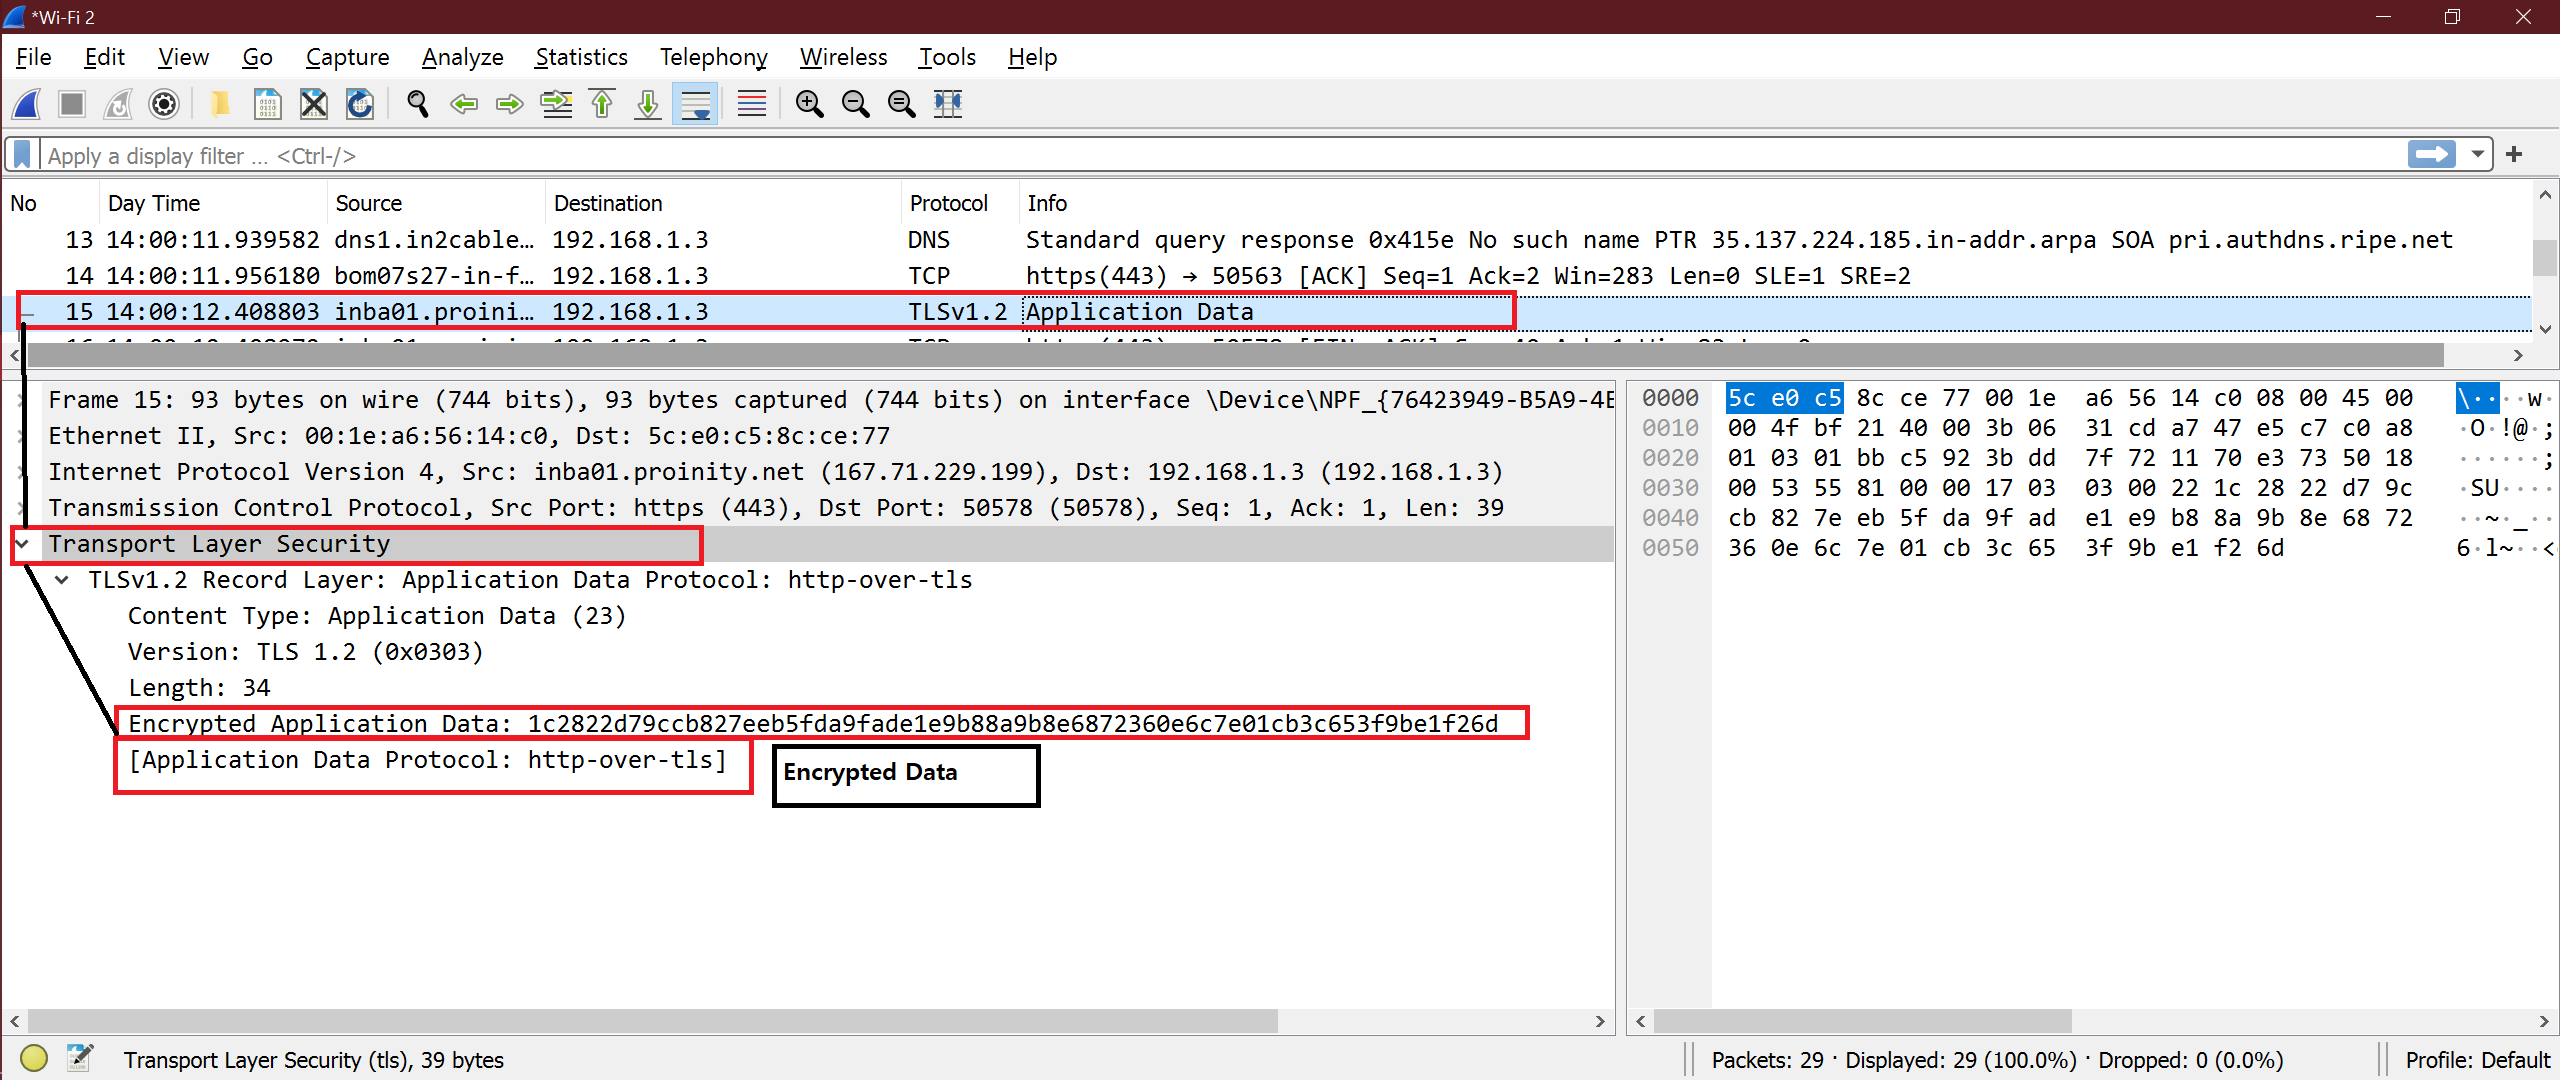
Screenshot for HTTPS Data:
Make Linux set up for SSL packet description
Step 1
Add below environment variable inside the .bashrc file. Open the .bashrc file and add the below line at end of the file. Save and close the file.

Now execute the below command to get the effect of it.
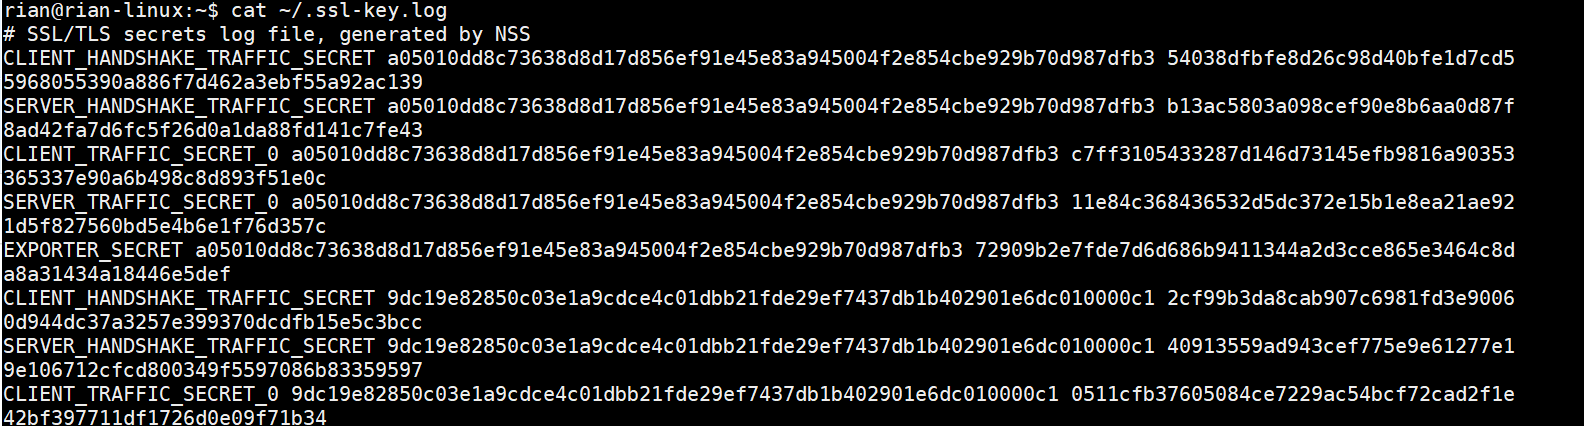
Now try the below command to get the value of “SSLKEYLOGFILE”
Here is the screenshot for all the above steps

Step 2
The above log file is not present in Linux. Create the above log file in Linux. Use the below command to create a log file.

Step 3
Launch default installed Firefox and open any https site like Linuxhint or Upwork.
Here I have taken the first example as upwork.com.
After the upwork website is opened in Firefox, check the content of that log file.
Command:
If this file is empty then Firefox is not using this log file. Close Firefox.
Follow the below commands to install Firefox.
Commands:
sudo apt-get update
sudo apt-get install firefox
Now, launch Firefox and check the content of that logfile
Command:
Now we can see huge information like the below screenshot. We are good to go.
Step 4
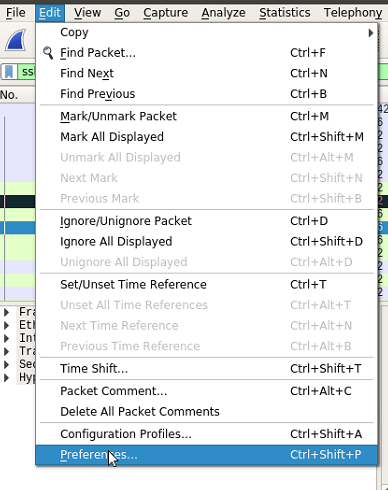
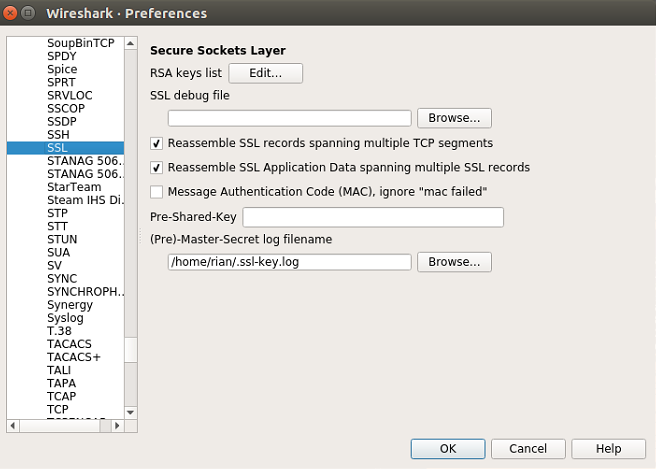
Now we need to add this log file inside Wireshark. Follow below path:
Wireshark->Edit->Preferences->Protocol->SSL->”Here provide your master secret log file path”.
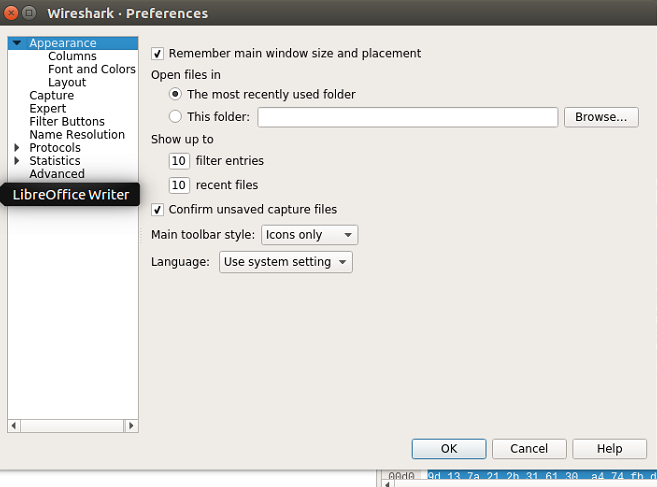
Follow the below screenshots for visual understanding.
After doing all these settings, do OK and start Wireshark on the required interfaces.
Now the set up is ready to verify SSL decryption.
Wireshark Analysis
After Wireshark starts capturing, put filter as “ssl” so that only SSL packets are filtered in Wireshark.
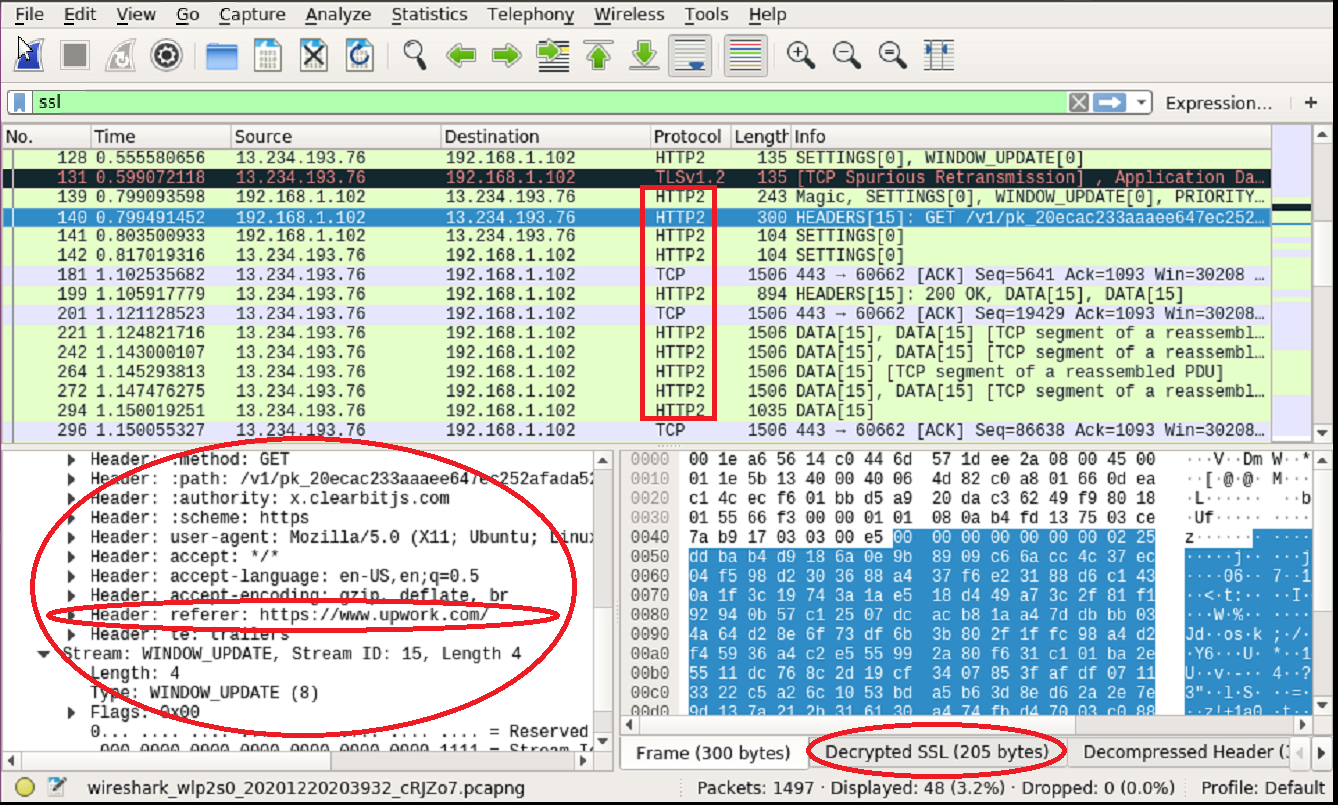
Look at the below screenshot, here we can see HTTP2 (HTTPS) is opened for some packets which were SSL/TLS encryption before.
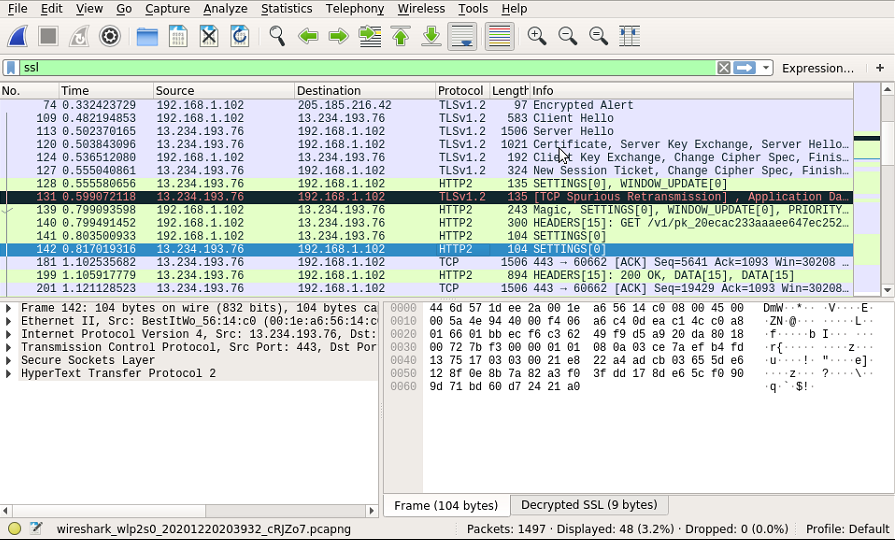
Now we can see the “Decrypted SSL” tab in Wireshark and HTTP2 protocols are opened visible. See the below screenshot for pointers.
Let’s see the differences between “Before SSL log file enabled” and “After SSL log file enabled” for https://linuxhint.com.
Here is the screenshot for packets of Linuxhint when “SSL log was not enabled”
Here is the screenshot for packets of Linuxhint when “SSL log was enabled”

We can see the differences easily. In the second screenshot, we can clearly see the URL that was requested by the user.
Now we can try other websites and observe if these methods work or not.
Conclusion
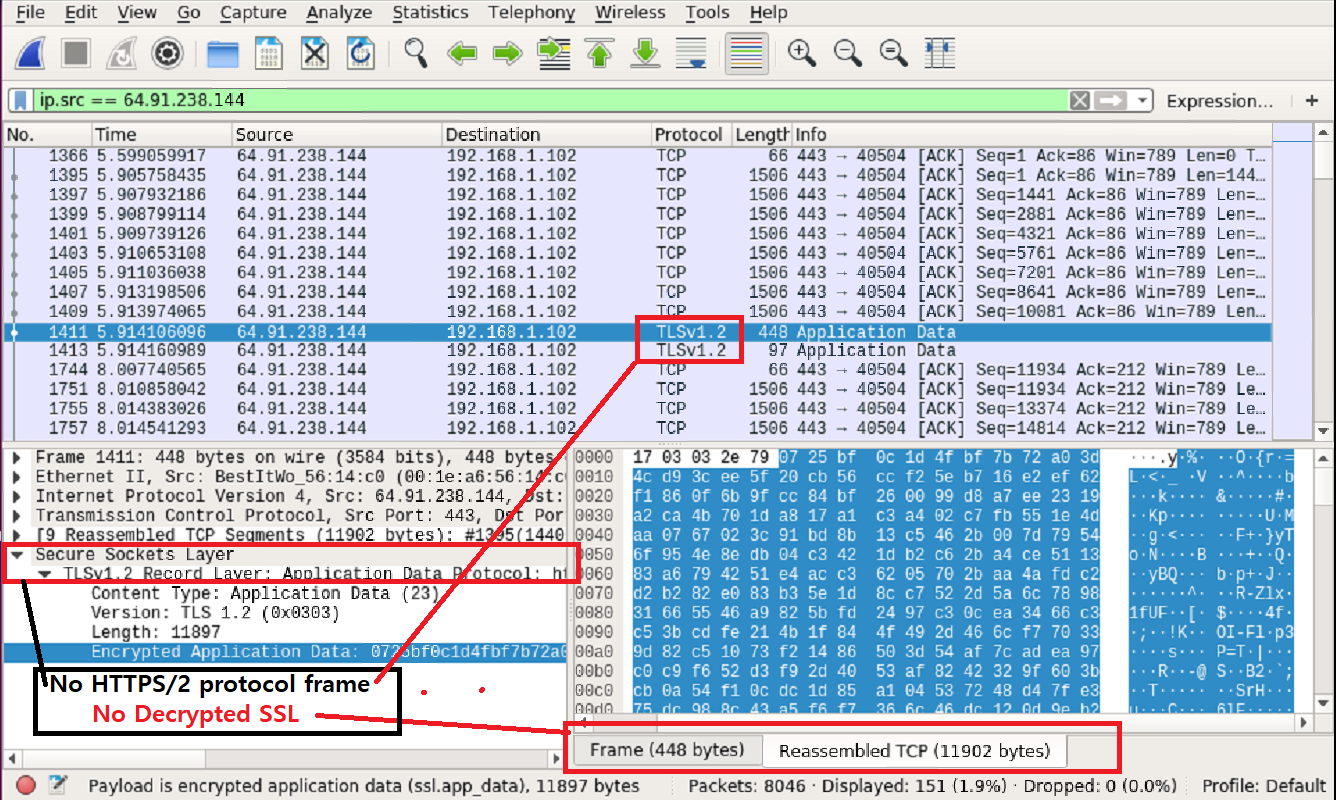
The above steps show how to make Linux set up to decrypt SSL/TLS encryption. We can see it worked well but some packets are still SSL/TLS encrypted. As I mentioned earlier it may not work for all packets or completely. Still, it’s good learning about SSL/TLS decryption.