In this article, I am going to show you how to install Web Station on your Synology NAS and use it to host websites. I will also show you how to create PHP and error page profiles. I will show you how to create a virtual host and configure it with custom PHP and error page profiles. So, let’s get started.
Table of Contents
- Installing Web Station
- Hosting Your First Website with Web Station
- Installing Web Station Back-end Packages and Service Packages
- Hosting PHP-based Dynamic Website with Web Station
- Creating Virtual Host Profiles
- Creating and Using Custom PHP Profiles
- Creating and Using Custom Error Pages
- Conclusion
- References
Installing Web Station
You can install Web Station on your Synology NAS from the Package Center app.
First, open the Package Center app.

Search for web station and click on Install as marked in the screenshot below.
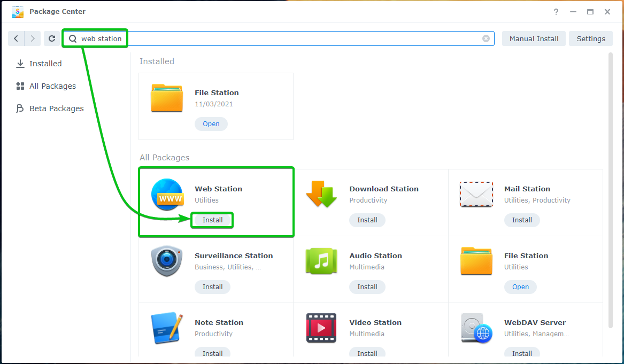
The Web Station should be installed within a few seconds.
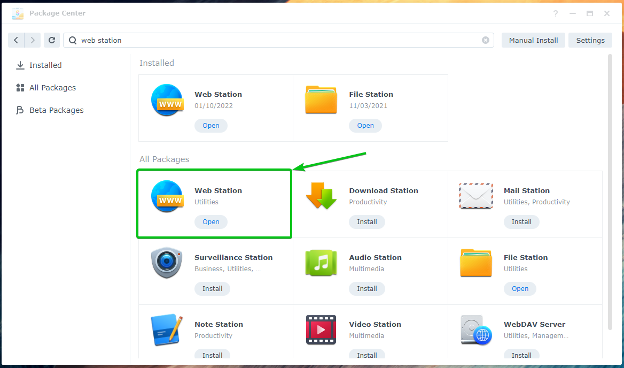
Once Web Station is installed, click on the Application Menu .
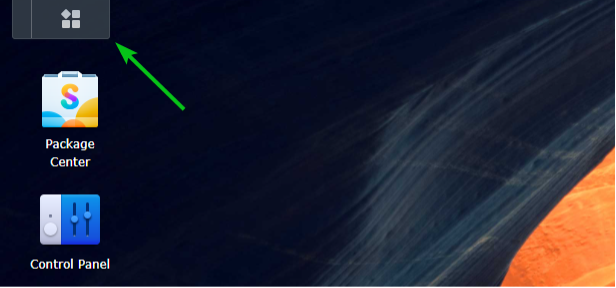
Click on Web Station as marked in the screenshot below.
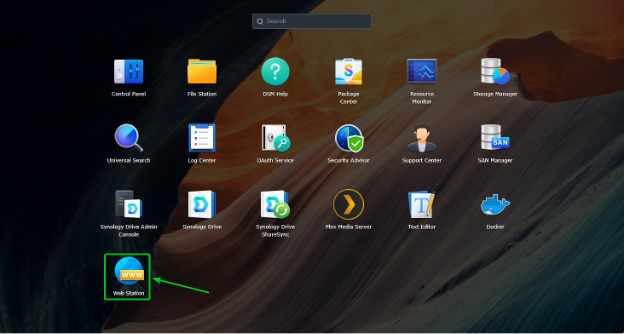
The Web Station app should be opened. Click on OK.
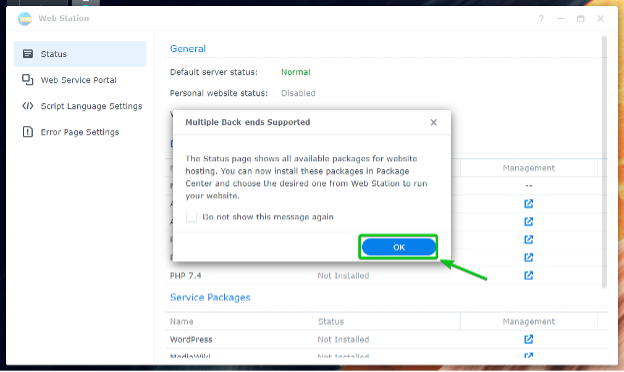
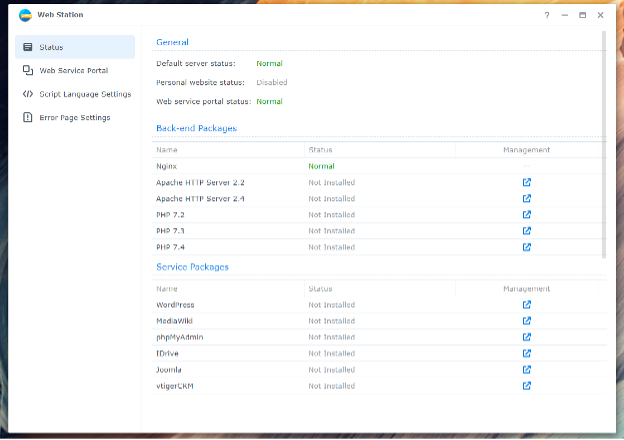
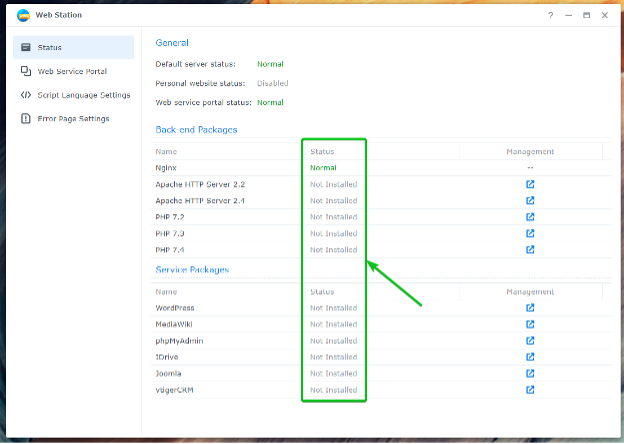
In the Status section of the Web Station, you will see the Back-end Packages and Service Packages that are Installed. The Back-end Packages and Service Packages that are Not Installed should also be listed.
NOTE: The Nginx back-end package is installed by default.
Hosting Your First Website with Web Station
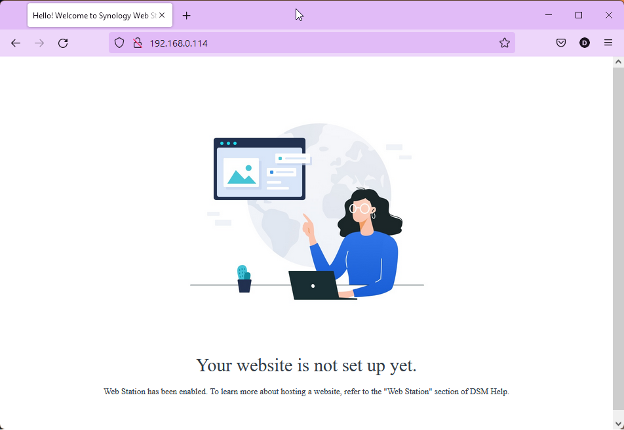
With the default Web Station configuration, you can host static websites on your Synology NAS. The Nginx web server will serve the static web pages.
Web Station comes with a default website. To visit the default website, try to access the URL http://192.168.0.114. If everything works, you will see the webpage as shown in the screenshot below.
NOTE: Here, 192.168.0.114 is the IP address of my Synology NAS. Replace it with yours from now on.
If you need any assistance with finding the IP address of your Synology NAS, read the article How Do I Find the IP Address of My Synology NAS?.
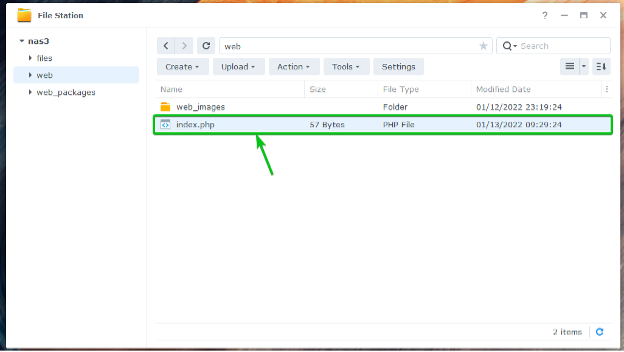
By default, Web Station serves webpages from the web shared folder as marked in the screenshot below. You can upload your desired HTML files in this shared folder to replace the default website.

As you can see, I have replaced the default website with a custom website.

Installing Web Station Back-end Packages and Service Packages
If you want to use the Apache webserver instead of the default Nginx web server or run dynamic websites via PHP, you will have to install the required Back-end Packages.
You can also install WordPress, phpMyAdmin, and other CMS Service Packages.
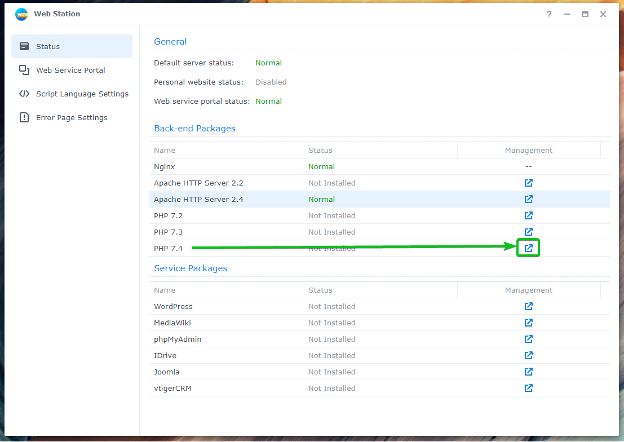
The Back-end or Service packages that are not installed will have the Not Installed status in the Status section of Web Station as marked in the screenshot below.
To install a Back-end or Service package, click on the respective icon as marked in the screenshot below.
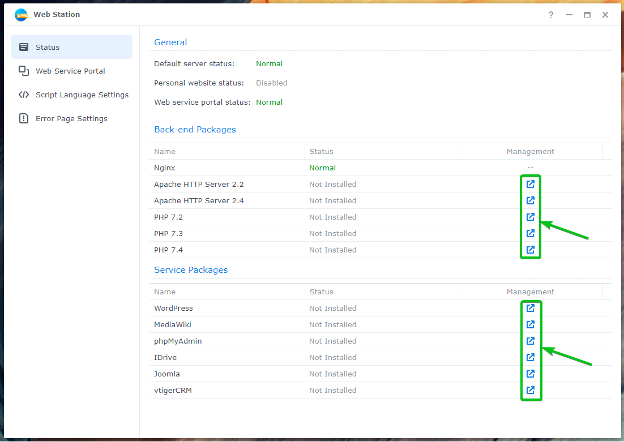
For example, to install the Apache HTTP Server 2.4 Back-end Package, click on the icon as marked in the screenshot below.

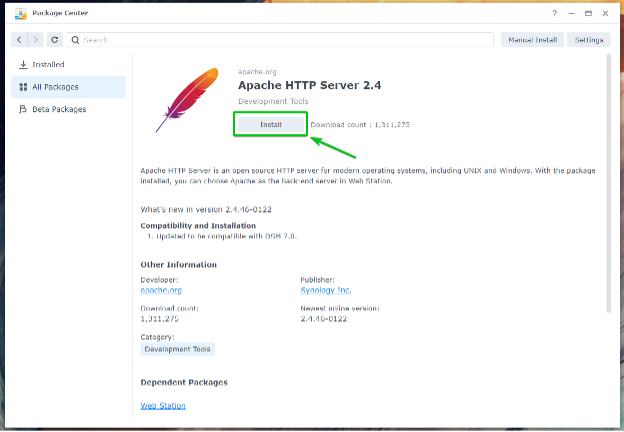
The Package Center app will show the Apache HTTP Server 2.4 package. Click on Install.
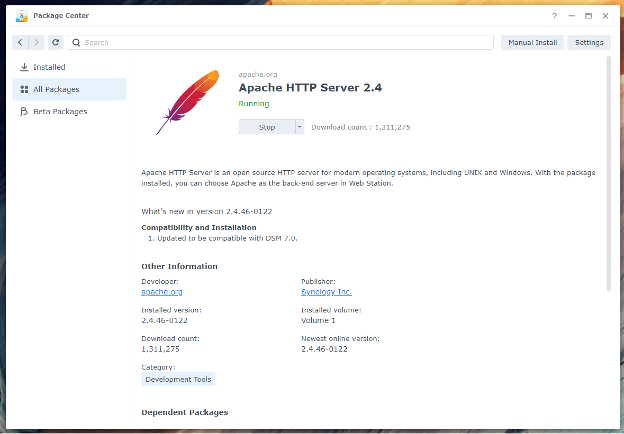
The Apache HTTP Server 2.4 package should be installed.
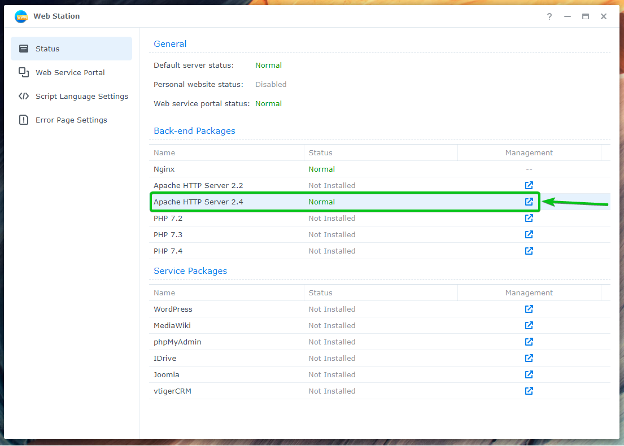
Once the Apache HTTP Server 2.4 package is installed, the Back-end package status will be changed to Normal, as marked in the screenshot below.
To enable PHP support, install one of the PHP back-end packages. In this article, I will install the PHP 7.4 package.
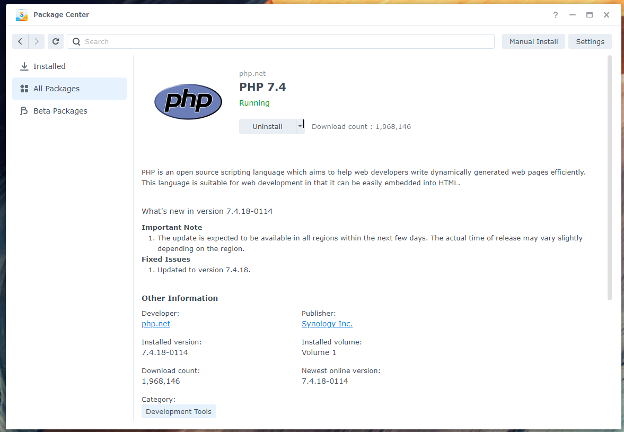
Click on Install.

The PHP 7.4 package should be installed.
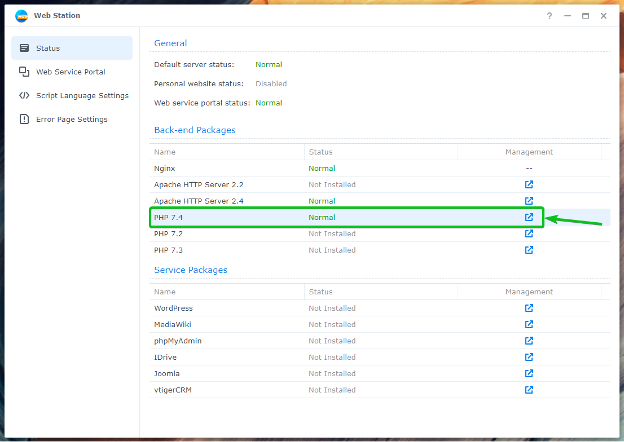
Once the PHP 7.4 package is installed, the Back-end package status will be changed to Normal as marked in the screenshot below.
You should use the Apache webserver instead of the Nginx web server and host dynamic websites with PHP.
Hosting PHP-based Dynamic Website with Web Station
Once you have installed the PHP Back-end package, you can configure Web Station to serve dynamic websites.
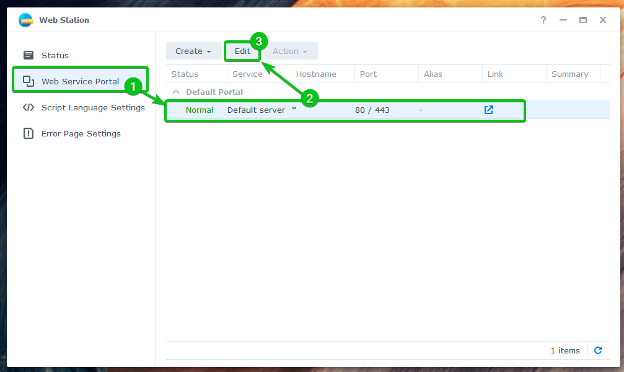
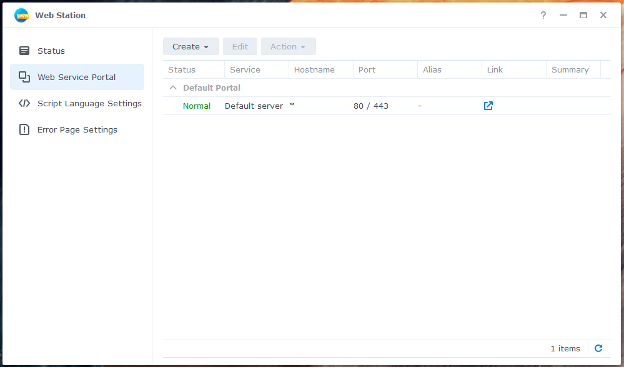
To do that, navigate to the Web Service Portal section1, select the Default server portal2, and click on Edit3 as marked in the screenshot below.
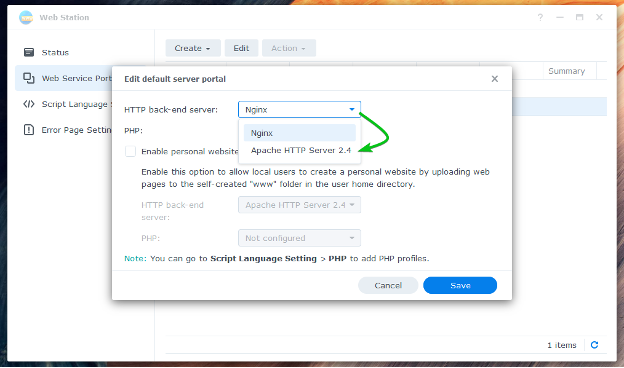
By default, the HTTP back-end server will be set to Nginx.
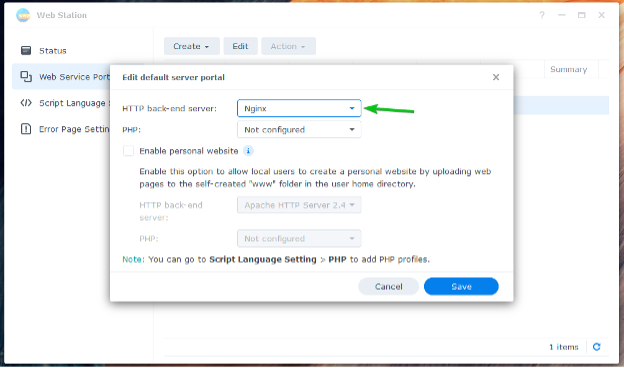
You can select the Apache HTTP Server from the HTTP-back-end server dropdown menu if you want to use the Apache webserver instead.
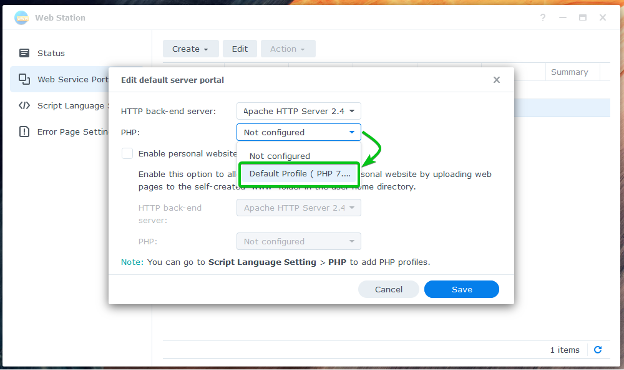
Select a PHP profile from the PHP dropdown menu as marked in the screenshot below to host a dynamic website.
Once you’re done, click on Save.
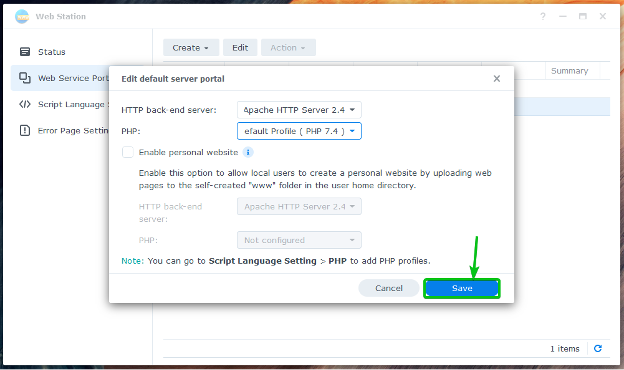
The default portal should be configured to serve a dynamic PHP website.
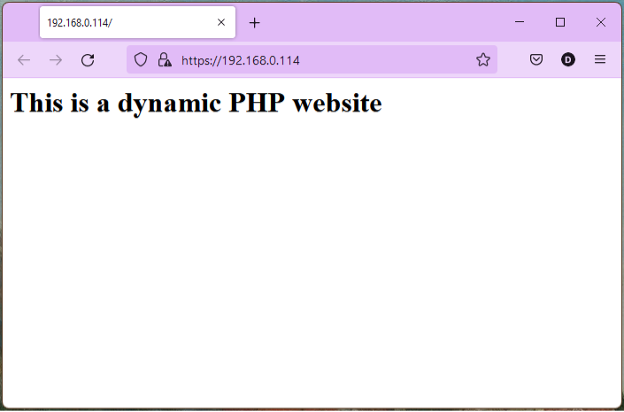
Now, create a simple index.php file in the web shared folder.
Once you’ve created/uploaded an index.php file in the web shared folder, visit the URL http://192.168.0.114 from your favorite web browser, and you should see your PHP-based website.
Creating Virtual Host Profiles
You can also create name-based and port-based virtual hosts with Web Station and host multiple websites from a single Synology NAS.
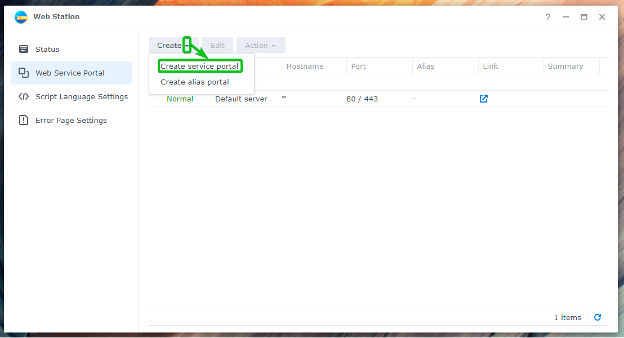
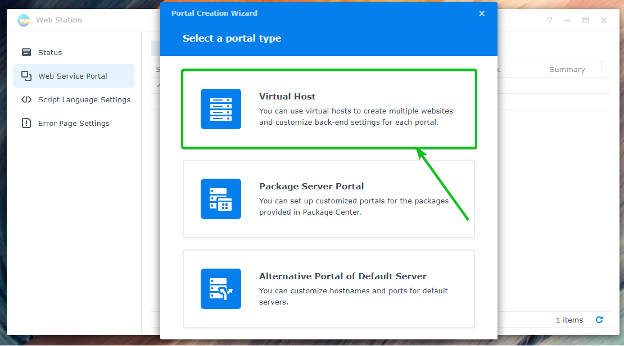
Navigate to the Web Service Portal section and click on Create to create a virtual host profile.

Click on Create service portal.
Click on Virtual Host.
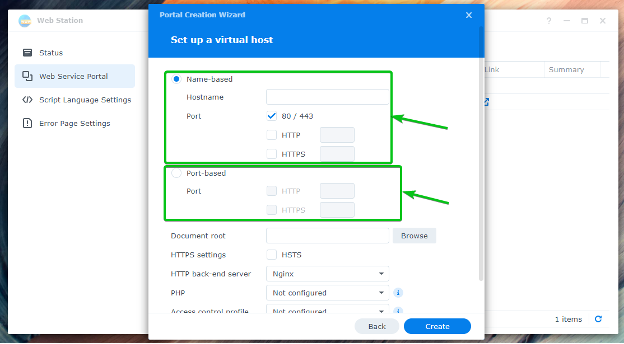
Select Named-based or Port-based to create a name-based or port-based virtual host, respectively.
Named-based: Web Station uses the DNS name pointing to the IP address of your Synology NAS to determine the website (or Virtual Host) to serve.
Port-based: Web Station uses the port number to determine the website (or Virtual Host) to serve.
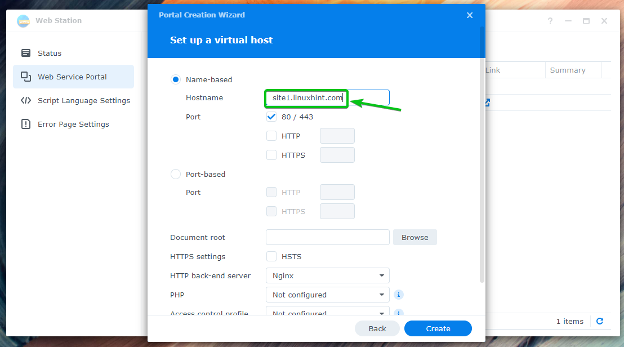
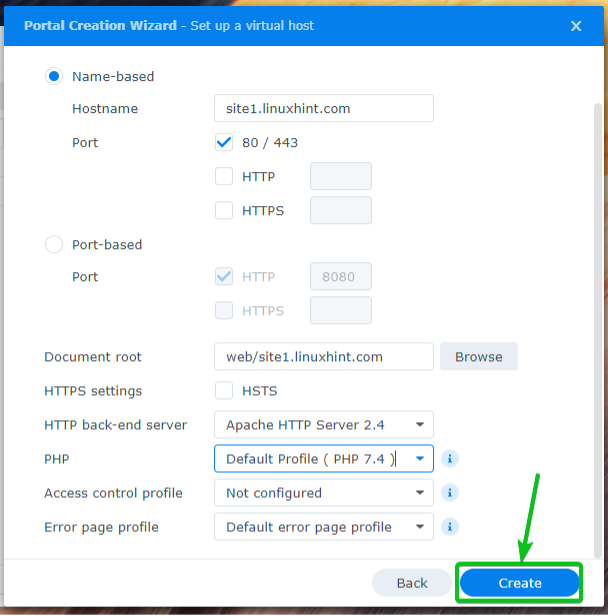
If you want to use the DNS name site1.linuxhint.com for the virtual host, select Named-based and type in site1.linuxhint.com in the Hostname section.
NOTE: For name-based virtual hosts, the DNS name you want to use must point/resolve to the IP address of your Synology NAS.
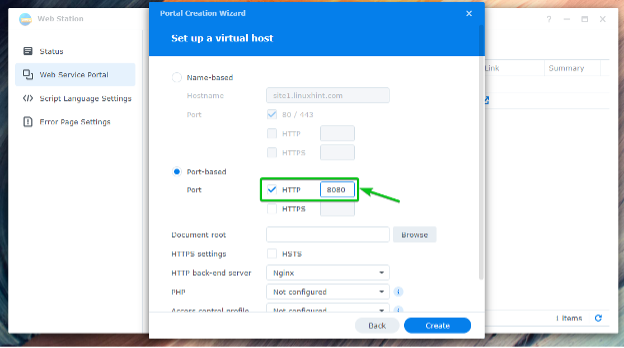
If you want to use port 8080 for the virtual host, select Port-based, check the protocol (HTTP or HTTPS) that you want to use, and type in 8080 as marked in the screenshot below.
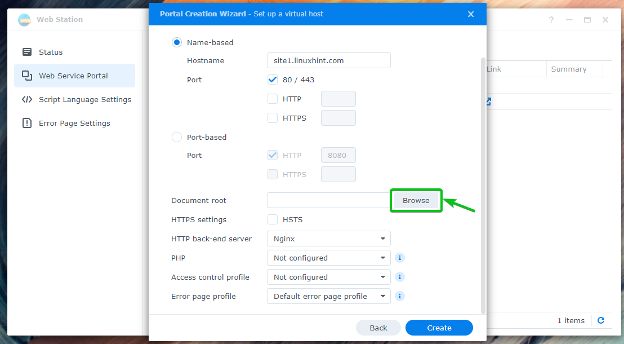
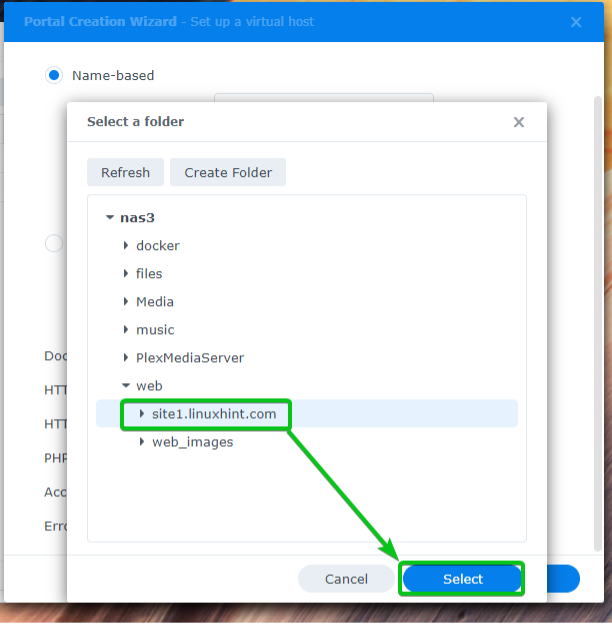
To select a folder from where Web Station will serve webpages, click on Browse as marked in the screenshot below.
Select your desired folder and click on Select.
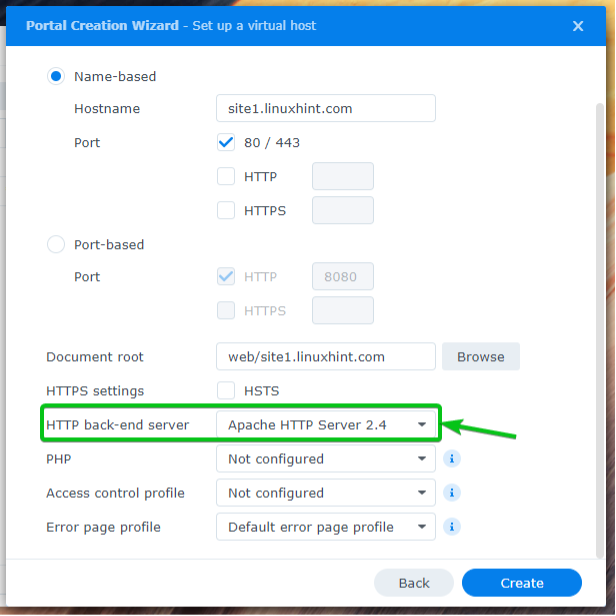
Select the webserver (Apache or Nginx) that you want to use from the HTTP back-end server dropdown menu.
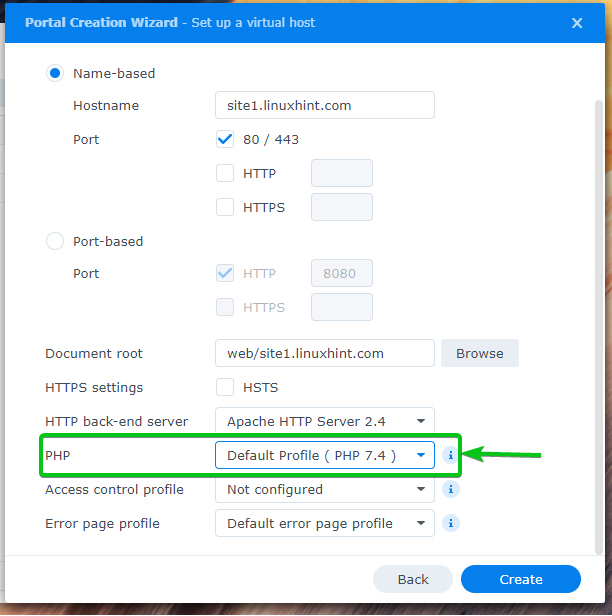
Select your desired PHP version profile from the PHP dropdown menu.
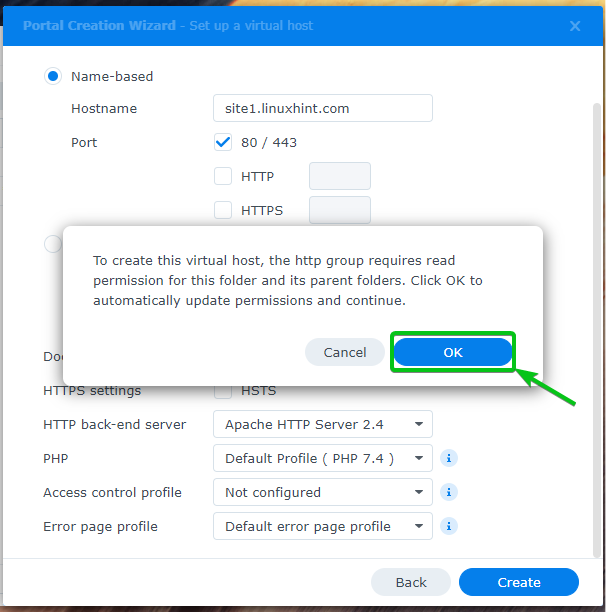
Once you’re done, click on Create.
Click on OK.
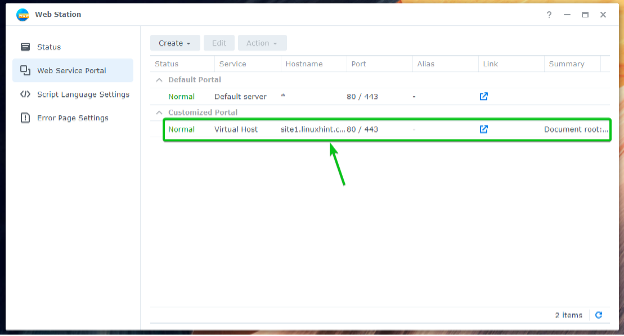
A new virtual host should be created.
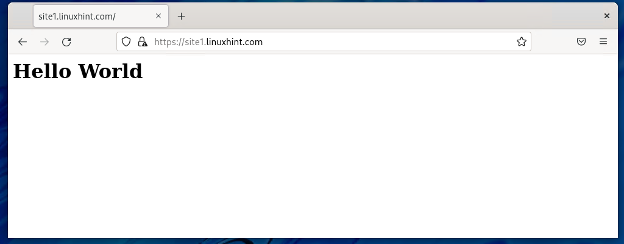
To access your virtual host, visit https://site1.linuxhint.com from your favorite web browser. The website on your selected folder will be loaded, as shown in the screenshot below.
Creating and Using Custom PHP Profiles
You can create custom PHP profiles and configure any virtual hosts to use them.
To create a custom PHP profile, click on Create from the Script Language Settings section as marked in the screenshot below.

In the Settings tab, type in your PHP Profile name1, type in a short Description of your PHP profile2, and select the version of PHP that you want to use from the PHP version dropdown menu3.
If you want to enable caching, check the Enable PHP cache checkbox4.
If you want to enable Xdebug, check the Enable Xdebug checkbox5.
If you want to display PHP error messages, check the Enable display_errors to display PHP error message checkbox6.

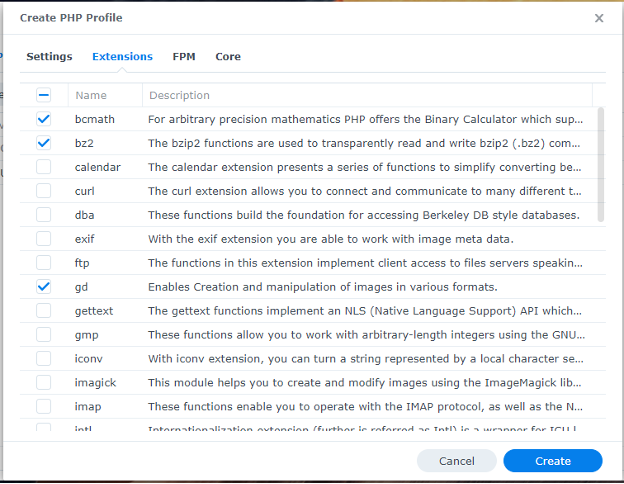
You can enable the desired PHP extensions from the Extensions tab that you need for this profile.
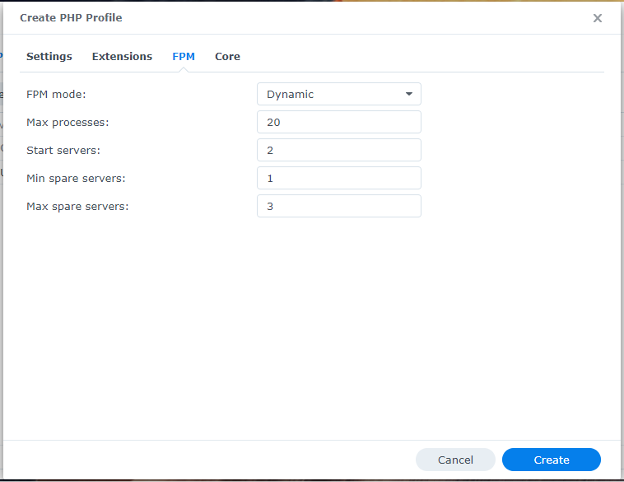
You can configure Fast-CGI Process Manager options for PHP from the FPM tab.
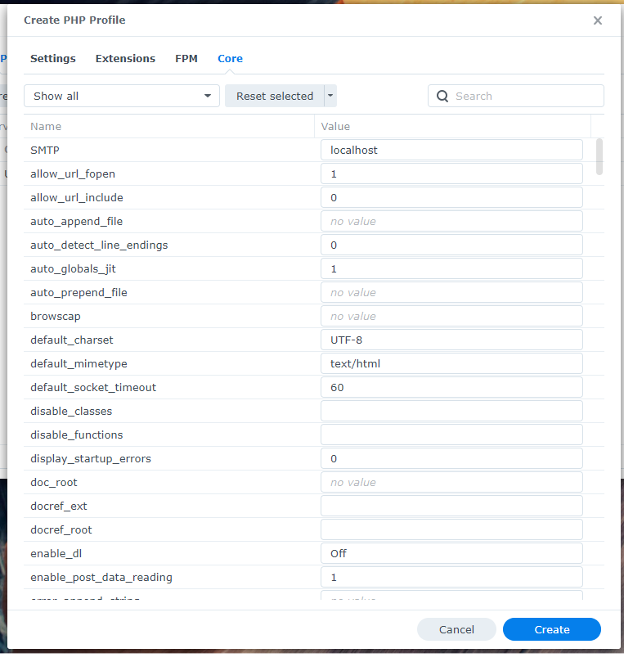
From the Core tab, you can configure php.ini settings for this profile.
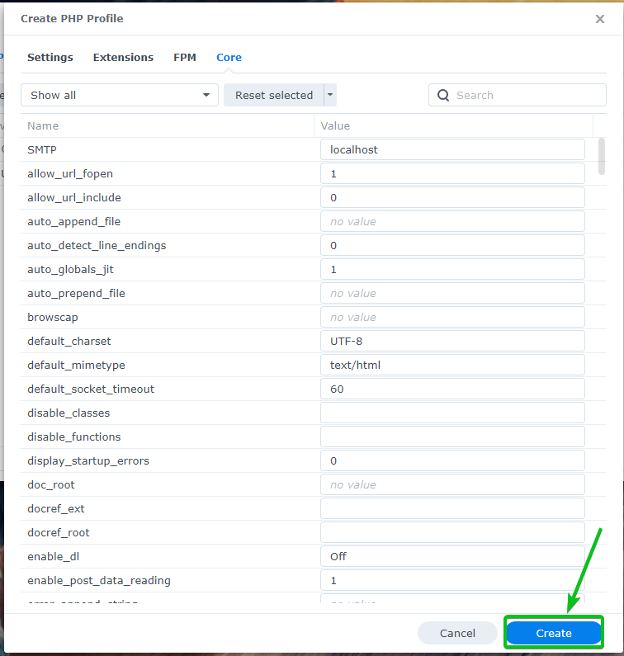
Once you’re happy, click on Create.
A new PHP profile should be created.
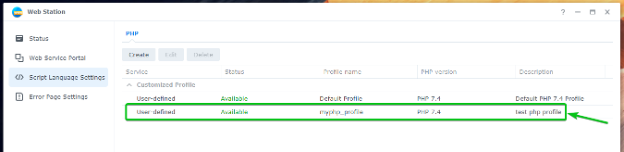
To use the newly created PHP profile, navigate to the Web Service Portal tab1, select your desired virtual host2, and click on Edit3 as marked in the screenshot below.

From the PHP dropdown menu1, select the custom PHP profile you’ve just created2.
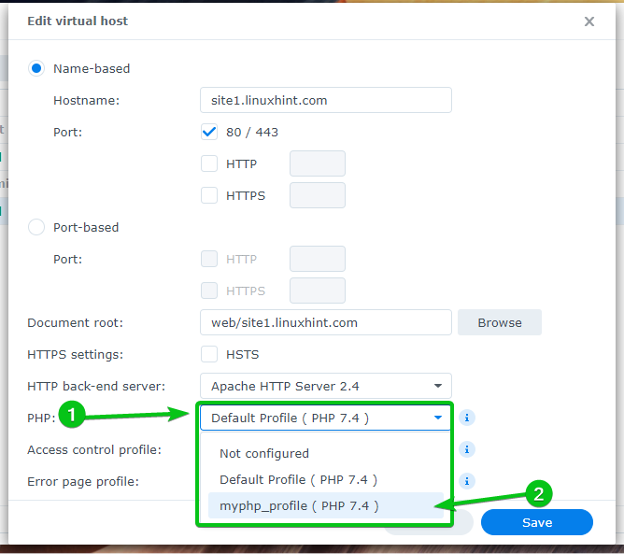
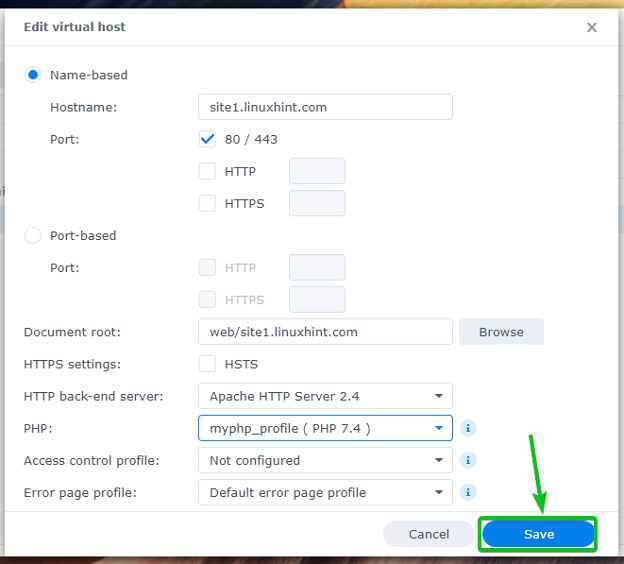
Once you’re done, click on Save.
The custom PHP profile that you’ve created should be used for this virtual host from now on.
Creating and Using Custom Error Pages
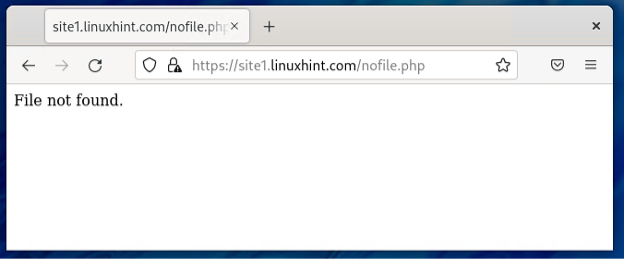
Web Station uses simple error pages by default. But you can create custom error page profiles and use them for any virtual hosts you want. This will make handling errors such as 404, 503, and so on very easy.
This is how the HTTP 404 error page of Web Station looks by default.
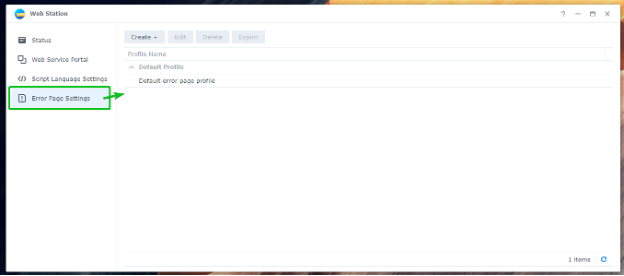
Navigate to the Error Page Settings section to create a custom error page profile.
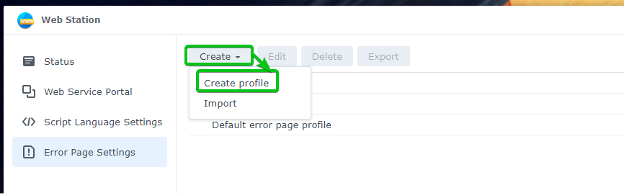
Click on Create > Create profile.
Type in a custom error page profile name in the Profile name section.
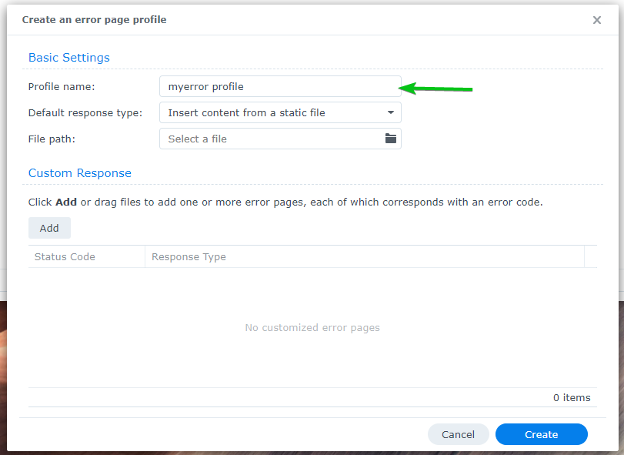
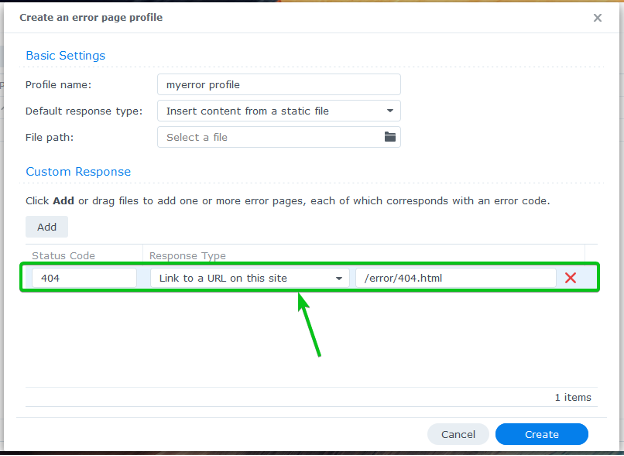
To add a Custom Response, click on Add.
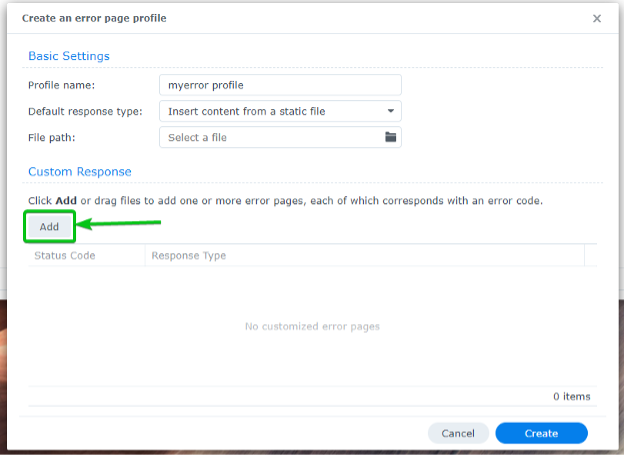
An empty custom response should be added, as marked in the screenshot below.
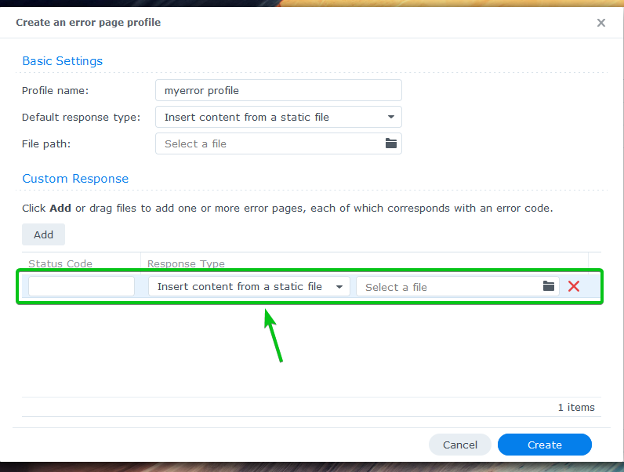
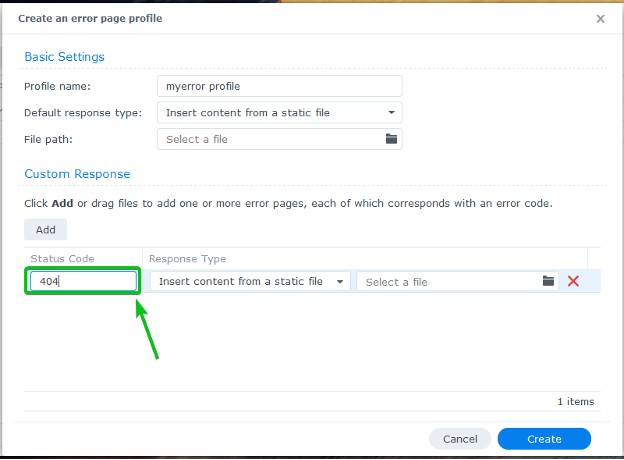
Type in the Status Code that you want to handle. For example, 404.
Select how you want to handle the status code from the Response Type dropdown menu.
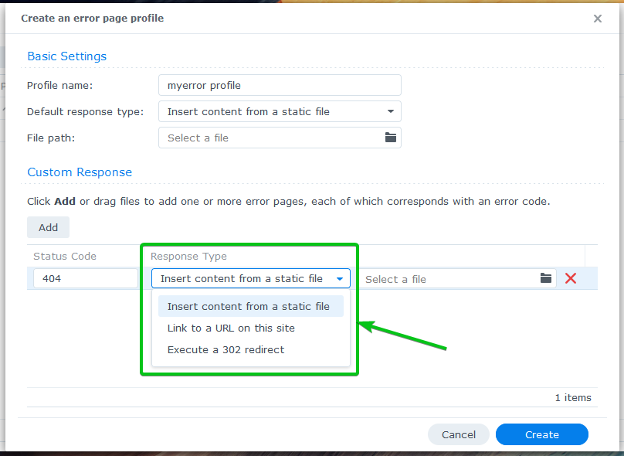
To serve an HTML file when an error occurs, select Insert content from a static file from the Response Type dropdown menu and upload an HTML file that you want to serve.

To serve error pages from your virtual host or website, select Link to a URL on this site from the Response Type dropdown menu and type in the relative path to the error page.
To redirect to another URL, select Execute a 302 redirect from the Response Type dropdown menu and type in the destination URL.

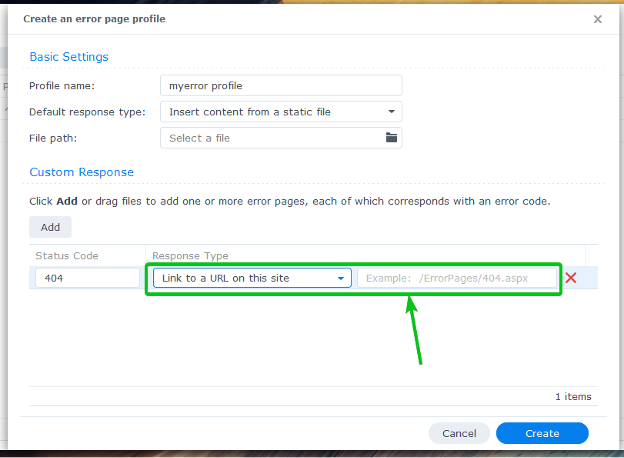
I will show you how to serve error pages from the document root of the virtual host. So, I have selected Link to a URL on this site from the Response Type dropdown menu and typed in the relative path to the error page of my website.
You will also have to select a default error page. It will be displayed when you don’t have any matching Custom Response.
To set a default error page, select a Default response type from the marked dropdown menu and fill in the required value below. You will find the same options as adding a Custom Response.
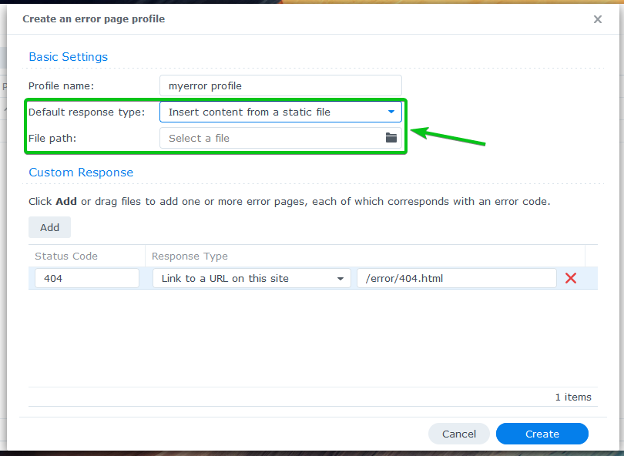
I will use a relative URL /error/default.html as the default error page.

Once you’re done, click on Create.
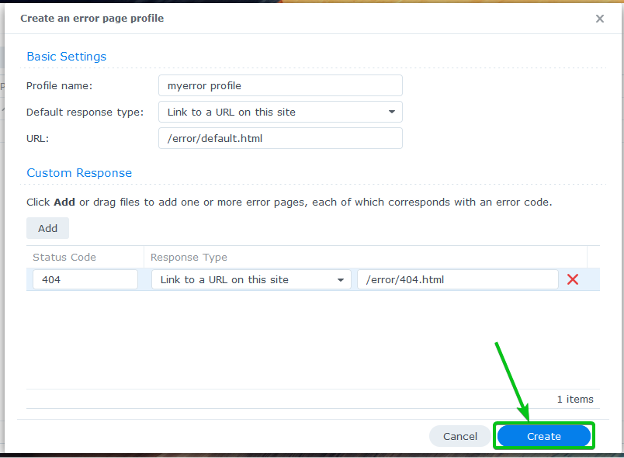
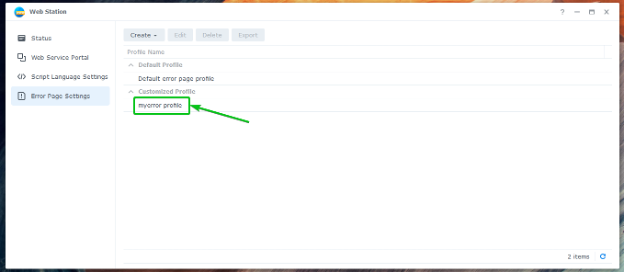
A new error profile should be created.
To use the newly created error profile, navigate to the Web Service Portal tab1, select your desired virtual host2, and click on Edit3 as marked in the screenshot below.
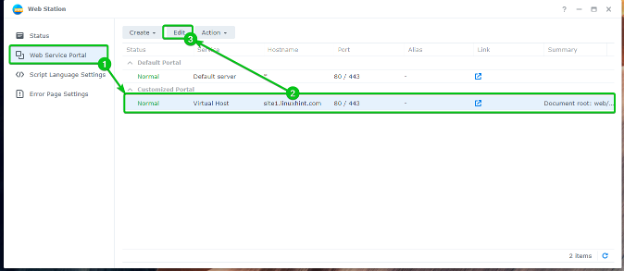
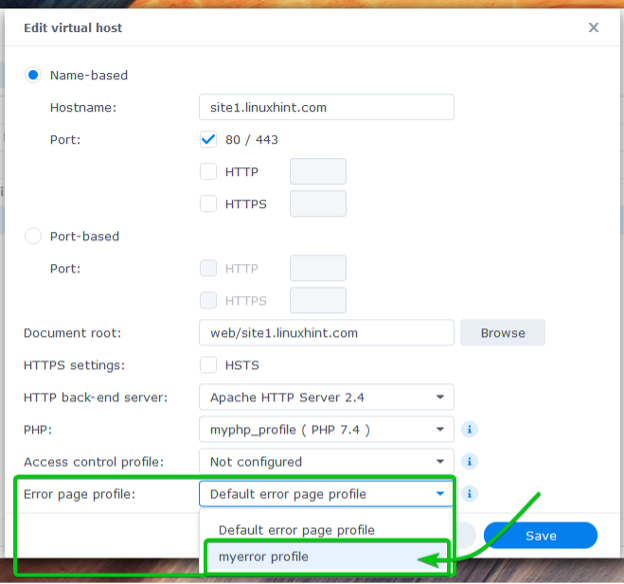
Select the newly created Error page profile from the dropdown menu as marked in the screenshot below.
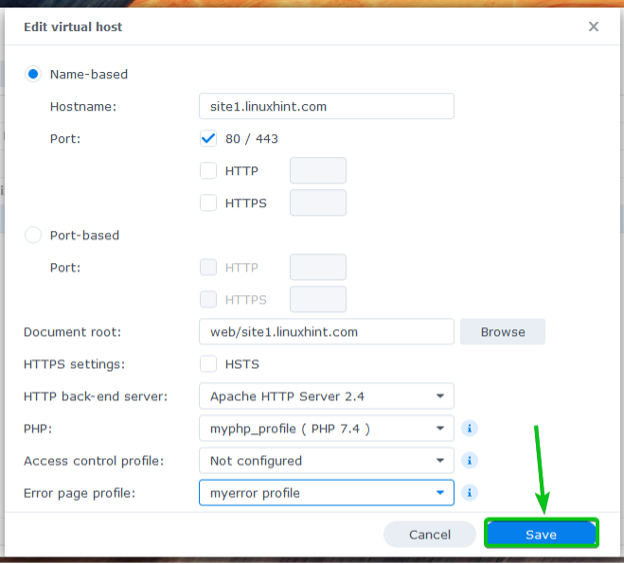
For the changes to take effect, click on Save.
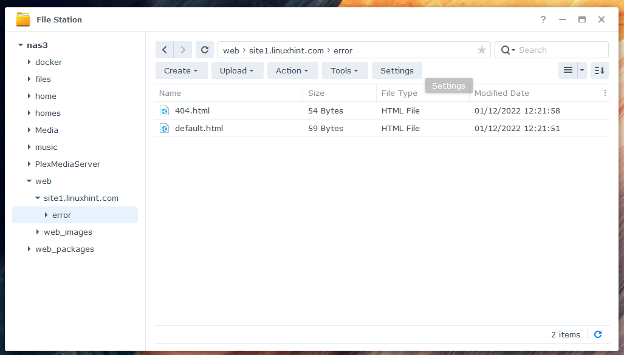
Create the necessary error pages in the error/ folder of the document root (the folder where you have stored your website files) of your virtual host.
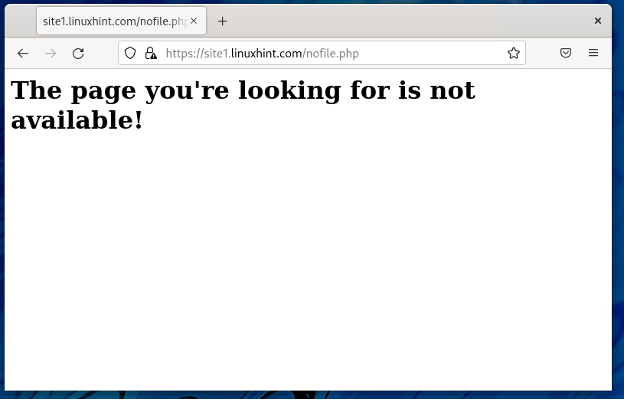
The new error pages will be used from now on, as shown in the screenshot below.
Conclusion
In this article, I have shown you how to install Web Station on your Synology NAS and use it to host static and dynamic websites. I have also shown you how to create custom PHP and error page profiles. I have shown you how to create a virtual host and configure it with a custom PHP and an error page profile.
References:
[1] How do I host a website on my Synology NAS?- Synology Knowledge Center