The full form of PXE is Preboot Execution Environment. It is a specialized boot ROM built into many newest generation network cards. It is mainly used to boot an operating system installer over the network and install it on your computer/server. So, you won’t need a CD/DVD ROM or a USB bootable thumb drive to install your favorite operating system on your computer/server.
In another article How to Configure Synology NAS as PXE Boot Server for Netbooting Linux Installation Images with PXELINUX (BIOS version), I have shown you how to configure PXELINUX on your Synology NAS to network boot Linux installation images on your computer/server via PXE. PXELINUX supports BIOS and UEFI systems. PXELINUX is very stable for BIOS-based motherboards. But at the time of this writing, the UEFI firmware is buggy and it freezes and crashes. The latest version of SYSLINUX (PXELINUX is a part of SYSLINUX) is v6.03 and it was last updated on Oct 6, 2014. It’s pretty old and I have not seen any development since then to solve the buggy UEFI firmware.
So, in this article, I am going to show you how to configure your Synology NAS as a PXE boot server to boot Linux installation images over the network using GRUB (one of the best bootloaders). GRUB supports BIOS and UEFI systems and it’s stable for both. GRUB is the default bootloader for almost all the popular Linux distributions out there. Unlike SYSLINUX, GRUB is a very active bootloader project.
I am going to show how to configure GRUB to PXE boot for the following Linux distributions in this article.
- Ubuntu Desktop 20.04 LTS
- Ubuntu Server 20.04 LTS
- Ubuntu Desktop 22.04 LTS
- Ubuntu Server 22.04 LTS
- Fedora Workstation 35
So, let’s get started.
Table of Contents:
- Creating a pxeboot Shared Folder
- Enabling NFS for the pxeboot Shared Folder
- Enabling the TFTP Service
- Installing DHCP Server
- Enabling DHCP for a Network Interface
- Uploading the Required Files to the NAS
- Enabling PXE on Synology NAS
- Booting Ubuntu Desktop 20.04 LTS Live via PXE
- Booting Ubuntu Server 20.04 LTS via PXE
- Booting Ubuntu Desktop 22.04 LTS Live via PXE
- Booting Ubuntu Server 22.04 LTS via PXE
- Booting Fedora 35 Workstation Live via PXE
- Conclusion
- References
Creating a pxeboot Shared Folder
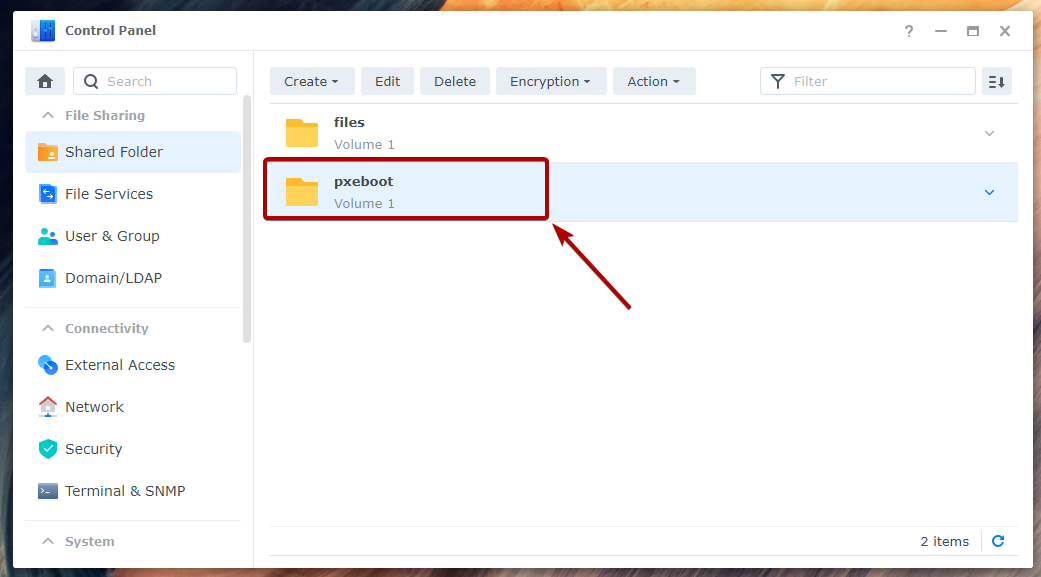
To keep all the PXE boot files organized, you should create a new shared folder pxeboot as shown in the screenshot below.
If you need any assistance on creating a new shared folder, read the article How to Setup Synology NAS?.
Enabling NFS for the pxeboot Shared Folder
You will also need to enable the NFS file service and configure the pxeboot shared folder for the NFS access for the PXE booting to work.
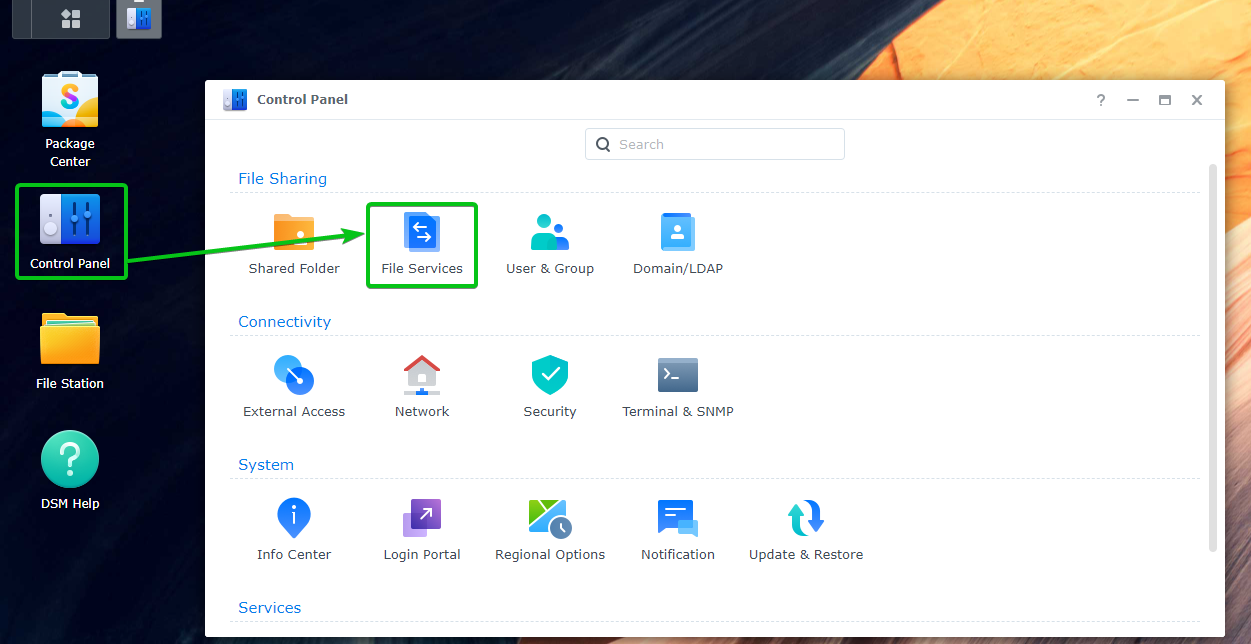
To enable the NFS file service, navigate to Control Panel > File Services.

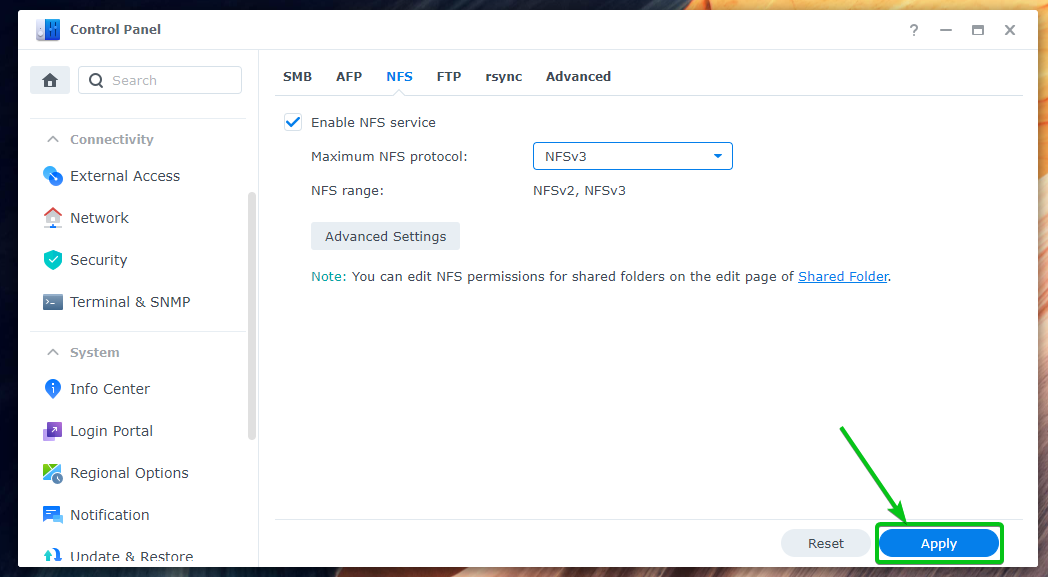
From the NFS tab, check the Enable NFS service checkbox as marked in the screenshot below.

Click on Apply for the changes to take effect.
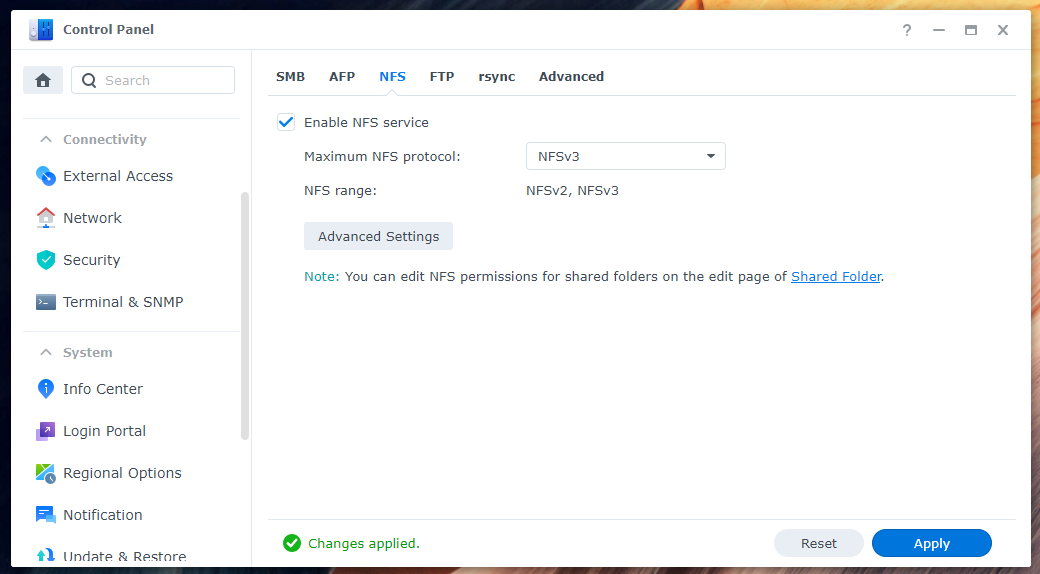
The NFS file service should be enabled.
Now, navigate to Control Panel > Shared Folder, select the pxeboot shared folder, and click on Edit as marked in the screenshot below.

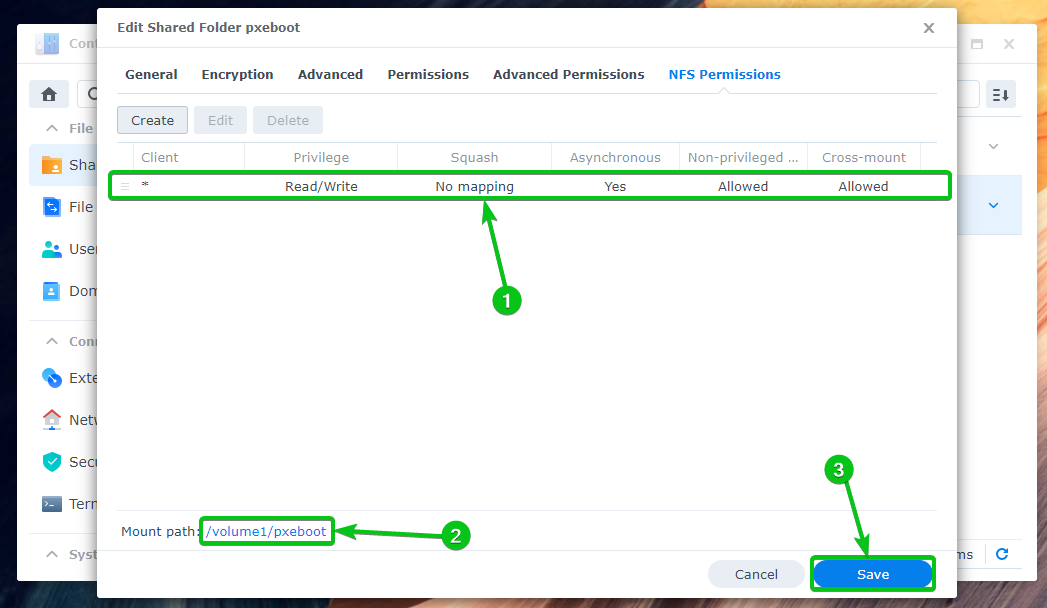
Click on Create from the NFS Permissions tab.

Type in * in the Hostname or IP section1, check the Allow connections from non-privileged ports (ports higher than 1024) checkbox2, check the Allow users to access mounted subfolders checkbox3, and click on Save4.

A new NFS access rule should be created1.
The shared folder can be accessed using the path /volume1/pxeboot as you can see in the screenshot below2. Remember the shared folder path as you will need it later.
For the changes to take effect, click on Save3.
Enabling the TFTP Service
To serve the PXE boot firmware, you will need to enable the TFTP file service on your Synology NAS.
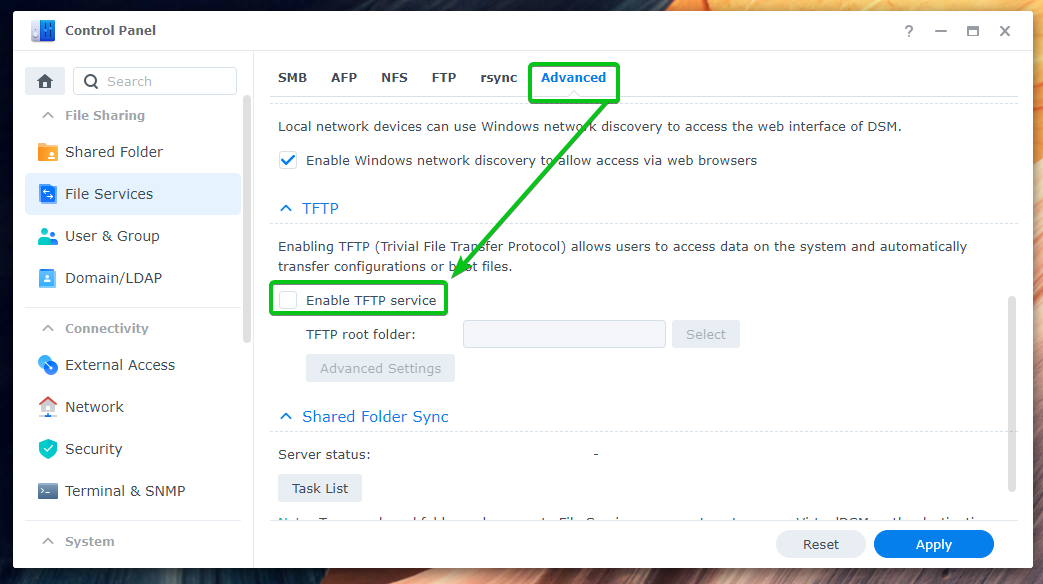
To enable the TFTP file service, navigate to Control Panel > File Services.
From the Advanced tab, scroll down to the TFTP section and check the Enable TFTP service checkbox as marked in the screenshot below.
Click on Select as marked in the screenshot below to set a TFTP roof folder.
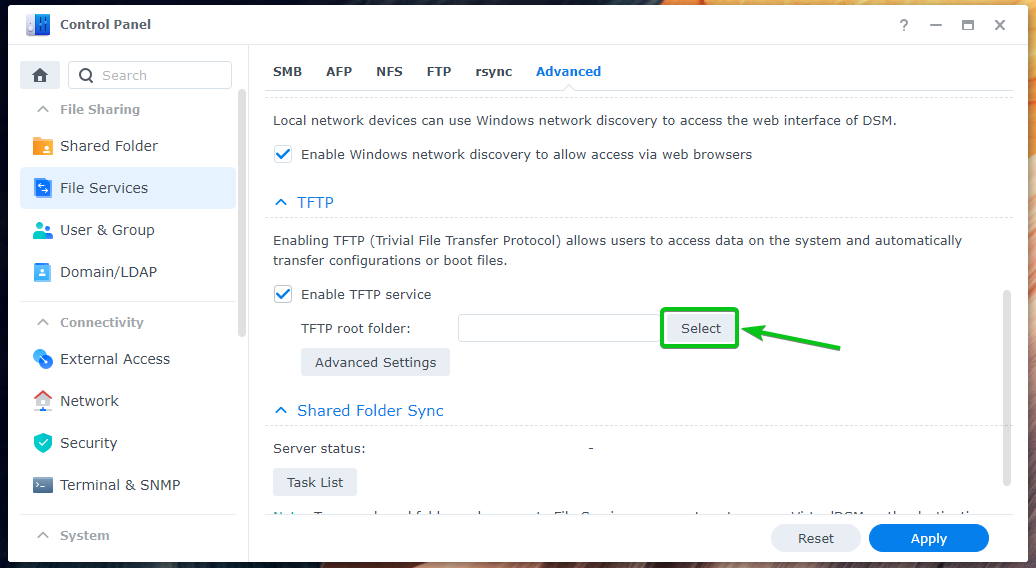
All the shared folders of your Synology NAS should be listed. Select the pxeboot shared folder and click on Select.

Click on Apply for the changes to take effect.

The TFTP file service should be enabled and the TFTP root folder should be set.

Installing DHCP Server
To get the PXE boot to work, you will need a working DHCP server.
To install a DHCP server on your Synology NAS, open the Package Center app1, search for the keyword dhcp2, and click on the DHCP Server package as marked in the screenshot below3.
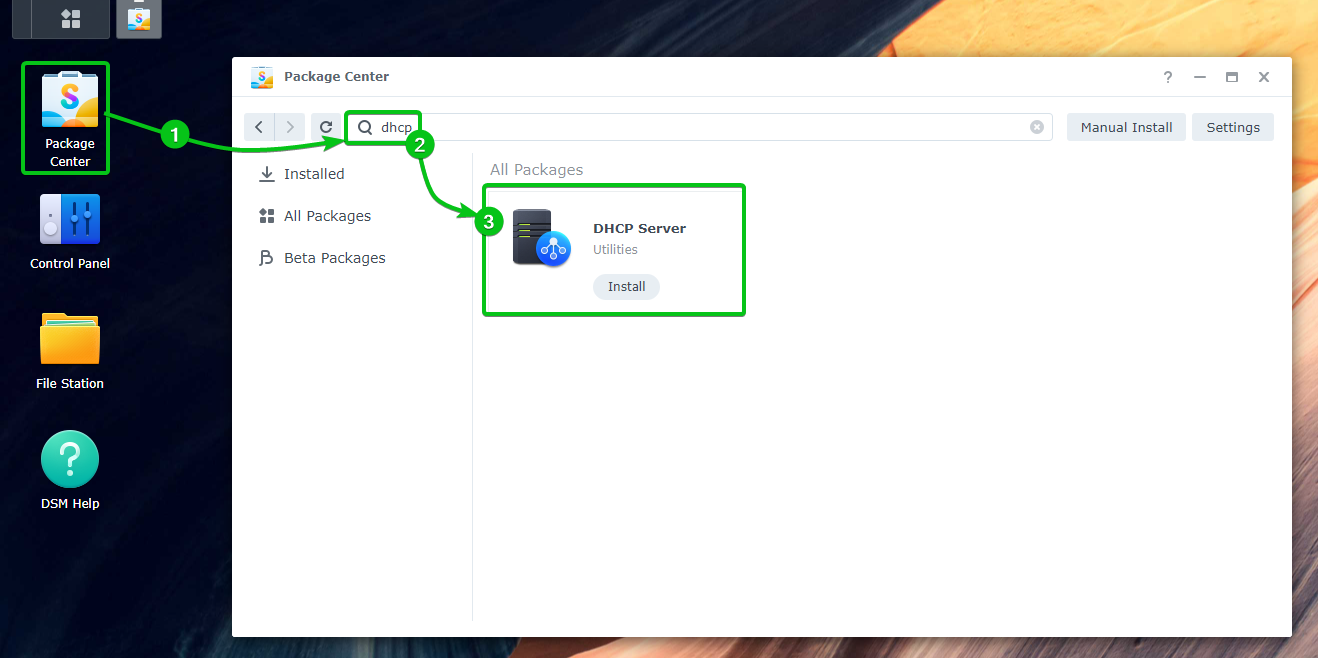
Click on Install.

The DHCP Server package should be installed.

Once the DHCP Server package is installed, you can start it from the Application Menu of the DSM web interface of your Synology NAS.

The DHCP Server app should be opened. You can configure the DHCP server and the PXE booting from here.

Enabling DHCP for a Network Interface
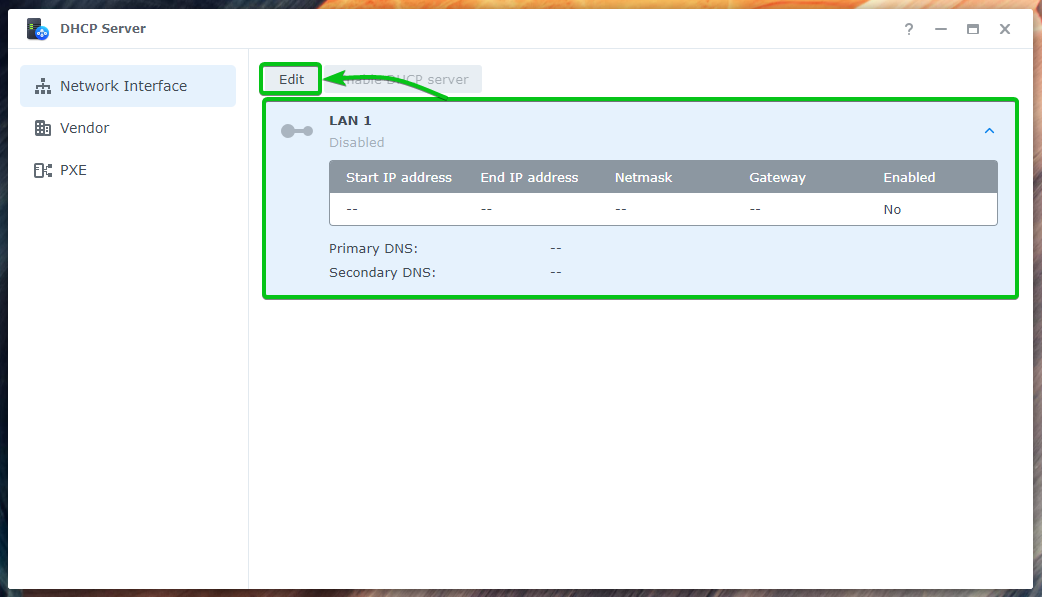
To enable DHCP, open the DHCP Server app, select a network interface from the Network Interface section, and click on Edit as marked in the screenshot below.
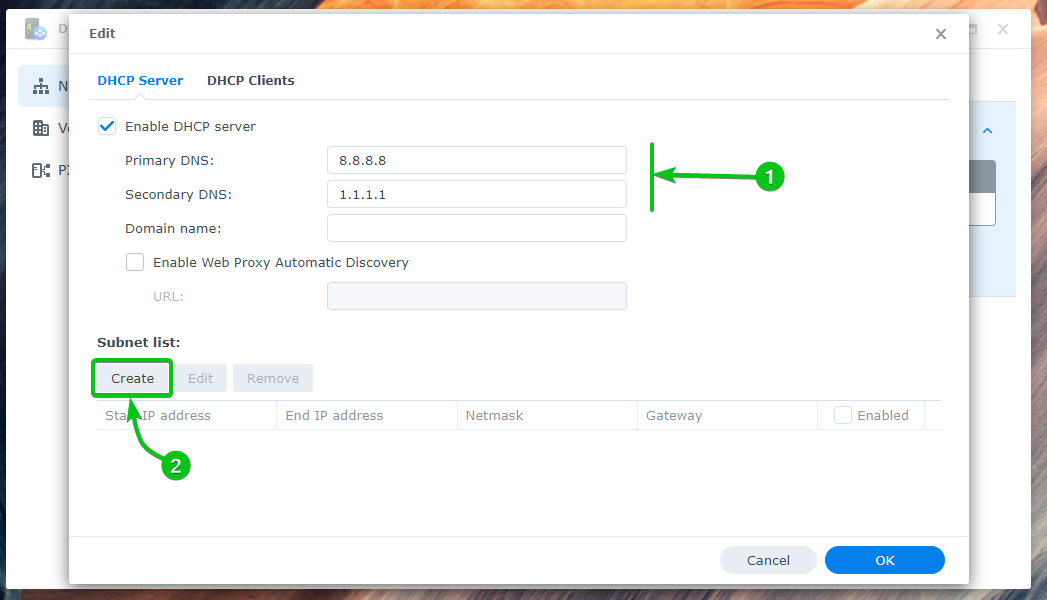
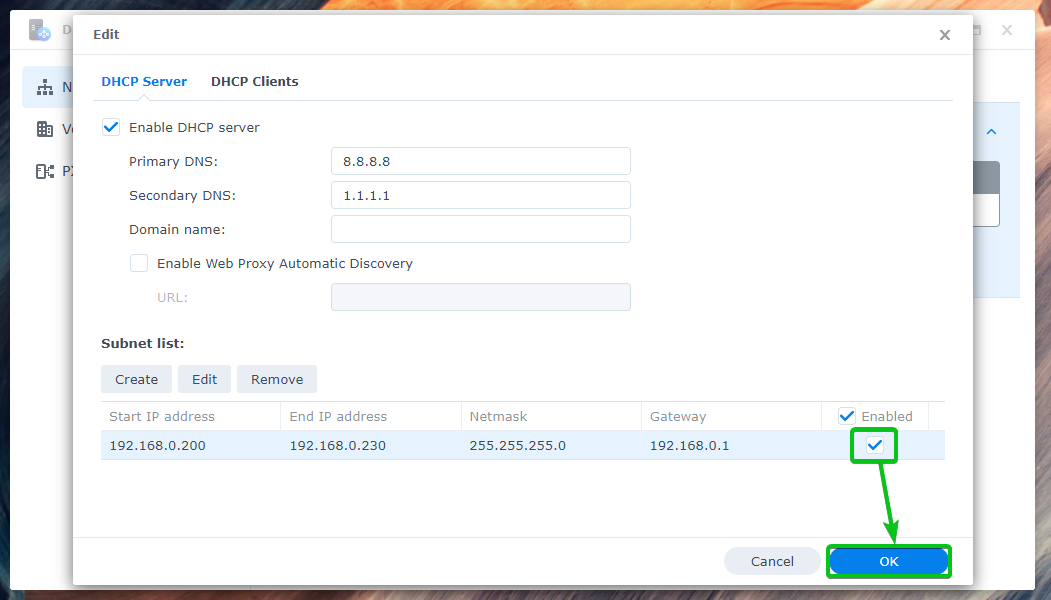
Check the Enable DHCP server checkbox from the DHCP Server tab as marked in the screenshot below.

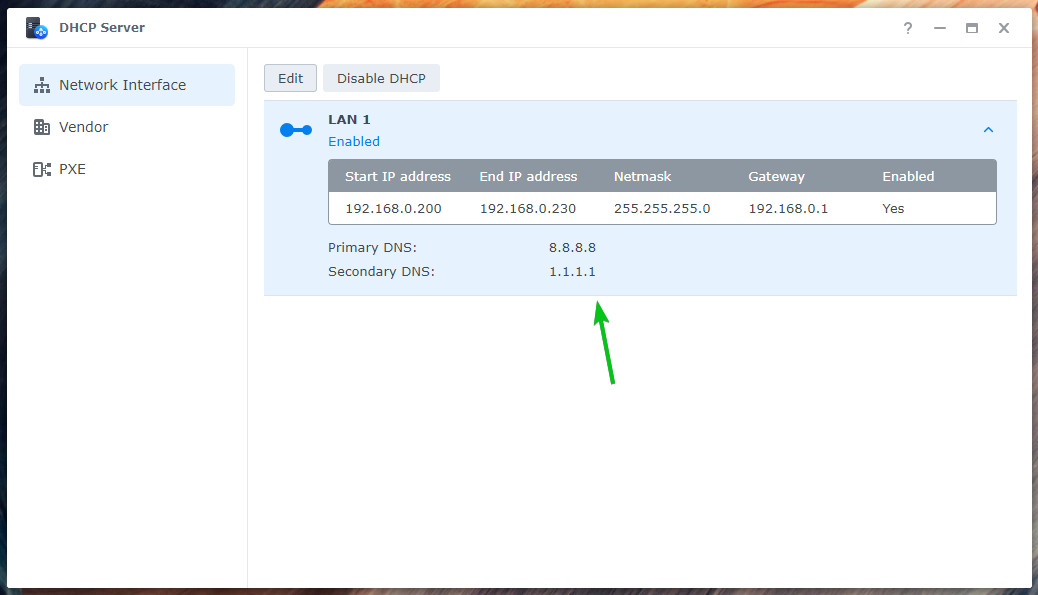
Type in your desired Primary DNS and Secondary DNS servers. I am using 8.8.8.8 as the Primary DNS and 1.1.1.1 as the Secondary DNS server1.
From the Subnet list section, click on Create2.
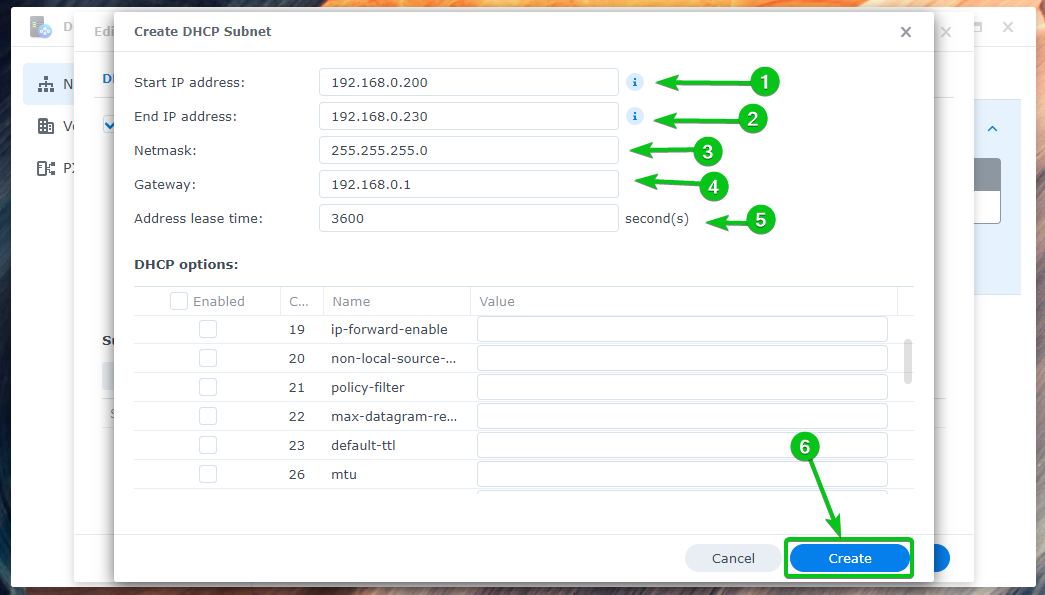
You will be asked to create a DHCP subnet.
Usually, your home router will have a DHCP server running. You can’t turn it off as you will need it for your home network devices (i.e., laptops, desktops, smartphones, IoT devices). To get a working DHCP server on your Synology NAS without turning off the DHCP server of your home router, you will have to create the same DHCP subnet on your Synology NAS as your home router. You will have 2 DHCP servers, but the one configured on your Synology NAS will supply the required files for the PXE booting. No matter which DHCP server your home networking devices use, everything will work just fine as they will be on the same subnet.
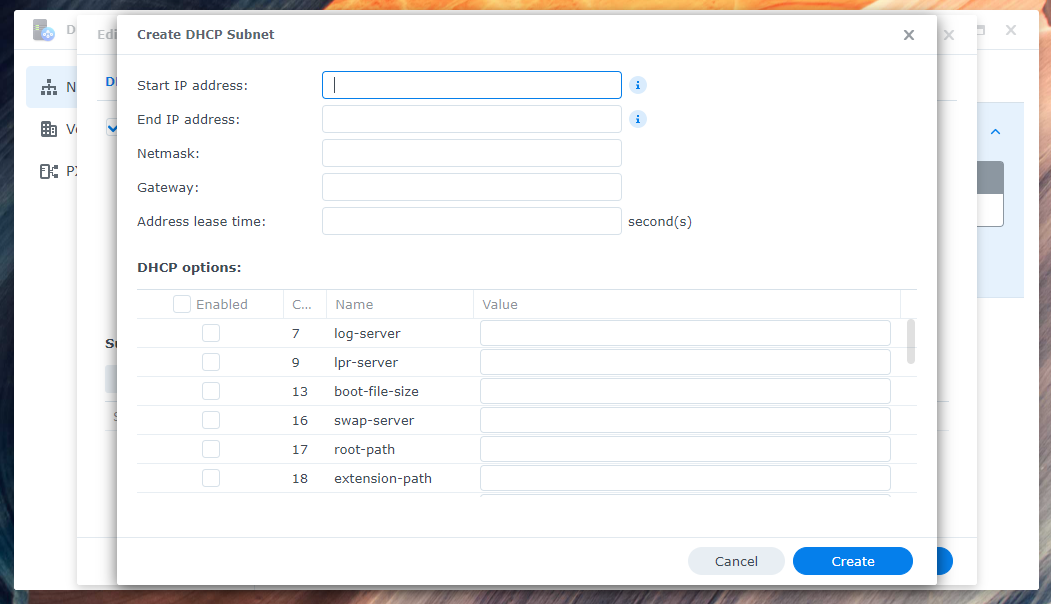
Type in your desired Start IP address1, End IP address2, Netmask3, and Gateway4 depending on the subnet of your home router.
My home router is using the subnet 192.168.0.0/24 and its IP address is 192.168.0.1. So, I have used the Gateway address 192.168.0.1 and Netmask 255.255.255.0. The Start and End IP addresses can be anything within the subnet. I have used the Start IP address 192.168.0.200 and the End IP address 192.168.0.230 in this case.
Type in 3600 (an hour) as the Address lease time5. It is the time the DHCP server will reserve an IP address for a DHCP client.
Once you’re done, click on Create6.
A new subnet should be created as you can see in the screenshot below.
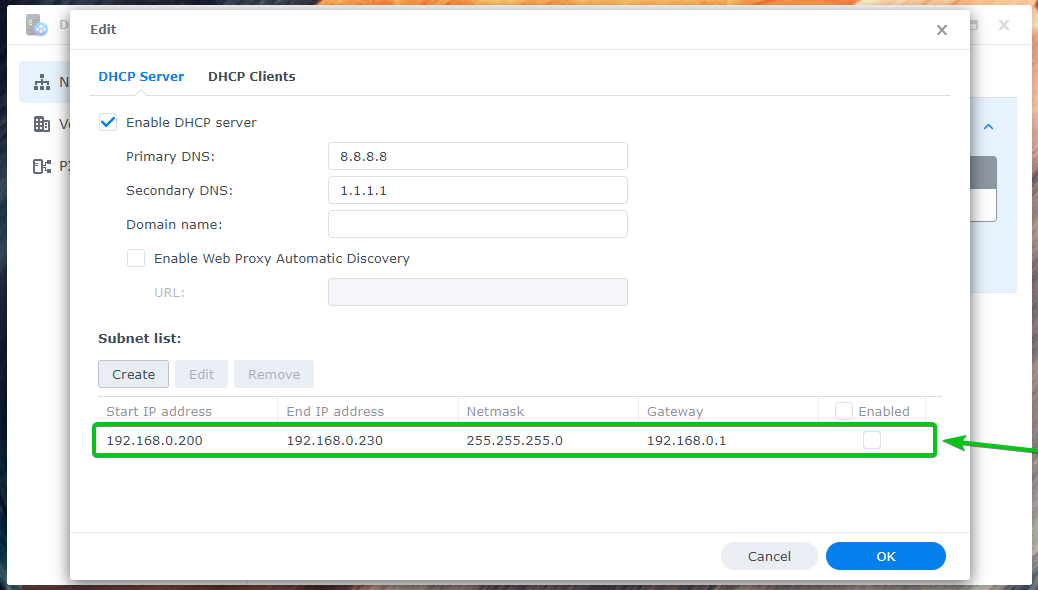
Check the Enabled checkbox to enable the subnet and click on OK as marked in the screenshot below.
Click on Yes.
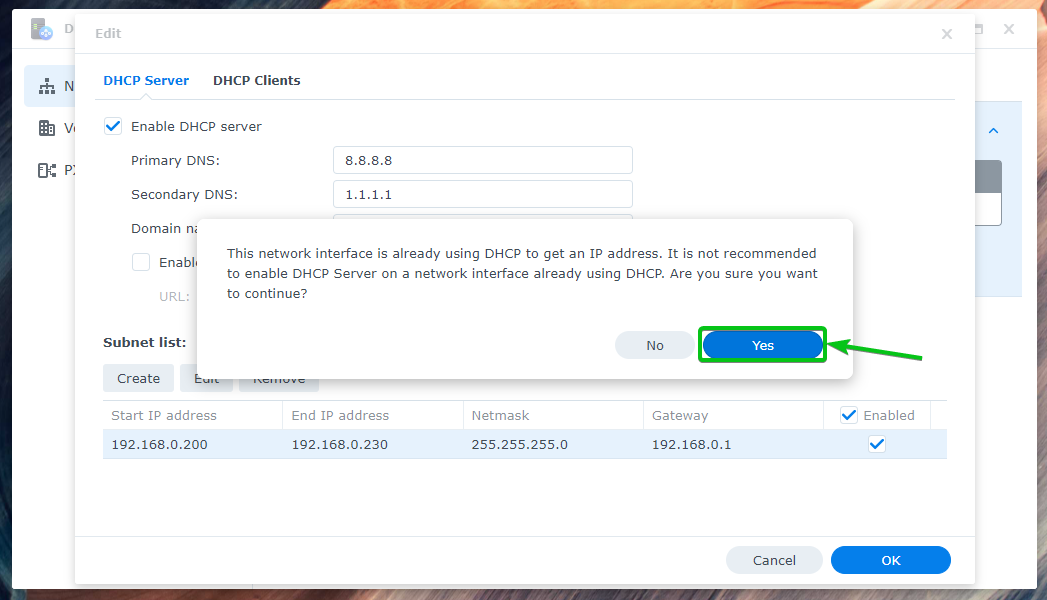
DHCP should be enabled for your selected network interface.
Uploading the Required Files to the NAS
To upload the required GRUB boot firmware files on your Synology NAS, you need to have a Linux distribution like Ubuntu, Linux Mint, Red Hat, Fedora, etc. installed on your computer. You can also use a Live USB thumb drive to get the required files.
In this article, I am going to use the Ubuntu Desktop 22.04 LTS Live bootable USB thumb drive to upload the required GRUB boot firmware files on my Synology NAS. If you need any assistance in creating a Ubuntu Desktop Live bootable USB thumb drive, read the article Installing Ubuntu Desktop 20.04 LTS.
Once you make a Ubuntu Desktop Live bootable USB thumb drive, boot from it.

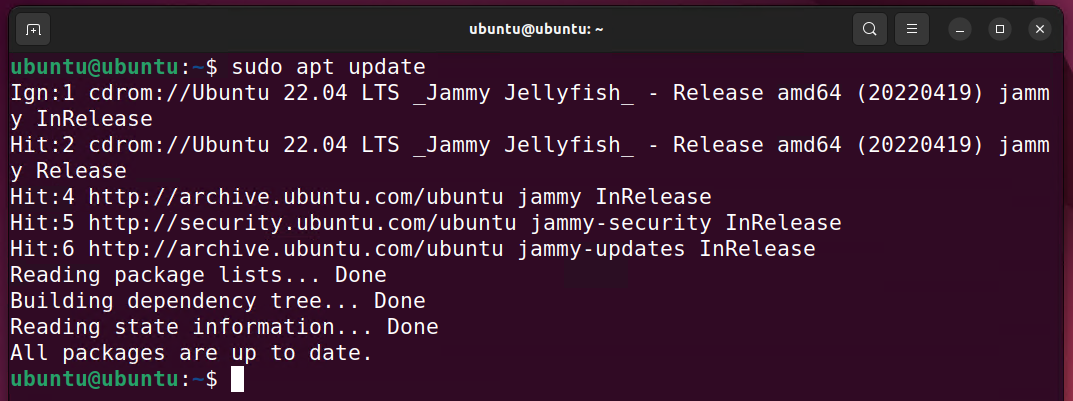
Open the Terminal app and run the following command to update the APT package repository cache:
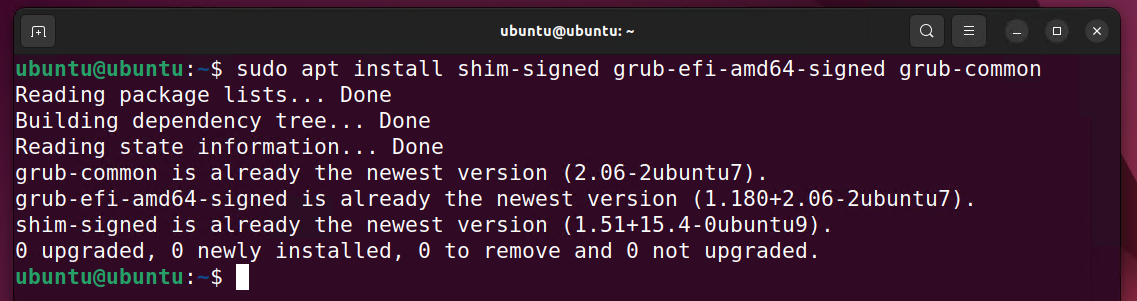
To install the packages shim-signed, grub-efi-amd64-signed, and grub-common, run the following command:

It’s very likely that these packages will be installed by default. In case they are not, they will be installed.
Now, copy the file shimx64.efi.signed to the ~/Downloads directory and rename it to bootx64.efi with the following command:

Now, copy the file grubnetx64.efi.signed to the ~/Downloads directory and rename it to grubx64.efi with the following command:

Now, copy the file unicode.pf2 to the ~/Downloads directory with the following command:

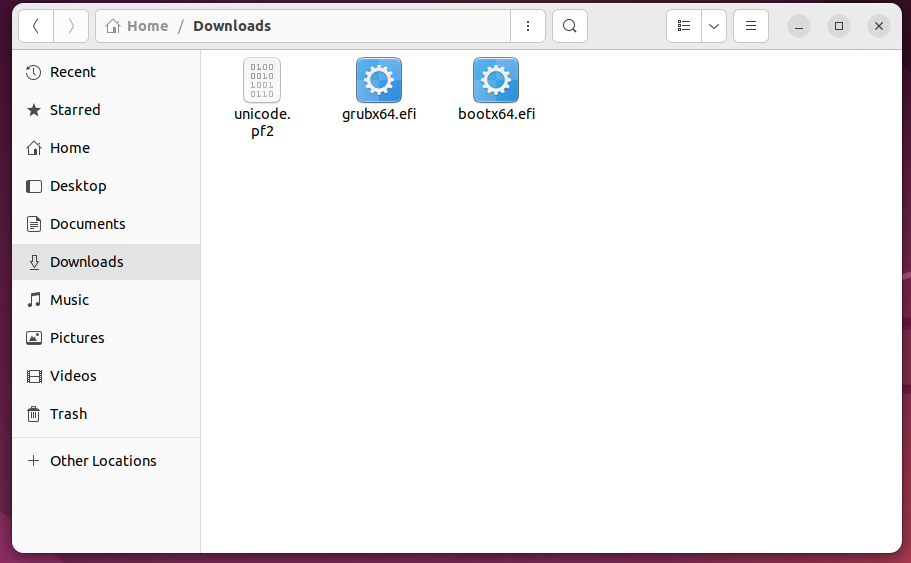
Once all the files are copied to the ~/Downloads directory, you should have the following files in the ~/Downloads directory.
Now, login to your Synology NAS and upload the files bootx64.efi and grubx64.efi in the pxeboot shared folder.

Click on Create > Create folder to create a new folder in the pxeboot shared folder of your Synology NAS.

Type in grub as the folder name and click on OK.
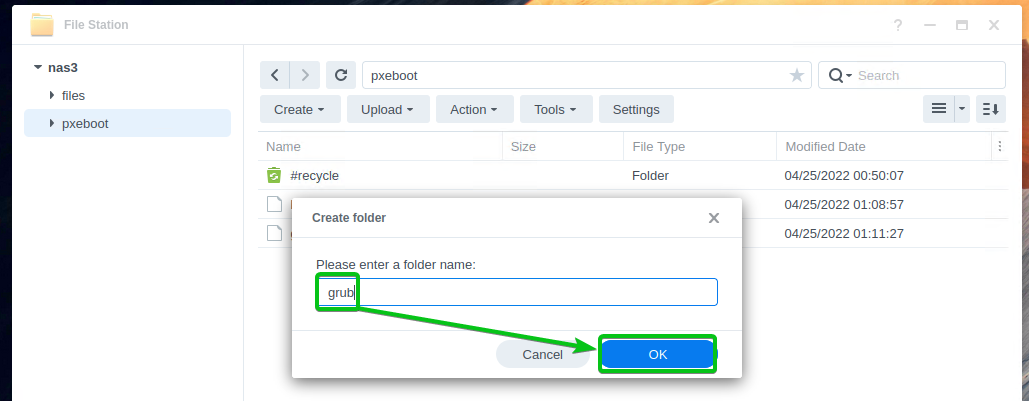
A new folder grub should be created.

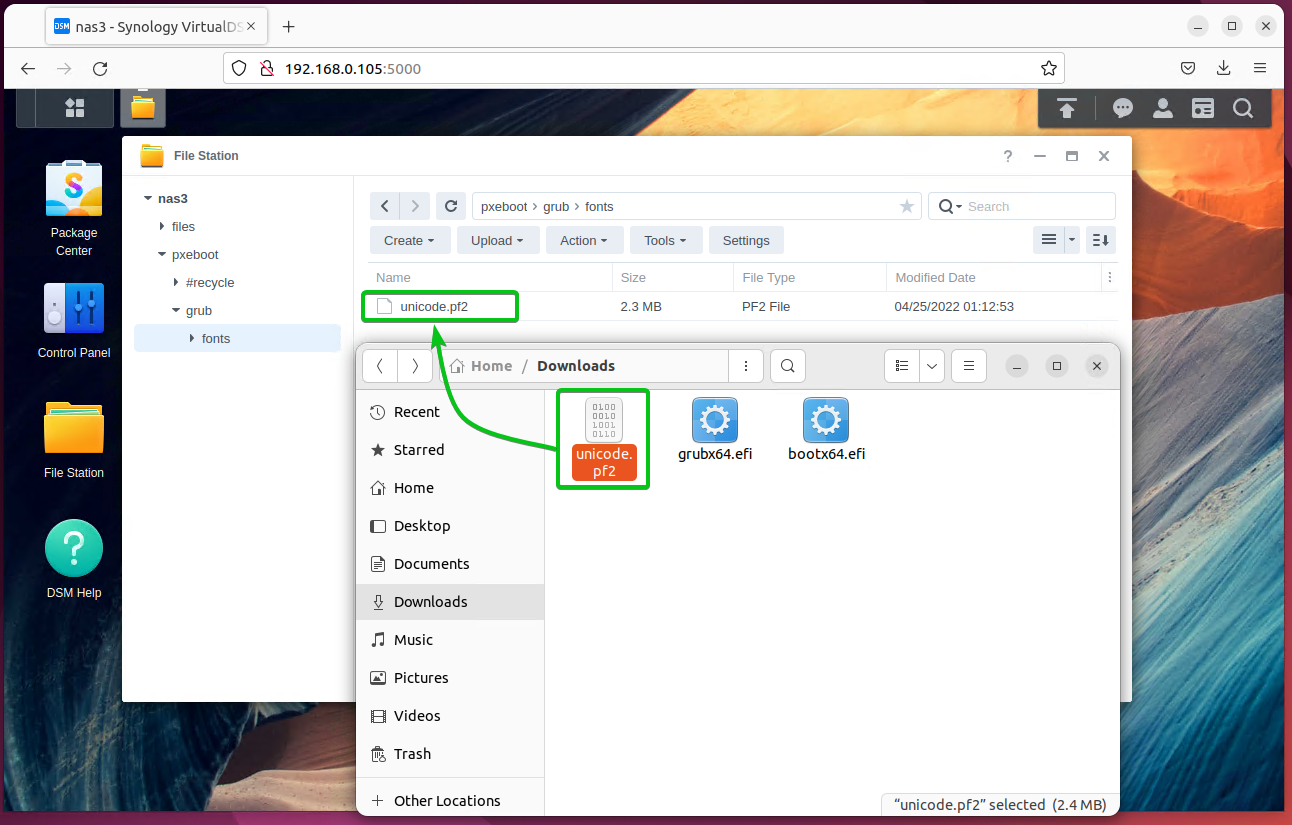
Navigate to the newly created grub/ folder and create a new folder fonts/ in the grub folder in the same way.

Navigate to the grub/fonts/ folder of your Synology NAS and upload the unicode.pf2 file from the ~/Downloads directory there.
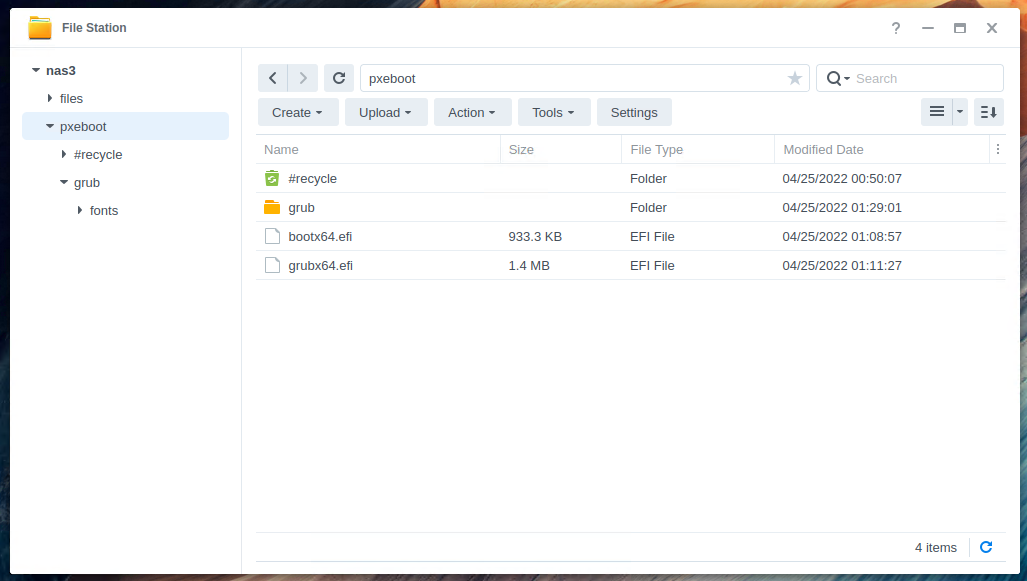
Once all the files are copied to the pxeboot shared folder of your Synology NAS, you should see the following files and folders there.
Enabling PXE on Synology NAS
Once you have uploaded all the required files to the pxeboot shared folder, you can enable PXE booting on your Synology NAS.
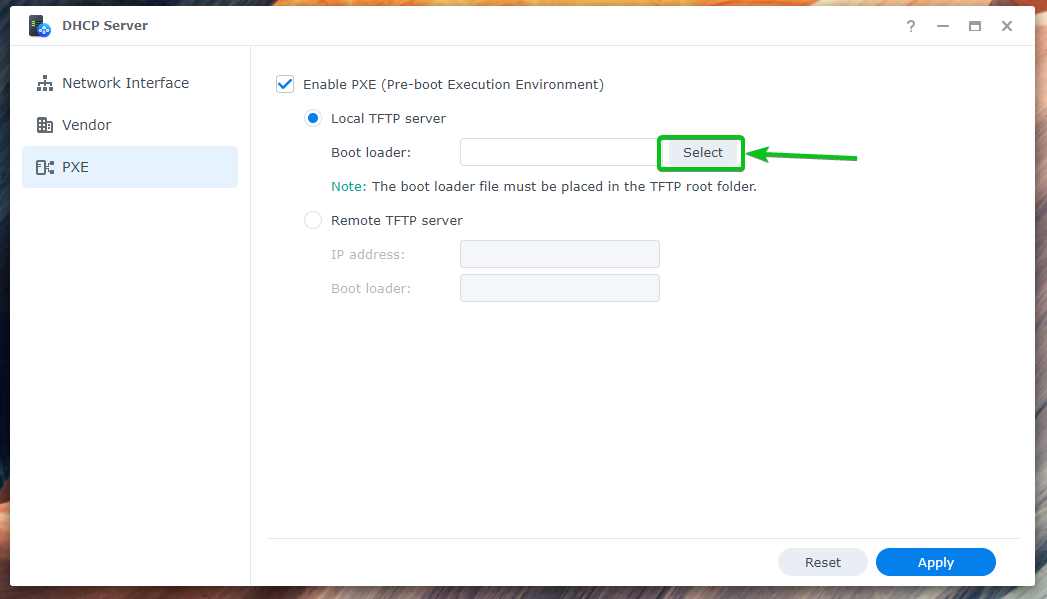
To enable PXE, open the DHCP Server app, navigate to the PXE section, and check the Enable PXE (Pre-boot Execution Environment) checkbox as marked in the screenshot below.
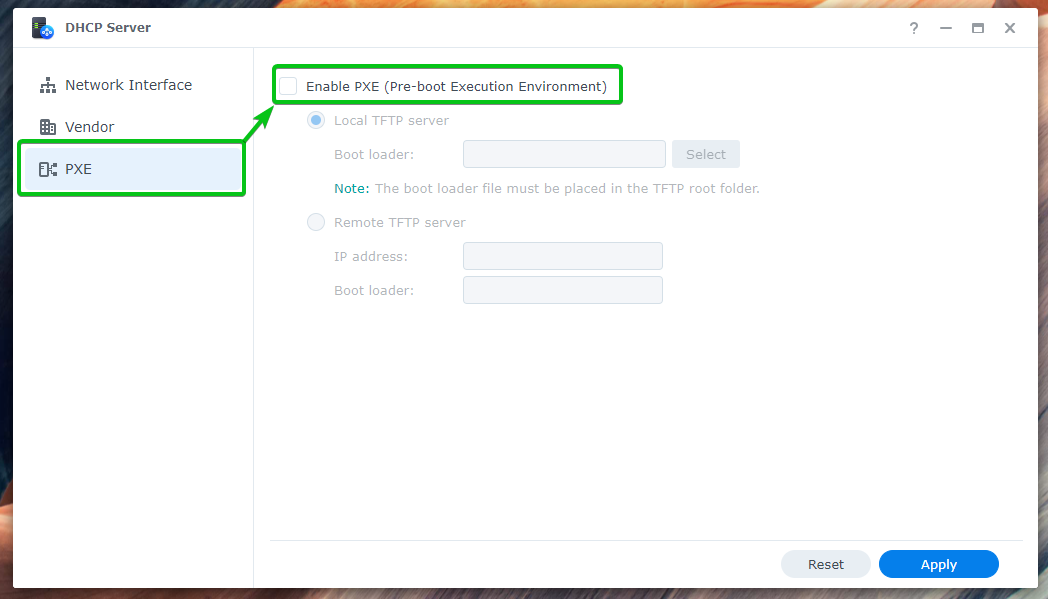
Once PXE is enabled, select Local TFTP server, and click on Select.
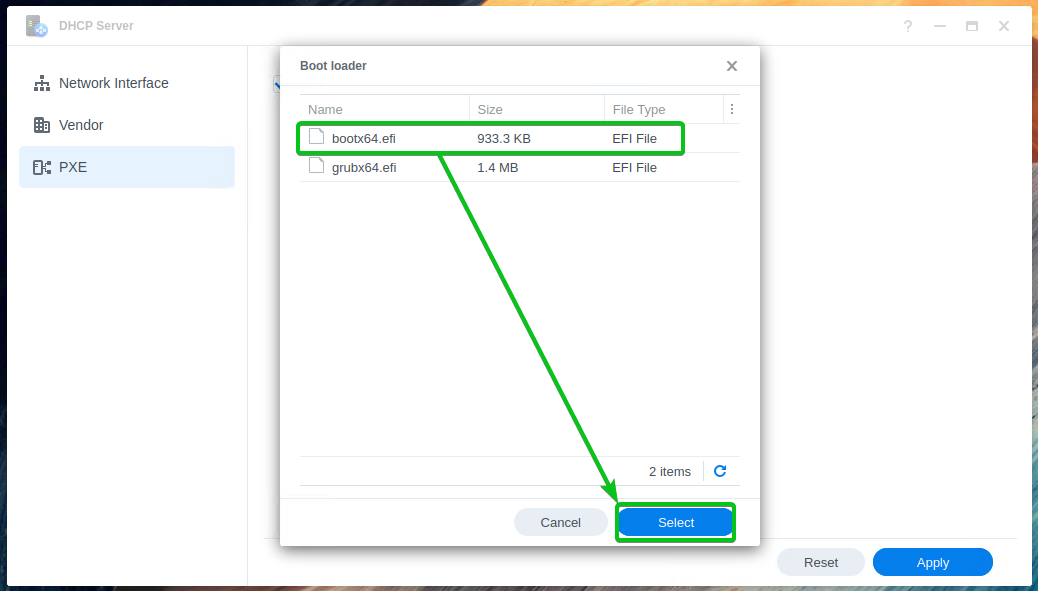
Select the file bootx64.efi from the list as the PXE Boot loader and click on Select.
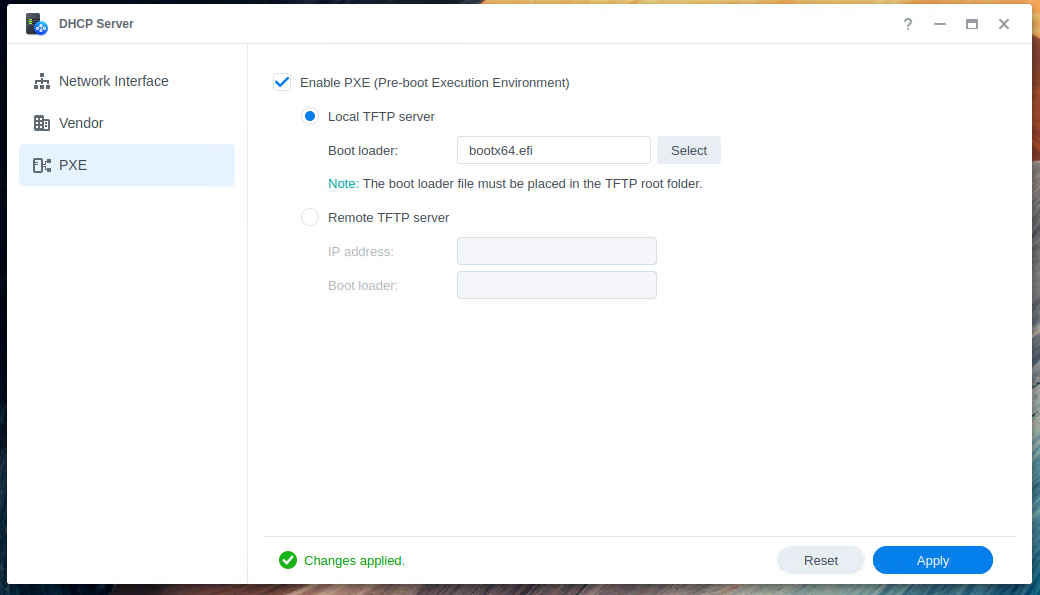
For the changes to take effect, click on Apply.

PXE should be enabled and bootx64.efi should be set as the PXE boot loader.
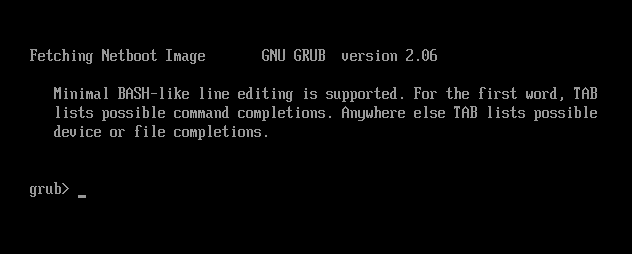
Now, if you boot your computer via PXE, you should see the following GRUB window. It means that PXE booting with GRUB UEFI firmware is working just fine.
Booting Ubuntu Desktop 20.04 LTS Live via PXE
First, download the Ubuntu Desktop 20.04 LTS ISO image from the official release page of Ubuntu 20.04 LTS.
Once the Ubuntu Desktop 20.04 LTS ISO image is downloaded, upload it to the pxeboot shared folder of your Synology NAS.
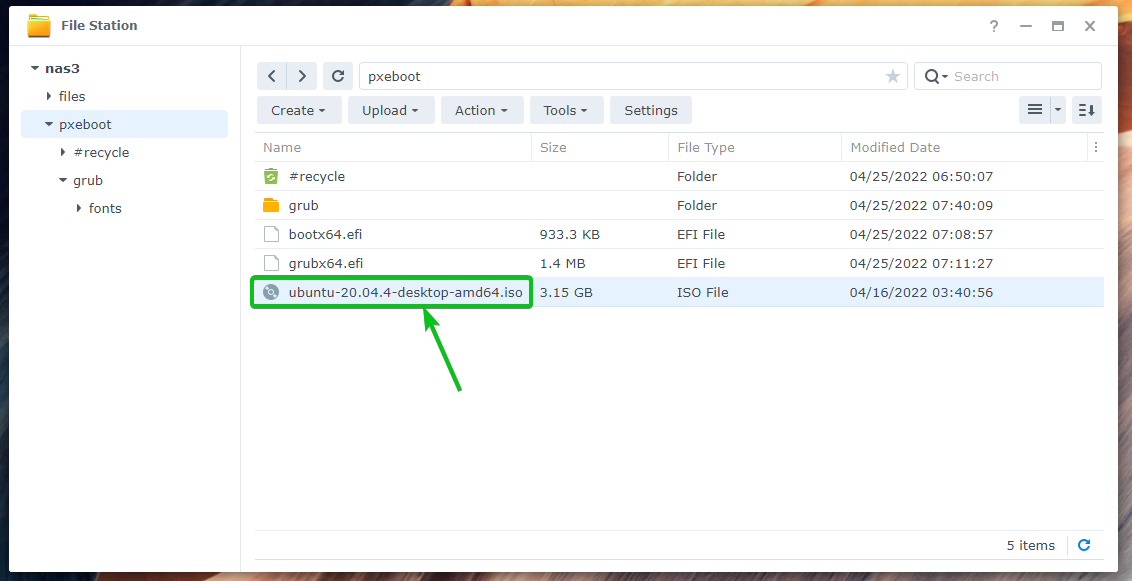
Right-click on the Ubuntu Desktop 20.04 LTS ISO image and click on Mount Virtual Drive as marked in the screenshot below.

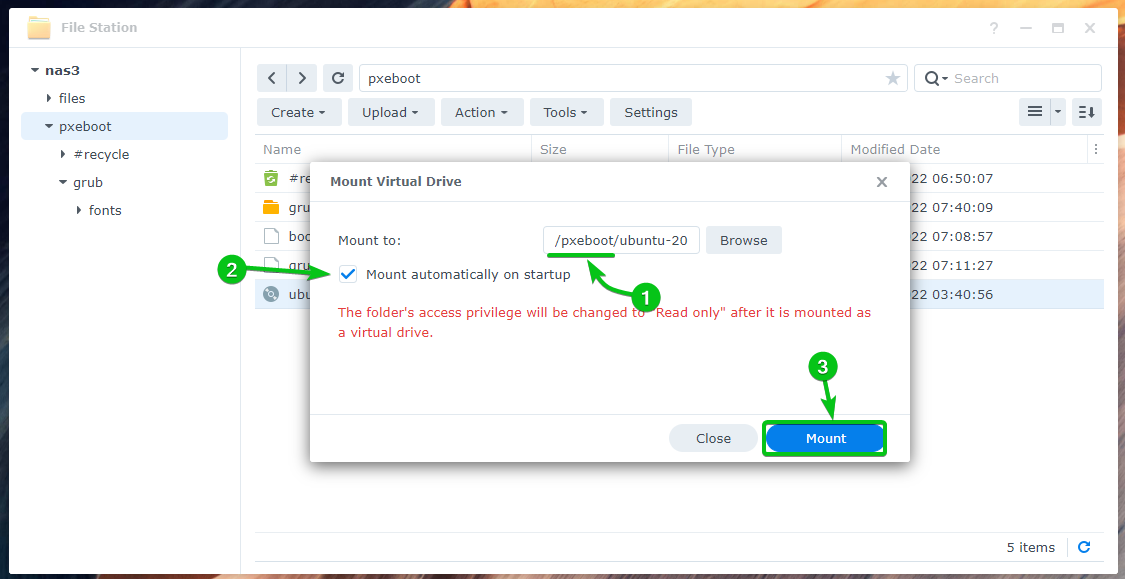
Make sure that the ISO image is mounted in the pxeboot shared folder1. Also, make sure to check the Mount automatically on startup checkbox so that the ISO image will be mounted automatically when your Synology NAS boots2. Then, click on Mount to mount the ISO image3.
The ISO image of Ubuntu Desktop 20.04 LTS should be mounted in the pxeboot shared folder as you can see in the screenshot below.
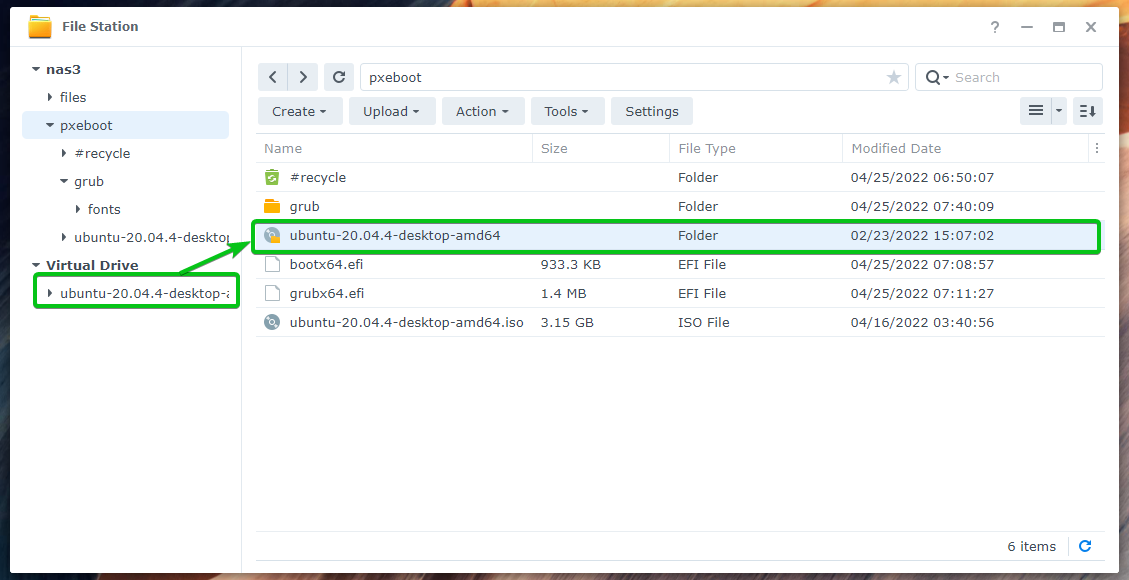
The contents of the mounted Ubuntu Desktop 20.04 LTS ISO image.

To boot Ubuntu Desktop 20.04 LTS via PXE using the GRUB UEFI firmware, you will have to add a menu entry for Ubuntu Desktop 20.04 LTS on the grub/grub.cfg configuration file.
NOTE: Make sure to create the grub.cfg file in the pxeboot shared folder if it does not exist.
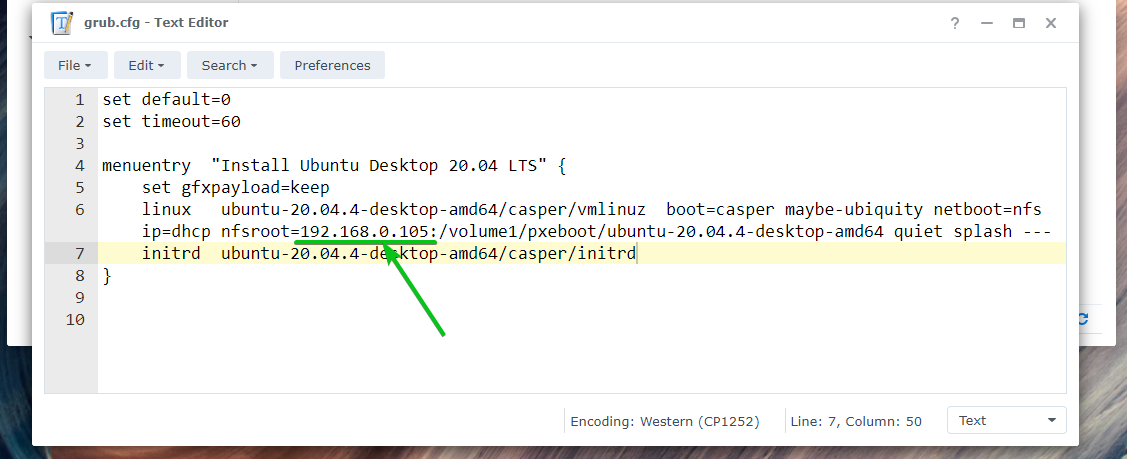
Type in the following lines in the grub/grub.cfg configuration file to boot Ubuntu Desktop 20.04 LTS via PXE using the GRUB UEFI firmware:
set timeout=60
menuentry "Install Ubuntu Desktop 20.04 LTS" {
set gfxpayload=keep
linux ubuntu-20.04.4-desktop-amd64/casper/vmlinuz boot=casper maybe-ubiquity netboot=nfs ip=dhcp nfsroot=192.168.0.105:/volume1/pxeboot/ubuntu-20.04.4-desktop-amd64 quiet splash ---
initrd ubuntu-20.04.4-desktop-amd64/casper/initrd
}
Once you’ve added a menu entry for Ubuntu Desktop 20.04 LTS, the grub/grub.cfg configuration file should look as follows:
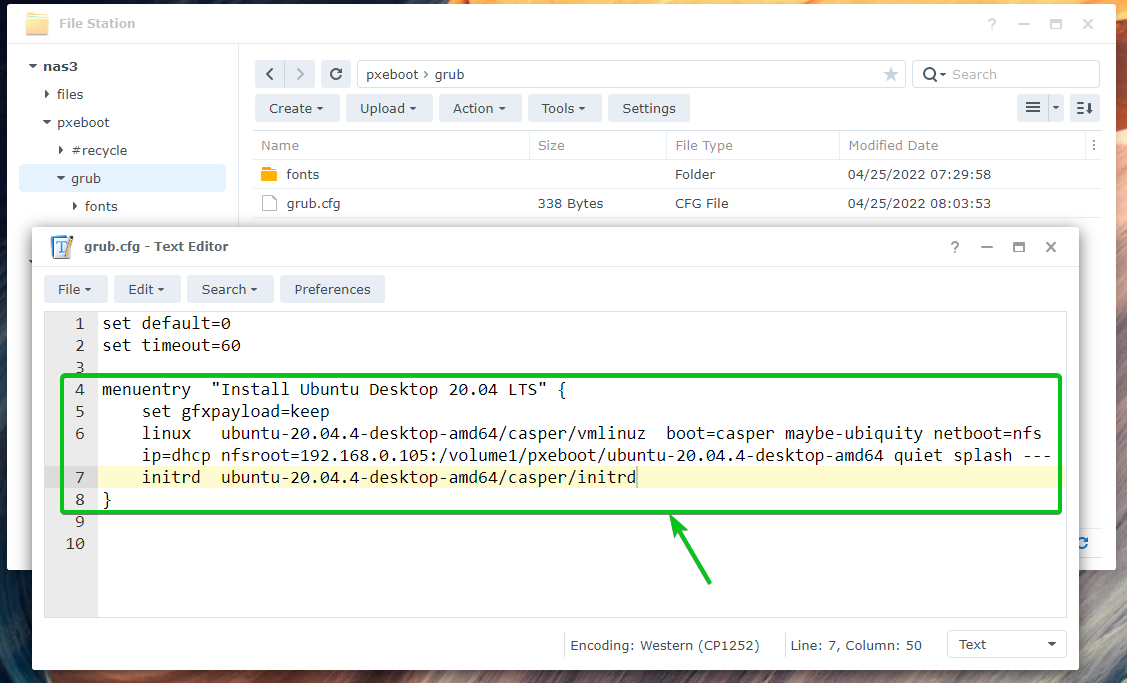
NOTE: Here, 192.168.0.105 is the IP address of my Synology NAS. Don’t forget to replace it with yours. If you need any assistance in finding the IP address of your Synology NAS, read the article How Do I Find the IP Address of My Synology NAS?.
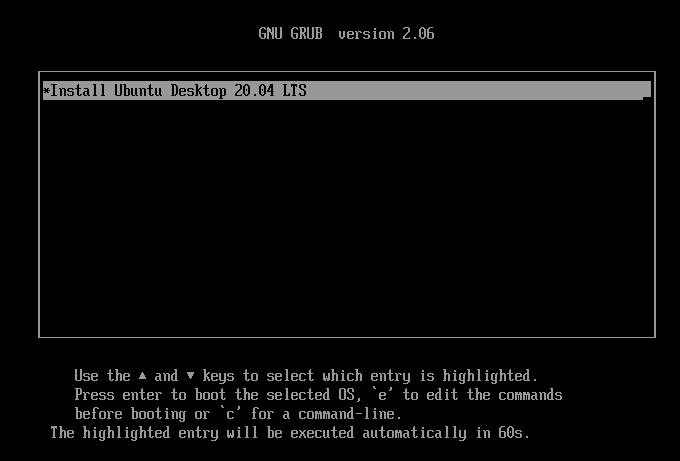
Now, boot your computer via PXE and you should see the following GRUB menu.
Select Install Ubuntu Desktop 20.04 LTS and press <Enter>.

Ubuntu Desktop 20.04 LTS Live is being booted.

Once Ubuntu Desktop 20.04 LTS Live is booted, you should see the following window. You can install Ubuntu Desktop 20.04 LTS on your computer from here. If you need any assistance in installing Ubuntu Desktop 20.04 LTS on your computer, read the article Installing Ubuntu Desktop 20.04 LTS.

Ubuntu Desktop 20.04 LTS Live network booted via PXE.

Booting Ubuntu Server 20.04 LTS via PXE
First, download the Ubuntu Server 20.04 LTS ISO image from the official release page of Ubuntu 20.04 LTS.
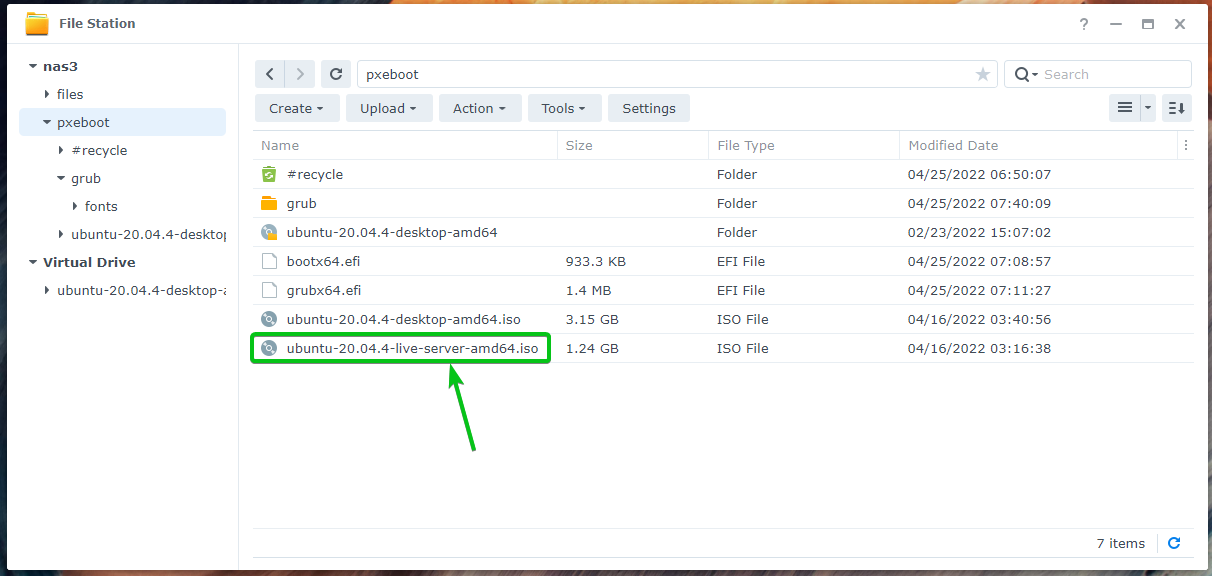
Once the Ubuntu Server 20.04 LTS ISO image is downloaded, upload it to the pxeboot shared folder of your Synology NAS.
Right-click on the Ubuntu Server 20.04 LTS ISO image and click on Mount Virtual Drive as marked in the screenshot below.

Make sure that the ISO image is mounted in the pxeboot shared folder1. Also, make sure to check the Mount automatically on startup checkbox so that the ISO image will be mounted automatically when your Synology NAS boots2. Then, click on Mount to mount the ISO image3.

The ISO image of Ubuntu Server 20.04 LTS should be mounted in the pxeboot shared folder as you can see in the screenshot below.

The contents of the mounted Ubuntu Server 20.04 LTS ISO image.

To boot Ubuntu Server 20.04 LTS via PXE using the GRUB UEFI firmware, you will have to add a menu entry for Ubuntu Server 20.04 LTS on the grub/grub.cfg configuration file.
NOTE: Make sure to create the grub.cfg file in the pxeboot shared folder if it does not exist.
Type in the following lines in the grub/grub.cfg configuration file to boot Ubuntu Server 20.04 LTS via PXE using the GRUB UEFI firmware:
set gfxpayload=keep
linux ubuntu-20.04.4-live-server-amd64/casper/vmlinuz netboot=nfs ip=dhcp nfsroot=192.168.0.105:/volume1/pxeboot/ubuntu-20.04.4-live-server-amd64
initrd ubuntu-20.04.4-live-server-amd64/casper/initrd
}
Once you’ve added a menu entry for Ubuntu Server 20.04 LTS, the grub/grub.cfg configuration file should look as follows:

NOTE: Here, 192.168.0.105 is the IP address of my Synology NAS. Don’t forget to replace it with yours. If you need any assistance in finding the IP address of your Synology NAS, read the article How Do I Find the IP Address of My Synology NAS?.

Now, boot your computer via PXE and you should see the following GRUB menu.
Select Install Ubuntu Server 20.04 LTS (netboot) and press <Enter>.

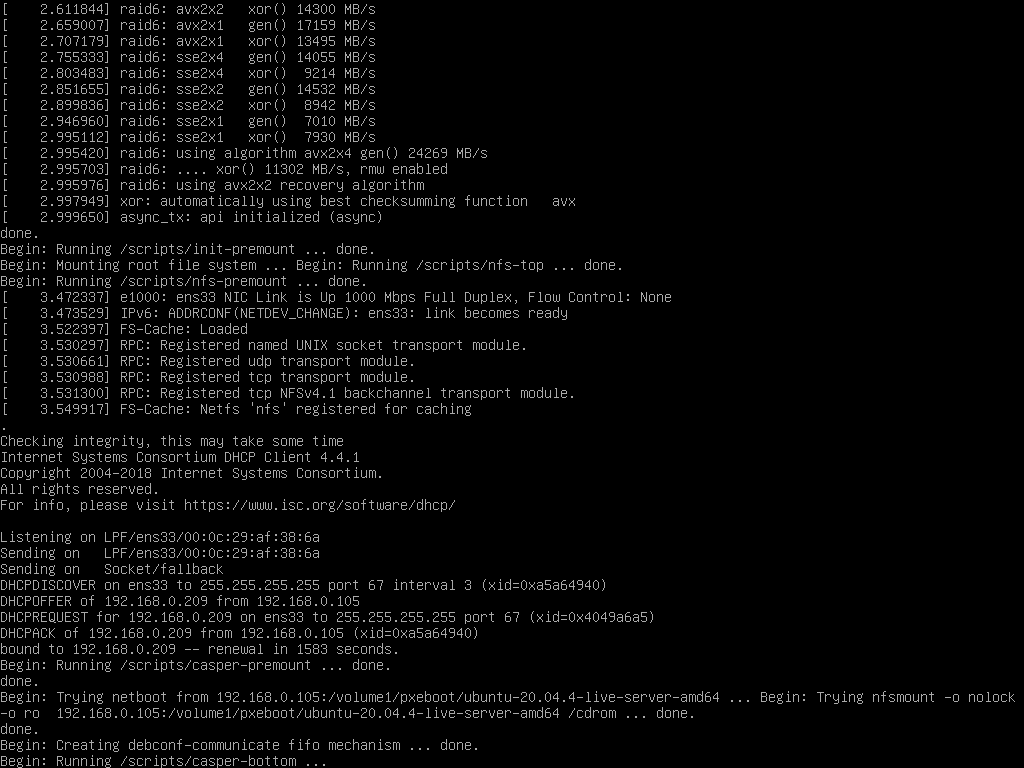
Ubuntu Server 20.04 LTS is being booted.
Once Ubuntu Server 20.04 LTS is booted, you should see the following window. You can install Ubuntu Server 20.04 LTS on your computer/server from here as usual. If you need any assistance in installing Ubuntu Server 20.04 LTS on your computer/server, read the article Installing Ubuntu Server 20.04 LTS.
Booting Ubuntu Desktop 22.04 LTS Live via PXE
First, download the Ubuntu Desktop 22.04 LTS ISO image from the official release page of Ubuntu 22.04 LTS.
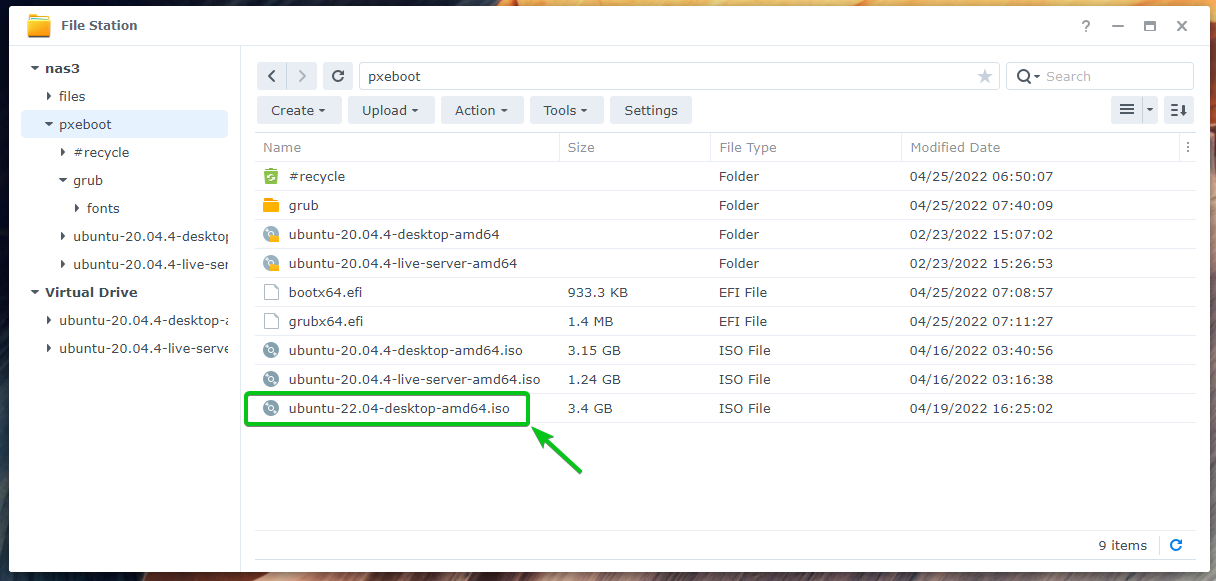
Once the Ubuntu Desktop 22.04 LTS ISO image is downloaded, upload it to the pxeboot shared folder of your Synology NAS.
Right-click on the Ubuntu Desktop 22.04 LTS ISO image and click on Mount Virtual Drive as marked in the screenshot below.
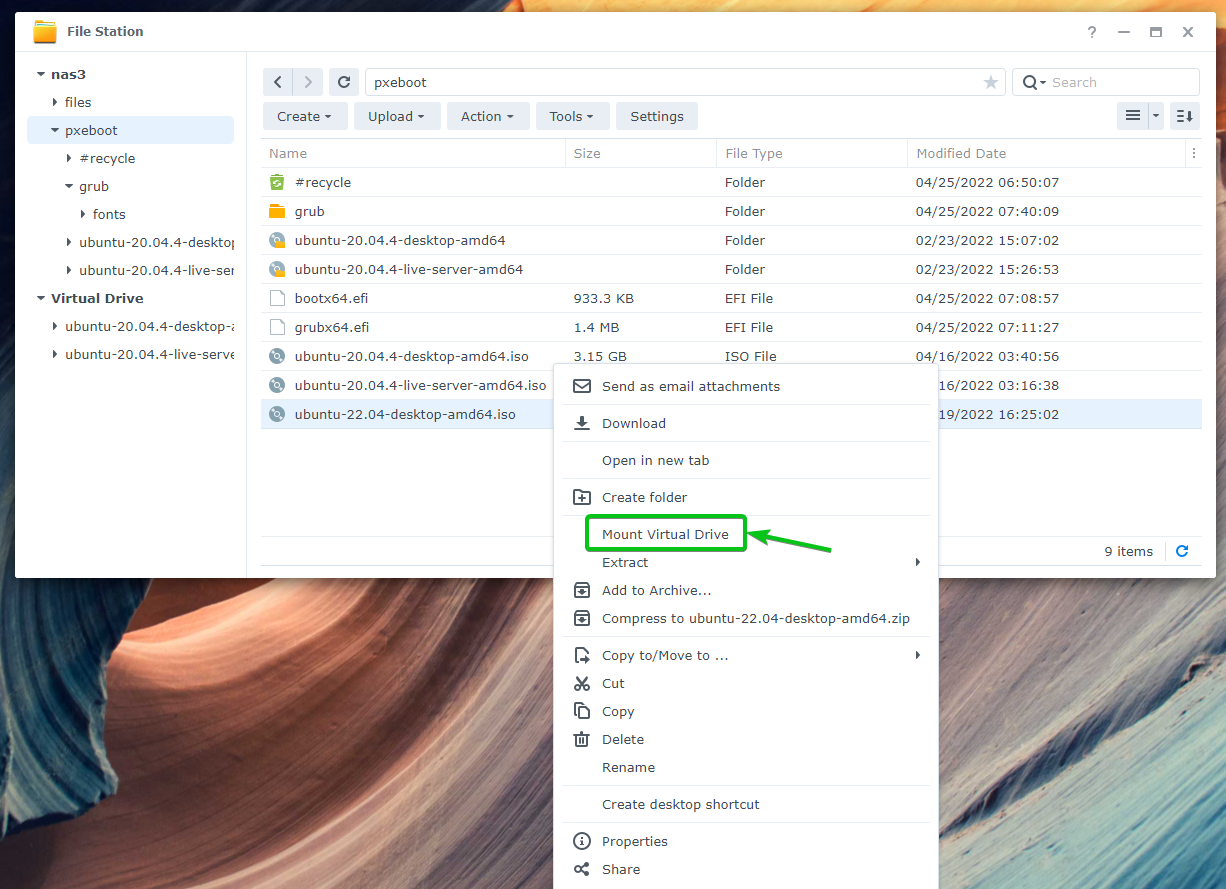
Make sure that the ISO image is mounted in the pxeboot shared folder1. Also, make sure to check the Mount automatically on startup checkbox so that the ISO image will be mounted automatically when your Synology NAS boots2. Then, click on Mount to mount the ISO image3.

The ISO image of Ubuntu Desktop 22.04 LTS should be mounted in the pxeboot shared folder as you can see in the screenshot below.

The contents of the mounted Ubuntu Desktop 22.04 LTS ISO image.

To boot Ubuntu Desktop 22.04 LTS via PXE using the GRUB UEFI firmware, you will have to add a menu entry for Ubuntu Desktop 22.04 LTS on the grub/grub.cfg configuration file.
NOTE: Make sure to create the grub.cfg file in the pxeboot shared folder if it does not exists.
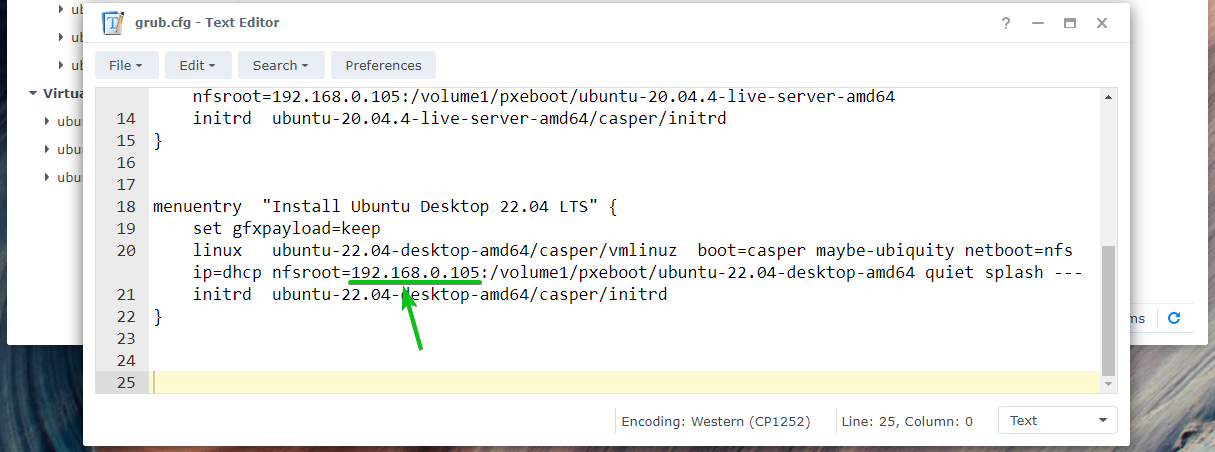
Type in the following lines in the grub/grub.cfg configuration file to boot Ubuntu Desktop 22.04 LTS via PXE using the GRUB UEFI firmware:
set gfxpayload=keep
linux ubuntu-22.04-desktop-amd64/casper/vmlinuz boot=casper maybe-ubiquity netboot=nfs ip=dhcp nfsroot=192.168.0.105:/volume1/pxeboot/ubuntu-22.04-desktop-amd64 quiet splash ---
initrd ubuntu-22.04-desktop-amd64/casper/initrd
}
Once you’ve added a menu entry for Ubuntu Desktop 22.04 LTS, the grub/grub.cfg configuration file should look as follows:
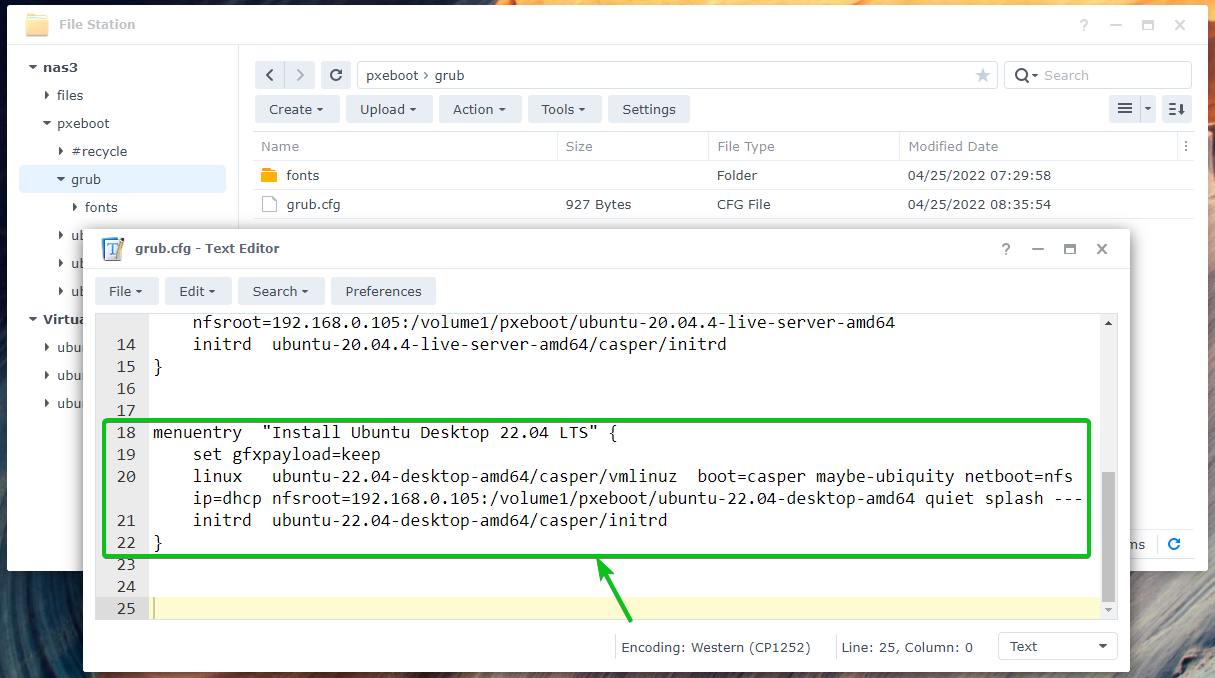
NOTE: Here, 192.168.0.105 is the IP address of my Synology NAS. Don’t forget to replace it with yours. If you need any assistance in finding the IP address of your Synology NAS, read the article How Do I Find the IP Address of My Synology NAS?.
Now, boot your computer via PXE and you should see the following GRUB menu.
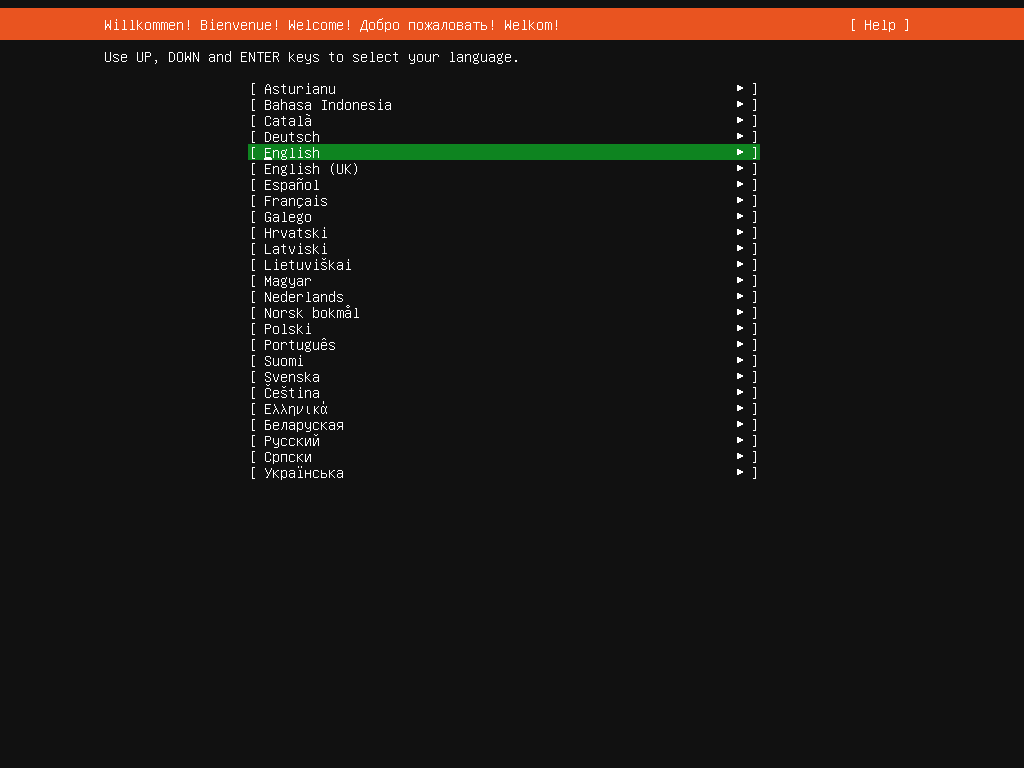
Select Install Ubuntu Desktop 22.04 LTS and press <Enter>.

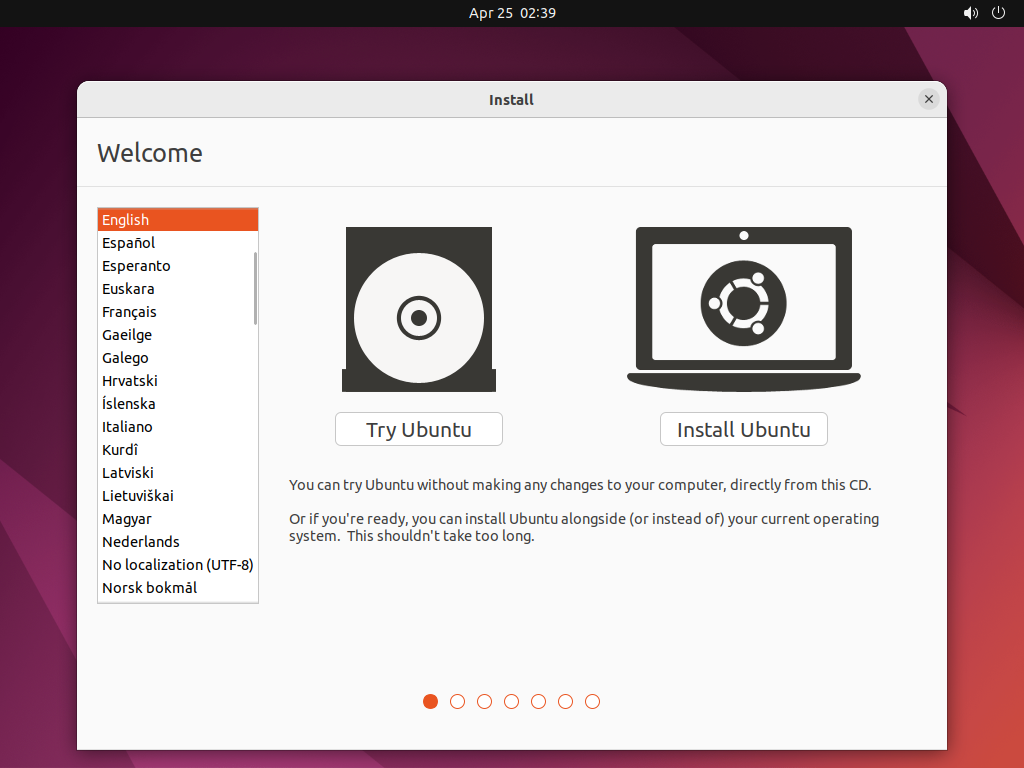
Ubuntu Desktop 22.04 LTS Live is being booted.

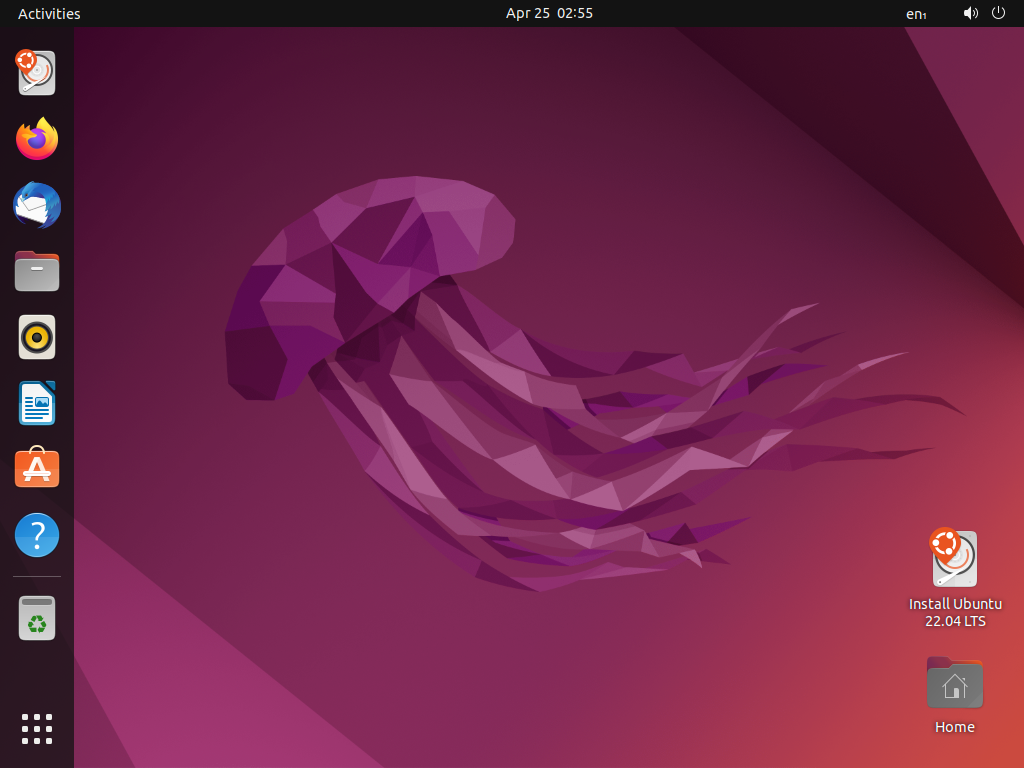
Once Ubuntu Desktop 22.04 LTS Live is booted, you should see the following window. You can install Ubuntu Desktop 22.04 LTS on your computer from here. If you need any assistance in installing Ubuntu Desktop 22.04 LTS on your computer, read the article Installing Ubuntu Desktop 20.04 LTS. Although the article is for Ubuntu Desktop 20.04 LTS, it may still be helpful.
Ubuntu Desktop 22.04 LTS Live network booted via PXE.
Booting Ubuntu Server 22.04 LTS via PXE
First, download the Ubuntu Server 22.04 LTS ISO image from the official release page of Ubuntu 22.04 LTS.
Once the Ubuntu Server 22.04 LTS ISO image is downloaded, upload it to the pxeboot shared folder of your Synology NAS.

Right-click on the Ubuntu Server 22.04 LTS ISO image and click on Mount Virtual Drive as marked in the screenshot below.
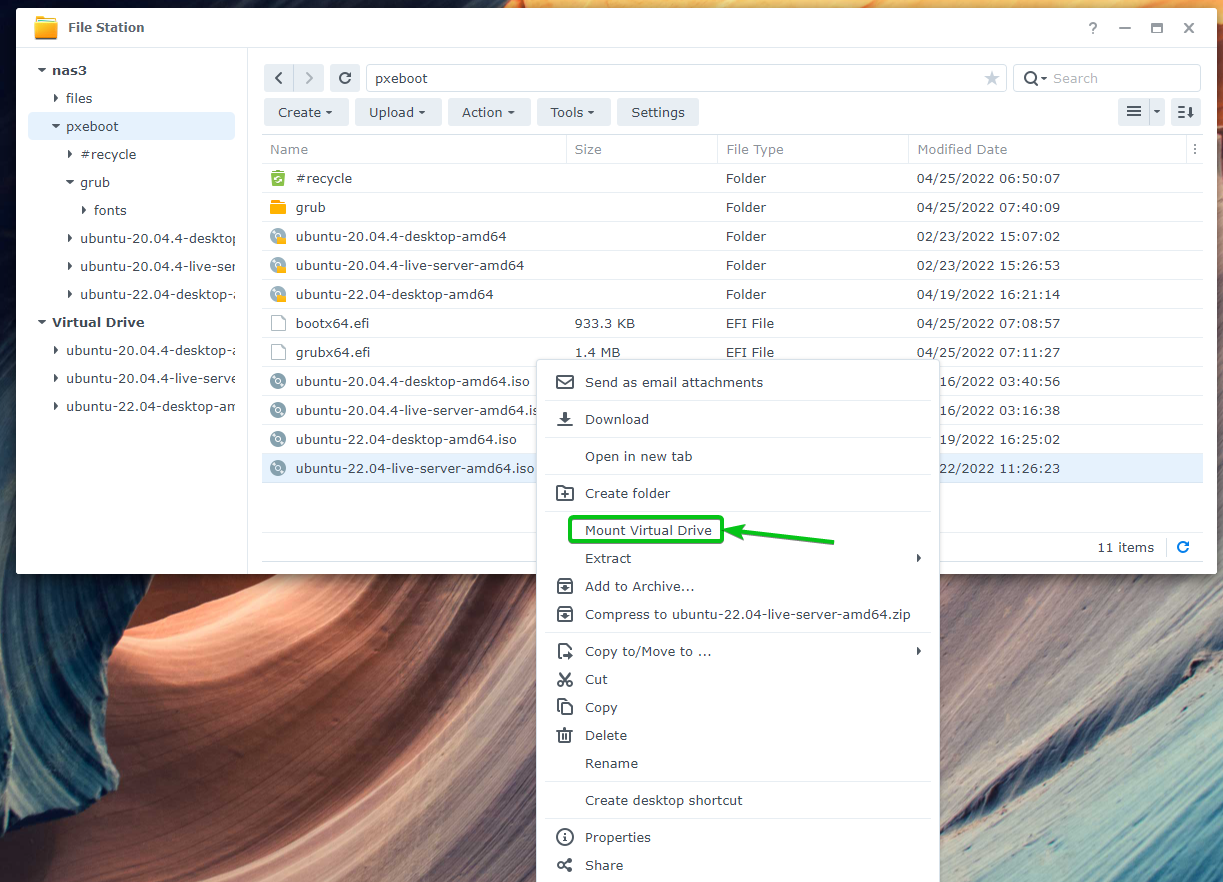
Make sure that the ISO image is mounted in the pxeboot shared folder1. Also, make sure to check the Mount automatically on startup checkbox so that the ISO image will be mounted automatically when your Synology NAS boots2. Then, click on Mount to mount the ISO image3.

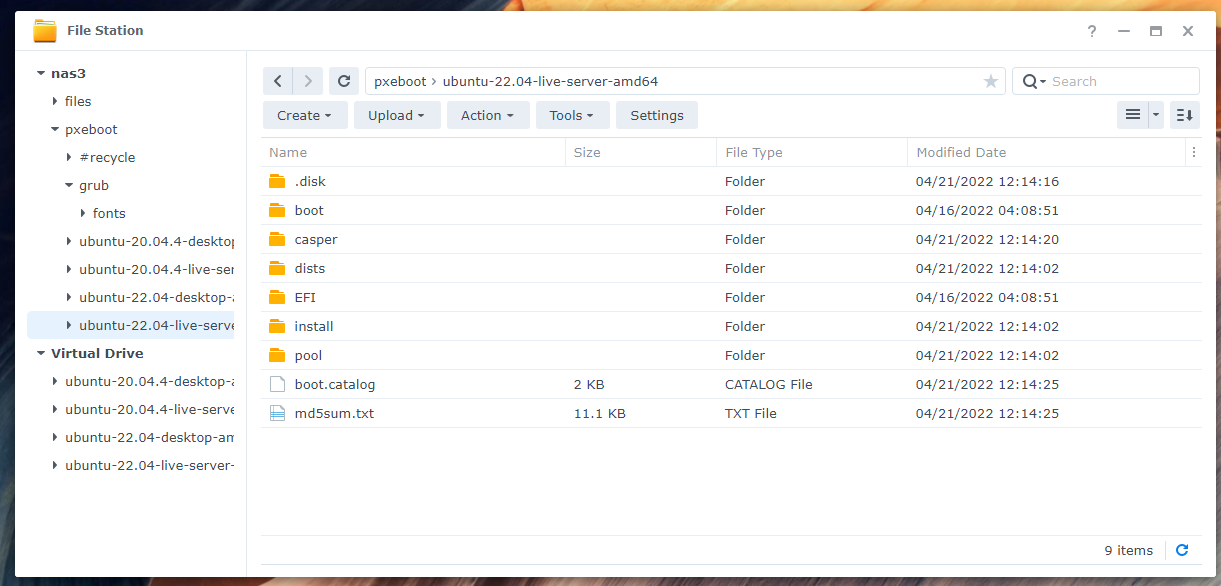
The ISO image of Ubuntu Server 22.04 LTS should be mounted in the pxeboot shared folder as you can see in the screenshot below.

The contents of the mounted Ubuntu Server 22.04 LTS ISO image.
To boot Ubuntu Server 22.04 LTS via PXE using the GRUB UEFI firmware, you will have to add a menu entry for Ubuntu Server 22.04 LTS on the grub/grub.cfg configuration file.
NOTE: Make sure to create the grub.cfg file in the pxeboot shared folder if it does not exists.
Type in the following lines in the grub/grub.cfg configuration file to boot Ubuntu Server 22.04 LTS via PXE using the GRUB UEFI firmware:
set gfxpayload=keep
linux ubuntu-22.04-live-server-amd64/casper/vmlinuz netboot=nfs ip=dhcp nfsroot=192.168.0.105:/volume1/pxeboot/ubuntu-22.04-live-server-amd64
initrd ubuntu-22.04-live-server-amd64/casper/initrd
}
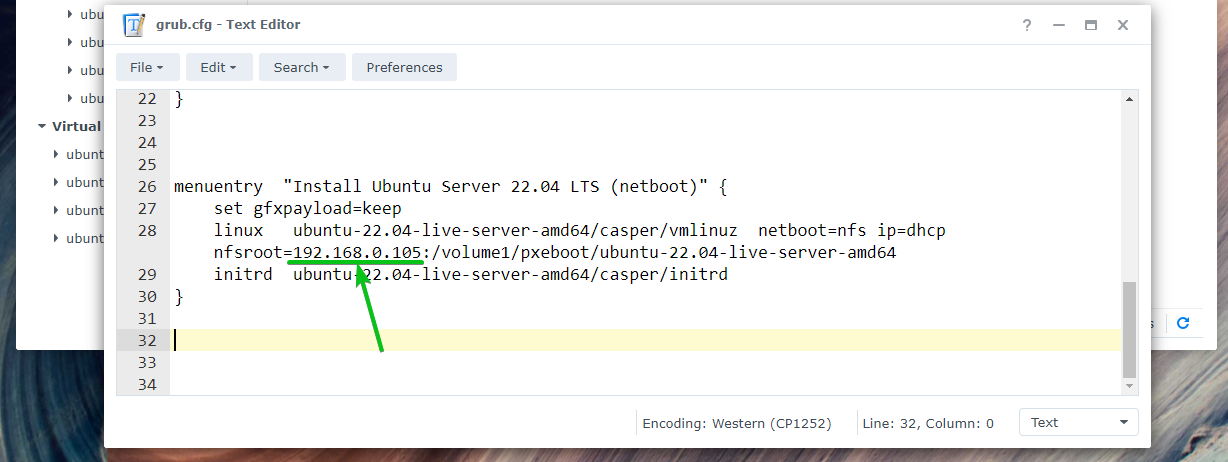
Once you’ve added a menu entry for Ubuntu Server 22.04 LTS, the grub/grub.cfg configuration file should look as follows:
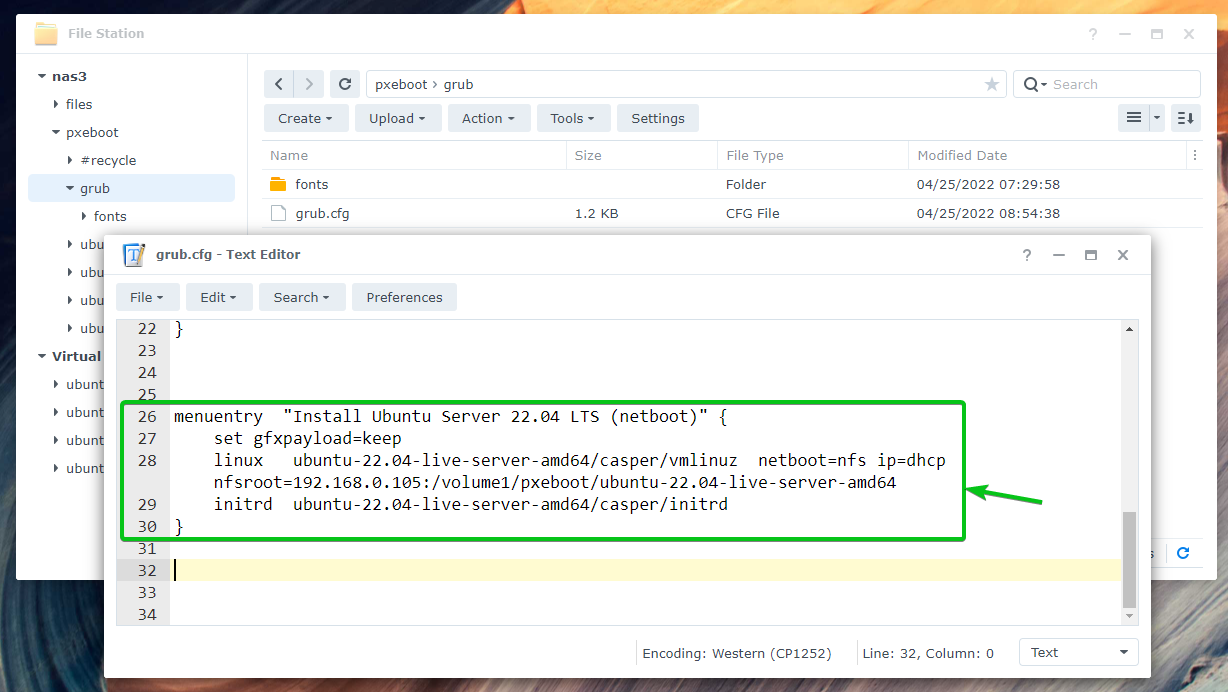
NOTE: Here, 192.168.0.105 is the IP address of my Synology NAS. Don’t forget to replace it with yours. If you need any assistance in finding the IP address of your Synology NAS, read the article How Do I Find the IP Address of My Synology NAS?.
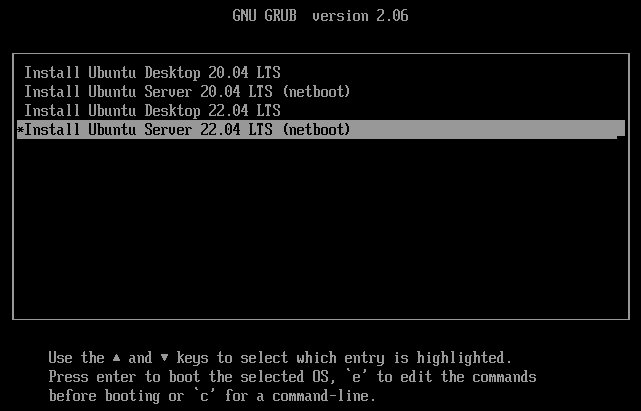
Now, boot your computer via PXE and you should see the following GRUB menu.
Select Install Ubuntu Server 22.04 LTS (netboot) and press <Enter>.

Ubuntu Server 22.04 LTS is being booted.
Once Ubuntu Server 22.04 LTS is booted, you should see the following window. You can install Ubuntu Server 22.04 LTS on your computer/server from here as usual. If you need any assistance in installing Ubuntu Server 22.04 LTS on your computer/server, read the article Installing Ubuntu Server 20.04 LTS. Although the article is for Ubuntu Server 20.04 LTS, it may still be helpful.

Booting Fedora 35 Workstation Live via PXE
First, download the Fedora Workstation 35 ISO image from the official downloads page of Fedora Workstation.
Once the Fedora Workstation 35 ISO image is downloaded, upload it to the pxeboot shared folder of your Synology NAS.
Right-click on the Fedora Workstation 35 ISO image and click on Mount Virtual Drive as marked in the screenshot below.
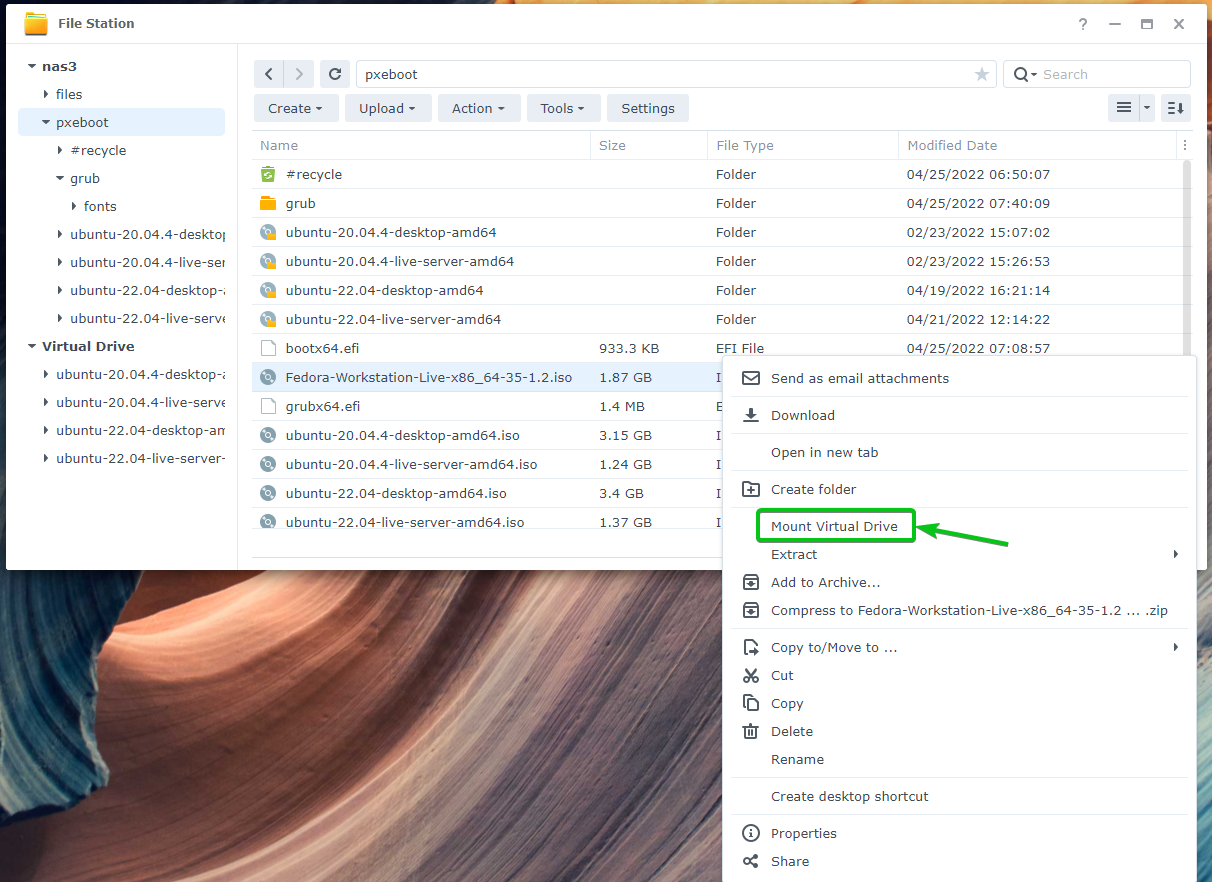
Make sure that the ISO image is mounted in the pxeboot shared folder1. Also, make sure to check the Mount automatically on startup checkbox so that the ISO image will be mounted automatically when your Synology NAS boots2. Then, click on Mount to mount the ISO image3.

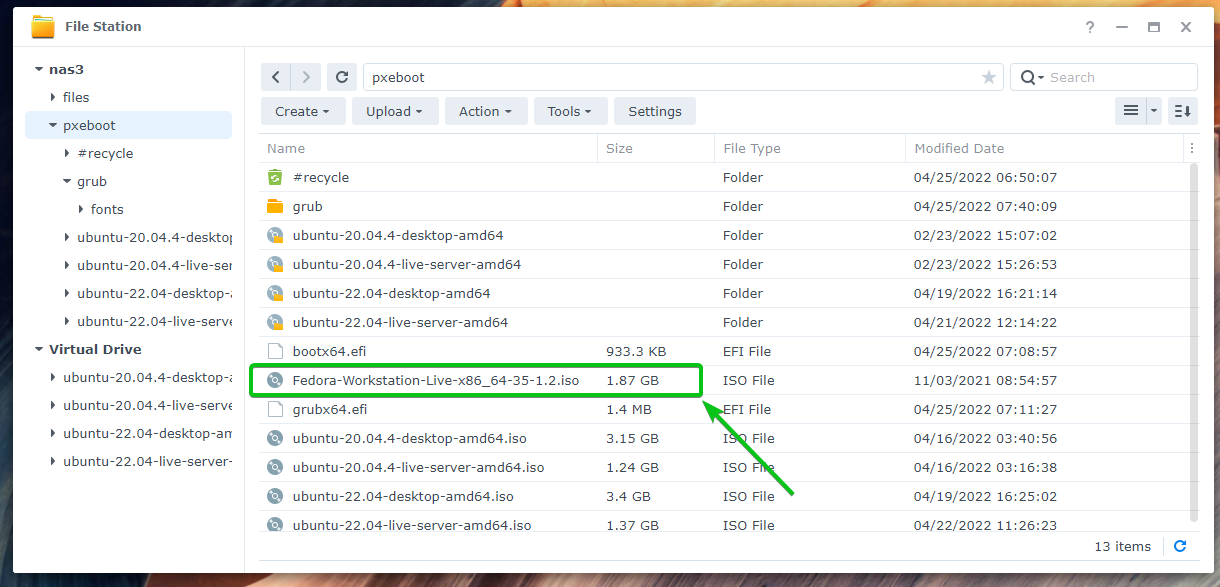
The ISO image of Fedora Workstation 35 should be mounted in the pxeboot shared folder as you can see in the screenshot below.

The contents of the mounted Fedora Workstation 35 ISO image.

To boot Fedora Workstation 35 Live via PXE using the GRUB UEFI firmware, you will have to add a menu entry for Fedora Workstation 35 on the grub/grub.cfg configuration file.
NOTE: Make sure to create the grub.cfg file in the pxeboot shared folder if it does not exists.
Type in the following lines in the grub/grub.cfg configuration file to boot Fedora Workstation 35 Live via PXE using the GRUB UEFI firmware:
set gfxpayload=keep
linux Fedora-Workstation-Live-x86_64-35-1.2/images/pxeboot/vmlinuz ip=dhcp rd.live.image root=live:nfs://192.168.0.105/volume1/pxeboot/Fedora-Workstation-Live-x86_64-35-1.2/LiveOS/squashfs.img
initrd Fedora-Workstation-Live-x86_64-35-1.2/images/pxeboot/initrd.img
}
Once you’ve added a menu entry for Fedora Workstation 35, the grub/grub.cfg configuration file should look as follows:

NOTE: Here, 192.168.0.105 is the IP address of my Synology NAS. Don’t forget to replace it with yours. If you need any assistance in finding the IP address of your Synology NAS, read the article How Do I Find the IP Address of My Synology NAS?.

Now, boot your computer via PXE and you should see the following GRUB menu.
Select Install Fedora Workstation 35 and press <Enter>.


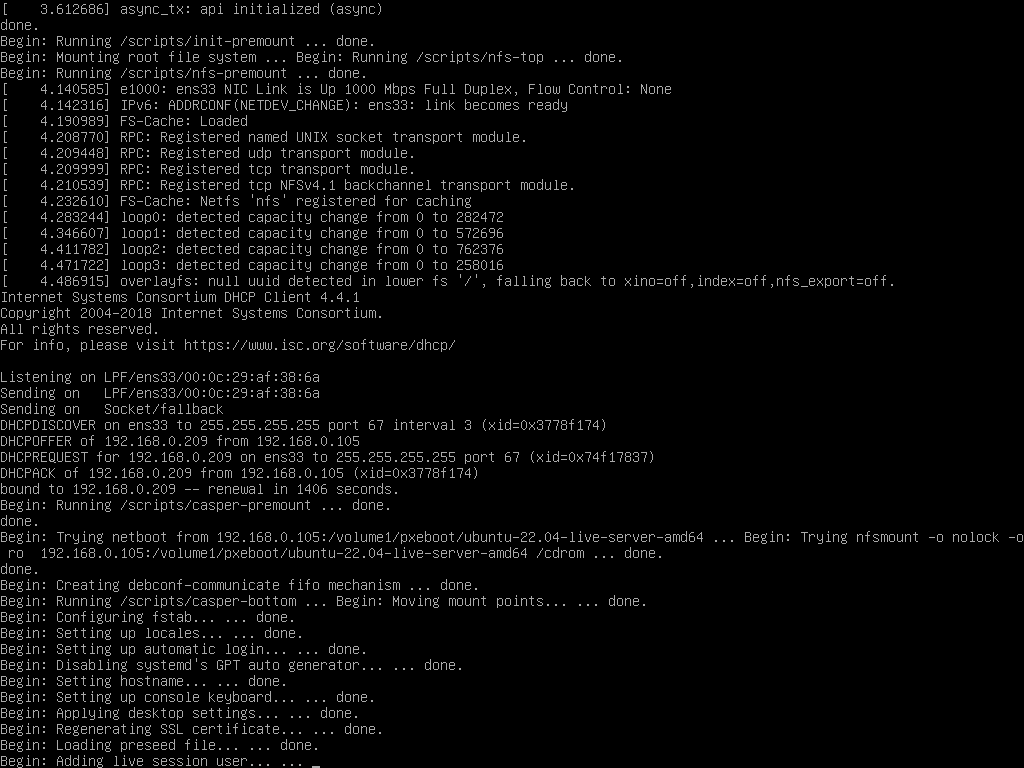
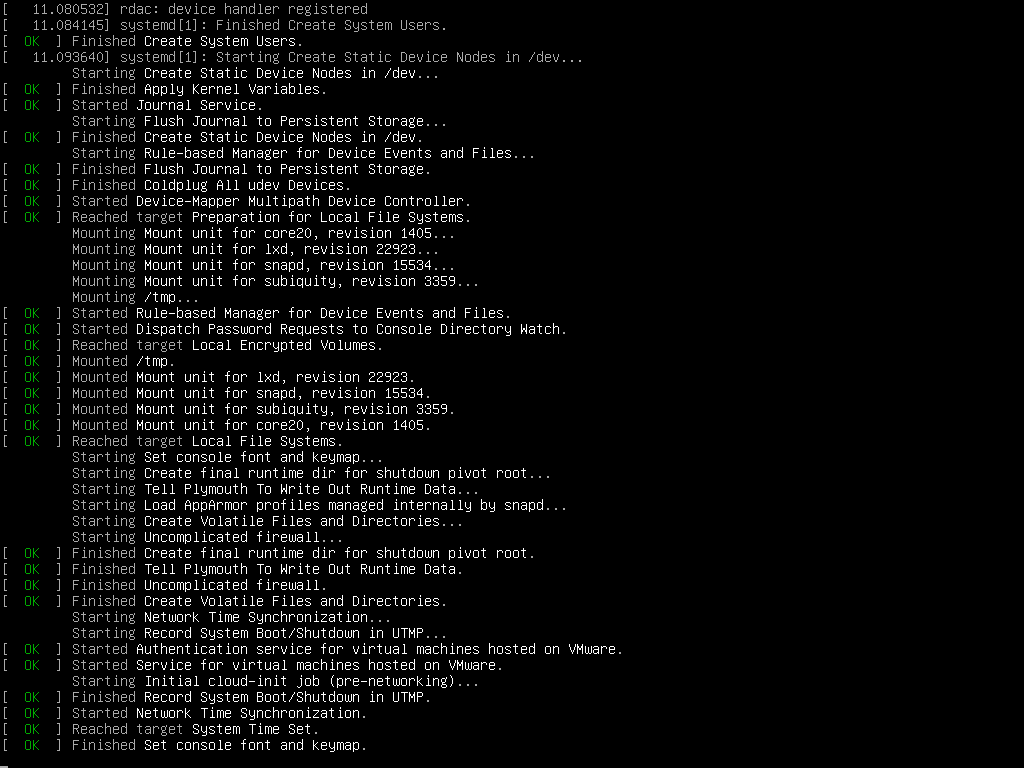
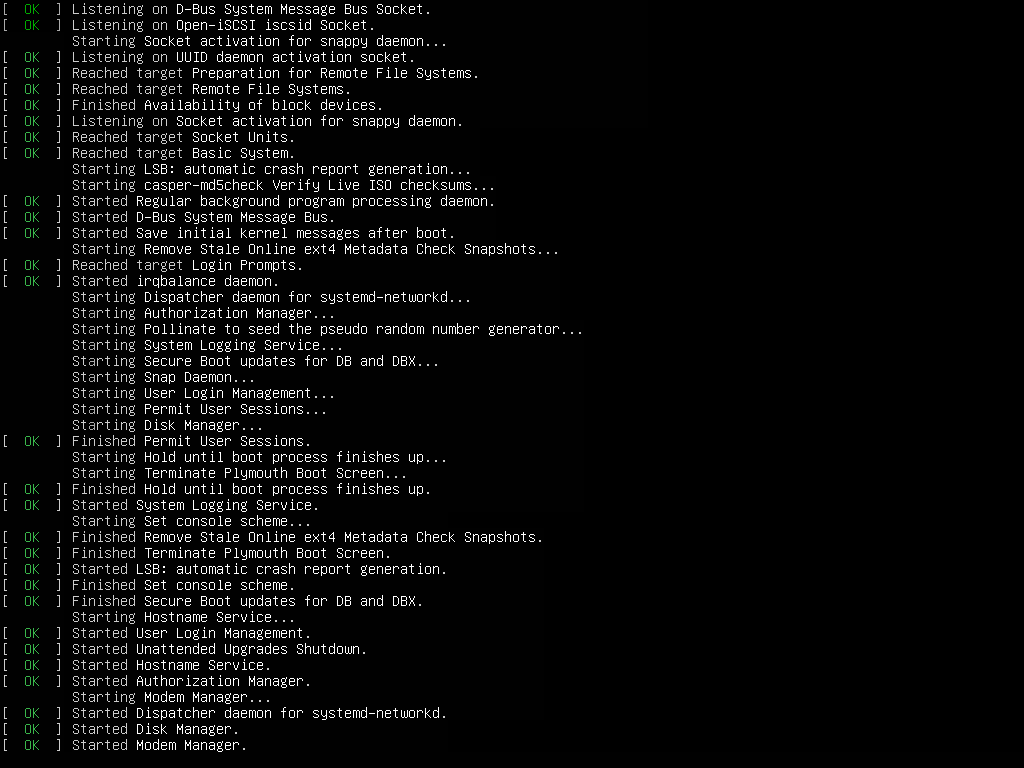
Fedora Workstation 35 Live is being booted.
Once Fedora Workstation 35 Live is booted, you should see the following window. You can install Fedora Workstation 35 on your computer as usual from here. If you need any assistance in installing Fedora Workstation 35 on your computer, read the article How to Install Fedora Workstation 35 from USB.

Fedora Workstation 35 Live mode once booted via PXE.

Fedora Workstation 35 installer once booted via PXE.

Conclusion
In this article, I have shown you how to configure the TFTP and NFS file services on your Synology NAS for PXE booting. I have also shown you how to download GRUB, copy the necessary files to your Synology NAS, and install and configure the DHCP Server package for booting GRUB on UEFI-based motherboards over the network via PXE. I have shown you how to add the necessary GRUB menu entries for PXE booting for the following Linux distributions:
- Ubuntu Desktop 20.04 LTS
- Ubuntu Server 20.04 LTS
- Ubuntu Desktop 22.04 LTS
- Ubuntu Server 22.04 LTS
- Fedora Workstation 35
References
- https://wiki.ubuntu.com/UEFI/SecureBoot/PXE-IPv6
- https://docs.fedoraproject.org/en-US/Fedora/22/html/Installation_Guide/pxe-bootloader.html
- https://wiki.fysik.dtu.dk/it/PXE_and_UEFI
- https://c-nergy.be/blog/?p=13808
- https://ubuntu.com/server/docs/install/netboot-amd64
- https://linuxhint.com/pxe_boot_ubuntu_server/
- http://manpages.ubuntu.com/manpages/bionic/man7/casper.7.html
- https://fedoraproject.org/wiki/Dracut/Options#NFS
- https://man7.org/linux/man-pages/man7/dracut.cmdline.7.html
- https://access.redhat.com/documentation/en-us/red_hat_enterprise_linux/7/html/storage_administration_guide/ch-disklesssystems
- https://bugzilla.redhat.com/show_bug.cgi?id=781983
- https://bugzilla.redhat.com/show_bug.cgi?id=537217