You can use the Synology Active Backup for Business app to back up your Windows and Linux computers, VMware and Hyper-V virtual machines, and rsync and SMB file servers.
At the time of this writing, only the beta version of the Active Backup for Business app supports Linux backups. The beta version of the Active Backup for Business app supports the following Linux distributions:
- CentOS/RHEL 6, CentOS/RHEL 7, and CentOS/RHEL 8
- Ubuntu 16.04 LTS, Ubuntu 18.04 LTS, and Ubuntu 20.04 LTS
- Fedora 30, Fedora 31, and Fedora 32
- Debian 8, Debian 9, and Debian 10
In this article, I will show you how to use Synology Active Backup for Business to back up your Linux computer. So, let’s get started.
Table of Contents:
- Things You Will Need
- Installing Active Backup for Business
- Running the Active Backup for Business App
- Configuring Storage for Active Backup for Business
- Creating a New Synology User
- Downloading the Active Backup for Business Linux Agent
- Copying the Linux Agent to Your Linux Computer
- Installing Active Backup for Business Linux Agent on Ubuntu/Debian
- Installing Active Backup for Business Linux Agent on RHEL/CentOS/Fedora
- Configuring the Active Backup for Business Linux Agent
- Creating a Backup Task With Active Backup for Business
- Modifying Backup Tasks of Active Backup for Business
- Taking a Backup of Your Linux Computer With Active Backup for Business
- Restoring Data From the Backup With Active Backup for Business
- Removing Backup Versions With Active Backup for Business
- Removing Backup Tasks From Active Backup for Business
- Removing Linux Computer From Active Backup for Business
- Conclusion
Things You Will Need:
To follow this article, you need:
– A Synology NAS device.
– A Synology account. If you don’t have a Synology, you can create one for free.
– A computer with Synology Active Backup for Business supported Linux distribution installed.
– A laptop or computer to access the web management interface of your Synology NAS.
You also need to know the IP address of your Synology NAS. The IP address of my Synology NAS is 192.168.0.110. It will be different for you. So, make sure to replace it with yours from now on.
Installing Active Backup for Business:
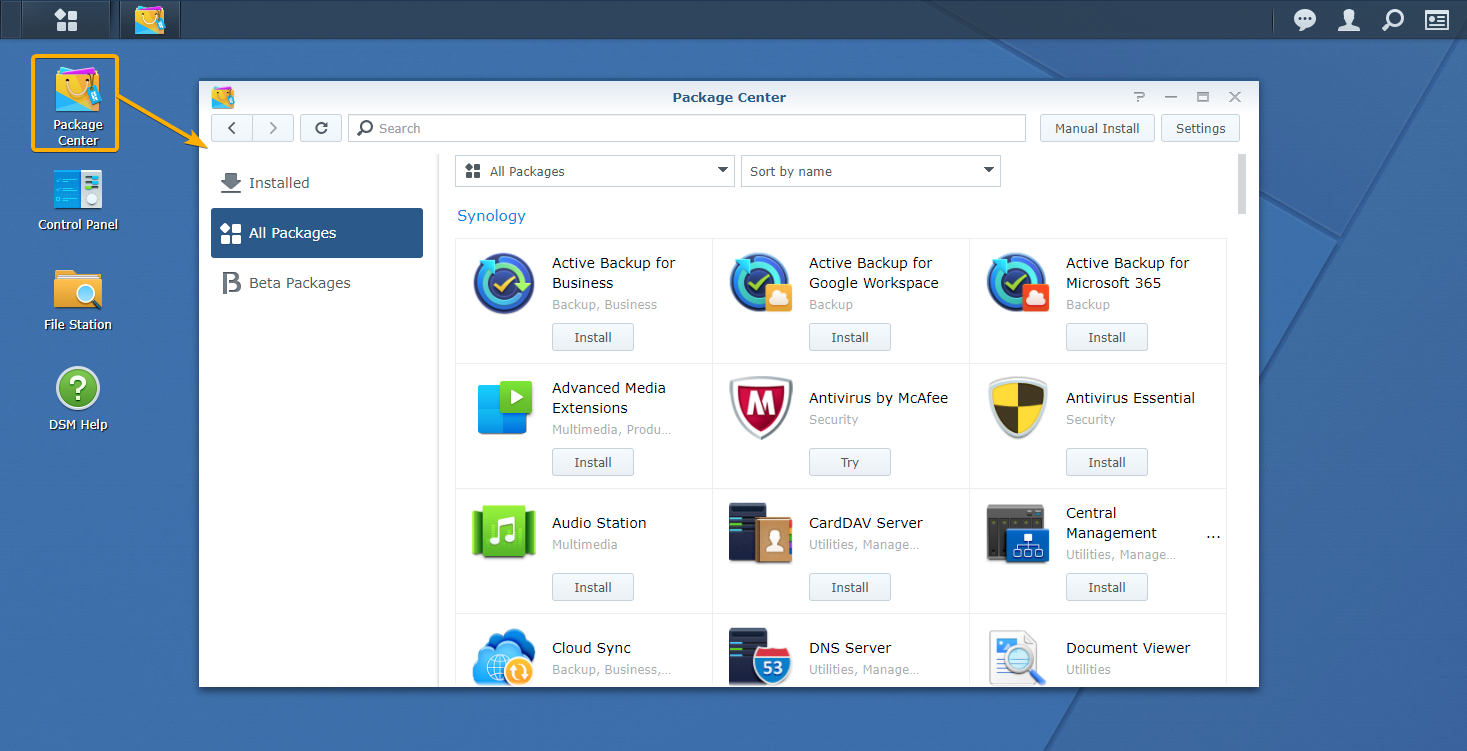
Active Backup for Business can be installed from the Package Center app.
Open the Package Center app from the web management interface of your Synology NAS.
Navigate to the Beta Packages section of the Package Center app. You should find the beta version of the Active Backup for Business app in there, as you can see in the screenshot below:
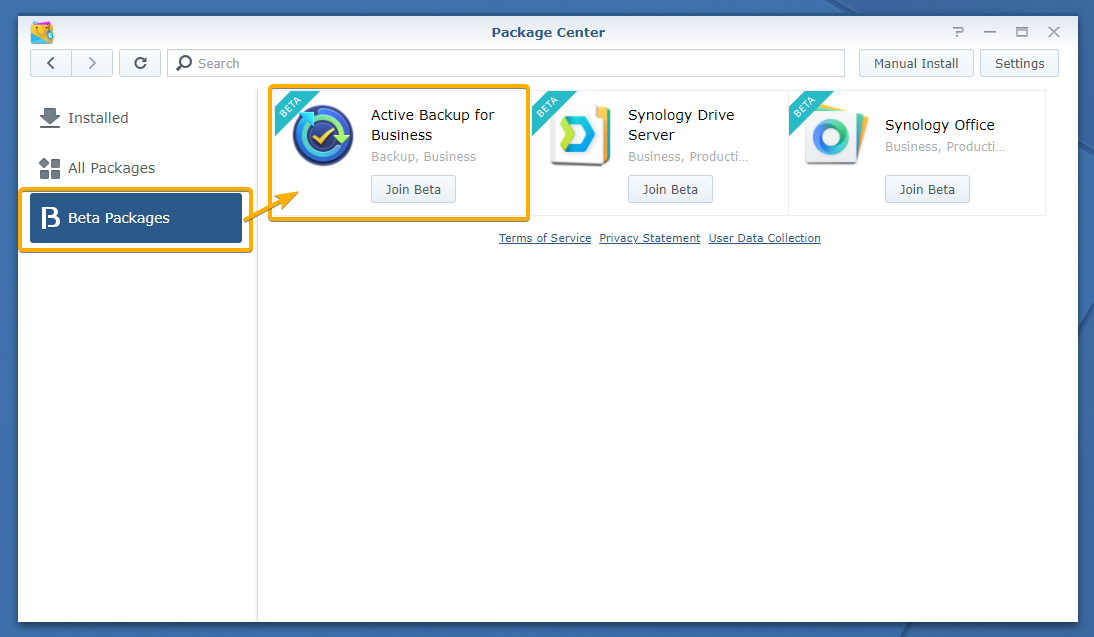
To install the beta version of the Active Backup for Business app, click on Join Beta as marked in the screenshot below:

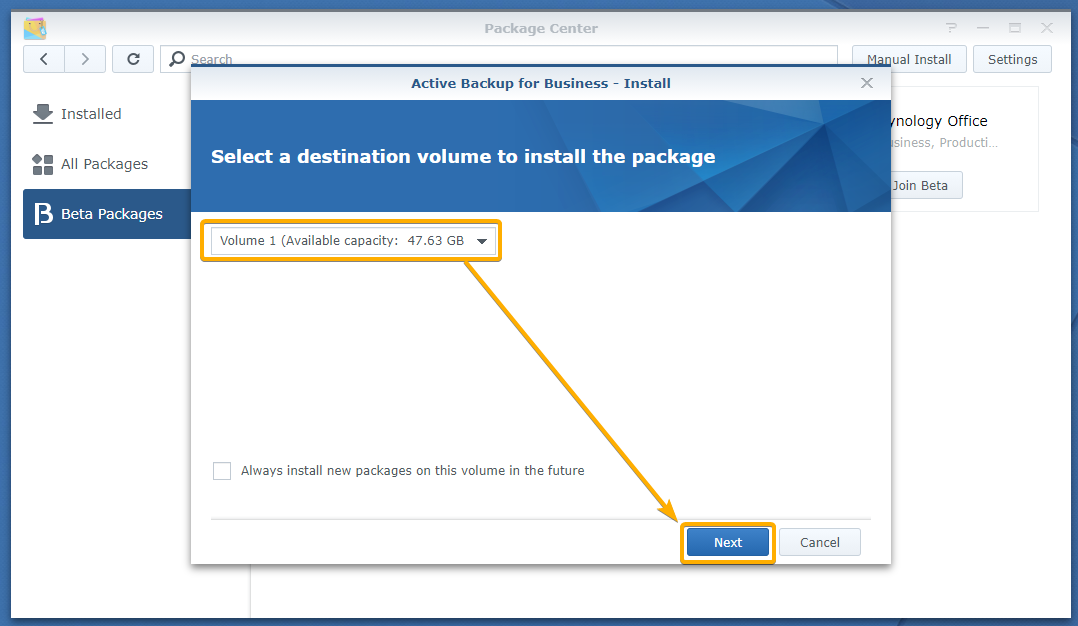
Select a volume where you want to install the Active Backup for Business app using the drop-down menu and click Next as marked in the screenshot below:
Click Apply.
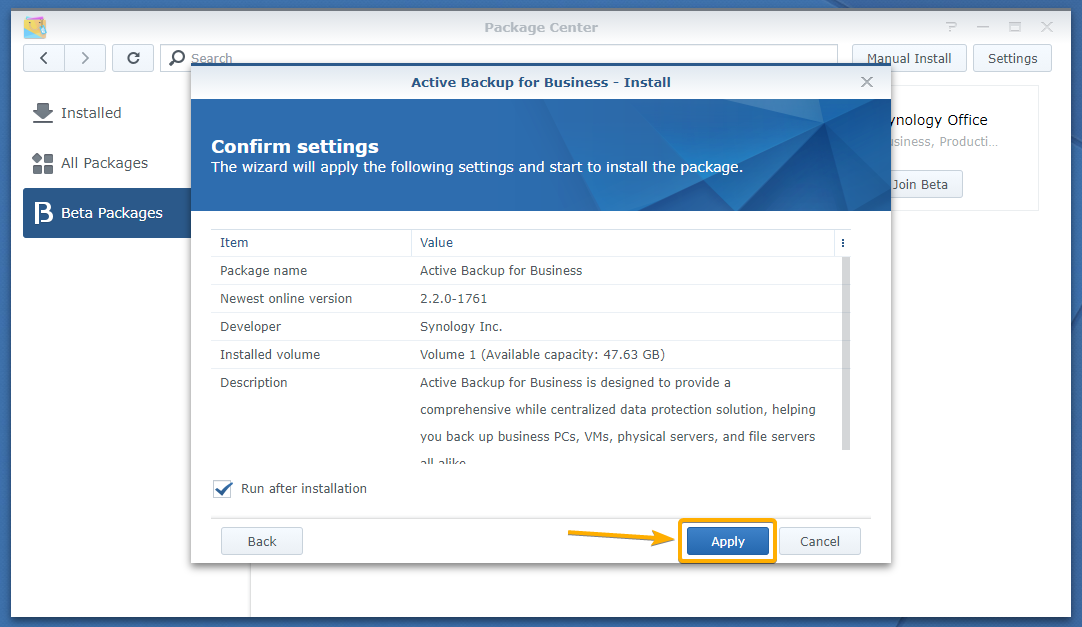
Active Backup for Business is being downloaded. It may take a few seconds to complete.

Active Backup for Business is being installed. It may take a few seconds to complete.
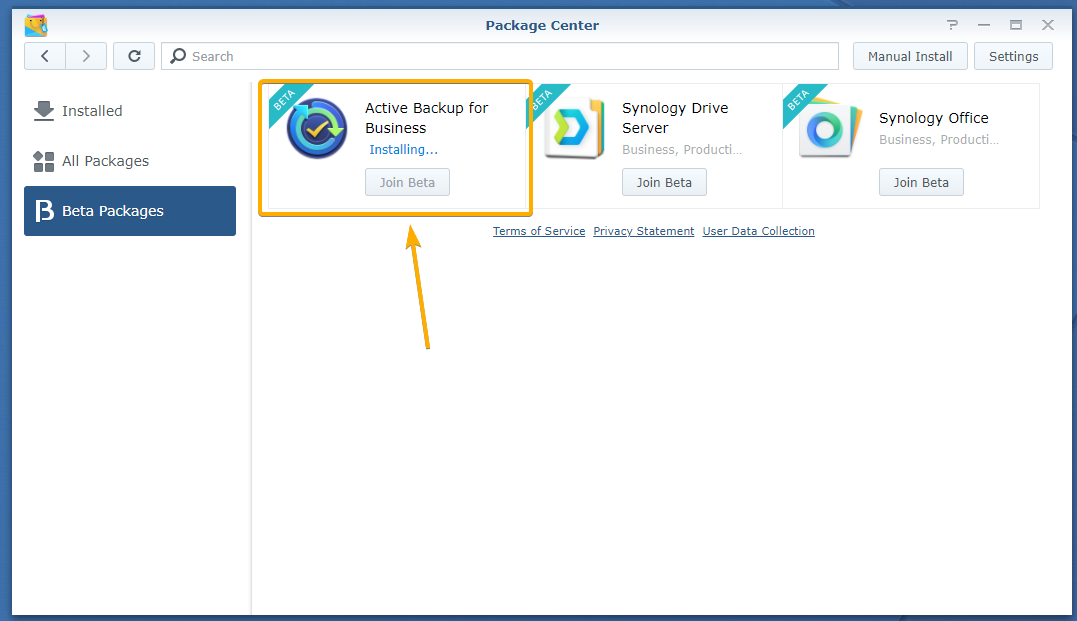
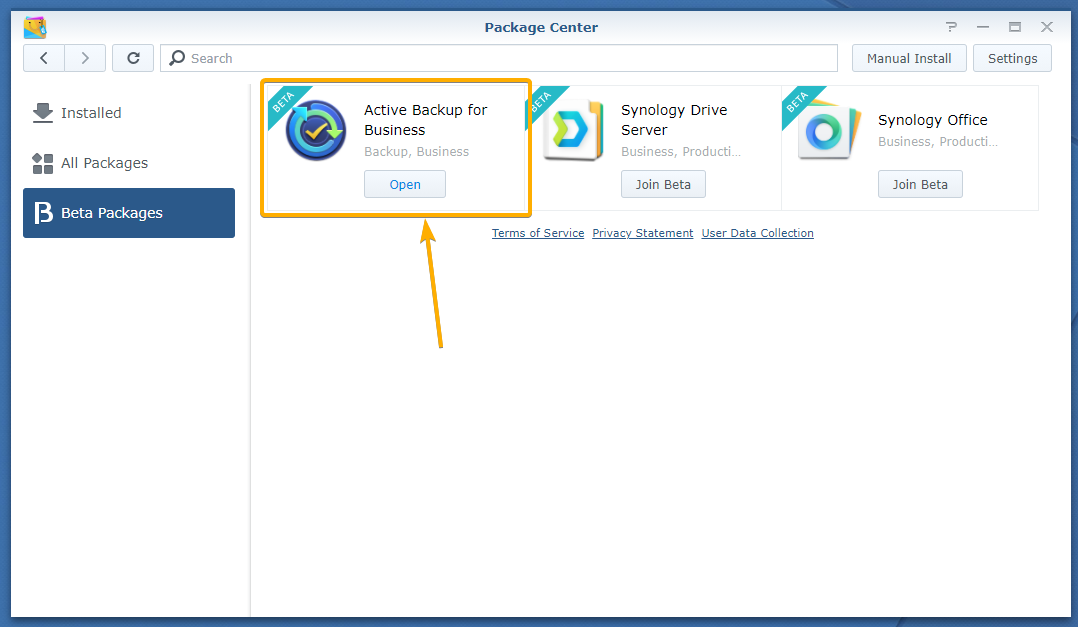
Active Backup for Business should be installed as you can see in the screenshot below:
Running the Active Backup for Business App:
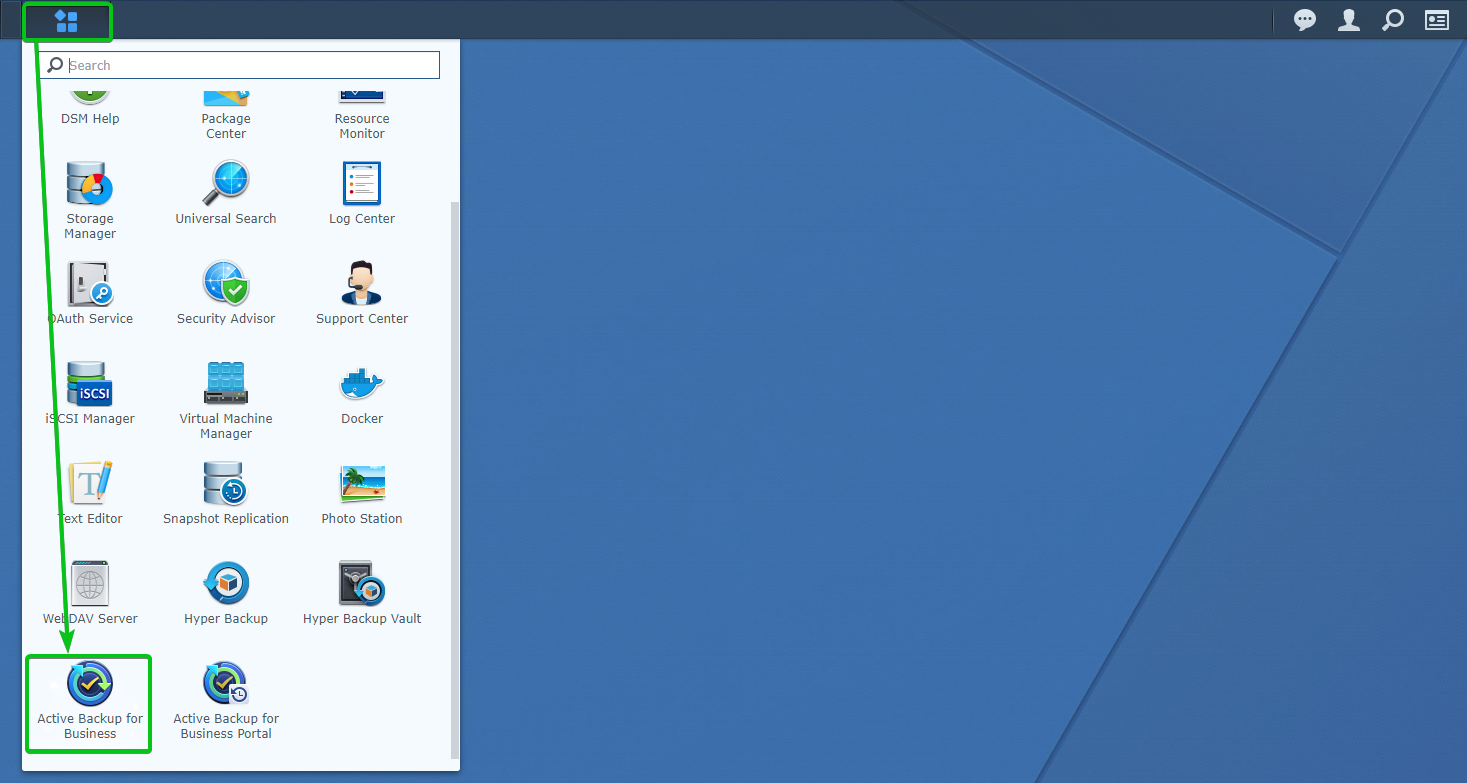
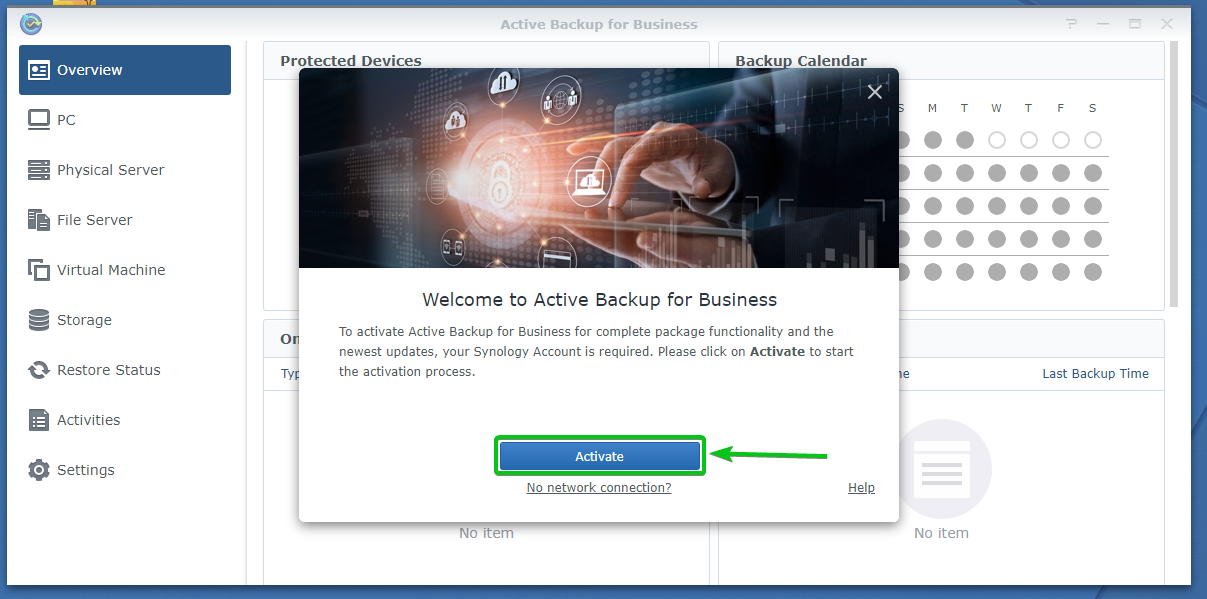
Once Active Backup for Business is installed, you can open the Active Backup for Business app from the application menu of the web management interface of your Synology NAS.
Now, you have to activate the Active Backup for Business app. You only need your Synology account to do that, and it’s free.
Now, to activate the Active Backup for Business app, click Activate as marked in the screenshot below:
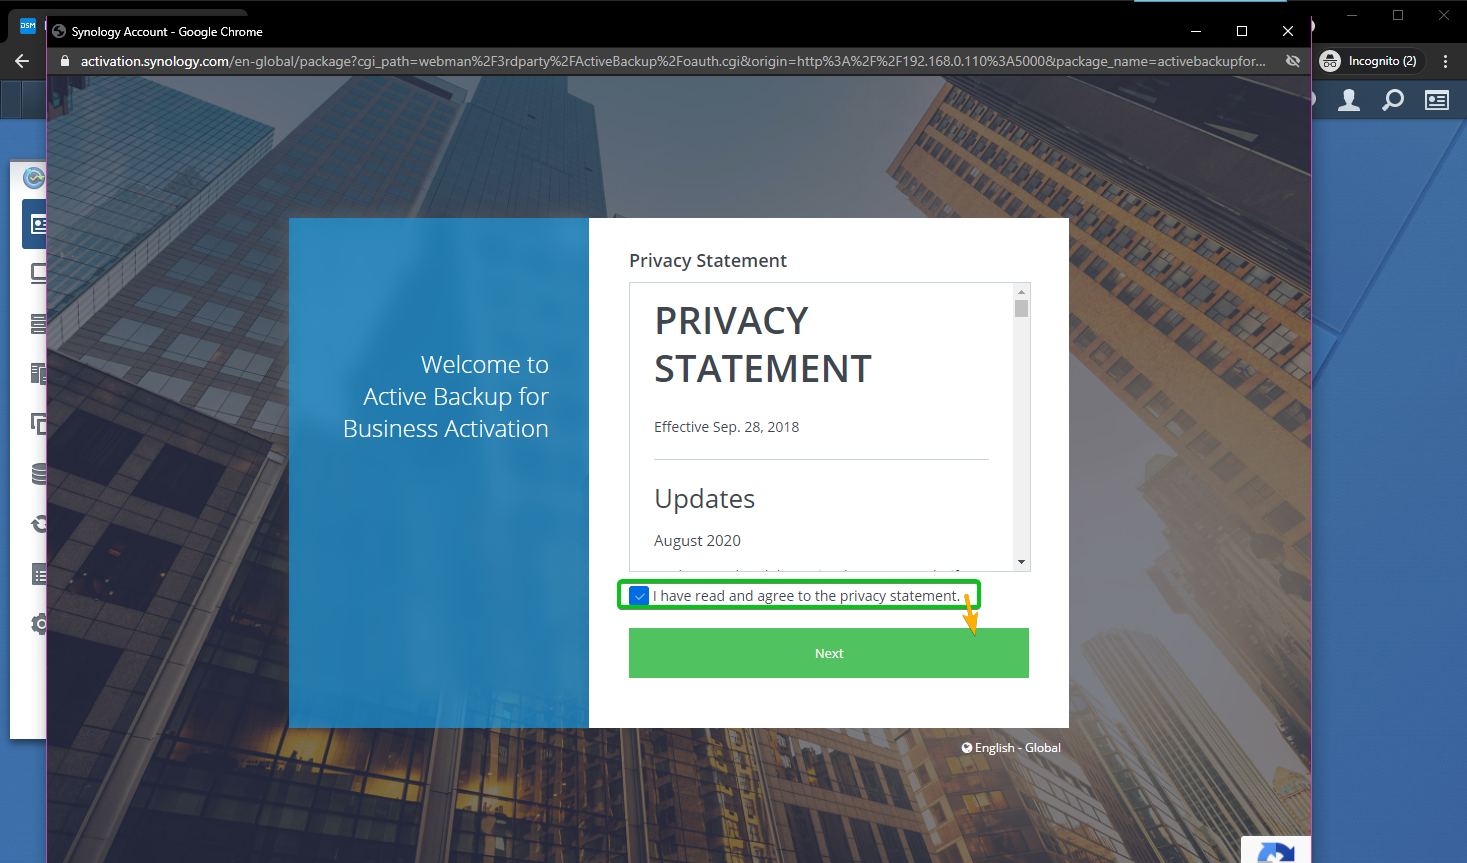
A new browser window should be displayed.
Check the I have read and agree to the privacy statement checkbox, and click Next as marked in the screenshot below:
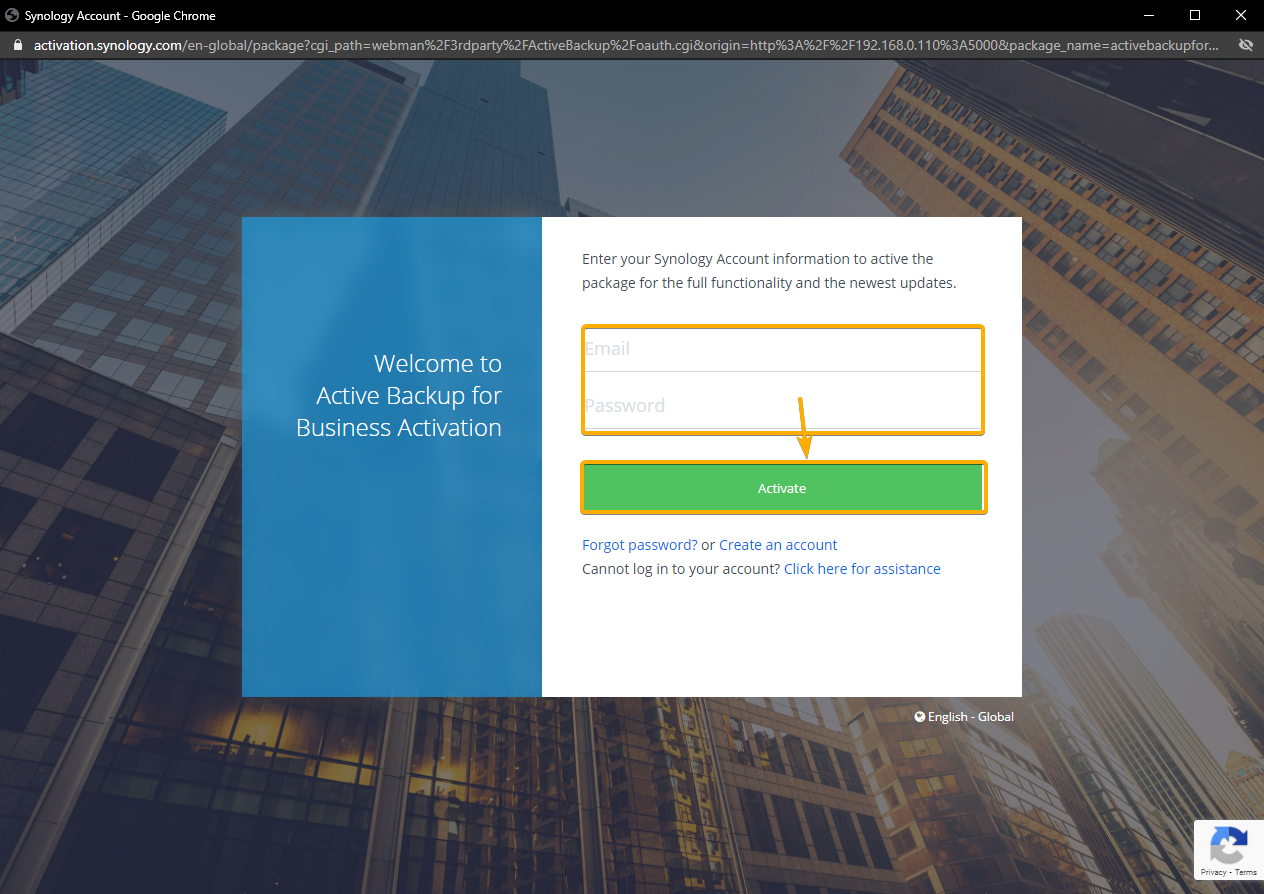
Type in the email and password of your Synology account, and click Activate as marked in the screenshot below:
Once you log in to your Synology Account, the Active Backup for Business app should be activated.
Click OK.
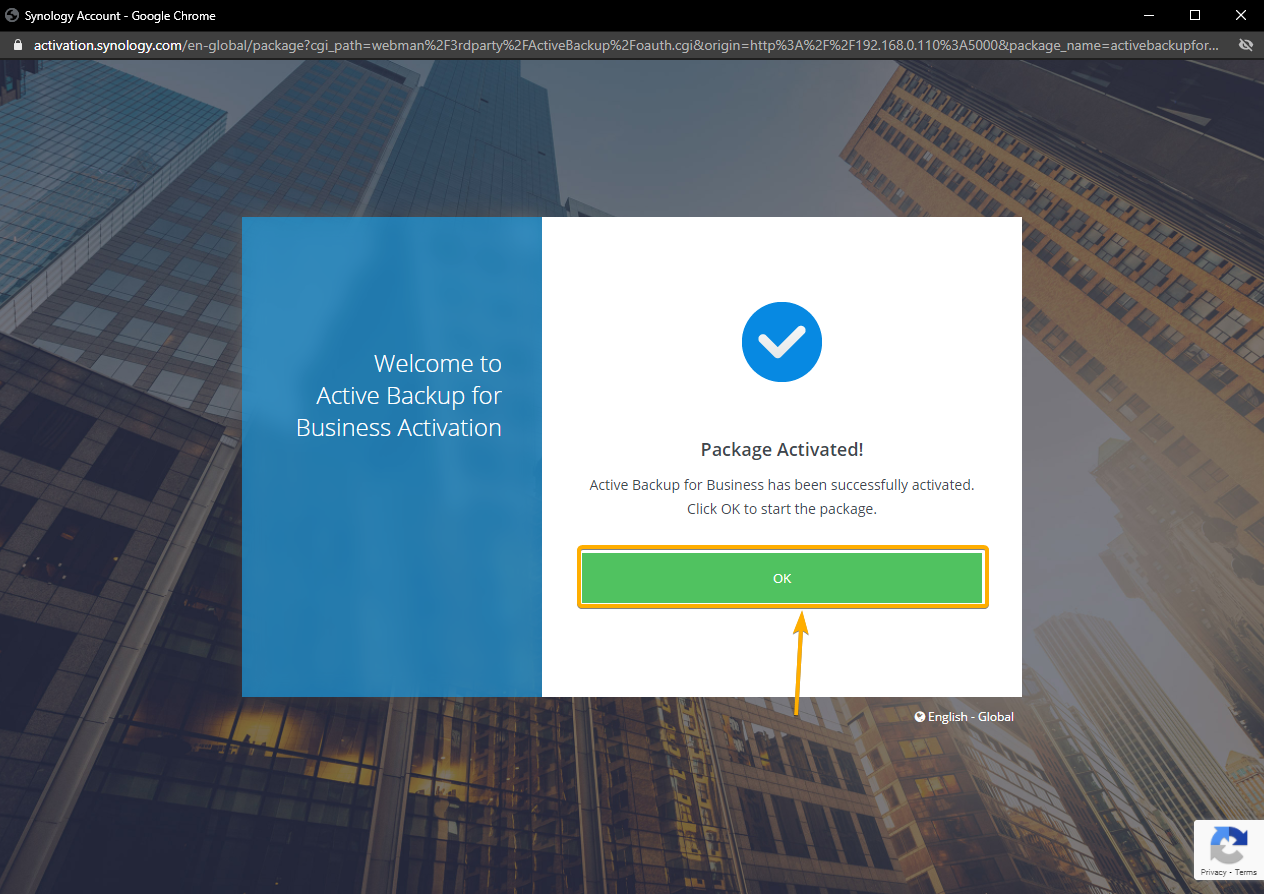
Active Backup for Business should be ready for use.

Configuring Storage for Active Backup for Business:
By default, Active Backup for Business creates an ActiveBackupforBusiness shared folder in a random volume. This is the shared volume that you may want to use to keep the backups of your Linux computer. In that case, you may want to change the volume that the ActiveBackupforBusiness shared folder is using.
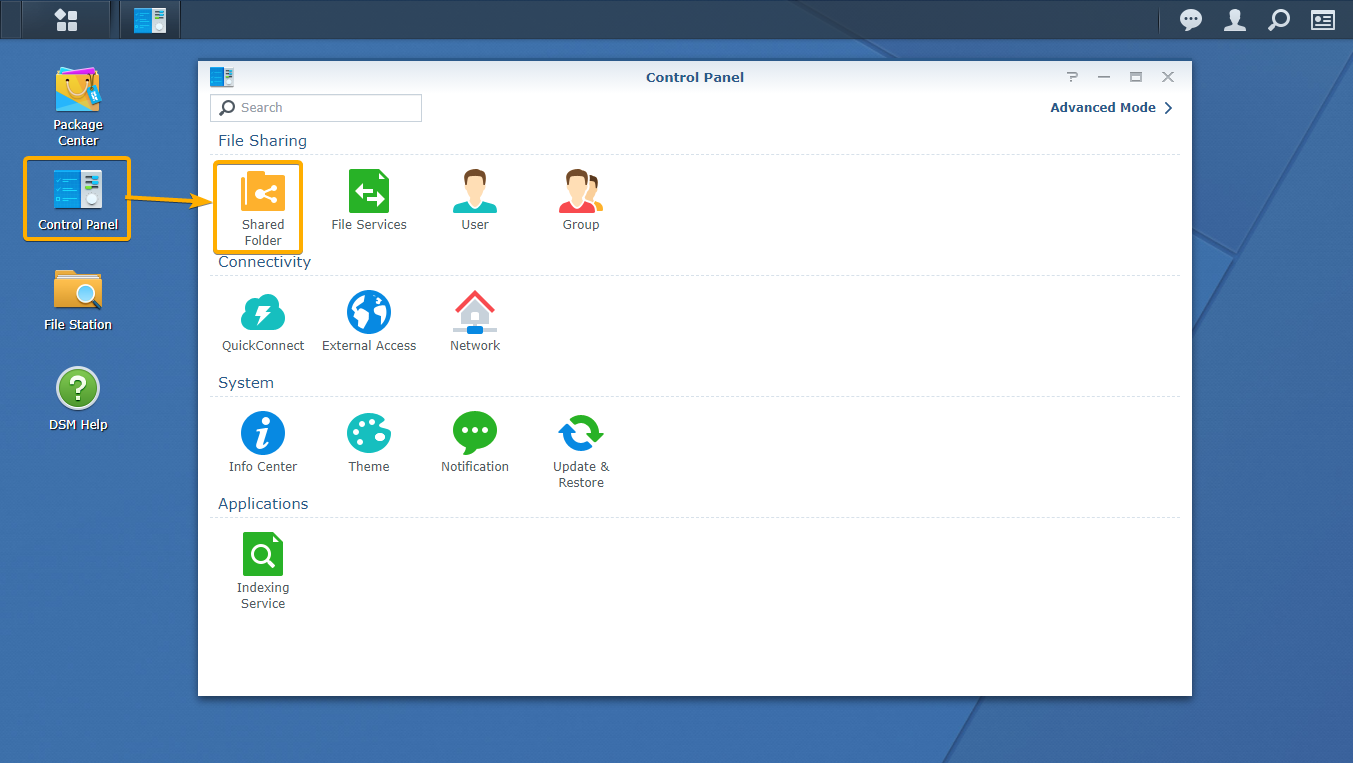
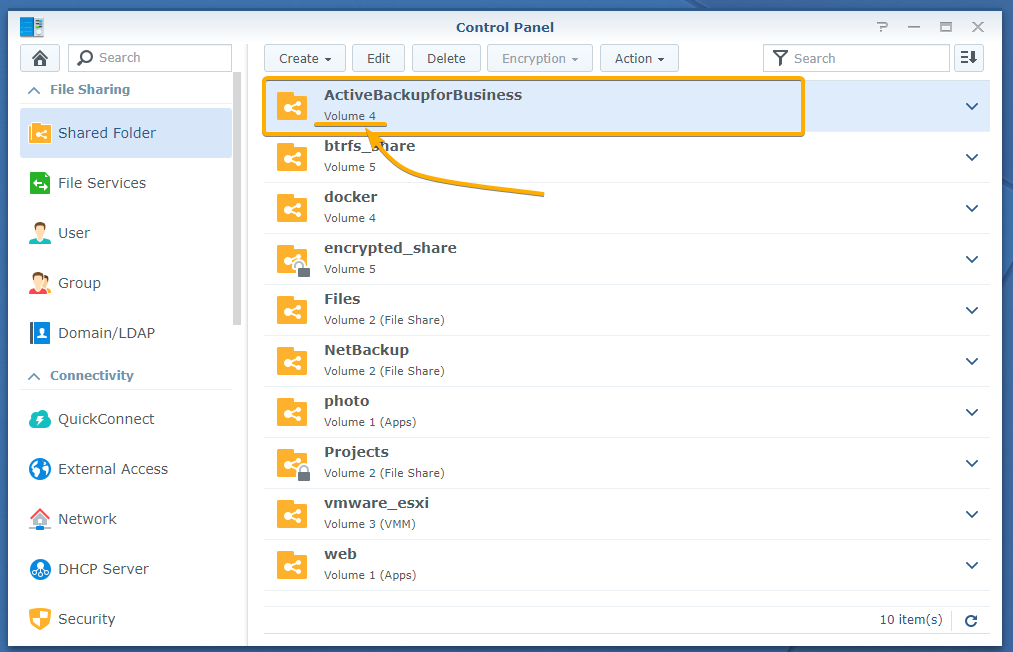
To do that, click on the Shared Folder icon from the Control Panel app as marked in the screenshot below:
As you can see, the ActiveBackupforBusiness shared folder was randomly created in Volume 5 of my Synology NAS.
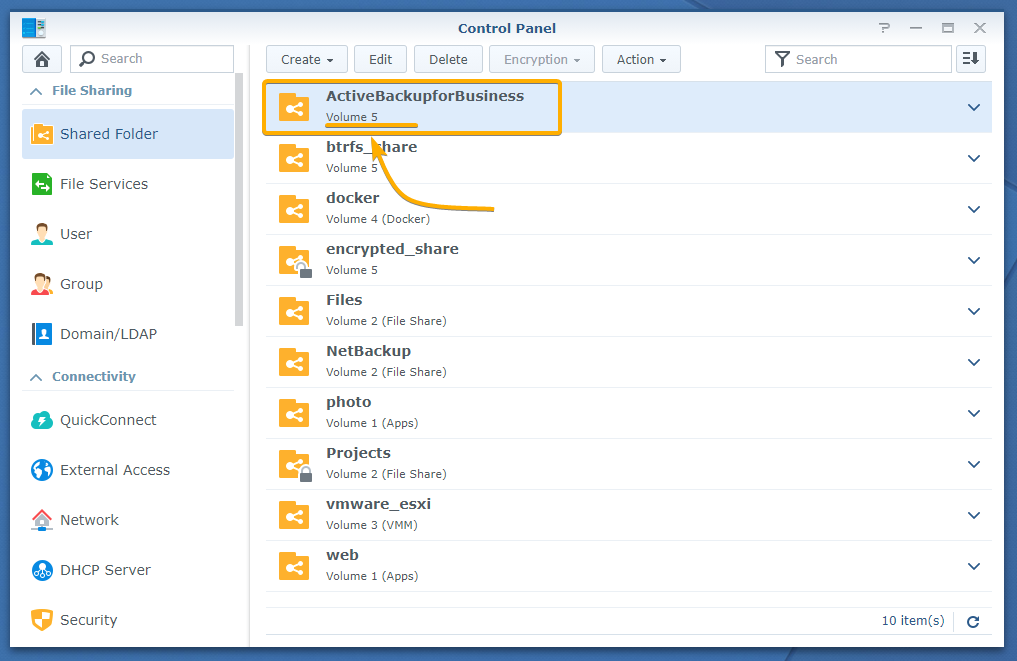
To change the volume of the ActiveBackupforBusiness shared folder, select it and click Edit as marked in the screenshot below:

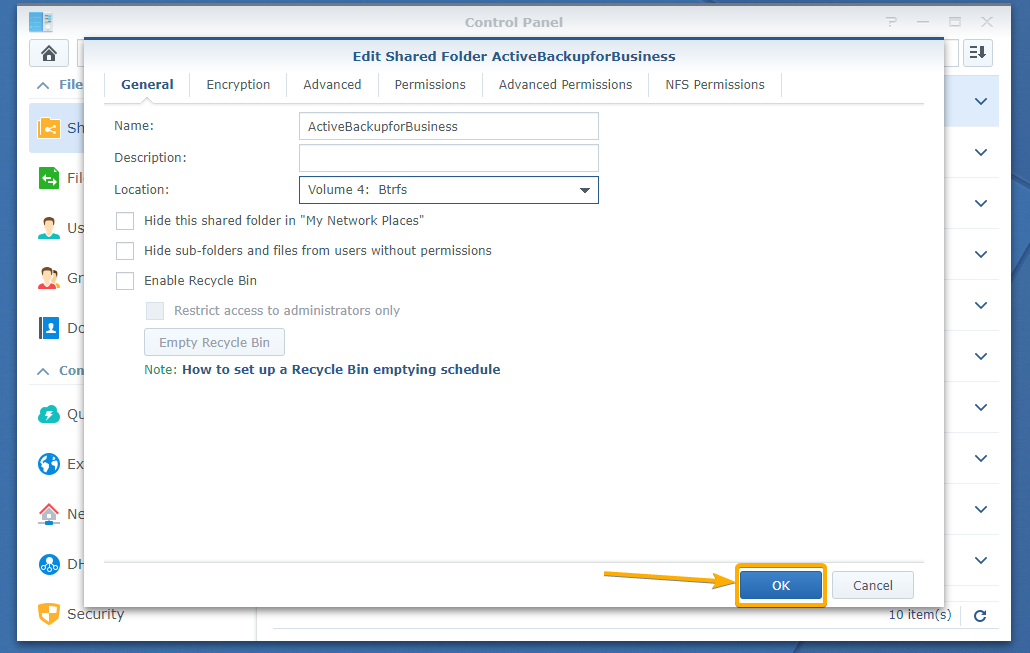
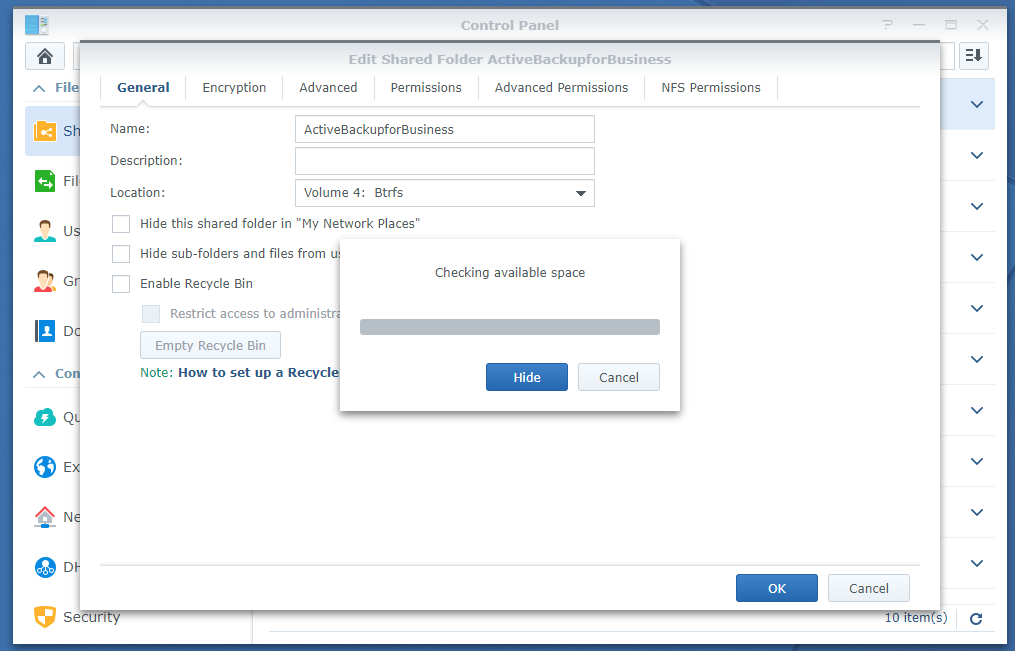
From the Location drop-down menu of the General tab, you can change the volume that the ActiveBackupforBusiness shared folder is using.

Select the volume that you want to use for the ActiveBackupforBusiness shared folder from the Location drop-down menu as marked in the screenshot below:

Once you’ve selected a volume for the ActiveBackupforBusiness shared folder, click OK.
Click Yes.
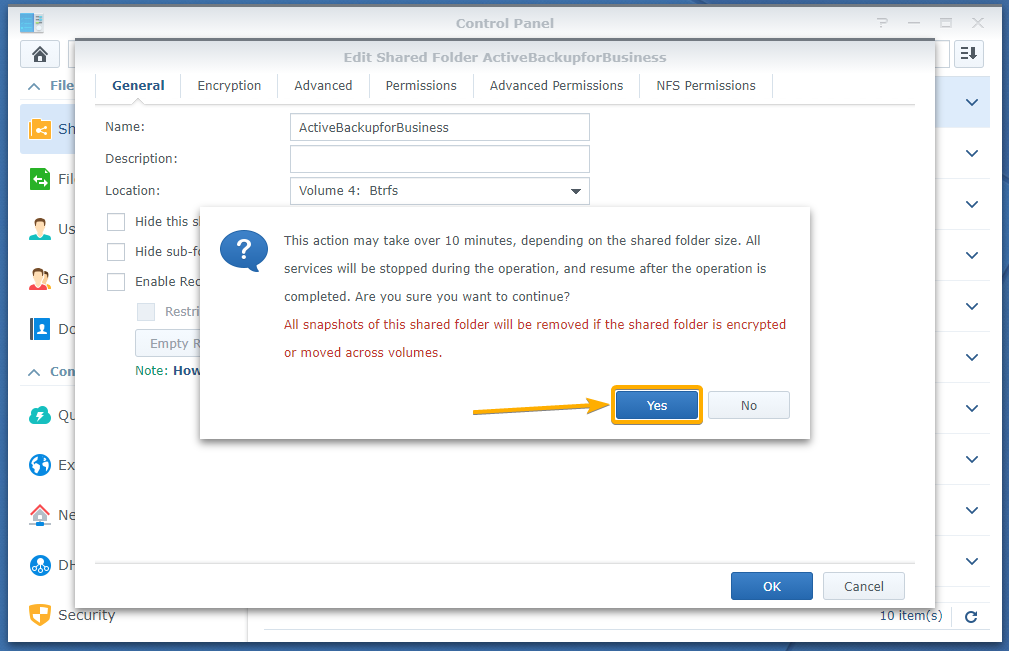
It may take a while for the ActiveBackupforBusiness shared folder to change the volume.
At this point, the volume that the ActiveBackupforBusiness shared folder is using should be changed as you can see in the screenshot below:
Creating a New Synology User:
To back up your Linux computer with Active Backup for Business, you will have to log in to your Synology NAS. Use the login username and password of your Synology NAS from the Linux computer you will be backing up. So, I recommend you create a dedicated user account on your Synology NAS for each Linux computer you will be backing up with Active Backup for Business.
To create a new user account on your Synology NAS, click on the User icon from the Control Panel app as marked in the screenshot below:

Click Create as marked in the screenshot below:

A User Creation Wizard window should be displayed.

Type in a user name and password as marked in the screenshot below.
TIP: If you’re going to back up a lot of Linux machines with Active Backup for Business, then I suggest you use the hostname of your Linux machine as the user name. This will make managing your backups, setting user quotas, and other things easier.
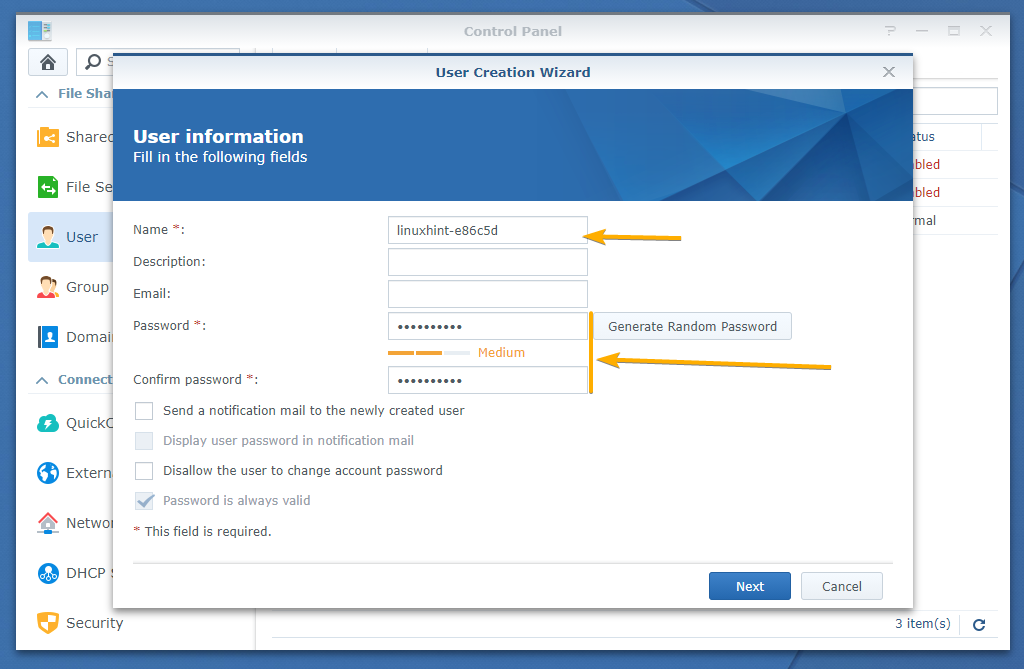
Once you’re done, click Next.

Click Next.

Allow the user to Read/Write to the ActiveBackupforBusiness shared folder and click Next.

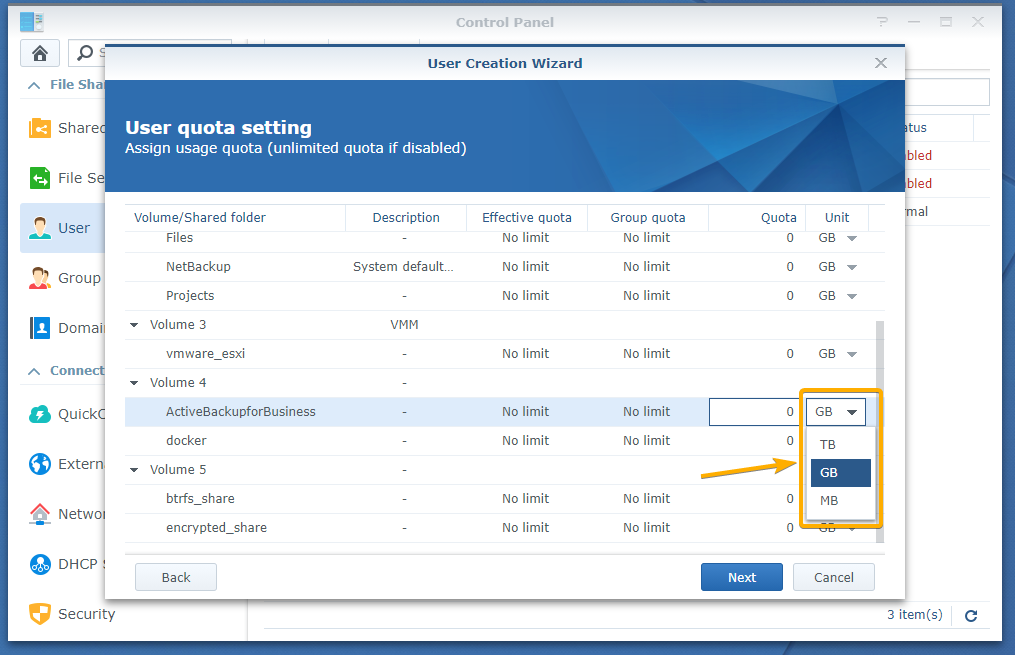
If you want, you can set up a quota to limit the disk space that the user can use from the ActiveBackupforBusiness shared folder for storing the backup data.
To do that, type in the amount of disk space in the marked section of the screenshot below that you want the user to use from the ActiveBackupforBusiness shared folder.
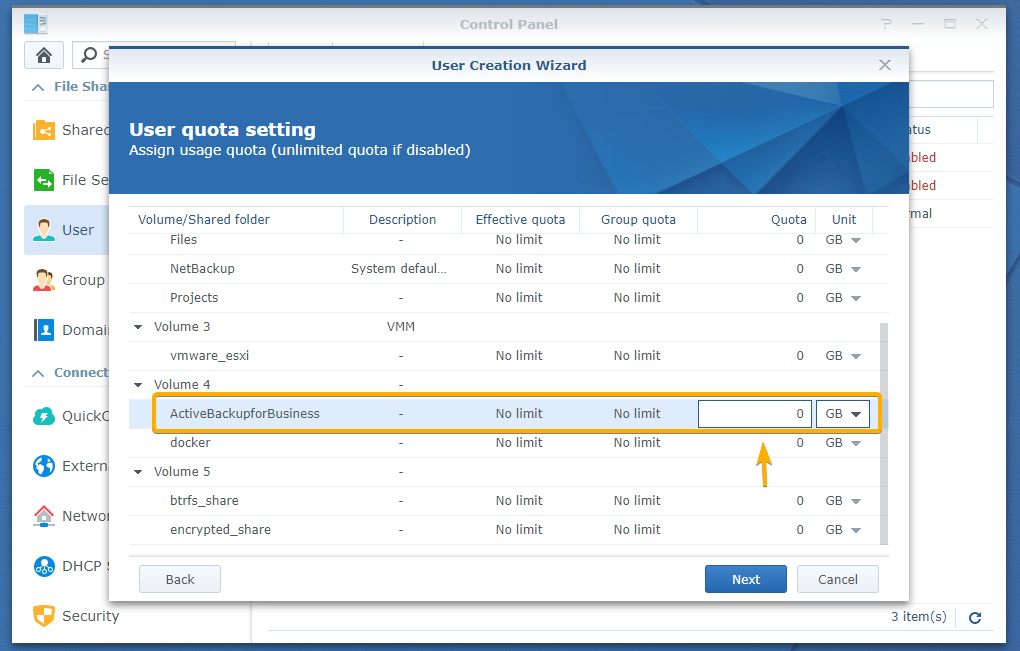
By default, the Gigabyte (GB) unit is selected. You can change it to Terabyte (TB) or Megabyte (MB) unit as well.
To do that, select your desired unit from the drop-down menu as marked in the screenshot below:
Once you’re done, click Next.
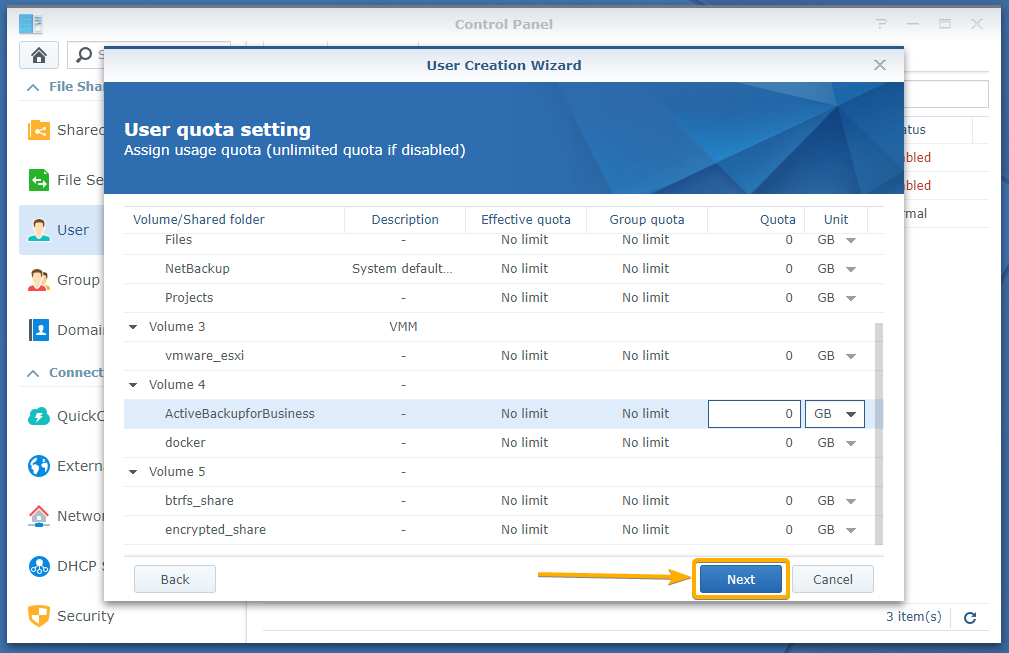
Click Next.
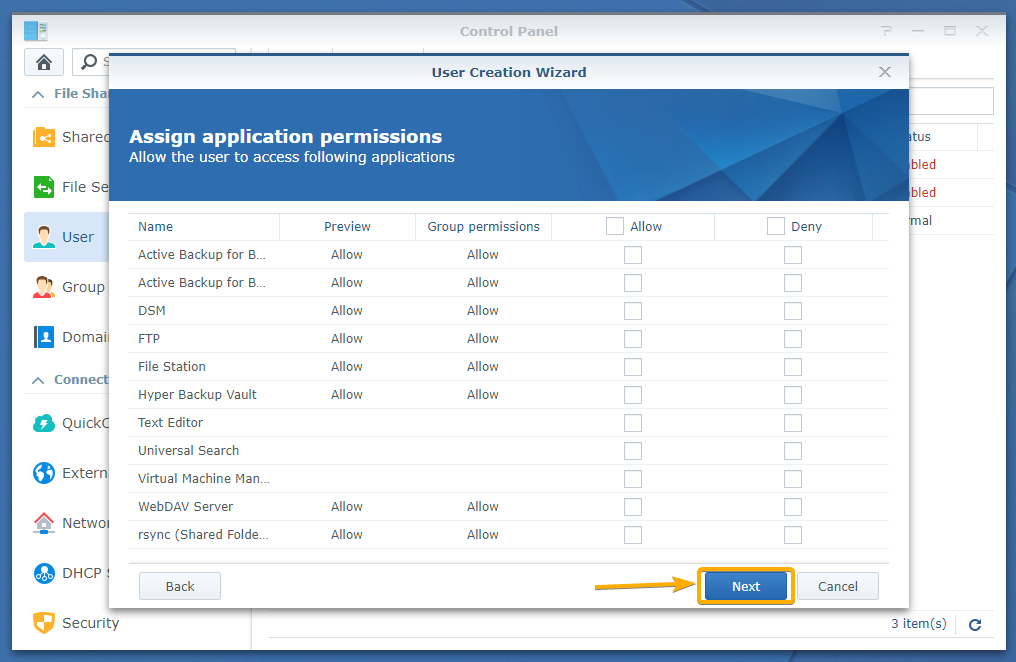
Click Next.
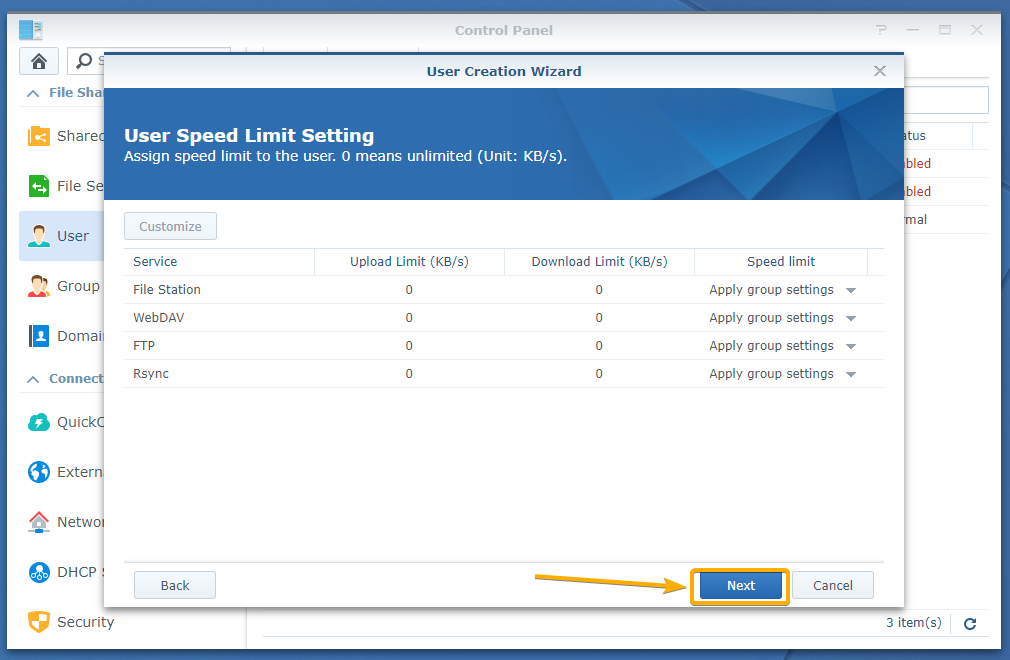
Click Apply.
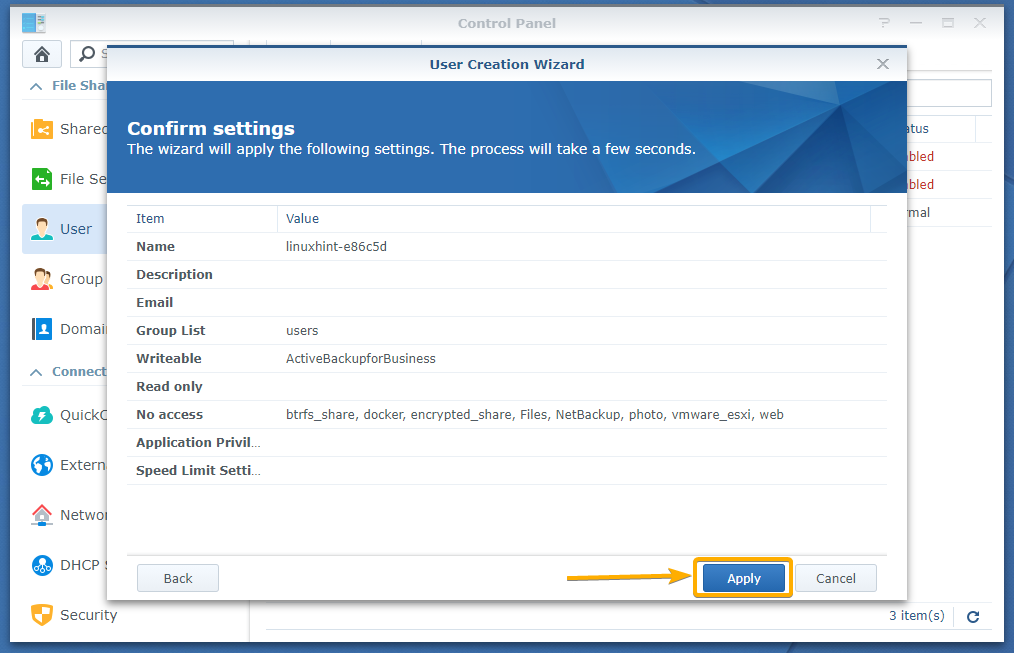
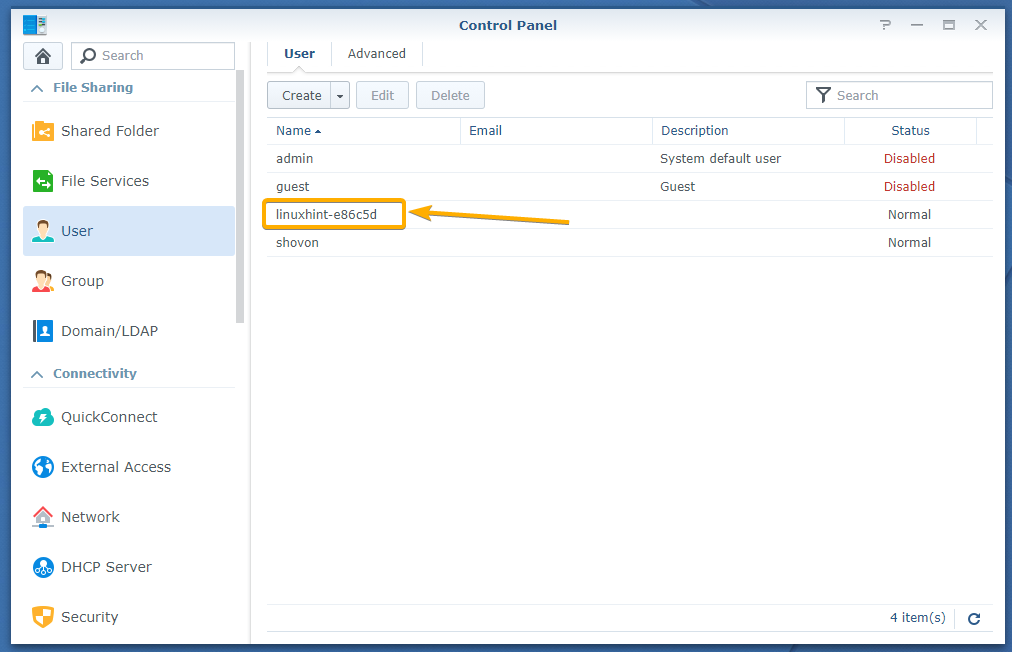
A new user should be created as you can see in the screenshot below:
Downloading the Active Backup for Business Linux Agent:
Now, you have to download the Active Backup for Business Linux Agent. This is the client program you will have to install on your Linux computer to back up data with Active Backup for Business.
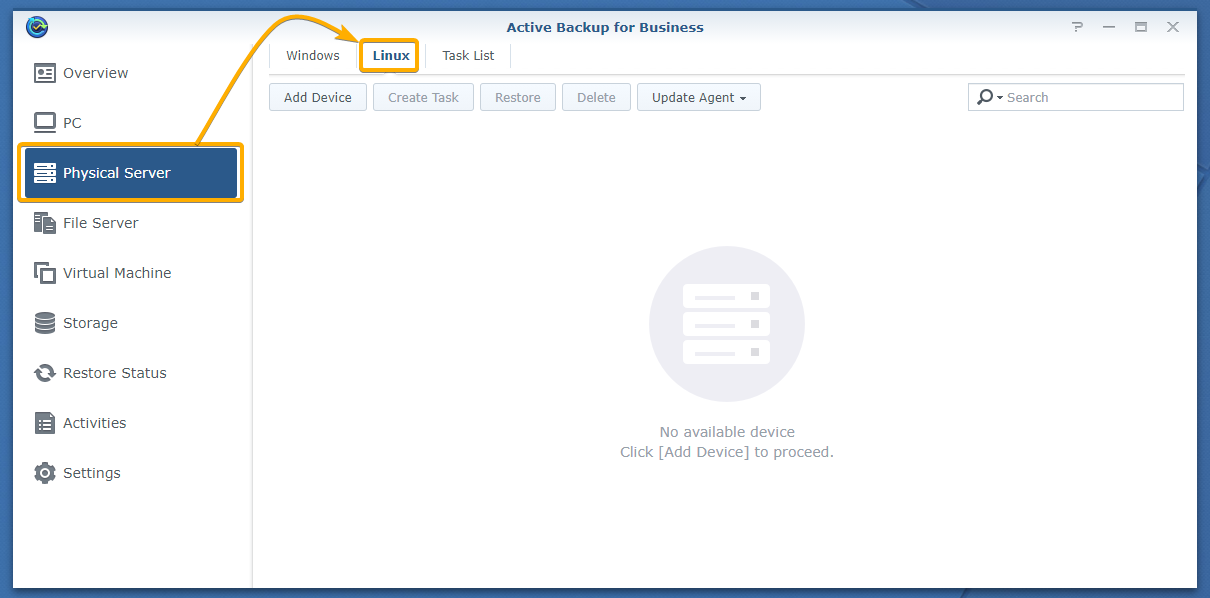
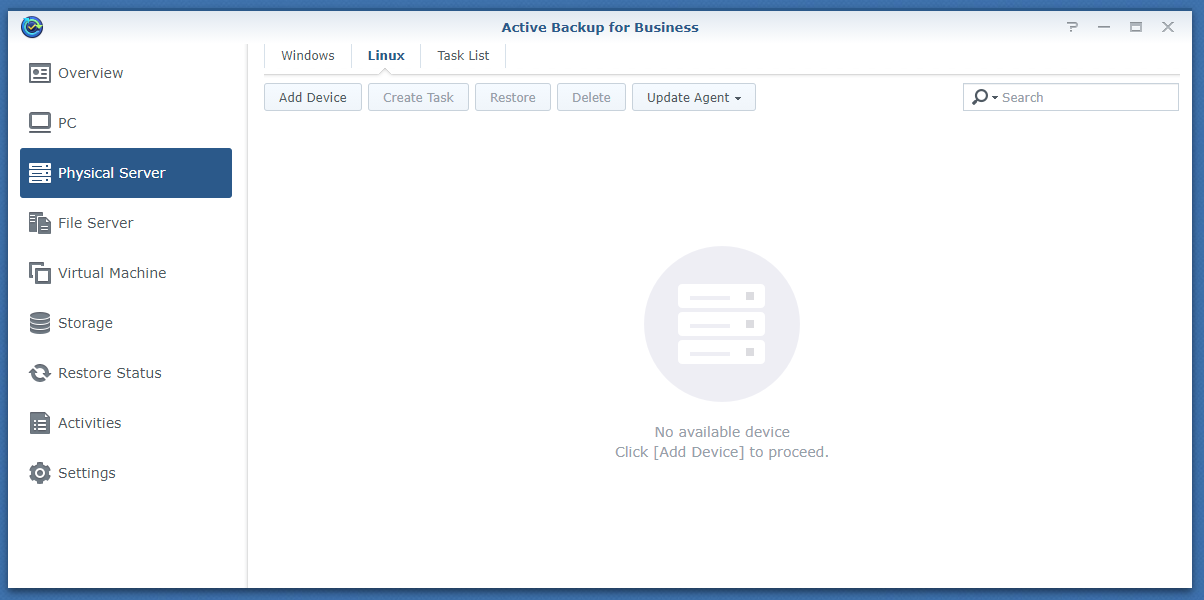
To do that, open the Active Backup for Business app and navigate to the Linux tab of the Physical Server section as marked in the screenshot below:
Click Add Device.
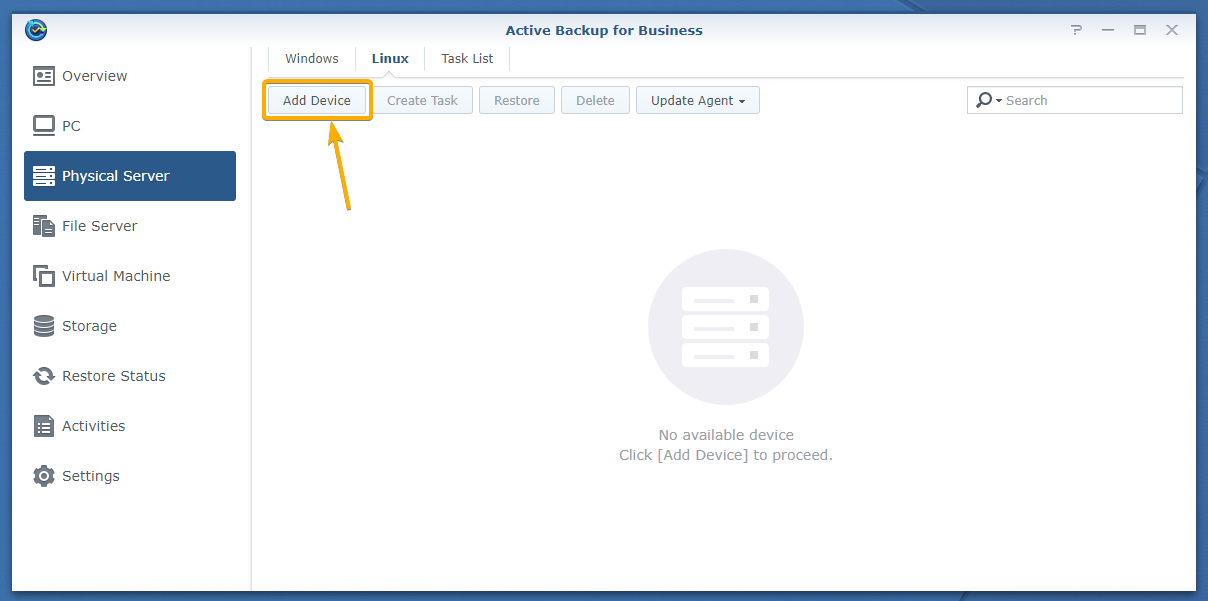
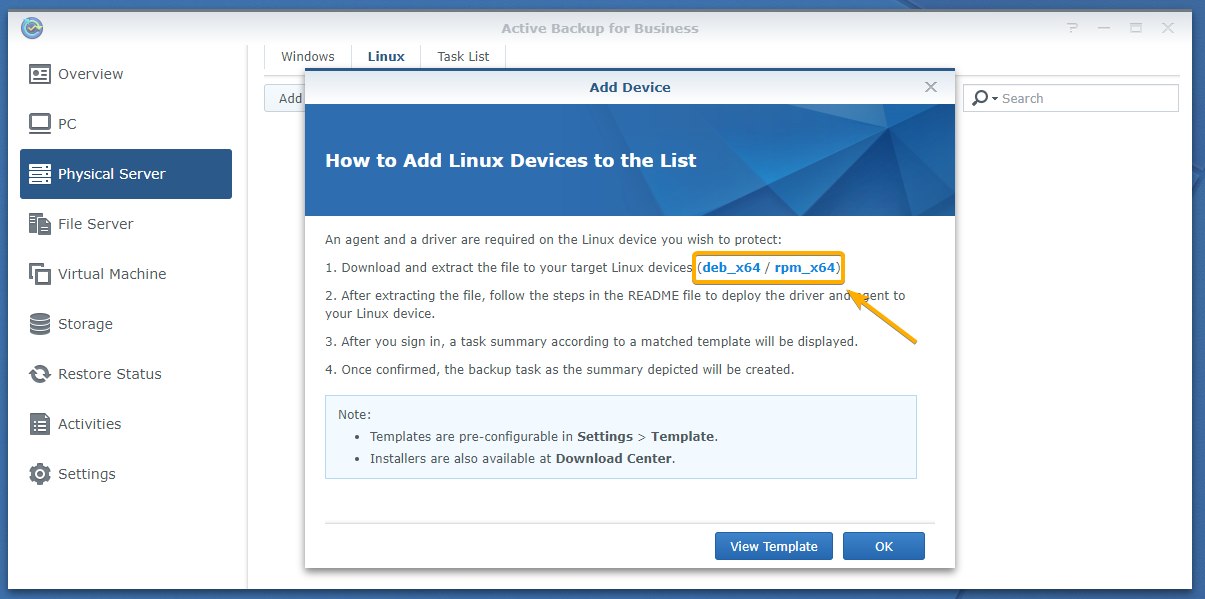
The Add Device window should be displayed.
You can click on the deb_x64 link to download the DEB package file and rpm_x64 link to download the RPM package file for the Active Backup for Business Linux Agent.
deb_x64: Download the DEB package file if you’re using the Ubuntu/Debian Linux distribution.
rpm_x64: Download the RPM package file if you’re using CentOS/RHEL/Fedora Linux distribution.
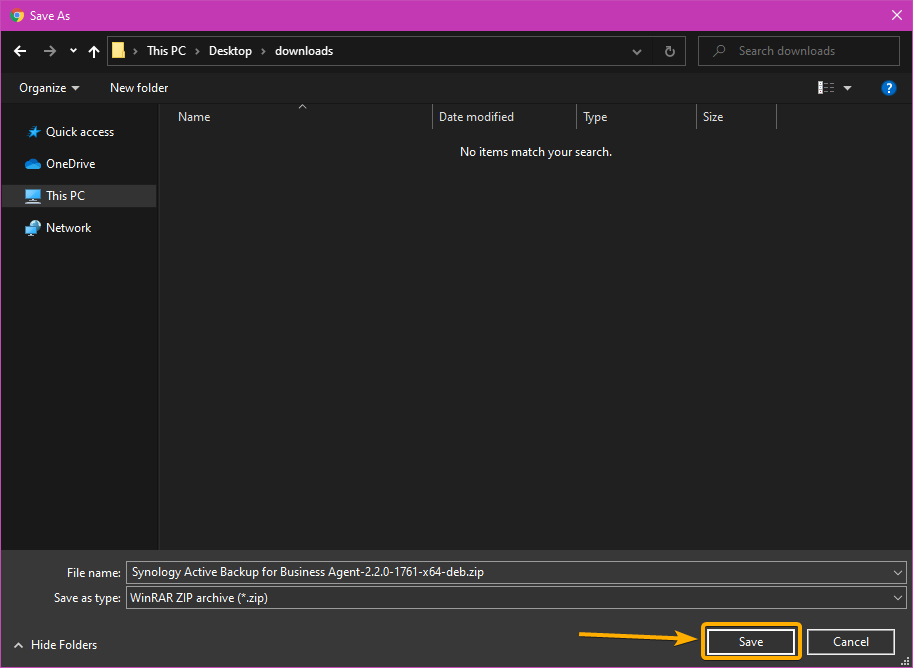
Once you click on a link, your browser should ask you to save the Active Backup for Business Linux Agent package file.
Select a folder where you want to download the Active Backup for Business Linux Agent package file and click Save.
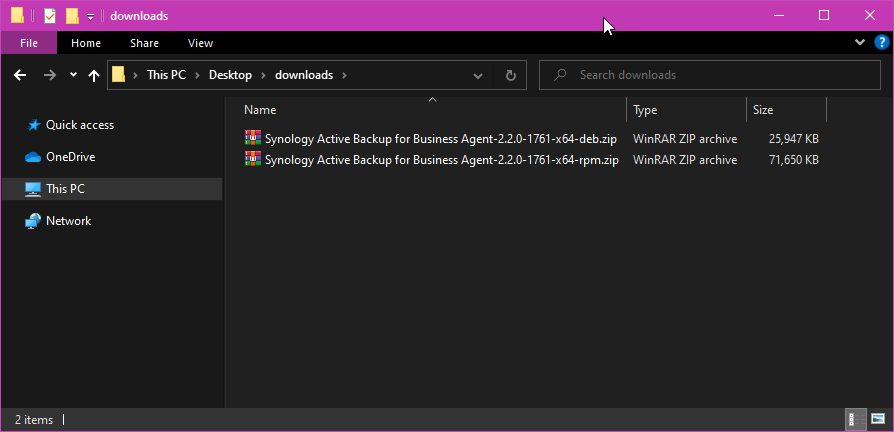
The Active Backup for Business Linux Agent package file should be downloaded.

I have downloaded the Active Backup for Business Linux Agent package files in the Desktop/downloads/ folder of my computer, as you can see in the screenshot below:
Copying the Linux Agent to Your Linux Computer:
You can copy the Active Backup for Business Linux Agent package file to your Linux computer via a USB thumb drive or SSH.
Copying files from one computer to another using a USB thumb drive is very easy. You already know how it’s done. But, if you need any assistance in copying the package files to your Linux computer via SSH, check the article Using sftp from the Linux command line.
You can also copy the package files from your computer to your Synology NAS and copy them from your Synology NAS to your Linux computer. If you need any assistance on that, read the Accessing the Share from Windows 10 and Accessing the Share from Linux sections of the article How to Setup Synology NAS.
Installing Active Backup for Business Linux Agent on Ubuntu/Debian:
NOTE: I have copied the DEB package file of the Active Backup for Business Linux Agent in the ~/Downloads directory of my computer. You may have copied it somewhere else. Make sure to replace the directory path with yours from now on and adjust the instructions as required.
First, navigate to the ~/Downloads directory as follows:

As you can see, the Active Backup for Business Linux Agent package file Synology Active Backup for Business Agent-2.2.0-1761-x64-deb.zip is here. The package file is a ZIP archive. So, you will have to unzip it.

Unzip the package file Synology Active Backup for Business Agent-2.2.0-1761-x64-deb.zip with the following command:

The package file Synology Active Backup for Business Agent-2.2.0-1761-x64-deb.zip should be unzipped.

Once the package file Synology Active Backup for Business Agent-2.2.0-1761-x64-deb.zip is unzipped, you should see an install.run file in your current working directory as marked in the screenshot below:

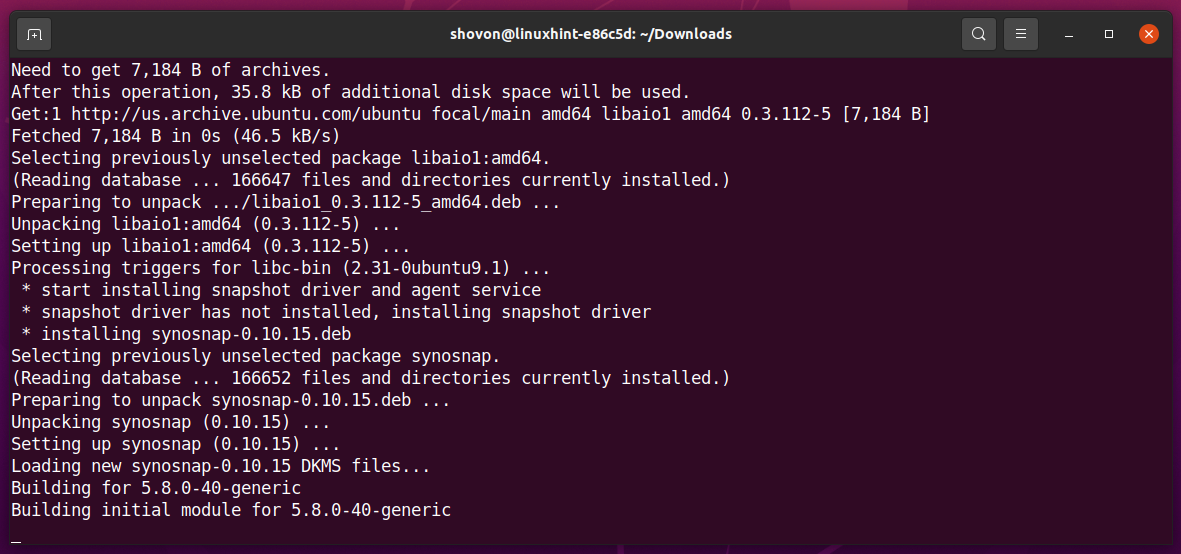
Run the install.run with super-user privileges script as follows:

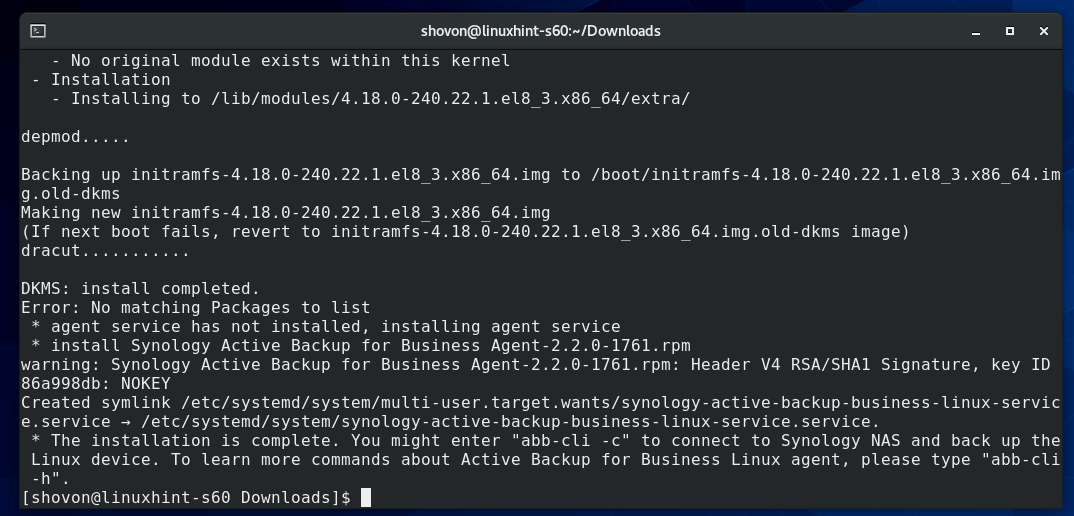
The install.run script is running. It may take a while to install the Active Backup for Business Linux Agent.
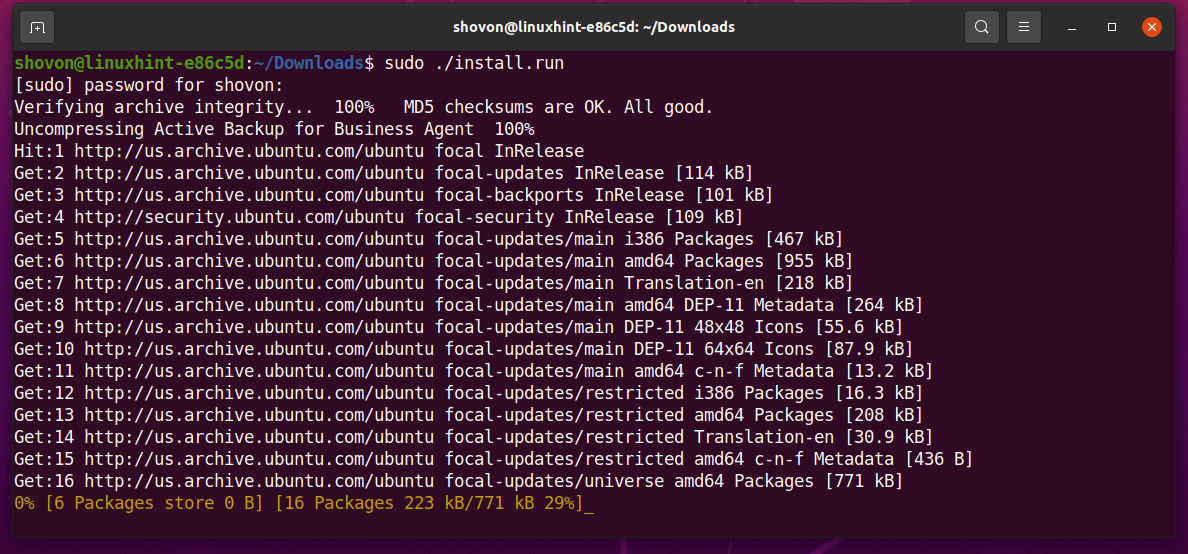
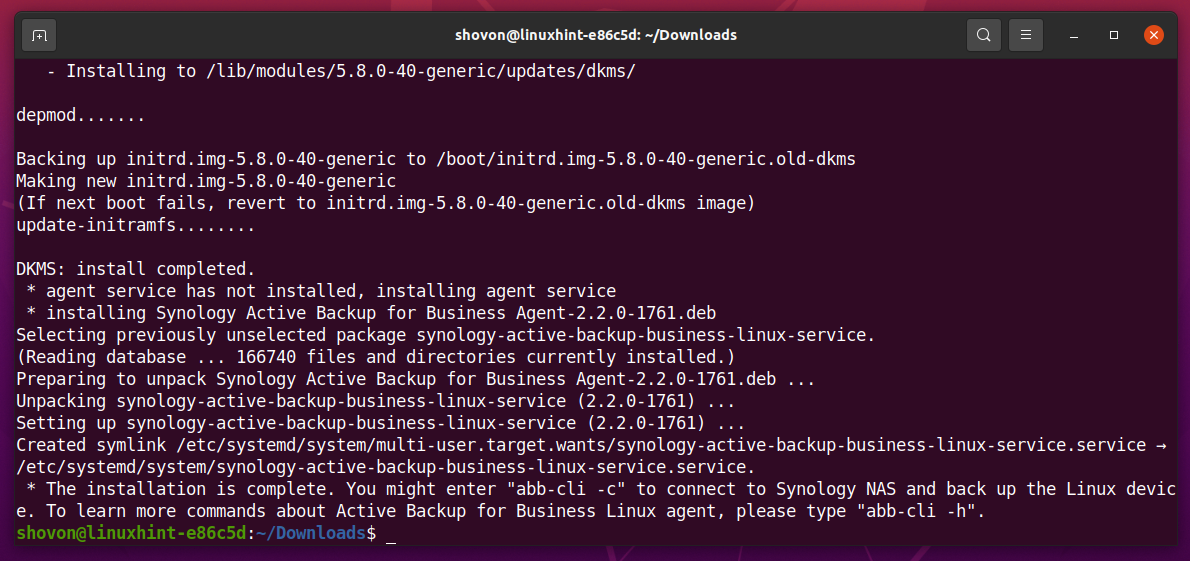
Active Backup for Business Linux Agent is being installed.
At this point, Active Backup for Business Linux Agent should be installed.
Installing Active Backup for Business Linux Agent on RHEL/CentOS/Fedora:
NOTE: I have copied the RPM package file of the Active Backup for Business Linux Agent in the ~/Downloads directory of my computer. You may have copied it somewhere else. Make sure to replace the directory path with yours from now on and adjust the instructions as required.
First, navigate to the ~/Downloads directory as follows:

As you can see, the Active Backup for Business Linux Agent package file Synology Active Backup for Business Agent-2.2.0-1761-x64-rpm.zip is here. The package file is a ZIP archive. So, you will have to unzip it.

Unzip the package file Synology Active Backup for Business Agent-2.2.0-1761-x64-rpm.zip with the following command:

The package file Synology Active Backup for Business Agent-2.2.0-1761-x64-rpm. should be unzipped.

Once the package file Synology Active Backup for Business Agent-2.2.0-1761-x64-rpm is unzipped, you should see an install.run file in your current working directory as marked in the screenshot below:

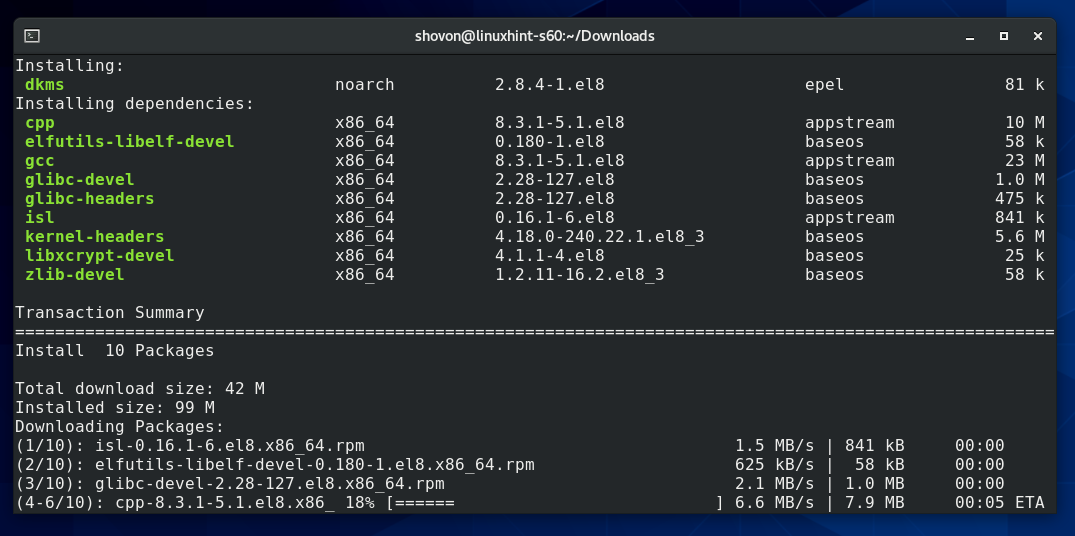
Run the install.run with super-user privileges script as follows:

The install.run script is running. It may take a while to install the Active Backup for Business Linux Agent.

Active Backup for Business Linux Agent is being installed.
Active Backup for Business Linux Agent is being installed.
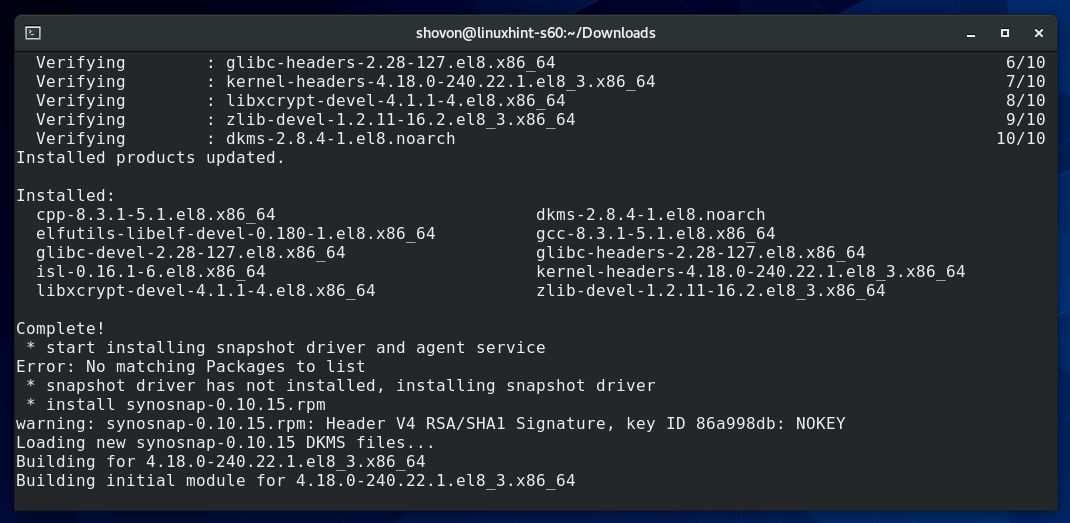
At this point, Active Backup for Business Linux Agent should be installed.
Configuring the Active Backup for Business Linux Agent:
Now, you have to log in to your Synology NAS using the Active Backup for Business Linux Agent from the Linux computer you want to back up via Active Backup for Business.
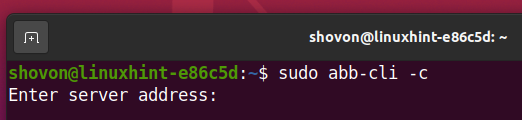
To do that, run the following command:

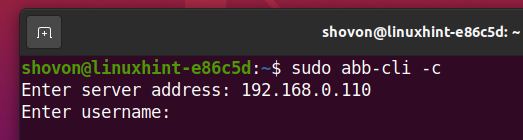
Type in the IP address or DNS name of your Synology NAS and press <Enter>.
Type in the login username and press <Enter>.
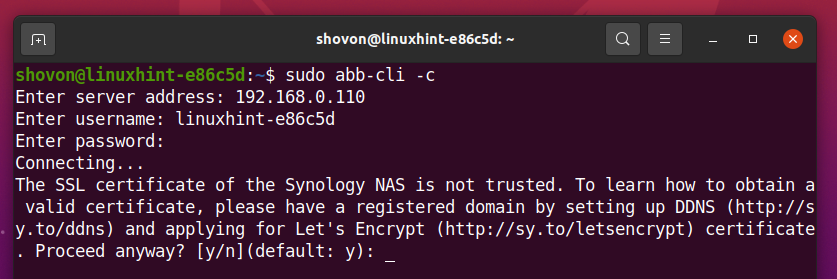
Type in the login password and press <Enter>.

If you’re using a Self-Signed SSL certificate on your Synology NAS, you may see the following prompt.
To accept the Self-Signed SSL certificate, press y and press <Enter>.
An authentication summary should be displayed. To confirm it, press y and then press <Enter>.
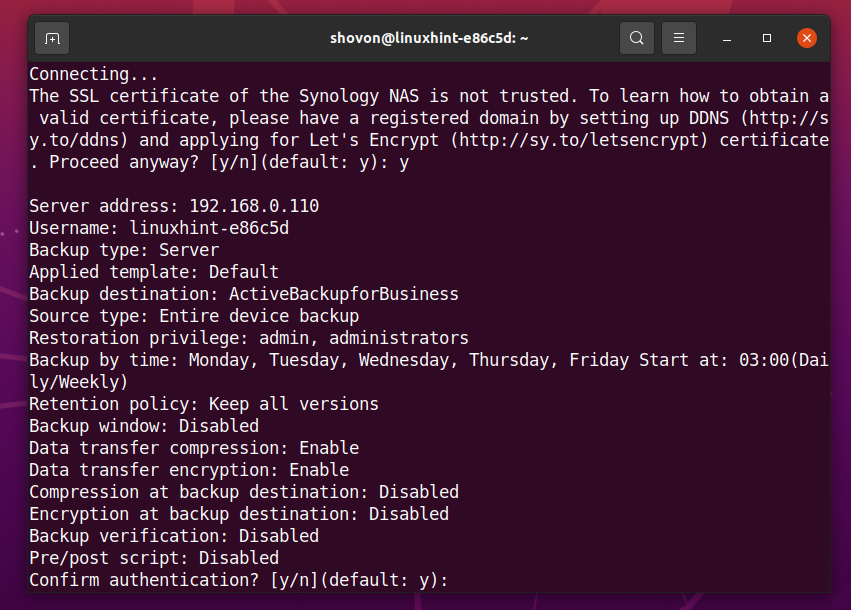
Your Linux computer should be successfully connected to your Synology NAS and ready for taking backups with Active Backup for Business.

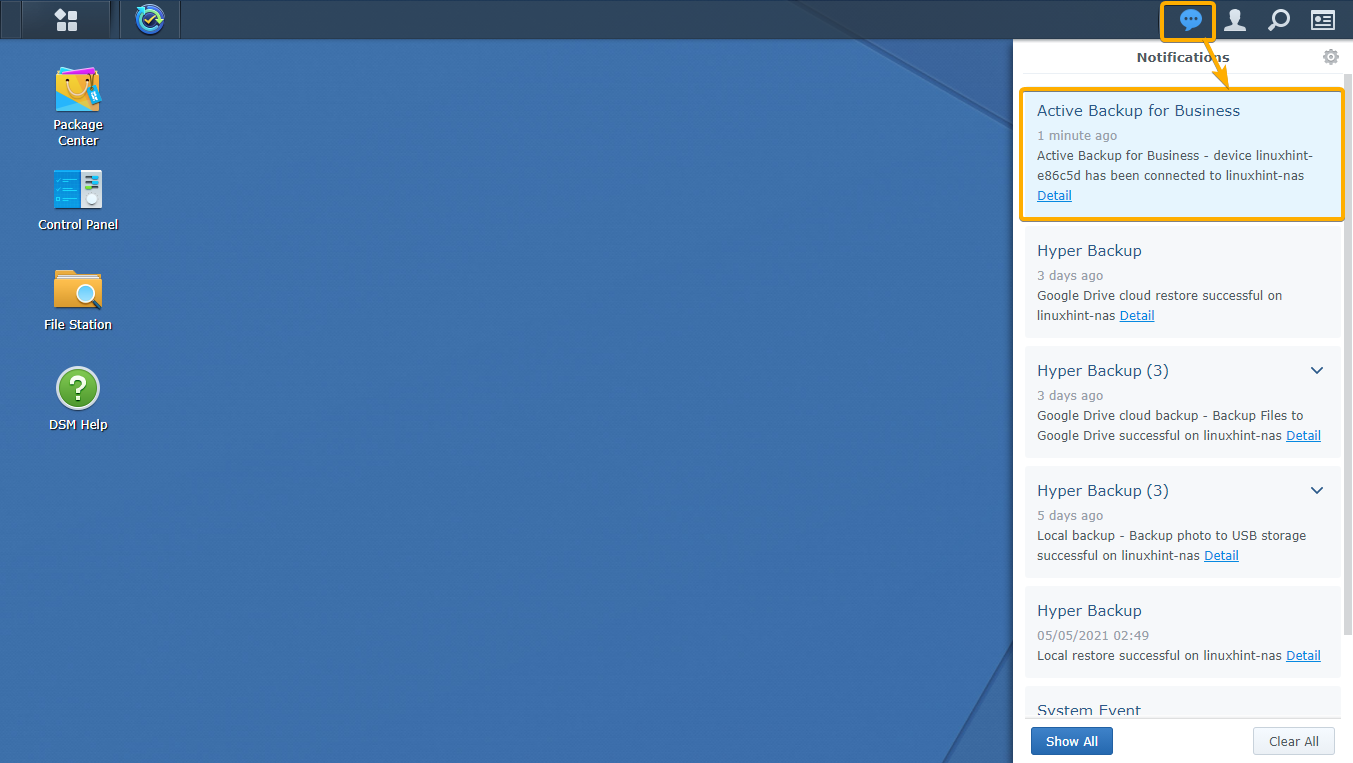
Your Synology NAS should also notify you once your Linux computer is connected to your Synology NAS using the Active Backup for Business Linux Agent.
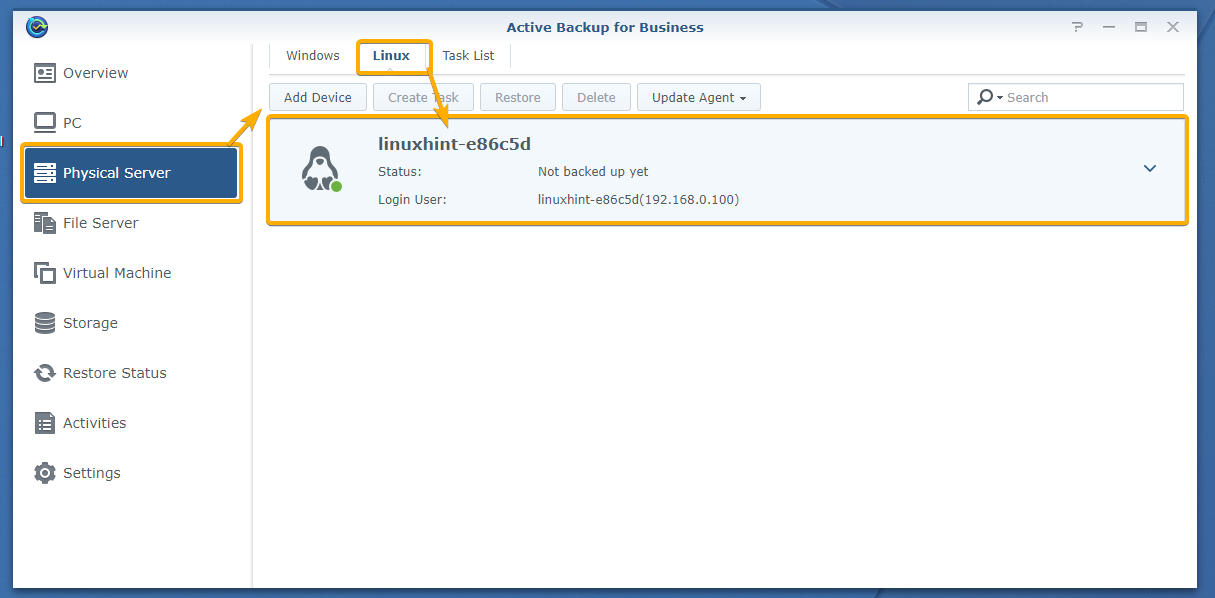
Now, open the Active Backup for Business app and navigate to the Linux tab of the Physical Server section. You should find the Linux computer you’ve added to Active Backup for Business, as you can see in the screenshot below:
Creating a Backup Task with Active Backup for Business:
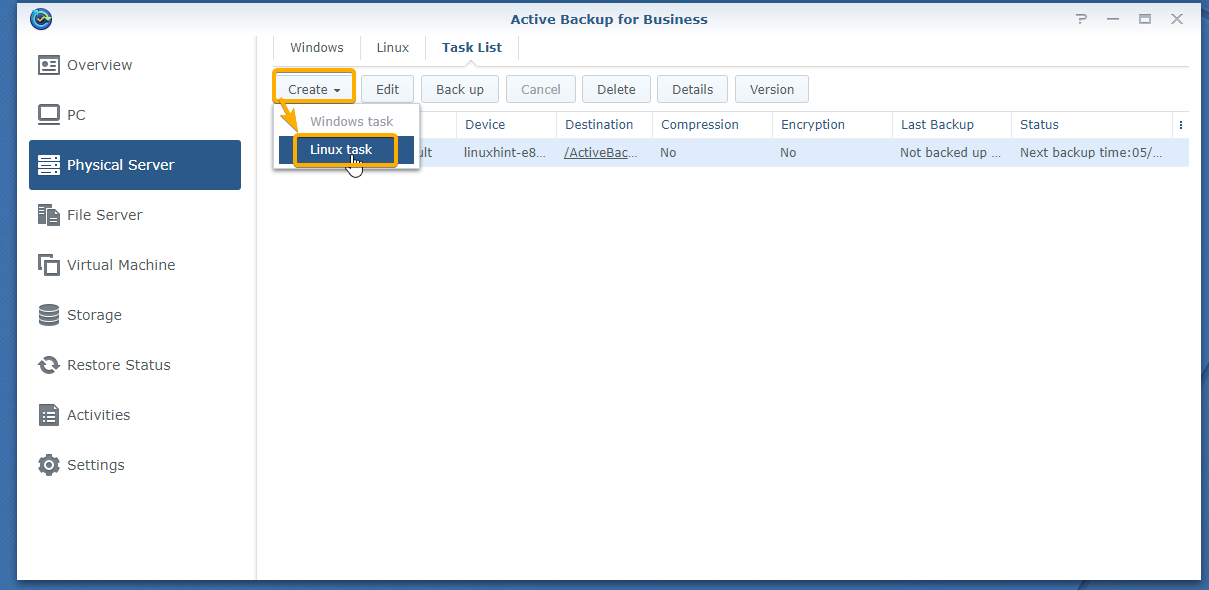
To see all the backup tasks of the physical servers you’ve added, navigate to the Task List tab of the Physical Server section of the Active Backup for Business app.
As you can see, a default backup task is created for the Linux computer you’ve added to Active Backup for Business.

You may still want to create a new backup task.
If that’s the case, click on Create > Linux task as marked in the screenshot below:
Now, select your Linux computer from the list and click Next as marked in the screenshot below:

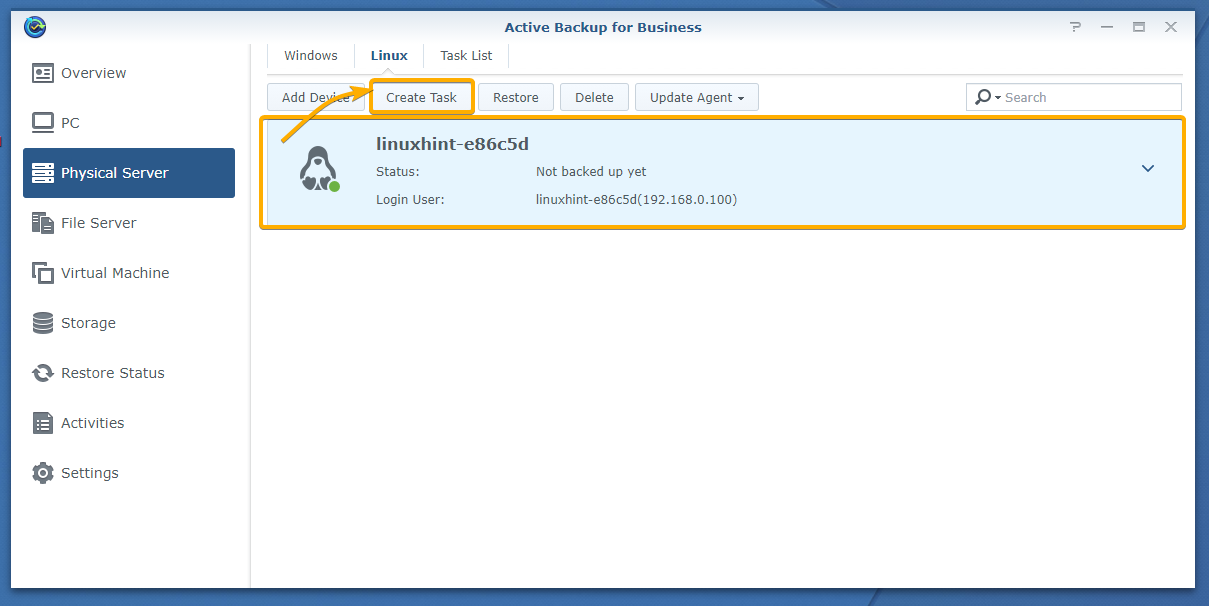
You can also create a new task from the Linux tab of the Physical Server section of the Active Backup for Business app.
Just select your Linux computer from the list and click Create Task as marked in the screenshot below:
In both cases, you should see the following window. You can create a new task from here.
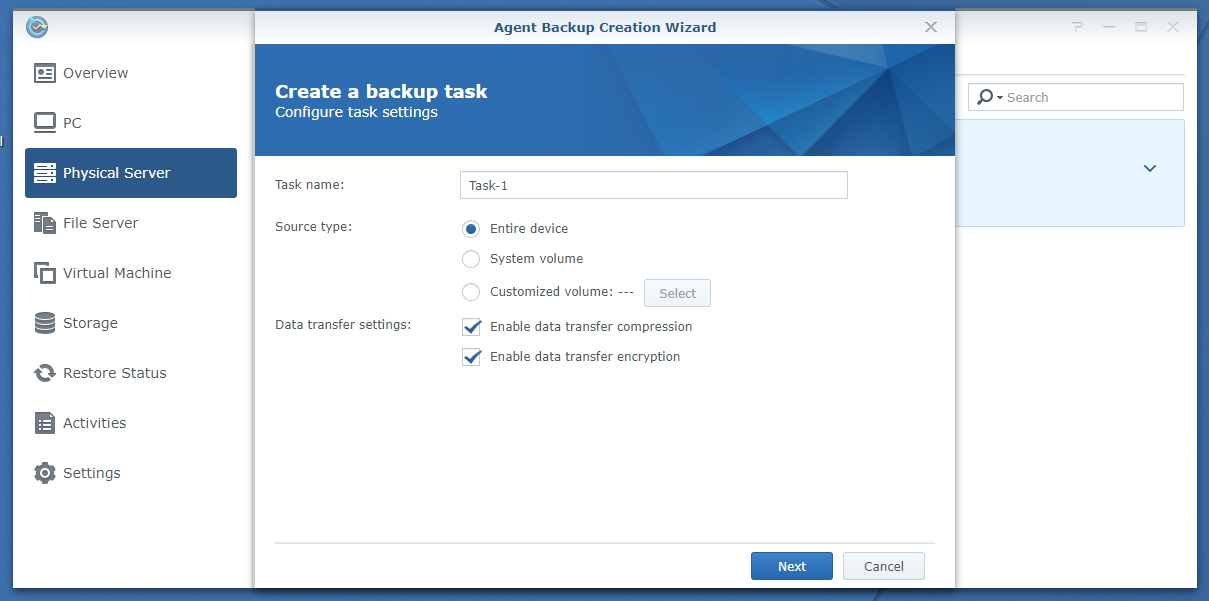
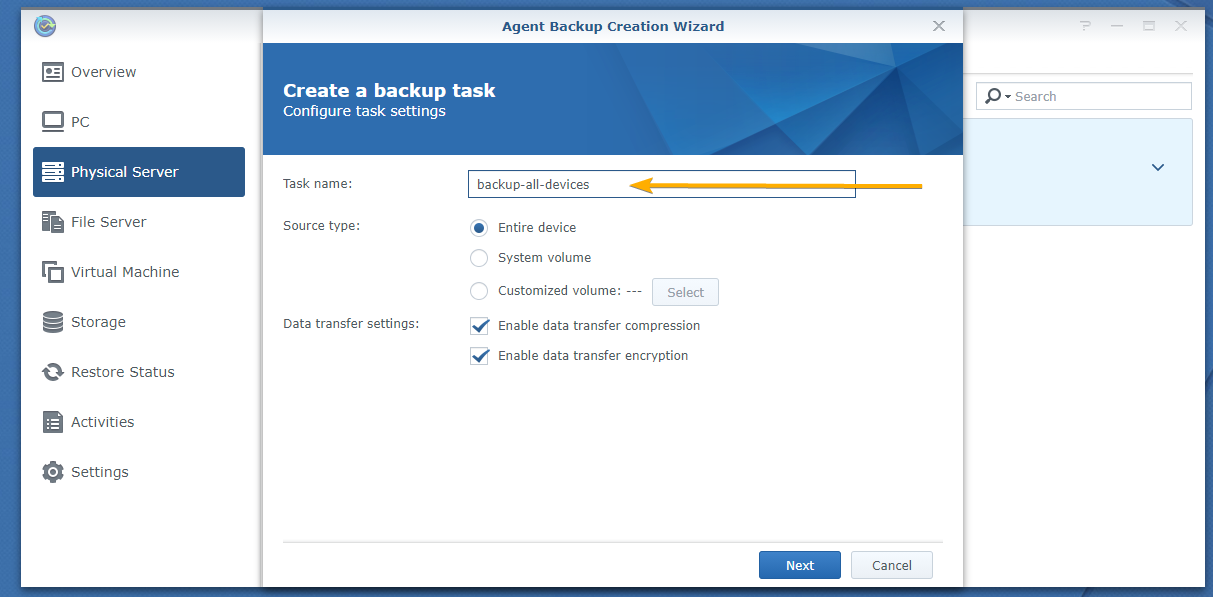
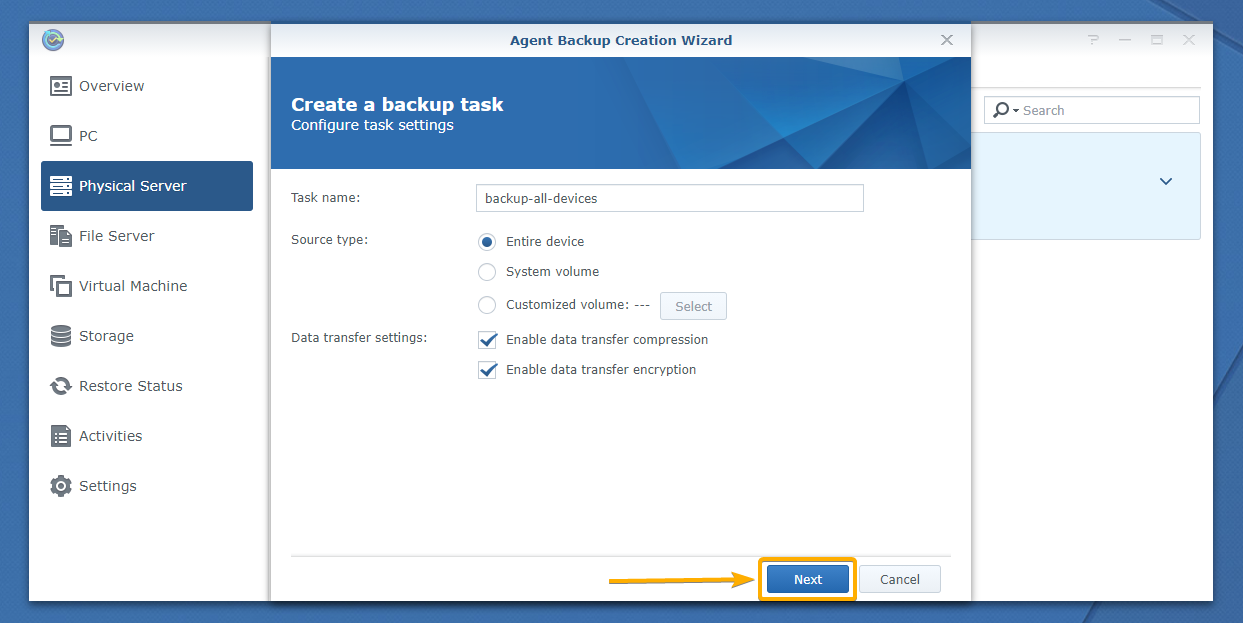
First, type in a Task name as marked in the screenshot below:
NOTE: The task name can’t have any spaces and other special characters.
Now, you have to select what you want to back up from your Linux computer.
You have 3 Source type options:
Entire device: Back up all the mounted partitions of your Linux computer.
System volume: Back up only the root partition of your Linux computer.
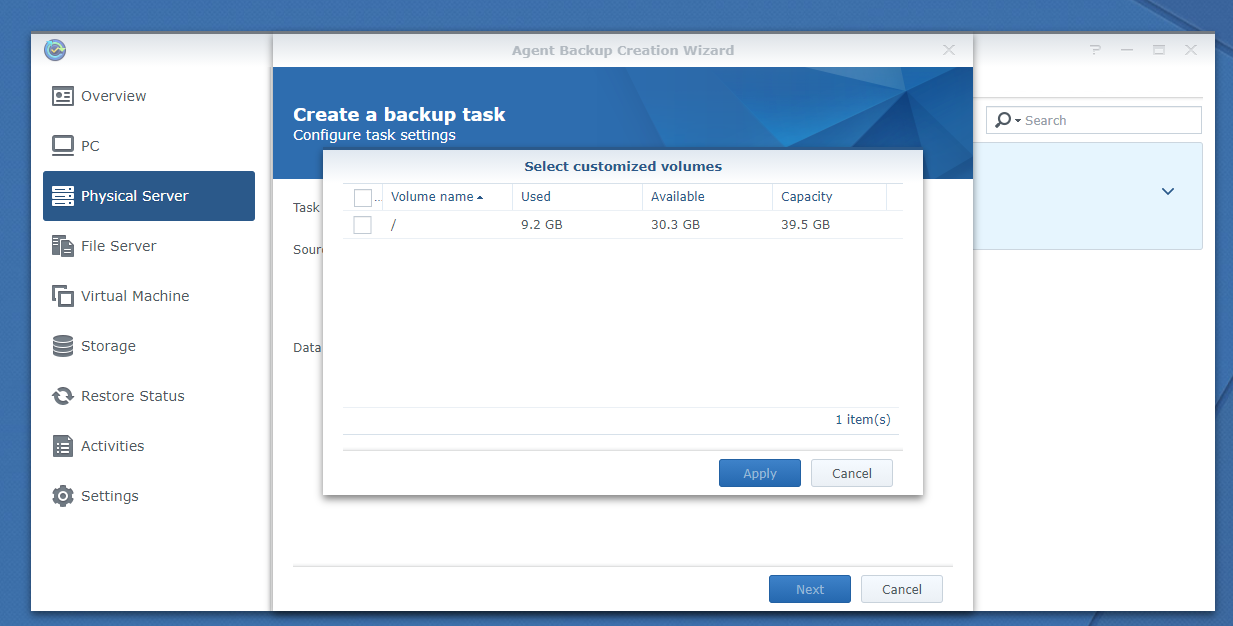
Customized volume: You can select the mounted partitions that you want to back up from your Linux computer manually.
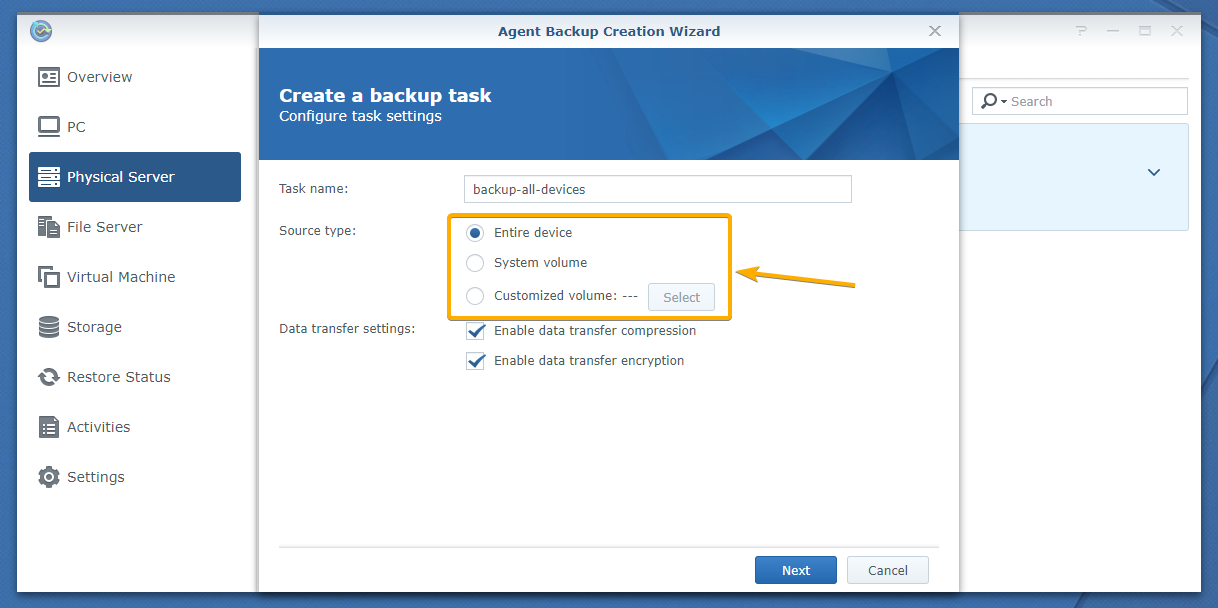
To select the mounted partitions manually, select Customized volume and click Select as marked in the screenshot below:

All the mounted partitions of your Linux computer should be listed. Select the ones you want to back up and click Apply.
Once you’re done, click Next.
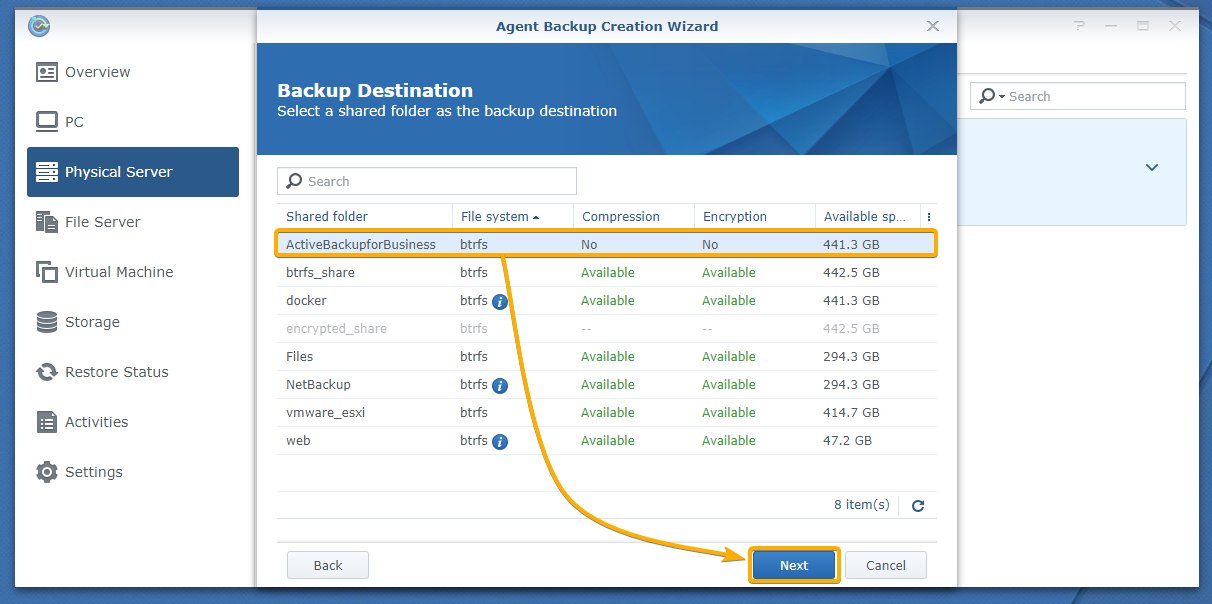
Select the ActiveBackupforBusiness shared folder from the list and click Next.
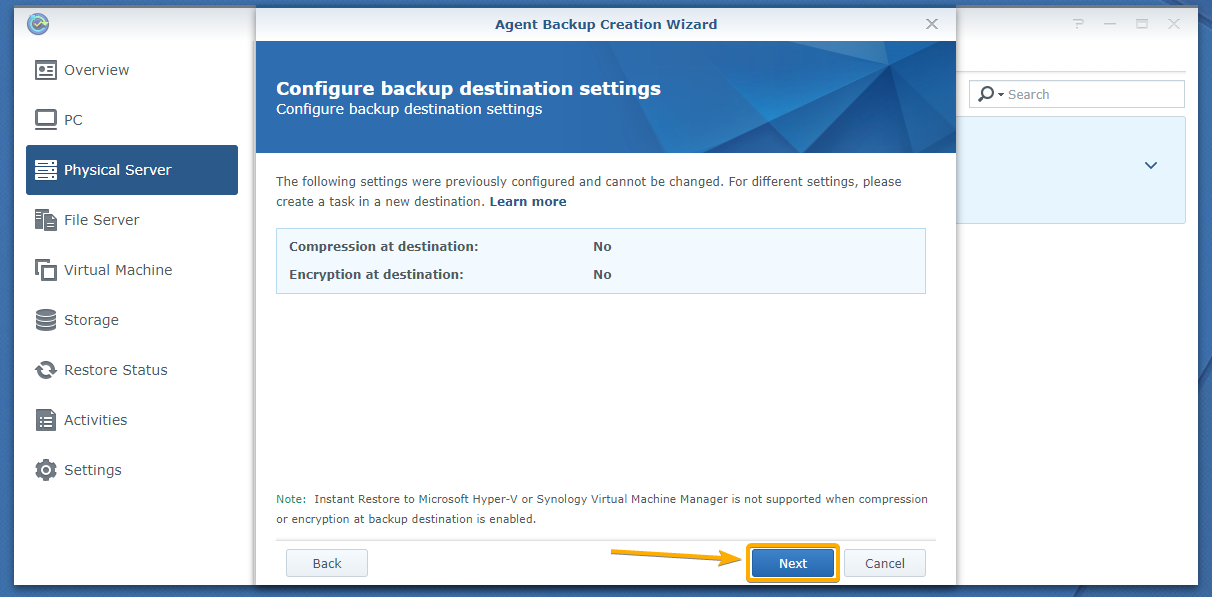
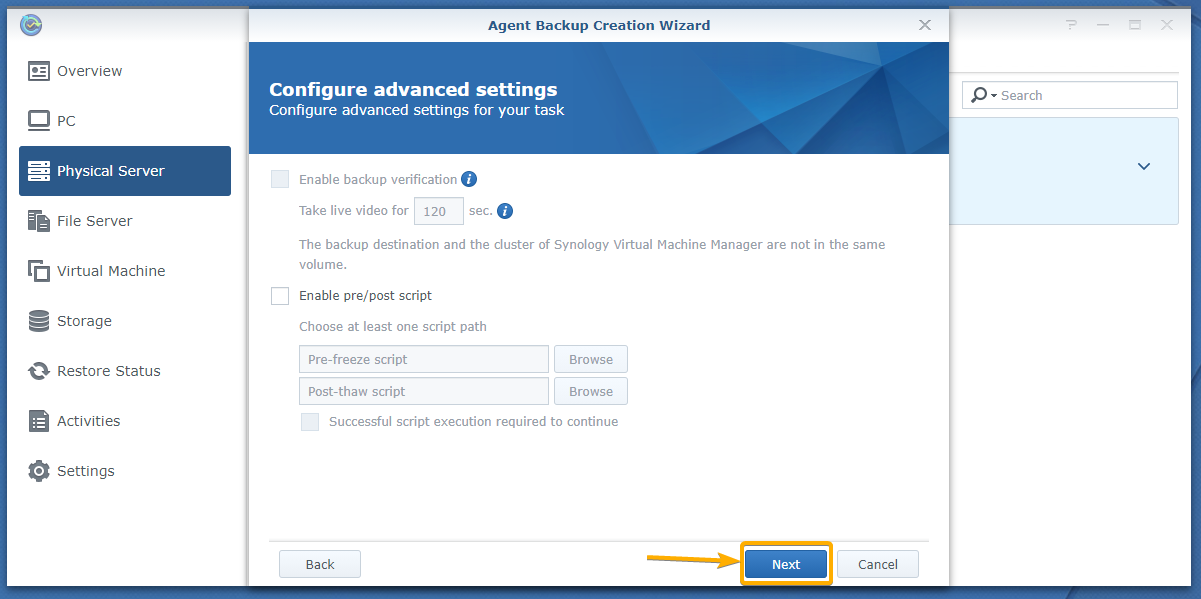
Click Next.
Click Next.
You can configure the backup schedule from here.
Manual backup: No automatic backups will be taken. You will have to back up data from your Linux computer manually. This is the default option.
Scheduled backup: Backups will be taken automatically depending on the scheduled backup settings.

If you want to take automatic backups of your Linux computer, select Scheduled backup and configure how often you want to run the backup task from the marked drop-down menus.

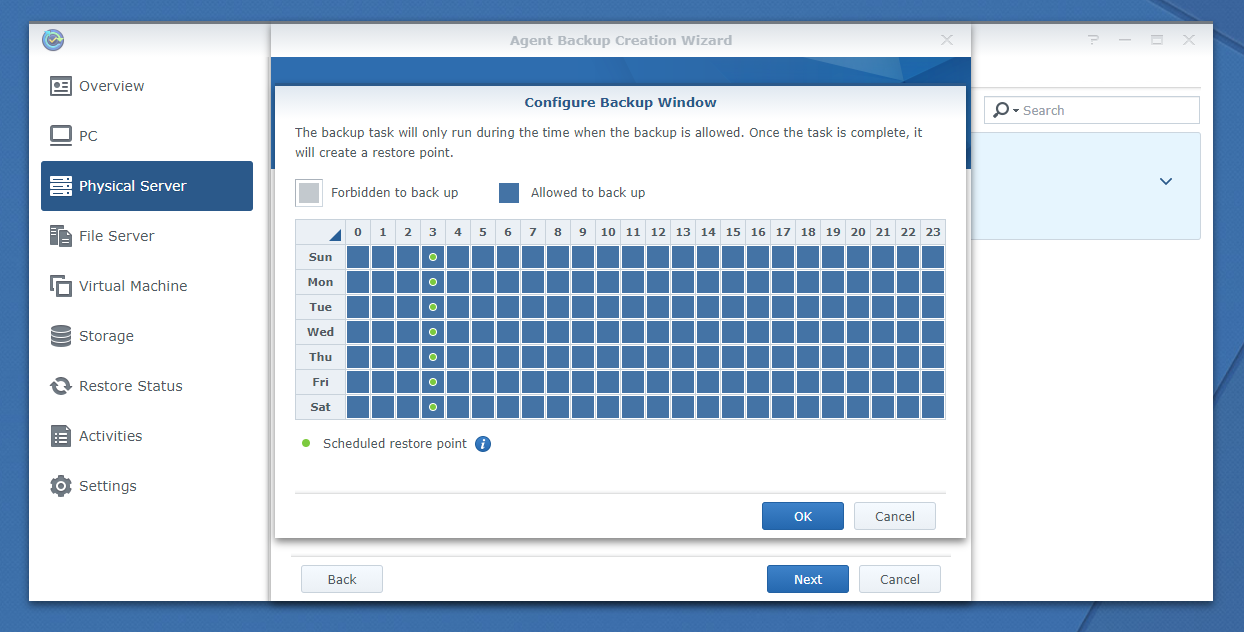
You can also set a time frame within which the backup task must run. The backup task won’t run outside of that time frame.
Check the Only run backup tasks within the designated time windows checkbox to enable this feature and click on Configure Backup Window to configure the time window as marked in the screenshot below;

The Configure Backup Window window should be displayed. You can configure the backup time window from here.
Once you’re done, click OK.
Once you’ve configured the backup task schedule settings, click Next.

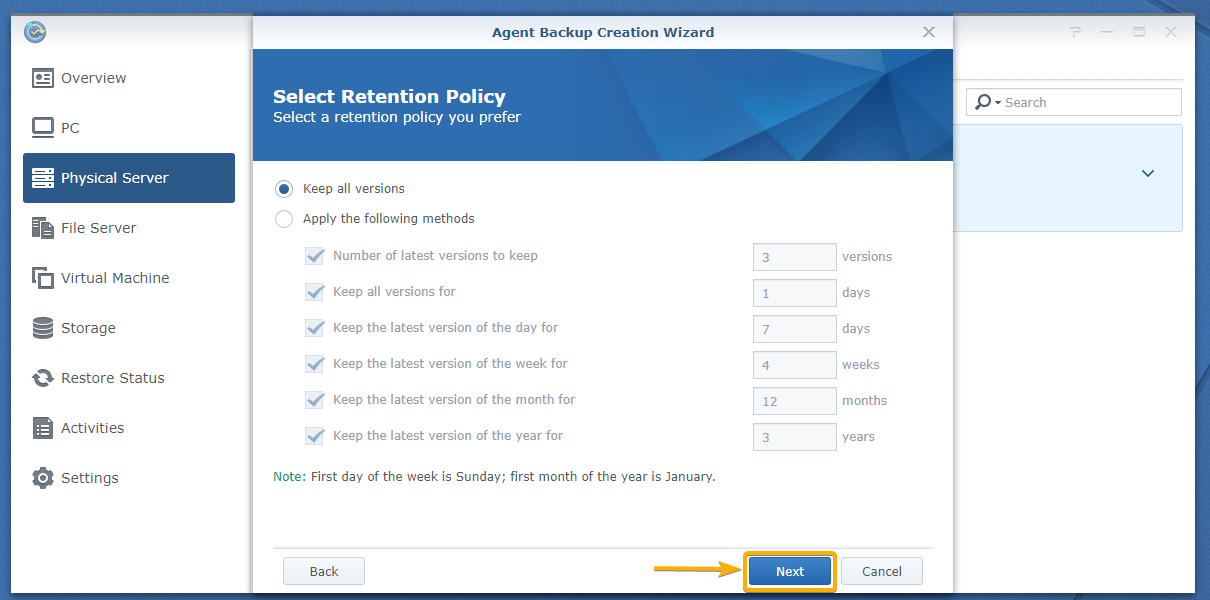
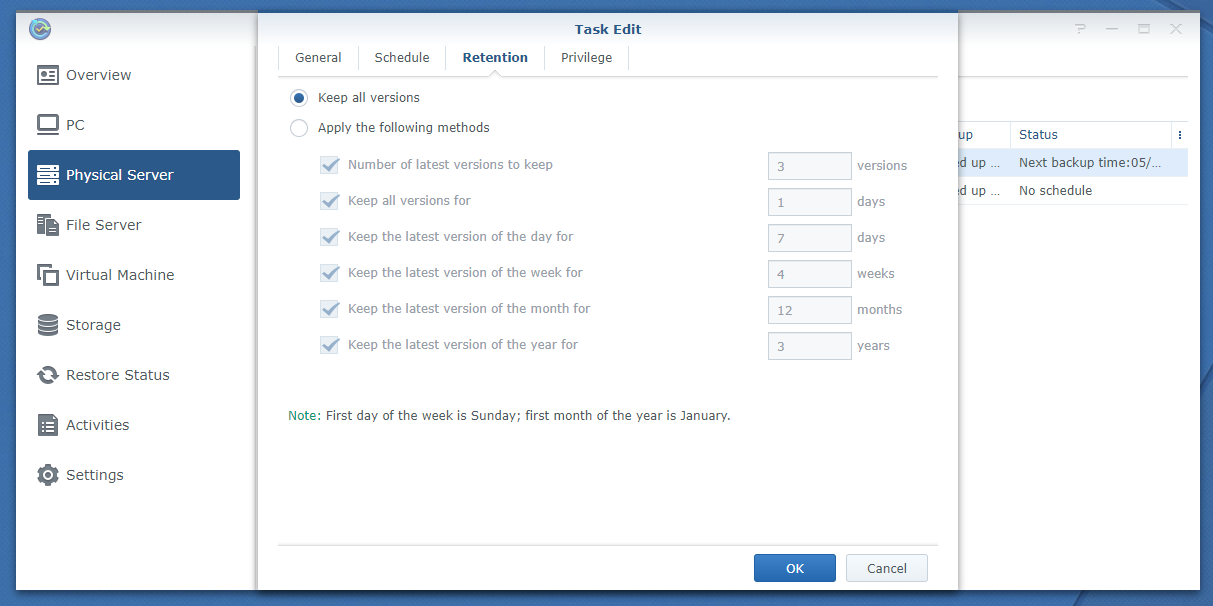
You can configure the retention policy from here.
The default retention policy is Keep all versions. In this retention policy, all the backup versions are kept. None is deleted.

If you want to keep only the latest versions of the backup, select Apply the following methods and configure how many backup versions you want to keep for each of the cases as marked in the screenshot below:

Once you’re done, click Next.
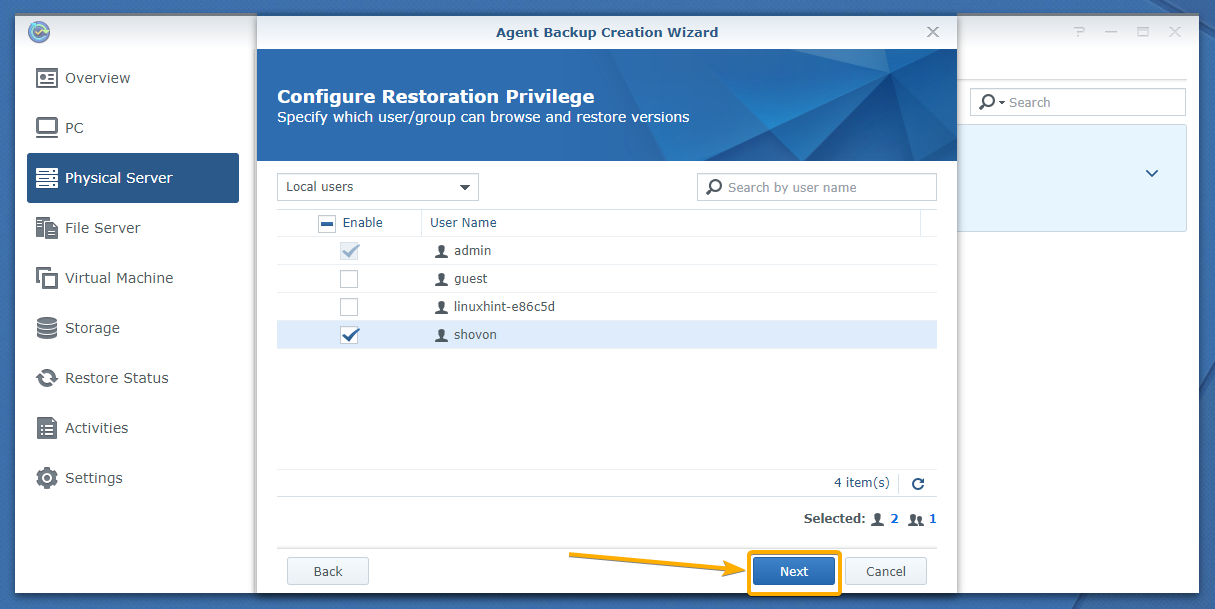
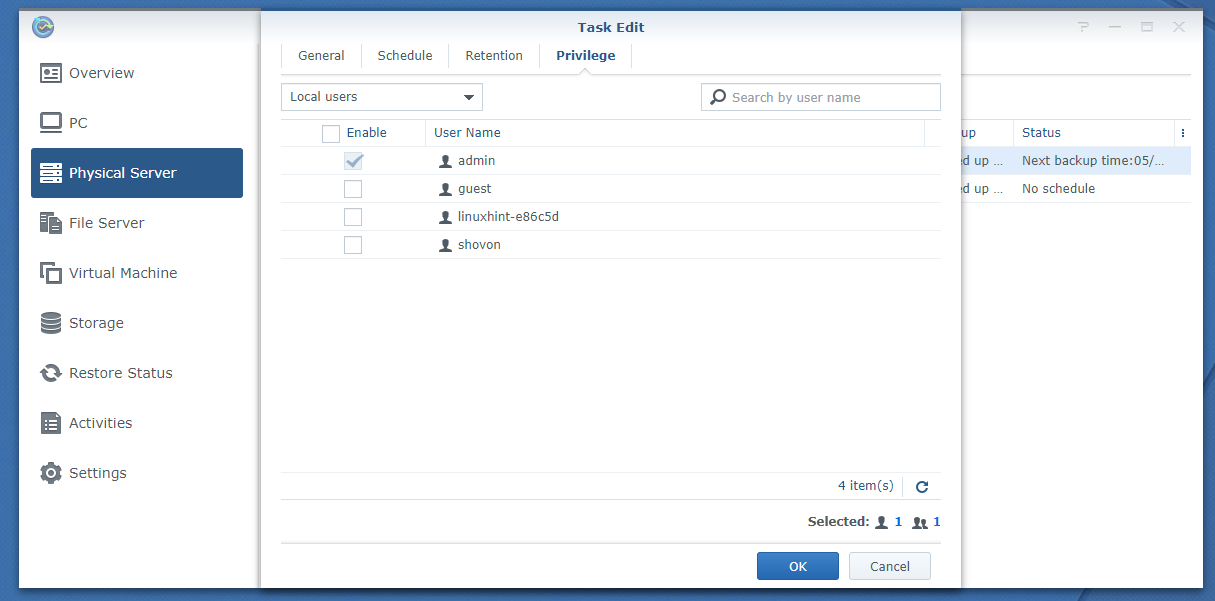
Now, select the users that you want to give privileges to restore data on your Linux computer from the backups and click Next.
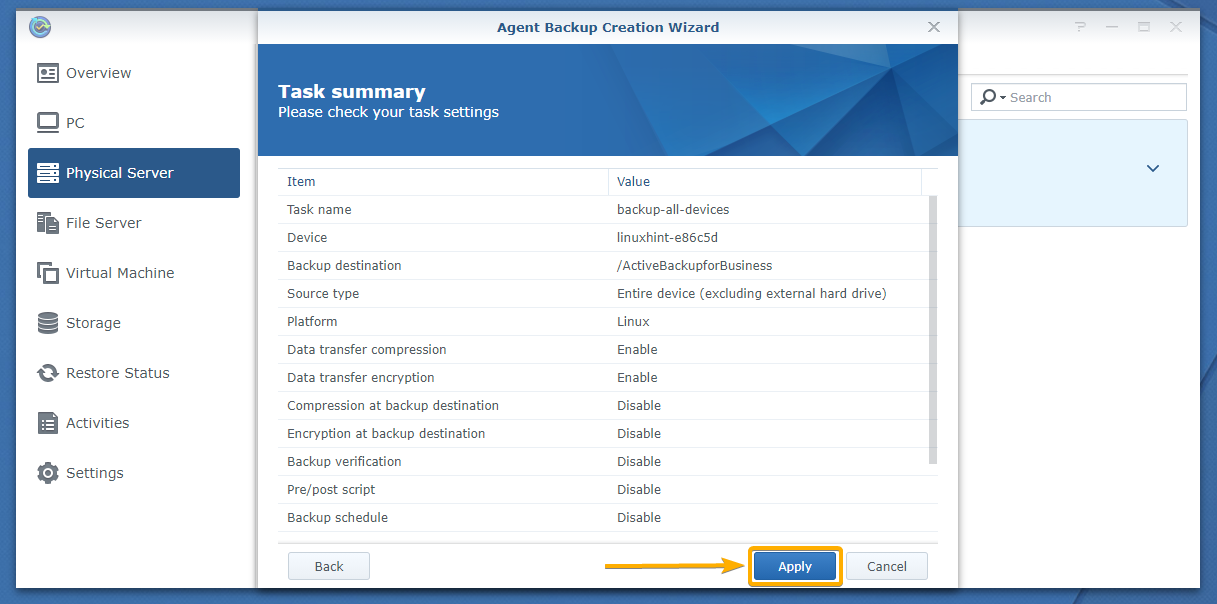
A summary of how the backup task will be configured should be displayed.
To create a backup task with these settings, click Apply.
If you want to take a backup just after the backup task is created, click Yes. Otherwise, click No.
I will take a backup later. So, I will click No.

As you can see, a new backup task is created.

Modifying Backup Tasks of Active Backup for Business:
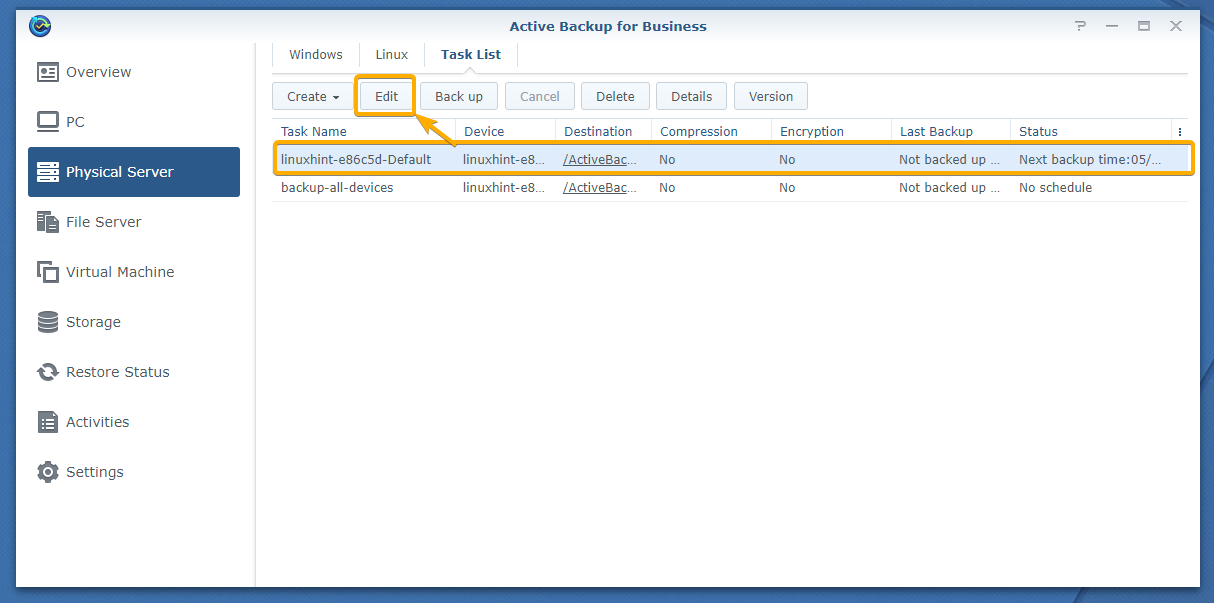
You can modify the settings of the backup tasks that you’ve already created.
To do that, select the backup task that you want to modify, and click Edit as marked in the screenshot below:
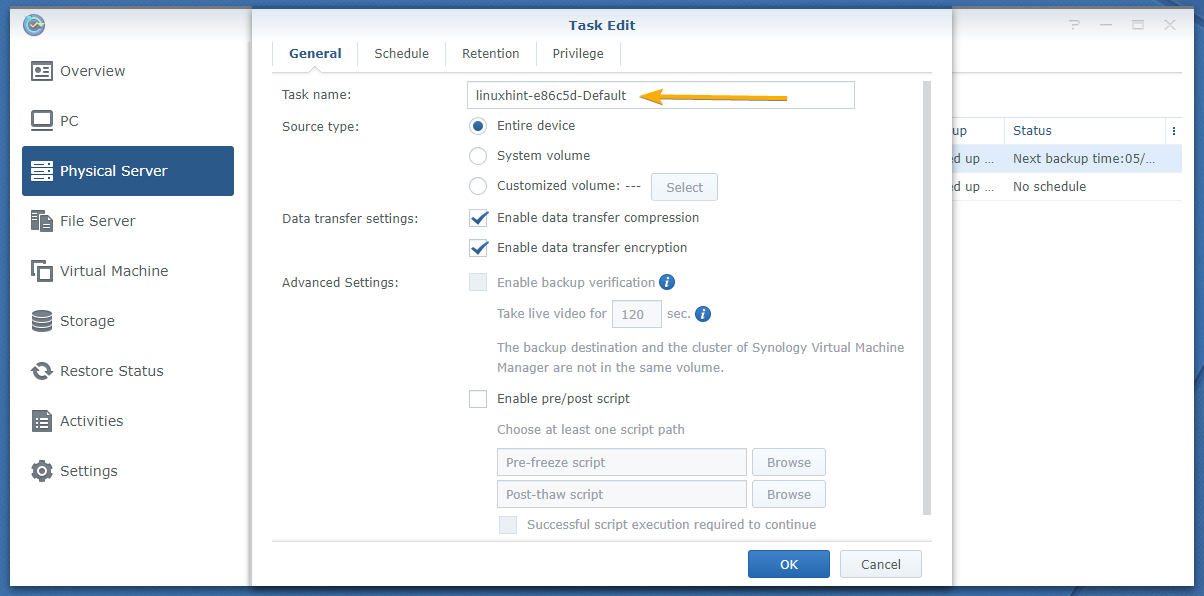
The Task Edit window should be displayed.

From the General tab, you can change the task name.
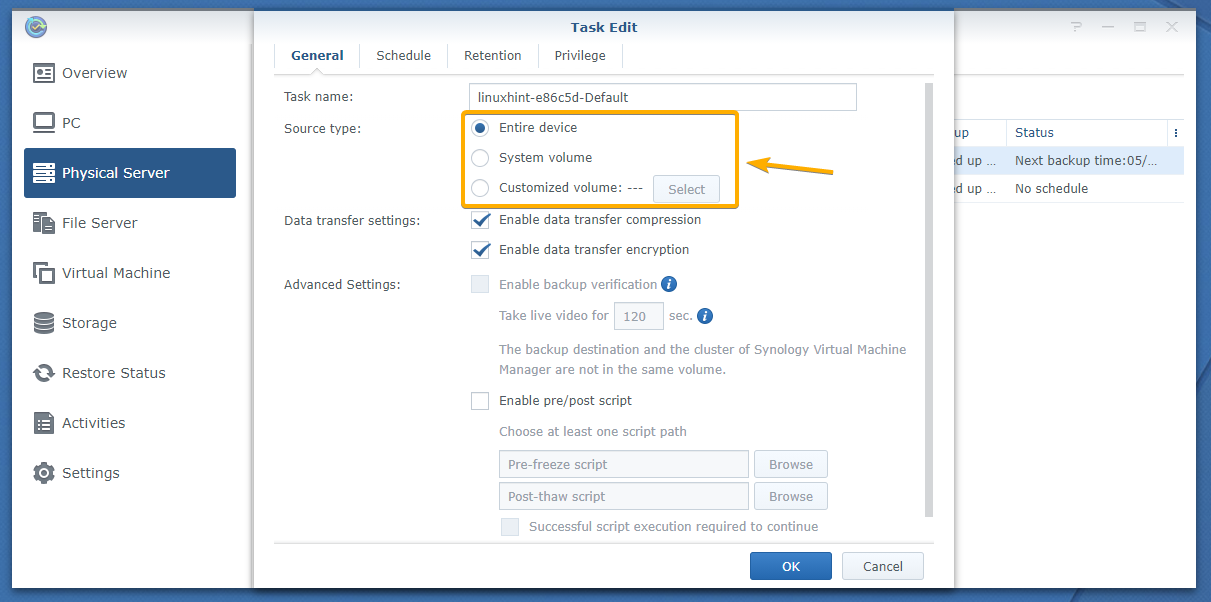
You can also change the partitions that you want to back up from your Linux computer.
From the Schedule tab, you can change the backup schedule settings for the backup task.

From the Retention tab, you can configure retention policies for the backup task.
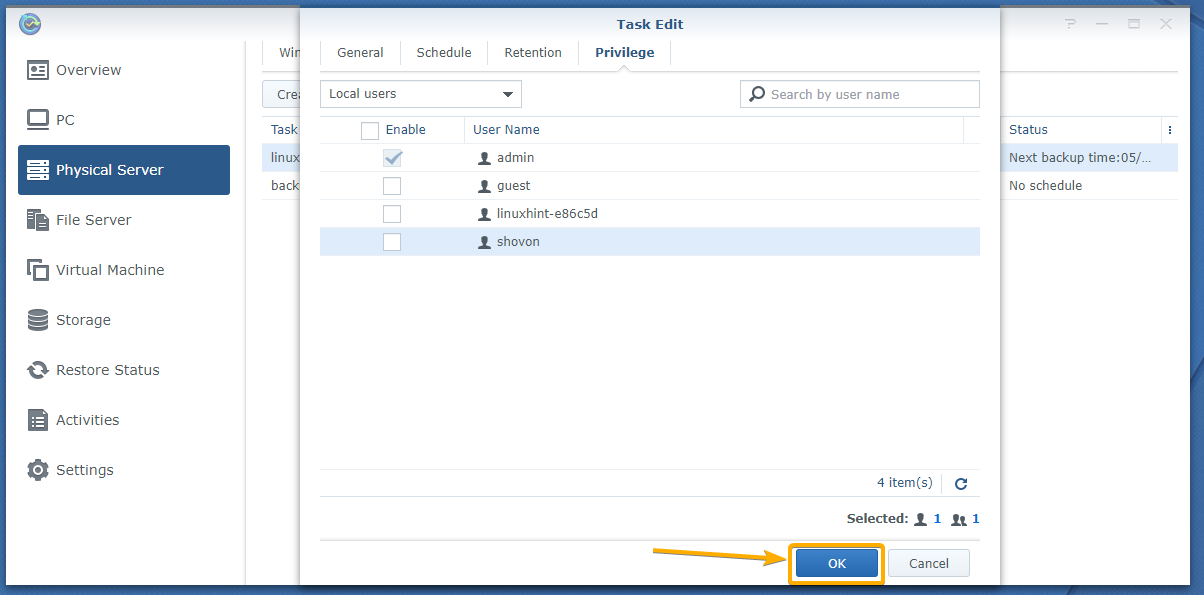
From the Privileges tab, you can configure the restore privileges for the Synology NAS users.
Once you’re done, click OK to save the changes.
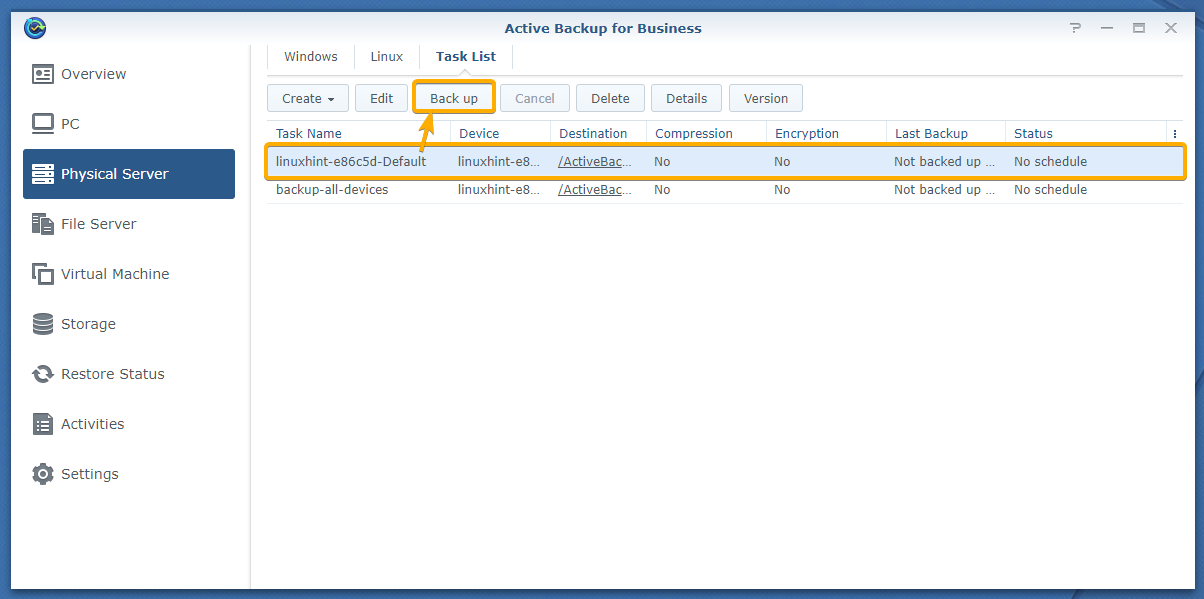
Taking a Backup of your Linux Computer with Active Backup for Business:
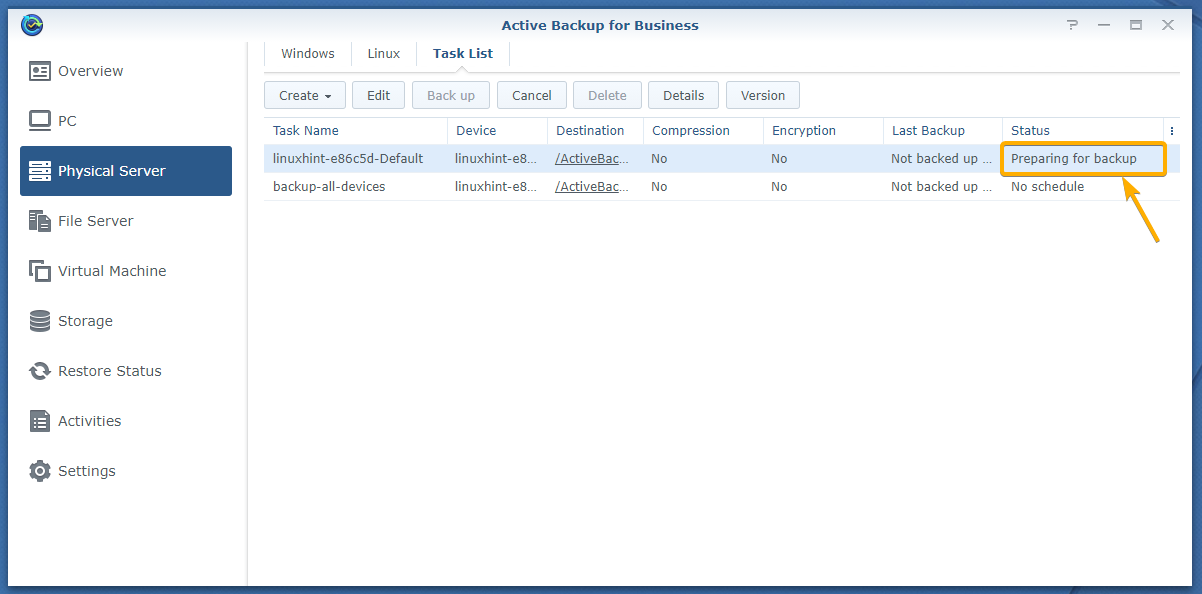
To take a backup of your Linux computer with Active Backup for Business, select a backup task from the Physical Server > Task List tab and click on Back up as marked in the screenshot below.
As you can see, the backup task is preparing to take a backup.
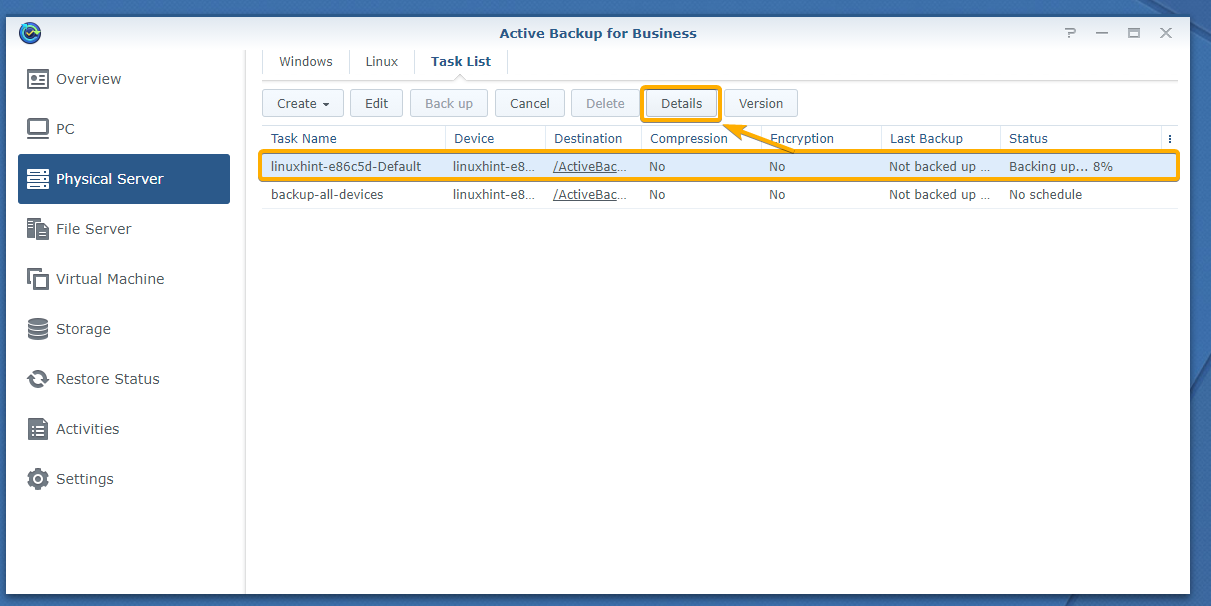
Very shortly, the backup task should start backing up data from your Linux computer. The progress of the backup should be displayed in the Status column as you can see in the screenshot below.

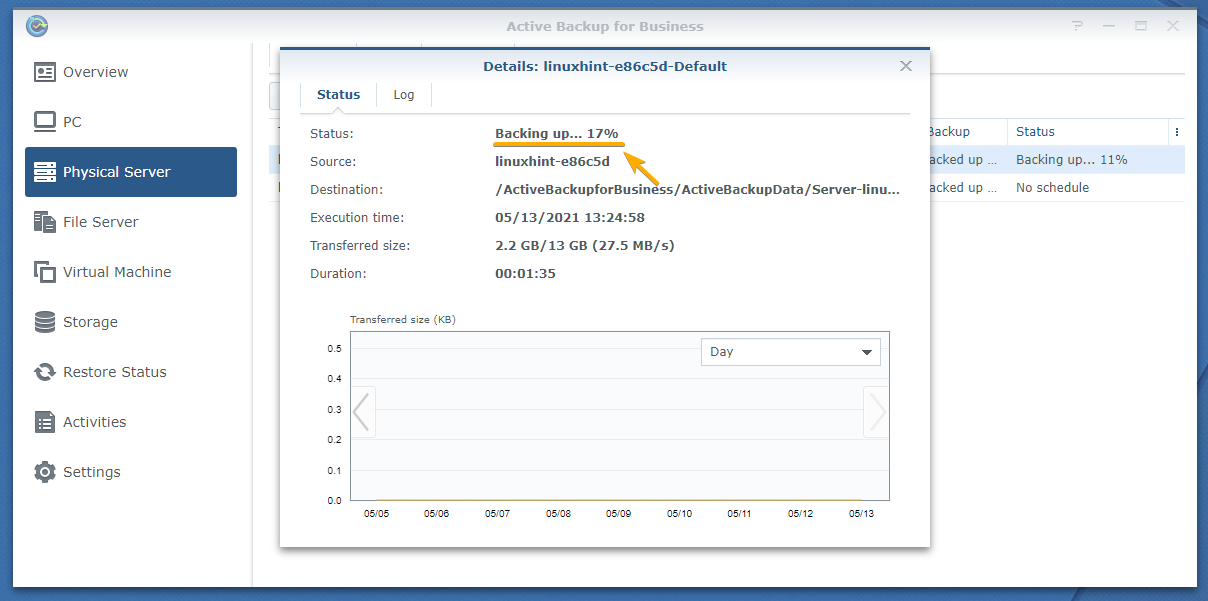
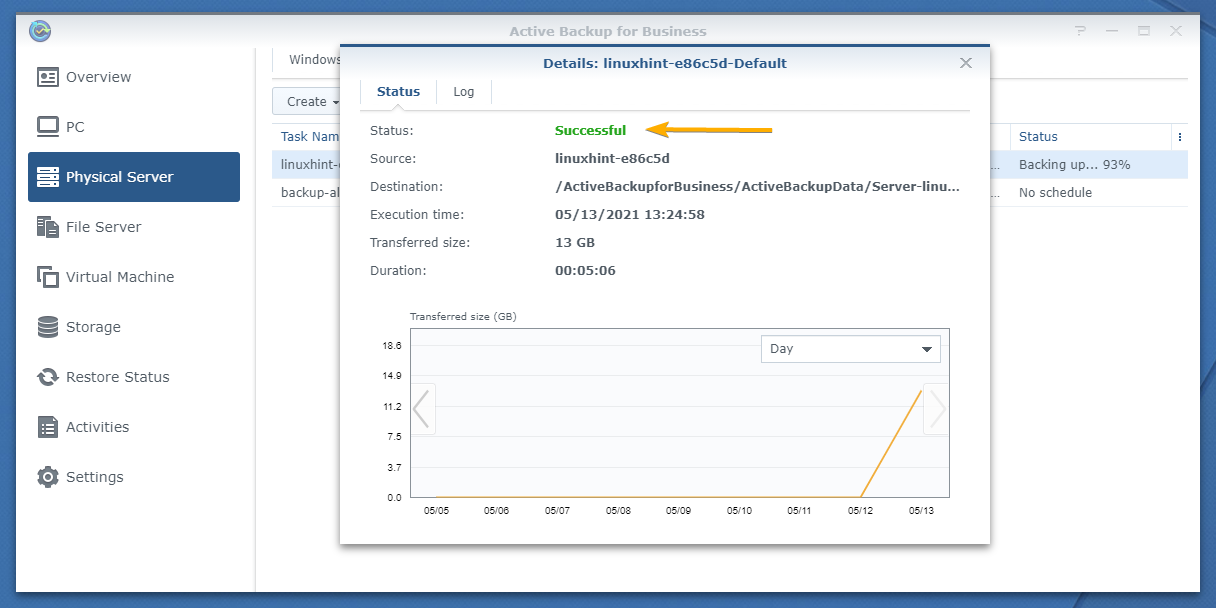
To find more information about the backup progress, select the running backup task and click Details.
The Details window of the backup task should be displayed.
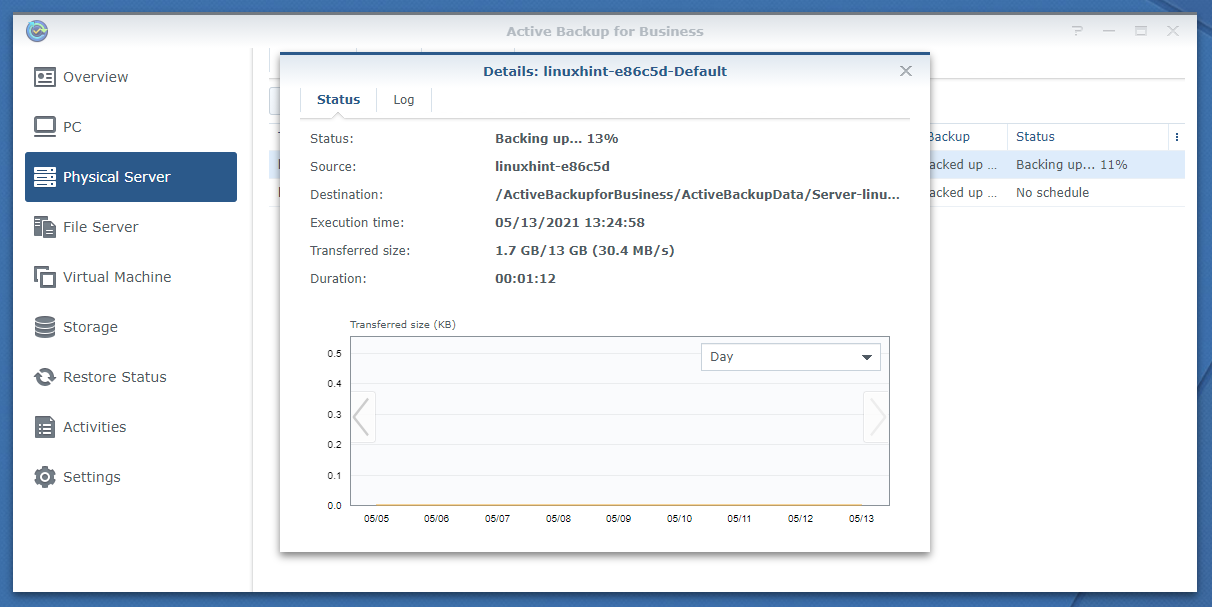
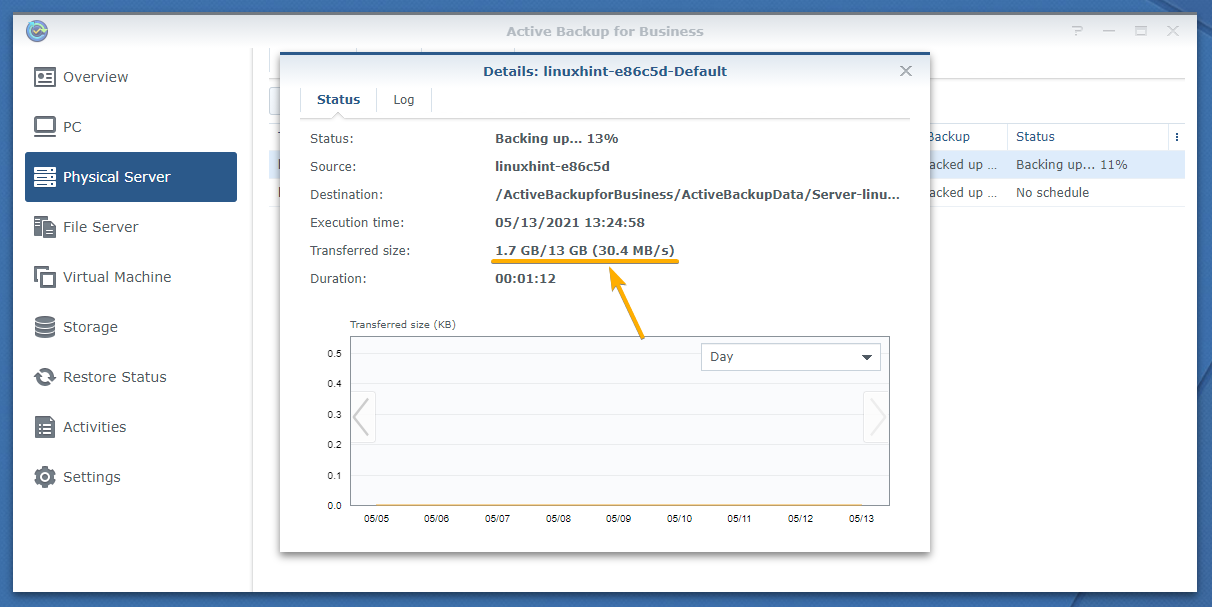
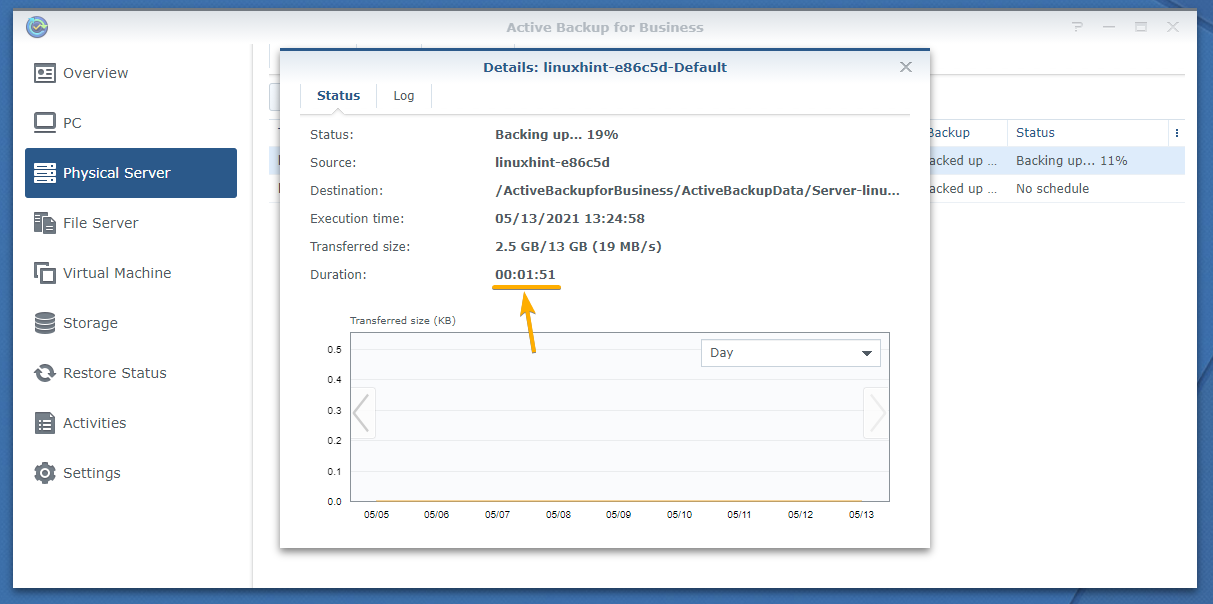
In the Transferred size section, you can see how much data is being backed up, how much data is backed up already, and the speed of the backup.
In the Status section, you can see the percentage of the data that is already backed up.
In the Duration section, you can find how long the backup task has been running.
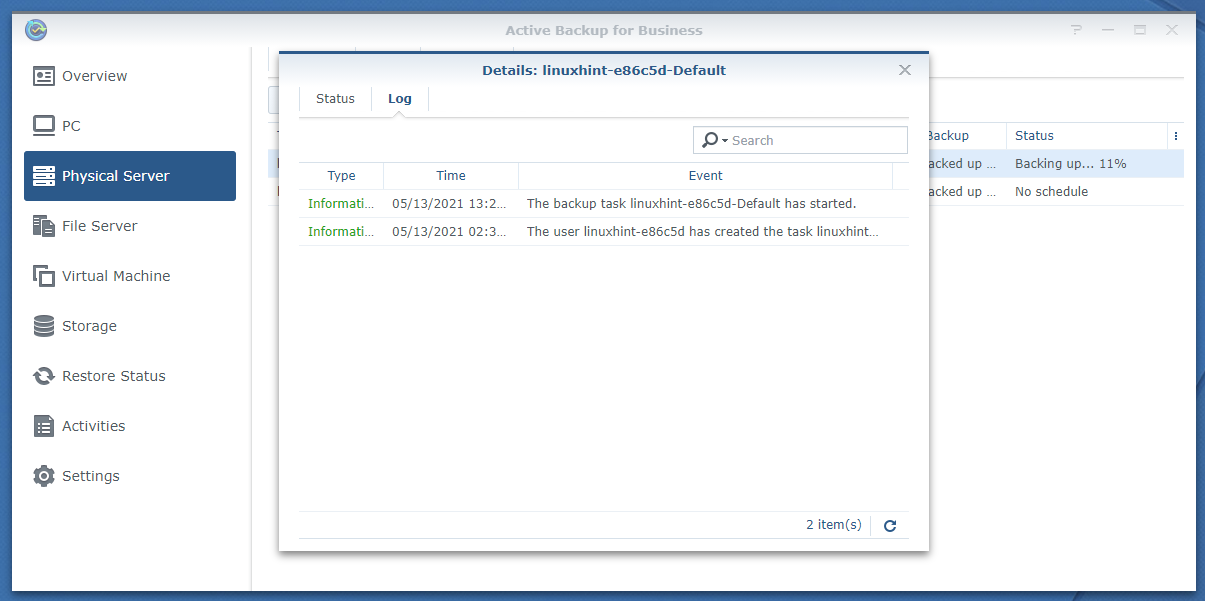
In the Log tab of the Details window, you can see backup logs for the task.
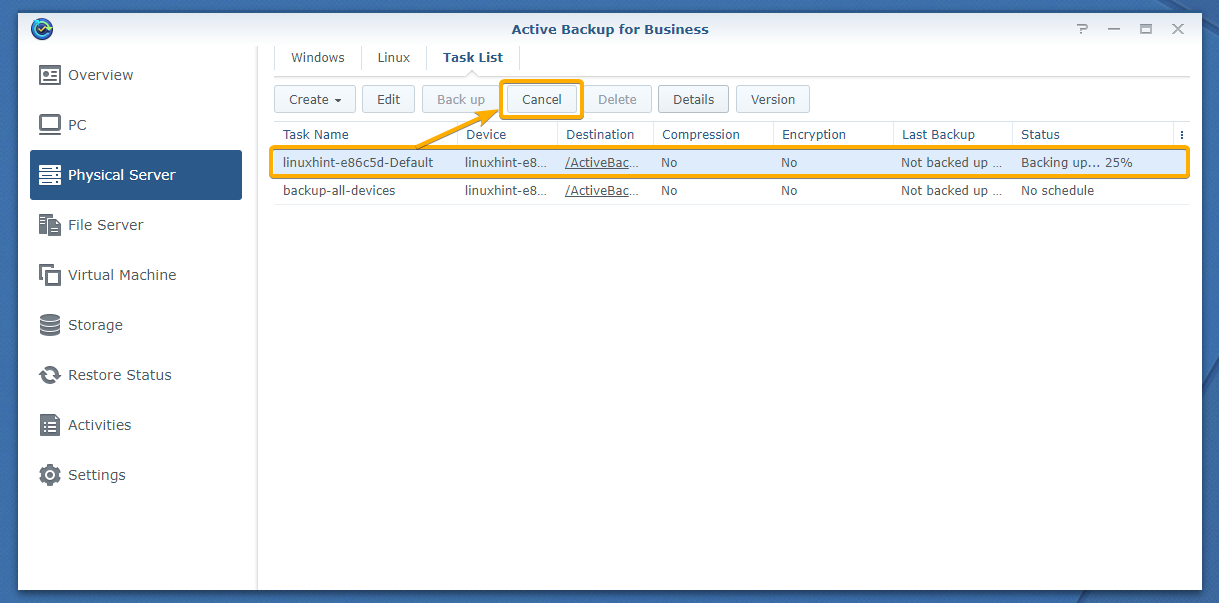
You can cancel the backup task anytime.
To cancel the backup task, select it and click Cancel as marked in the screenshot below:
Once the backup is complete, the Status section should display the message Successful as marked in the screenshot below:
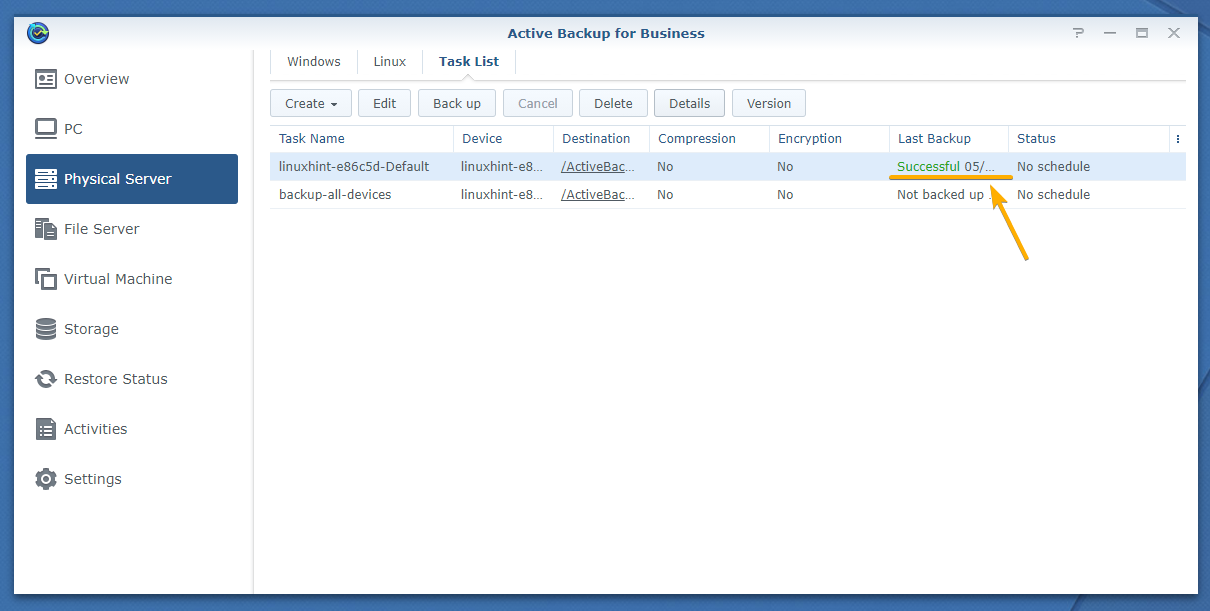
The Last Backup column of the Physical Server > Task List tab should also display the message Successful as marked in the screenshot below:
Restoring Data From the Backup With Active Backup for Business:
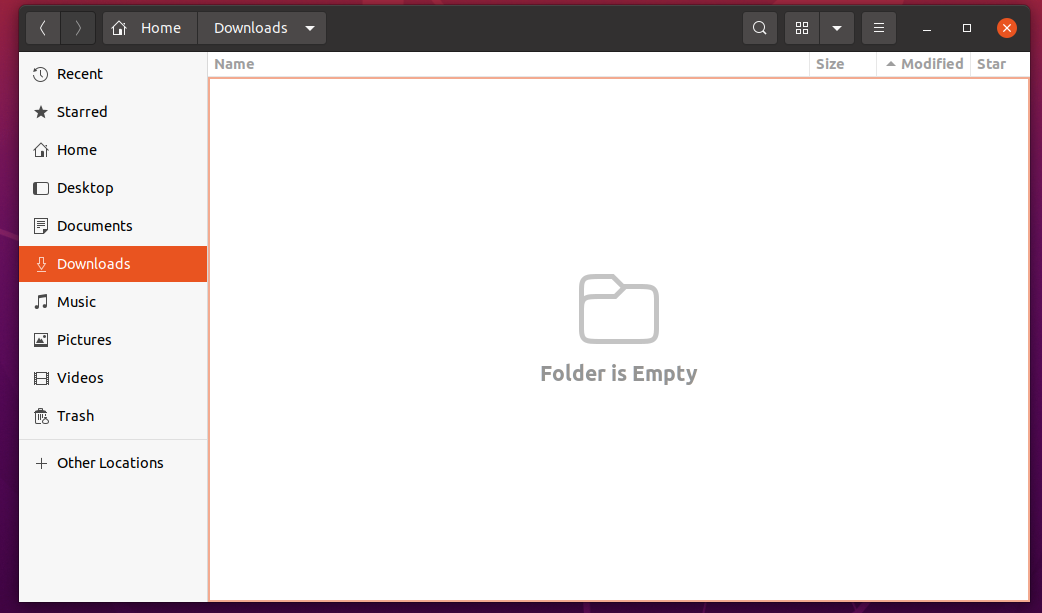
To demonstrate the process of restoring data from the backup with Active Backup for Business, I will remove some of the files from my Linux computer and restore them from the backup.

As you can see, I have removed some of the files from the ~/Downloads directory of my Linux computer. Let’s restore them.
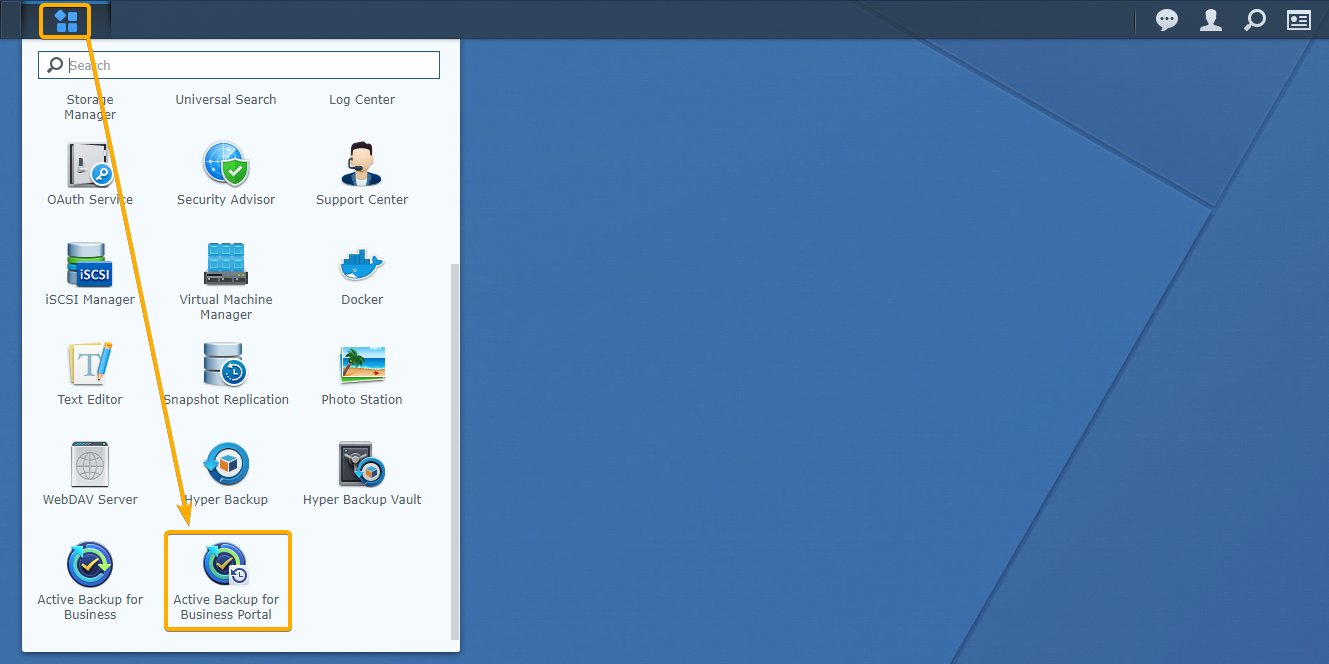
To restore the removed files on your Linux computer with Active Backup for Business, you will have to use the Active Backup for Business Portal app. The Active Backup for Business Portal app should be installed automatically when you install the Active Backup for Business app on your Synology NAS.
You can open the Active Backup for Business Portal app from the Application Menu of the management interface of your Synology NAS as marked in the screenshot below:
The Active Backup for Business Portal app should be opened in a new browser window, as you can see in the screenshot below:
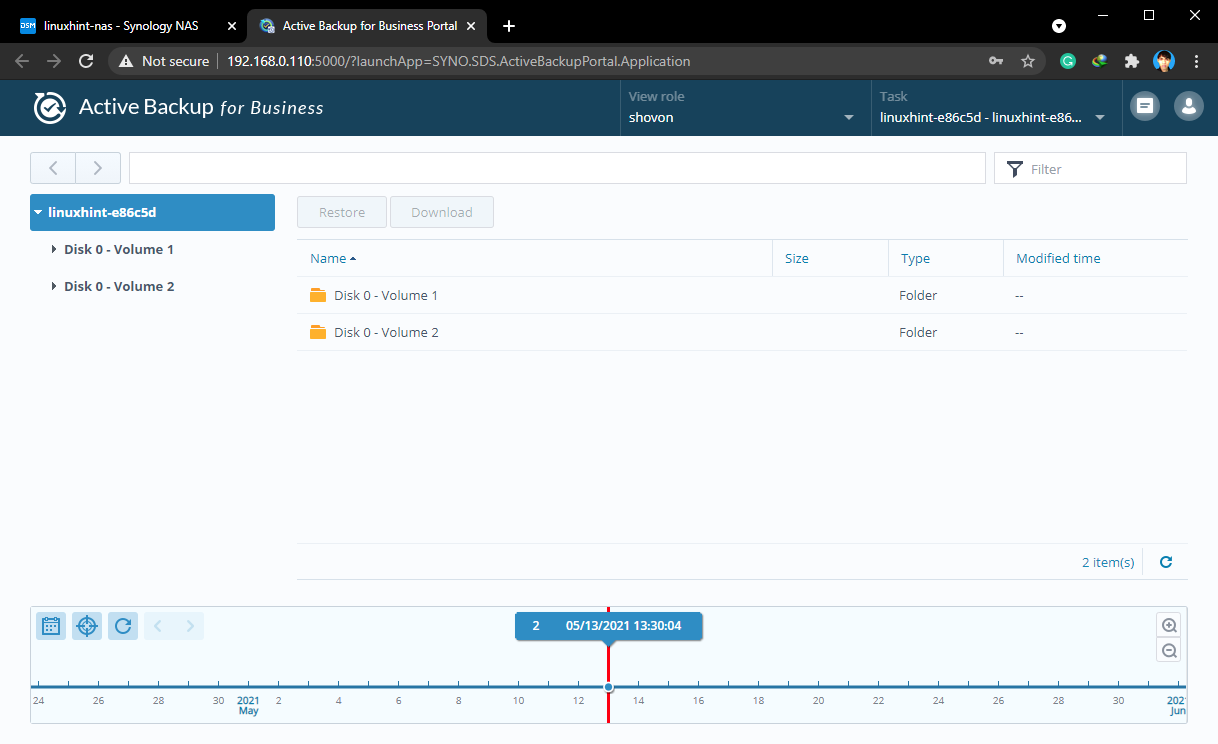
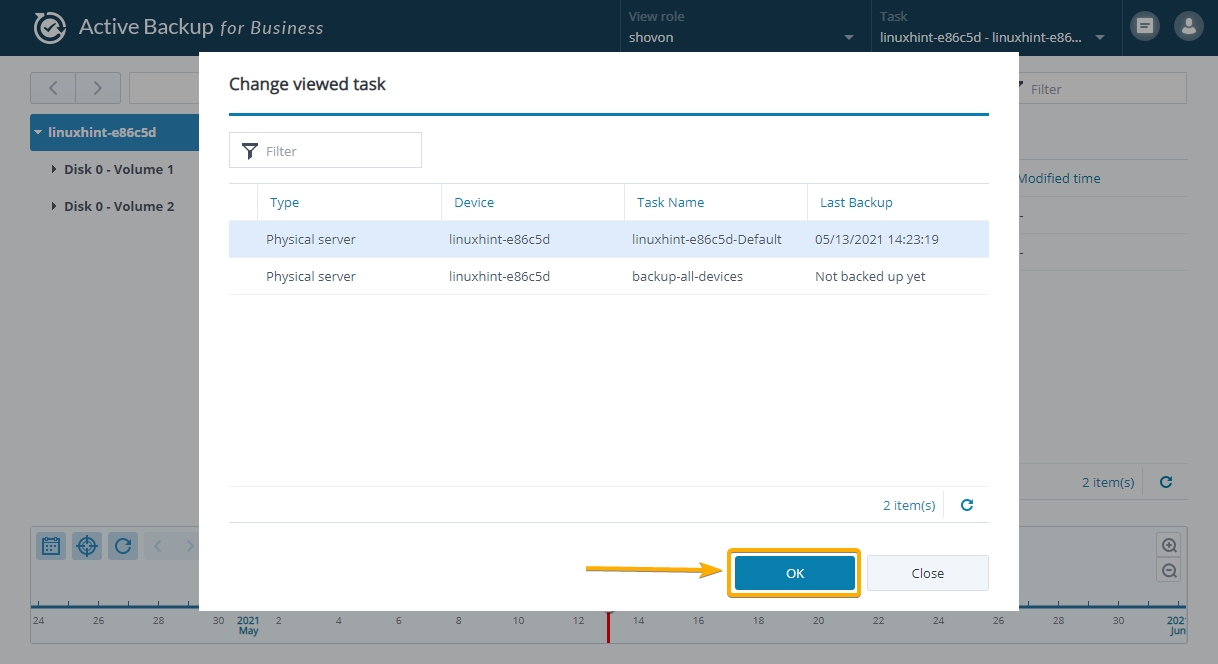
You can select a specific Active Backup for Business task from the Task drop-down menu as marked in the screenshot below:

Now, select a backup task from the list that you want to use to restore data on your Linux computer and click OK.
You can change the user that you want to use to restore data from the backup from the View role drop-down menu as marked in the screenshot below:
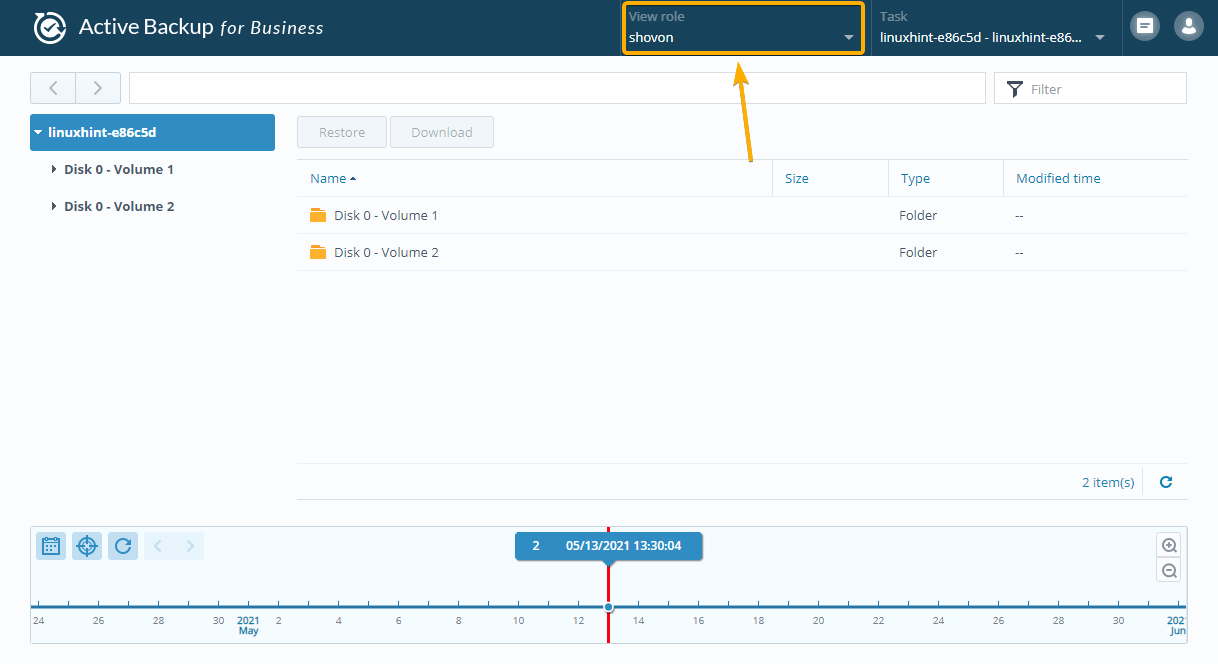
Now, select a user from the list and click OK.

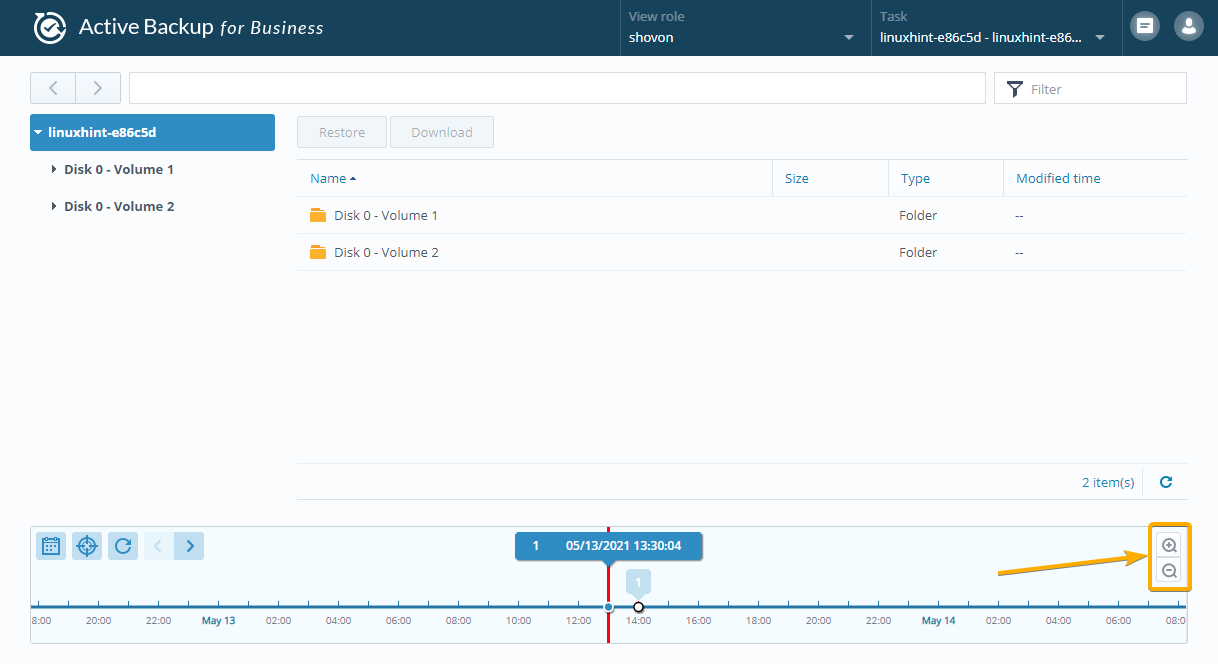
You can select a backup version from the timeline as marked in the screenshot below:

You can use the Zoom In and Zoom Out icons as marked in the screenshot below to zoom in and zoom out of the timeline, respectively. This will make selecting backup versions easier for you.
Now, you can select a disk volume from the list. These are like partitions on your Linux computer.

Once you navigate to the disk volume, the files/folders of that disk volume should be displayed.
These are the versions of the files/folders that are in the backup.

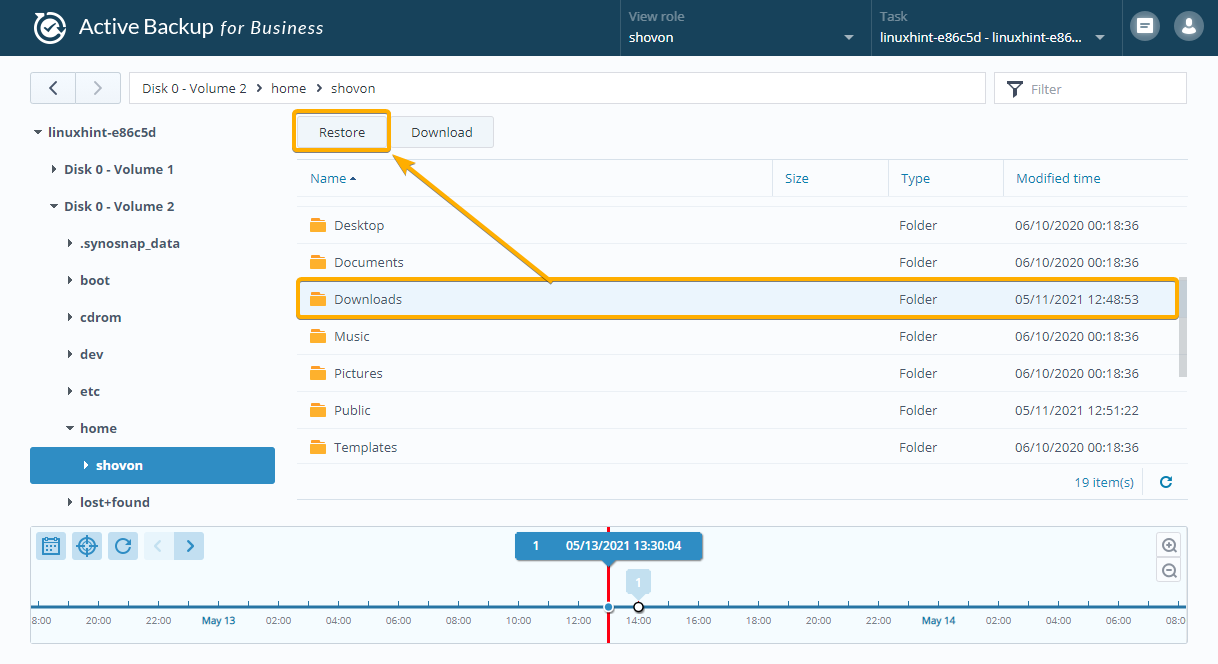
You can restore an entire folder with the Active Backup for Business Portal app.
To do that, select a folder that you want to restore and click on the Restore button as marked in the screenshot below:
You can also restore specific files from the backup. Just select the files that you want to restore and click Restore as marked in the screenshot below:

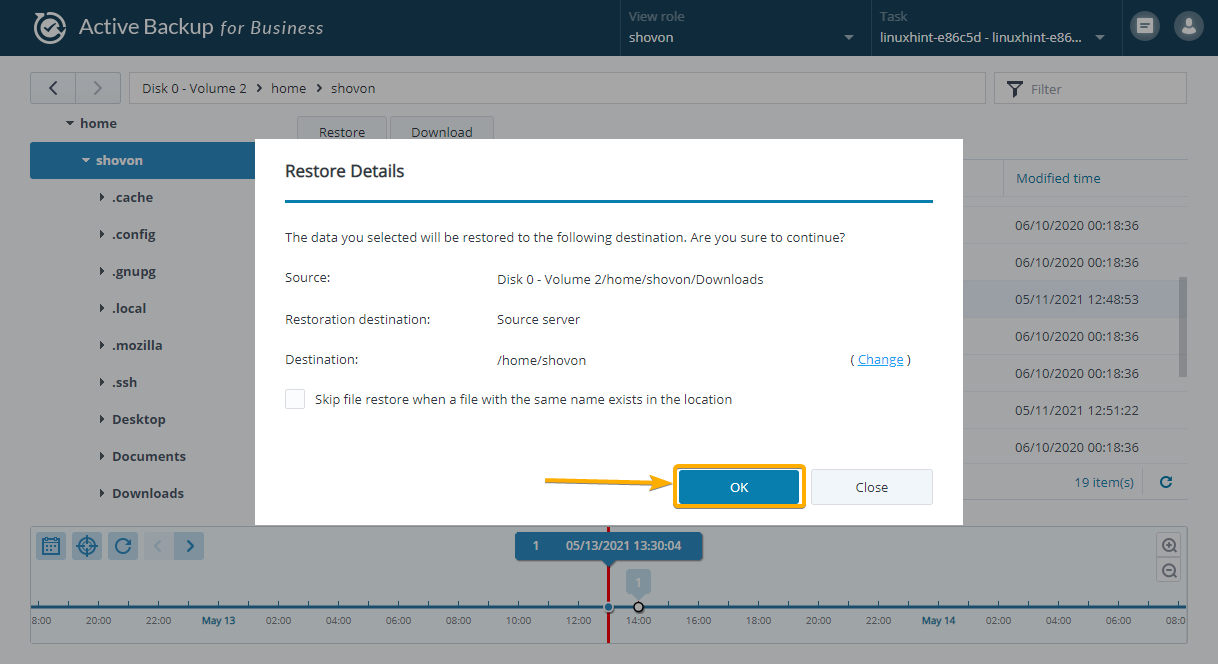
To confirm the restore operation, click OK, as marked in the screenshot below:
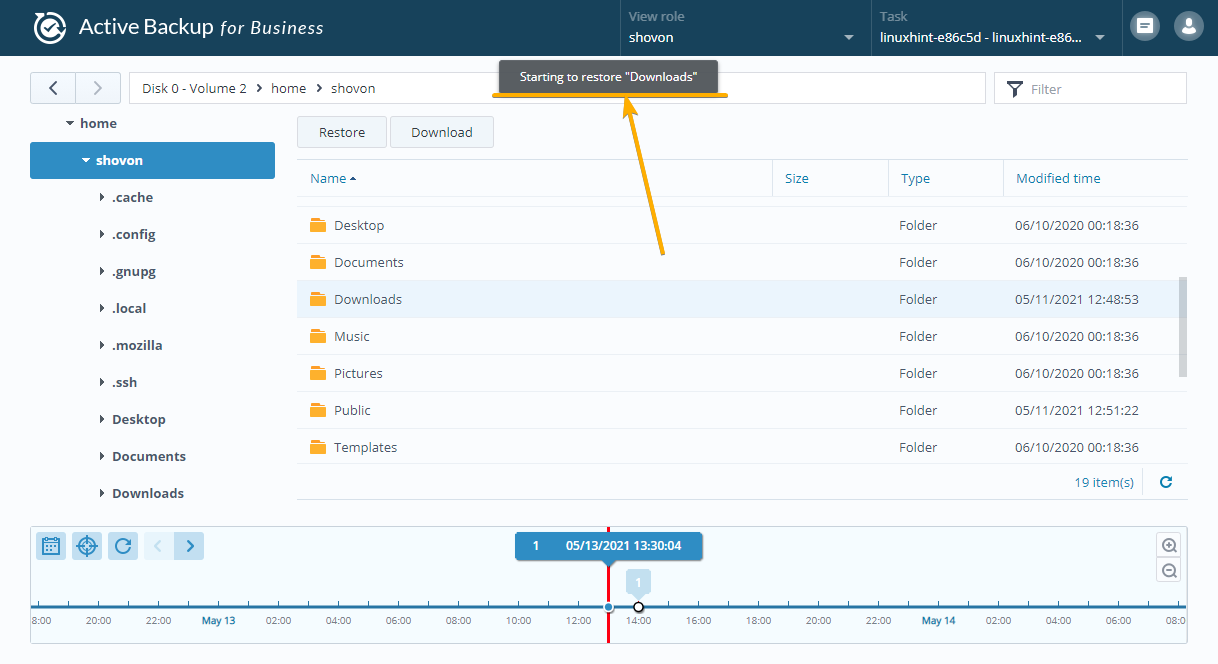
The restore operation should start as you can see in the screenshot below:
It may take a while to complete depending on the size of the files/folders that you are restoring.
Once the files/folders are restored, you should get a notification in the web management interface of your Synology NAS, as you can see in the screenshot below:
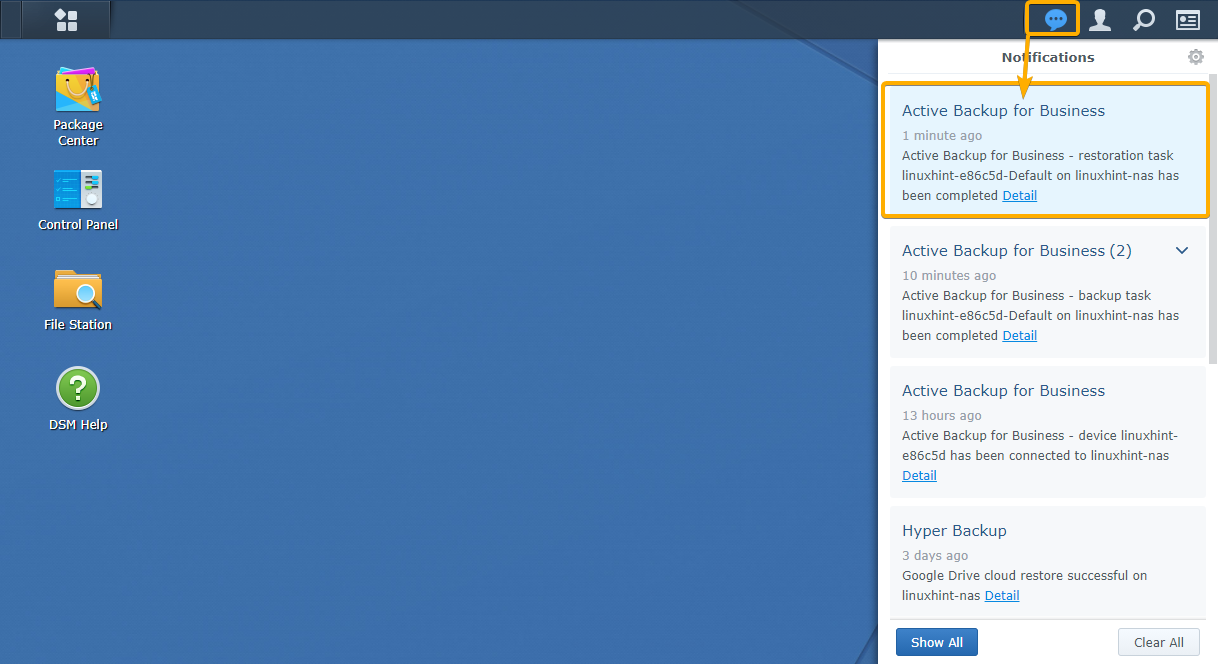
As you can see, the files that I have removed from my Linux computer are restored.

Removing Backup Versions With Active Backup for Business:
You can manually remove backup versions of a task with Active Backup for Business.
To remove a backup version of a task, select the task from the Physical Server > Task List tab and click Version as marked in the screenshot below:
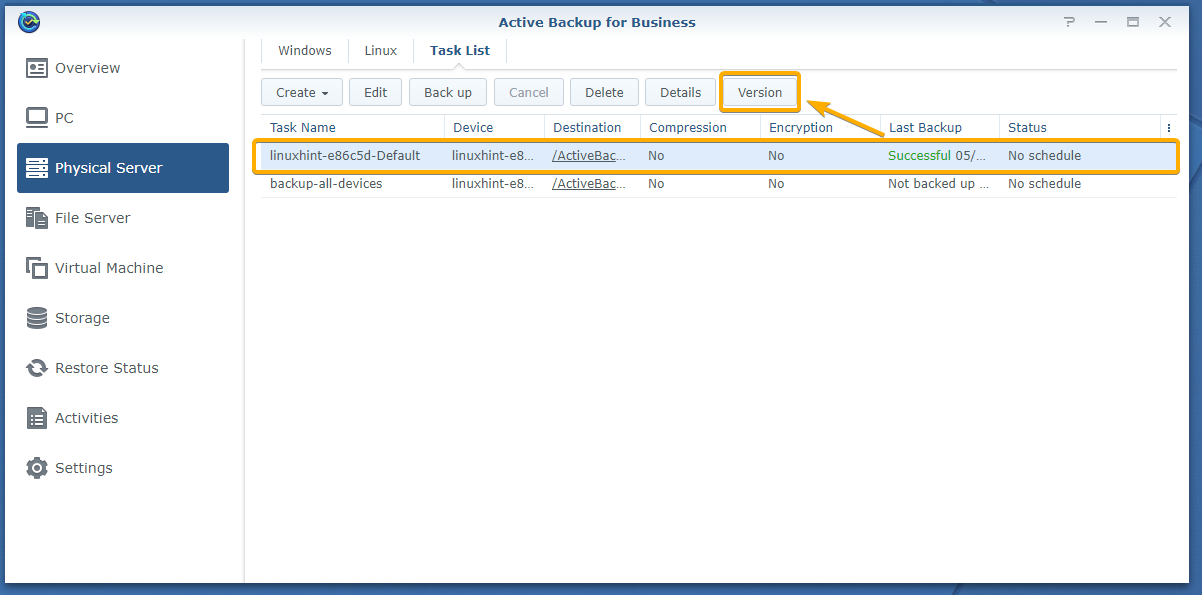
All the backup versions of that task should be listed as you can see in the screenshot below:

To remove a backup version, hover your mouse cursor over the backup version and click on the X icon as marked in the screenshot below:
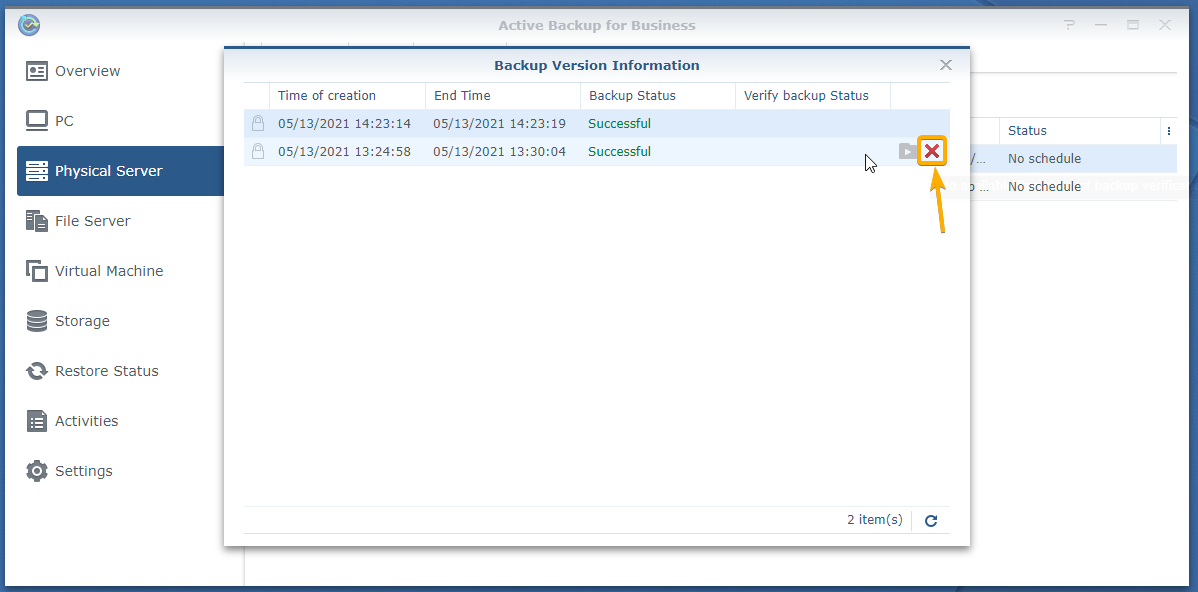
To confirm the removal operation, click Delete.

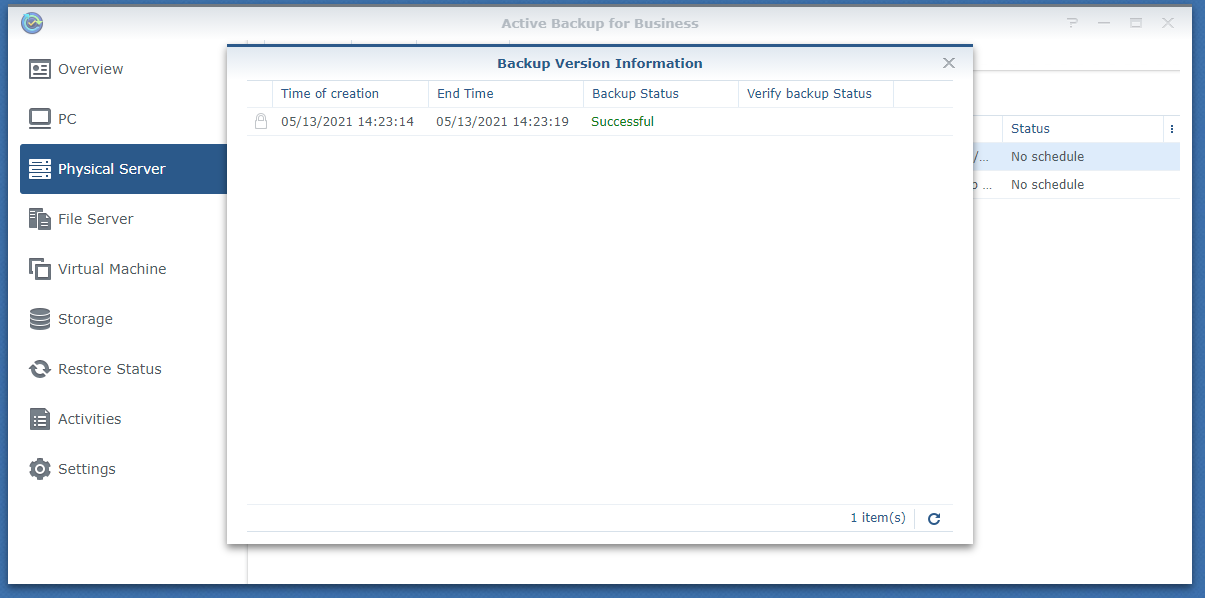
The backup version is being removed as you can see in the screenshot below. It may take a few seconds to complete.

The backup version should be removed.
Removing Backup Tasks From Active Backup for Business:
You can remove backup tasks with Active Backup for Business.
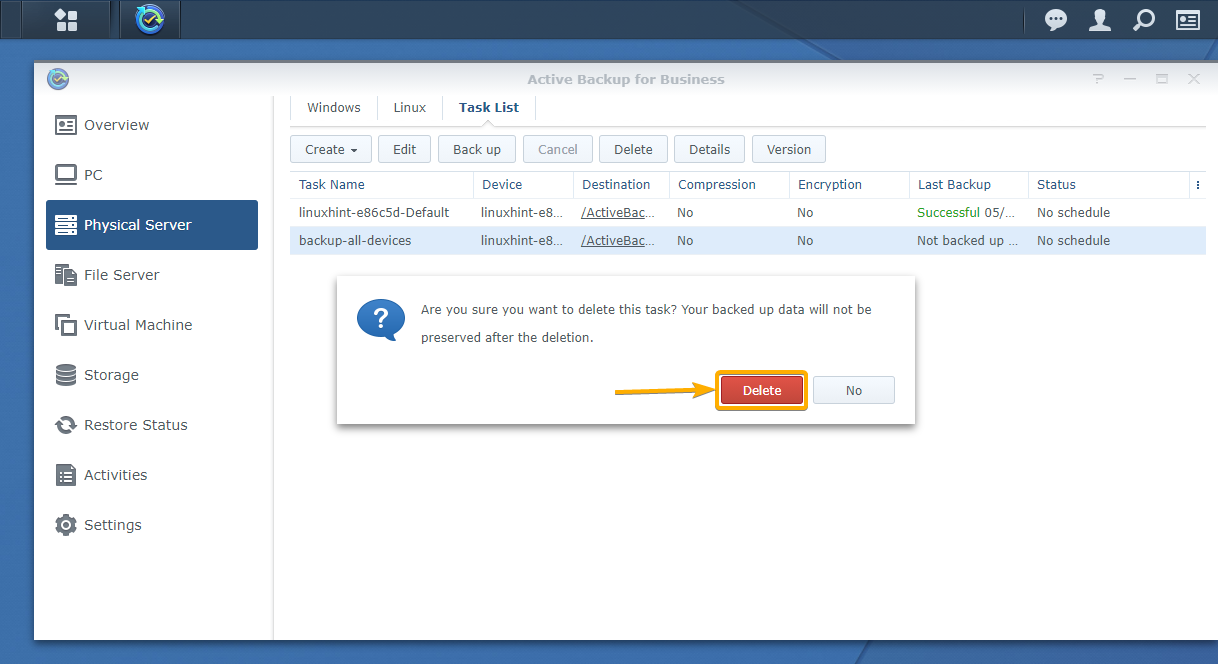
To remove a backup task with Active Backup for Business, select the backup task from the Physical Server > Task List tab and click Delete as marked in the screenshot below:
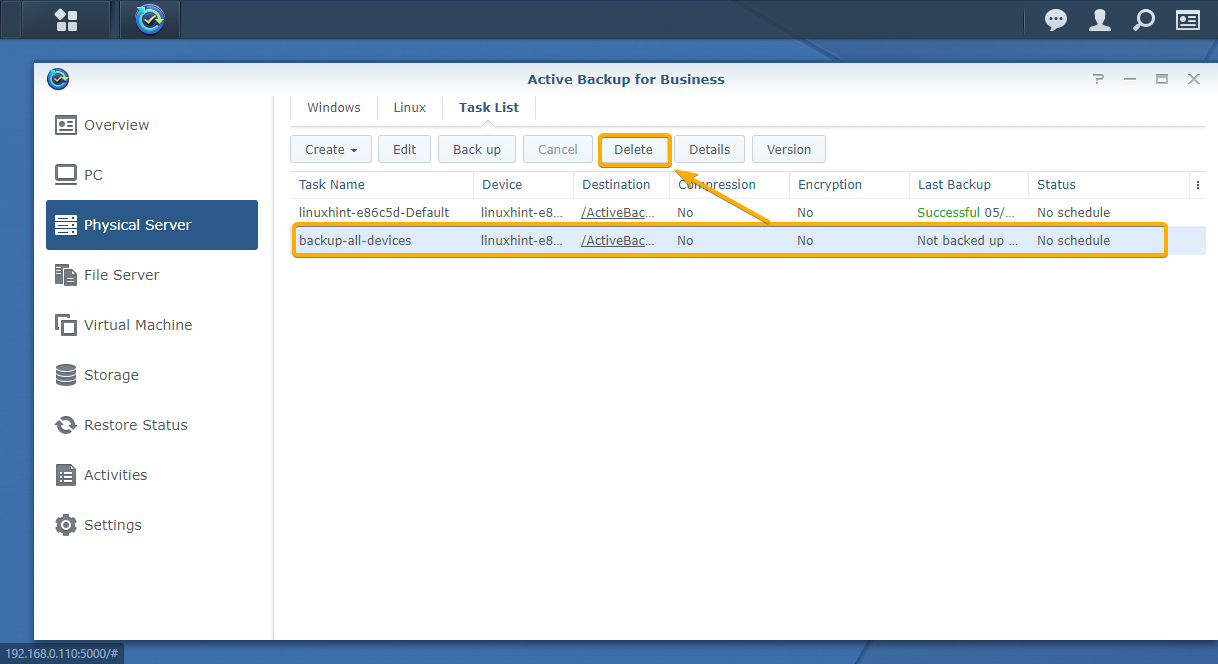
To confirm the removal operation, click Delete.
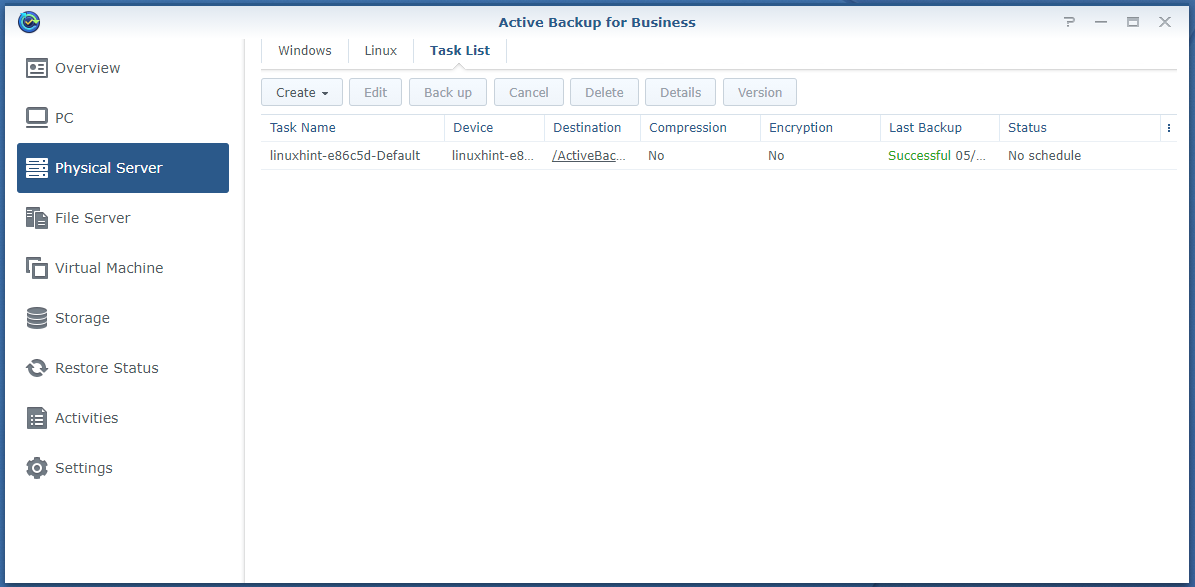
The backup task should be removed.
Removing Linux Computer From Active Backup for Business:
If you want to remove a Linux computer from Active Backup for Business, select it from the Physical Server > Linux tab and click Delete as marked in the screenshot below:

To confirm the removal operation, click Confirm Deletion as marked in the screenshot below:

Active Backup for Business is removing the Linux computer, as you can see in the screenshot below:
The Linux computer should be removed from Active Backup for Business.
Conclusion:
In this article, I have shown you how to install the Active Backup for Business app on your Synology NAS, install Active Backup for Business Linux Agent on Linux, and add a Linux computer to Active Backup for Business while using the Active Backup for Business Linux Agent. The following steps are to create a backup task, take backups using Active Backup for Business, and restore files/folders from backups using Active Backup for Business Portal. I have also shown you how to create Synology NAS users for Active Backup for Business and manage the backup tasks and backup versions with Active Backup for Business.