HTML is a language that is used in web design and development. By the usage of the only html, we can make static web pages. The alignment and designing are done through CSS. Like other programming languages, there are also codes/commands known as tags. These tags are written with angular brackets.
We may find some interactive built-in modular websites that use just drag and drop approach, which are all made up of HTML. We can add many items in the html like text, images, videos, etc. Each item has a separate tag written inside the html tag body. HTML has many functions to be applied. One of which is a link. Link is a feature that turns the current page into another one. A link behind the image is today’s topic to be explained here.
Required Essentials
There are two basic tools used for the implementation of HTML code.
- A text editor
- A browser
One tool is used as an input tool whereas the other one acts as output software. In the text editor, we write the code that is to be run on the other software. This editor act as an input tool. On the other hand, the browser acts as an output tool. It is a platform that runs the HTML code written in the editor.
As we are performing this task on Windows, the text editor is notepad by default. You can use sublime, notepad ++, etc. whereas the browser is internet explorer. But in our guide, we will use Google Chrome and notepad, which is easily accessible.
HTML Manual
If we want to elaborate the concept of link in the image, we need to understand the working of HTML first. HTML body is divided into two parts. One is the head and the second one is the body. The head part is written first. In that portion, we include the title of the web page. The functional part is known to be the body portion of the HTML. Because all the properties of HTML are defined here.
All the tags including HTML have opening and closing tags. The HTML code that is written in the notepads is saved in both notepad and browser extensions. The .txt extension, is saved as a code, whereas with HTML, it is saved for the browser. The file of the text editor must be saved with the HTML extension. For example, link.html. then, you will see that the file is saved with the icon of the current browser you are using for this purpose.
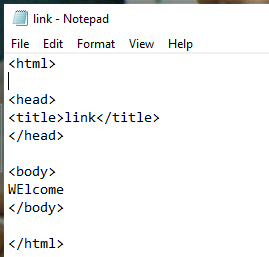
The below image is a sample code of HTML. In the head portion, we have added the name of the title of the page. And in the body portion, plain text is added.
Creation of a Simple Hyperlink
You might have observed the links on the websites in the form of text or the image. These are developed by using the hyperlinks in the HTML code. This is the feature of both the static and dynamic web pages. It has both opening and closing tags. <a> is known as an anchor tag. The syntax is given below.
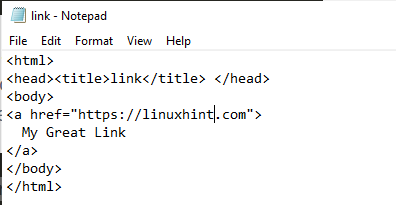
Href is for the reference of the page. Here, we write the address of that specific website or web page where we want to go by clicking the link. Whereas inside the body of the anchor tag, we write the text to which we want to link. For instance, we have used some text below.
As we write the address, you can see that it is automatically underlined and its color is changed. It implies differentiating between the simple text and the hyperlink. Whereas inside the body, we have used a simple sentence. Consider the above example in the working state.
As we have written this code in the notepad, now we will run it to get the output from the browser.

From the output, you can observe that the text we have added is underlined, which shows that it is a link. As we hover the mouse pointer to the link, the pointer is converted into the hand symbol.
Image Tag in HTML
Image is the basic content of the HTML. There is a specific tag used. The image tag is a bit different from other tags. As it doesn’t contain opening and closing tags in it. Image can be added directly from your system or the internet as well. The source of the image is mentioned. In the source, you add the location/address of the image, either it is in any folder or placed on any website.
Here, image tag is <img>. ‘Src’ stands for the source. This is the path of the image with the file extension.

See the output below.
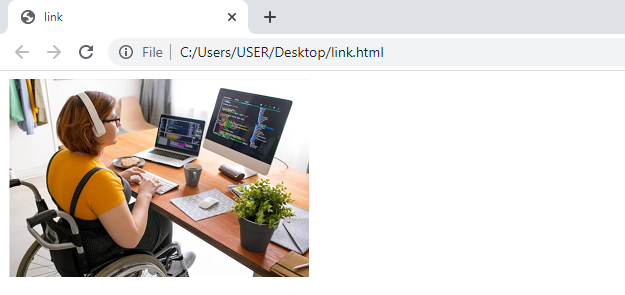
Image and a Link
Link a website with the image
You must have come across websites, especially in the website stores or the online shopping websites. There are tons of images that open into another page upon clicking. We add a link for the image or linking two pages through a link. This page may be a static or a dynamic page. We need two items tag in it. One is the image tag and the other is the link tag.
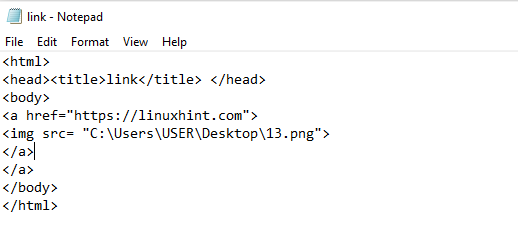
The image code is added inside the anchor tag as we want the image to act like a link. Below is the complete HTML code.
Now, we will execute this code in Google Chrome.
Through the image, it will not be possible to explain accurately. But when you practice, you will see that when you hover the mouse, the image shows the hand of the pointer, showing it as a link. When we click the image, it will open into the website, whose address is mentioned in the reference portion. The below website will be opened.

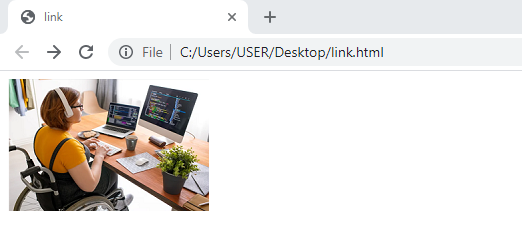
Link a static web page with the image
If you are willing to add the static web page in the code, then simply replace the address of the website with the page present in your system.
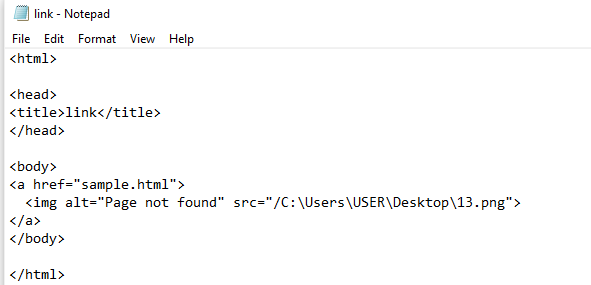
In the browser, you will see that the static sample page is opened whose address was given inside the tag.

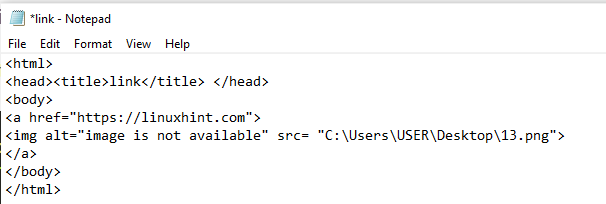
Alt Attribute and the Image Link
This attribute helps in describing something about the image. This is displayed only when due to some reason, the image is not loaded or your internet connection might be slow. So, this description is shown that helps the reader in knowing something about the image or a website.
This is the tag. Alt attribute is written inside the img tag.
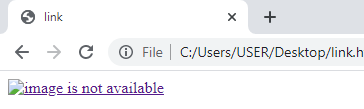
The output is shown below that shows the text alternative to the image.
Conclusion
In this article, we have used the simple tags of both a link and an image. Also, we use an image as a link with many examples. There can be many ways to elaborate on this concept. We have mentioned some easy examples in this guide.