This article will illustrate the following content:
How to Upload an Image to Stable Diffusion?
To upload an image to stable diffusion, it is required that Stable Diffusion be installed in the operating system. For this purpose, refer to the article “Install Stable Diffusion on Windows” which is a comprehensive guide to easily install it.
Let us follow the below-mentioned instructions to upload an image to Stable Diffusion:
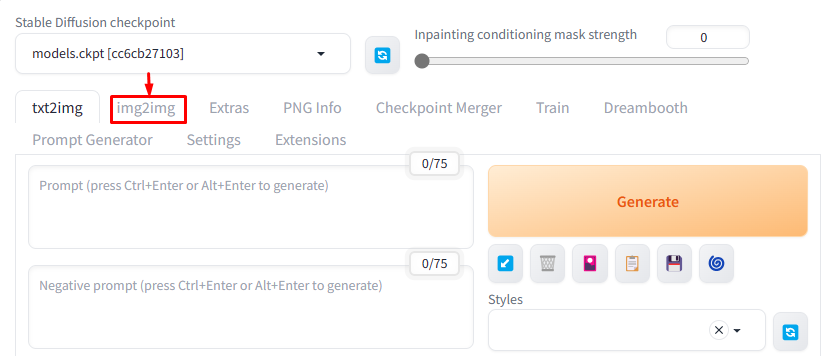
First, select the “img2img” option in the menu:
Then, click on the below-highlighted option to upload an image:
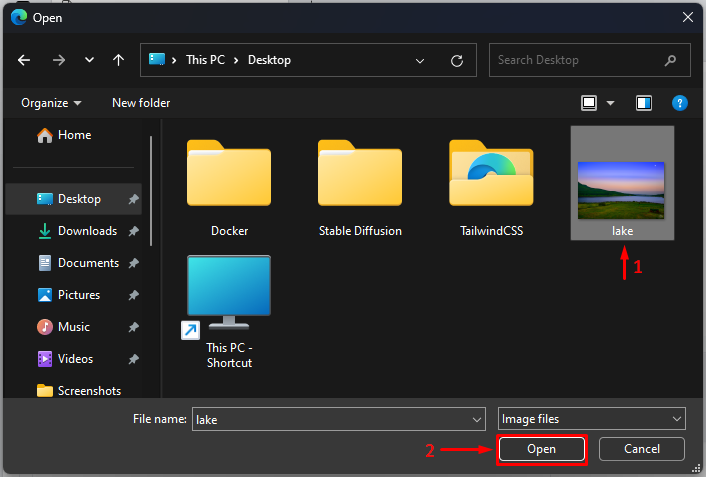
After that, choose the desired image that needs to be uploaded and click on the “Open” option:
Upon doing so, the desired image will be uploaded:
How to Use Uploaded Image in Stable Diffusion?
The uploaded image in Stable Diffusion can be used for various purposes, such as users can edit this image, adding new objects to the image, using this image as a base image to generate other images, and many more.
Check out the following instructions for a better understanding:
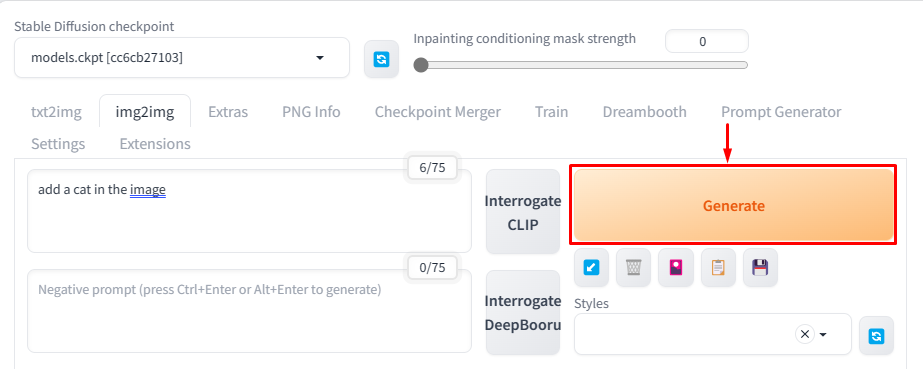
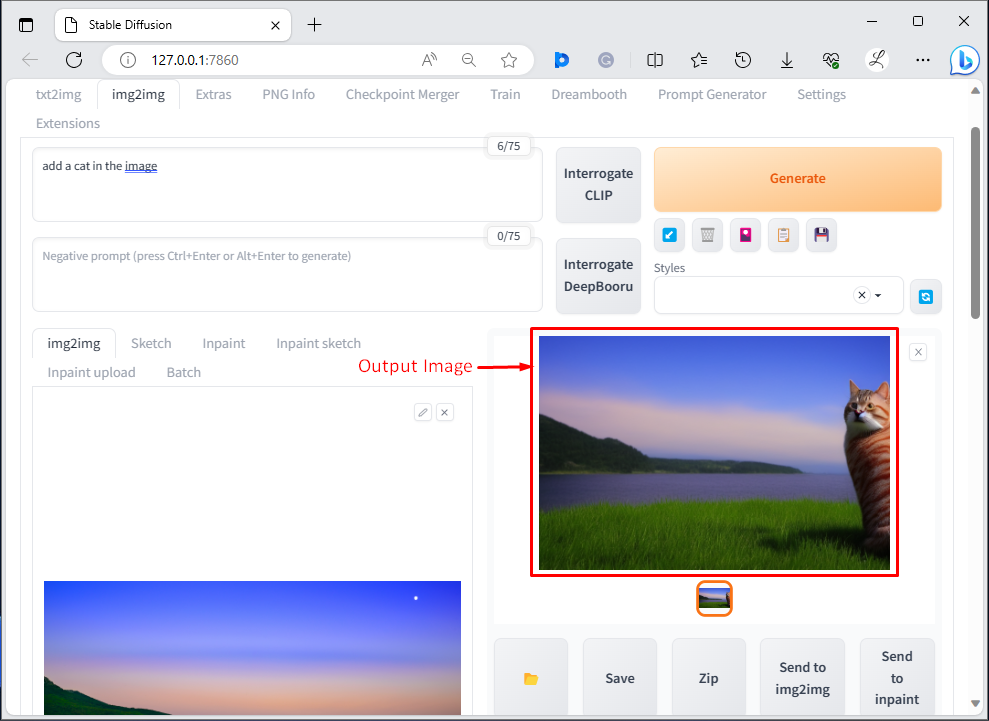
After uploading the image on Stable Diffusion, provide the desired prompt. For instance, we have provided the following prompt because we want to generate a new image from the uploaded image and add a cat to it:
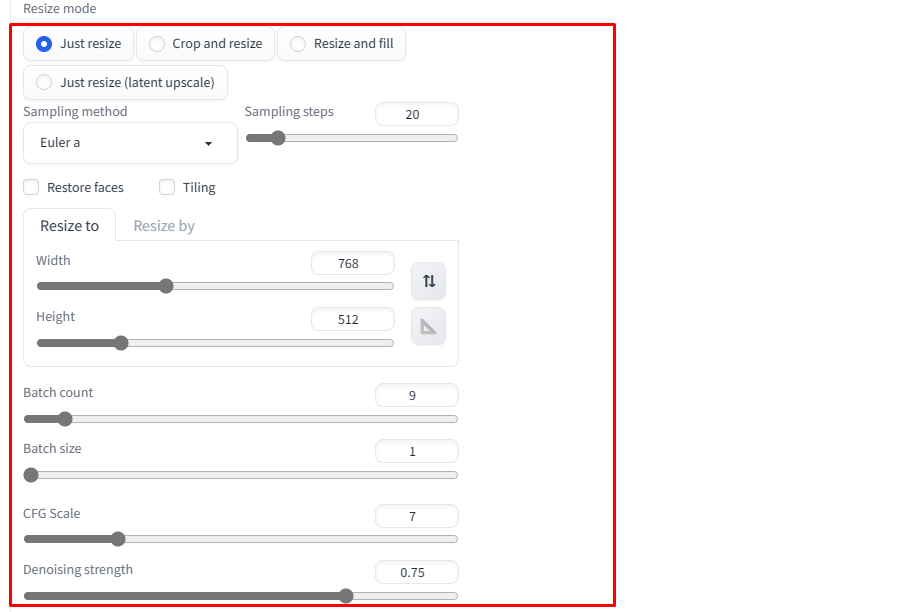
Then, configure the desired settings such as image width, height, and batch size according to your needs:
Next, hit the “Generate” button:
Finally, the new image will be generated based on the uploaded image:
Output
We have efficiently explained the method of uploading and using an image in Stable Diffusion.
Conclusion
To upload an image to Stable Diffusion, first, select the “img2img” option in the menu. Then, select the “Drop Image Here -or- Click to Upload” option. Next, choose the desired image that needs to be uploaded and hit the “Open” button. After that, the user can use that image as a base image and can make changes to it. This article has illustrated the method to upload and use an image in Stable Diffusion.

