This article will provide the basics of Docker volume.
What is Docker Volume?
Docker volume is referred to as an external file system for containers. The data created by the Docker containers are preserved using Docker volume. It is also referred to as a container backup system as it is independent of the container’s life cycle and managed by the host. Moreover, users can mount the volume to the container when the container is created and started.
How to Mount Volume in Docker?
Different methods of mounting the volume with containers are available in Docker. To help with this, we have listed a few ways to mount/bind volume with Docker containers:
- Method 1: Mount Volume While Creating and Starting the Container
- Method 2: Create and Mount Volume
- Method 3: Mount Volume in Dockerfile
- Method 4: Mount Volume in Docker Compose
Method 1: Mount Volume While Creating and Starting the Container
To mount the volume while creating and starting the containers, you can utilize the “–mount” or “-v” option along with “the docker run” command. For this purpose, follow the following instructions.
Step 1: Create Simple HTML File
First, create a simple HTML file “index.html”, in the directory you want to mount with the Docker container, and paste the below snippet into the file:
<head>
<style>
body{
background-color: black;
}
h1{
color:aquamarine;
font-style: italic;
}
</style>
</head>
<body>
<h1> Hello! Welcome to Linuxhint Tutorial</h1>
</body>
</html>
Step 2: Mount Volume While Creating and Starting Container
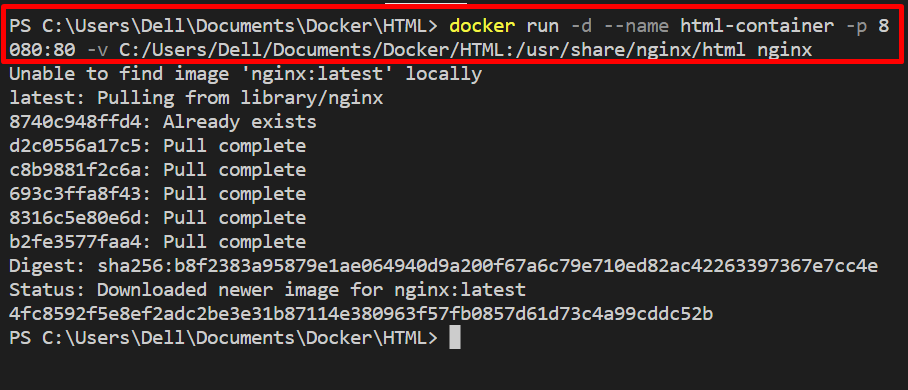
Next, create and run the Docker container with the help of the provided command:
In the above command:
- “-d” option is utilized to execute the container in detached mode/background.
- “–name” defines the name of the container.
- “-p” specifies the exposing port for the container.
- “-v” is utilized to mount the volume. Here, we have mounted the local directory “C:/Users/Dell/Documents/Docker/HTML” as the source with the “/usr/share/nginx/html” container path.
- “nginx” is an official Docker image pulled from the registry:
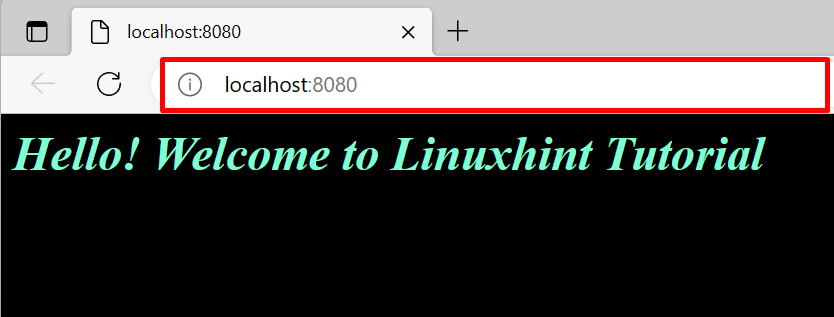
After starting the container, navigate to the exposing port of the local host. For instance, we have navigated to the “localhost:8080”.
It can be seen that we have successfully executed the “index.html” file that is placed on the mounted path:

Method 2: Create and Mount Volume
In order to create a Docker volume and then mount it with the Docker container, utilize the “docker volume create” command. For the proper guideline, the below-given instructions are effective enough.
Step 1: Create Docker Volume
Create a new Docker volume or external file system to mount it with the container using the provided command. Here, “–name” is used to name the volume:

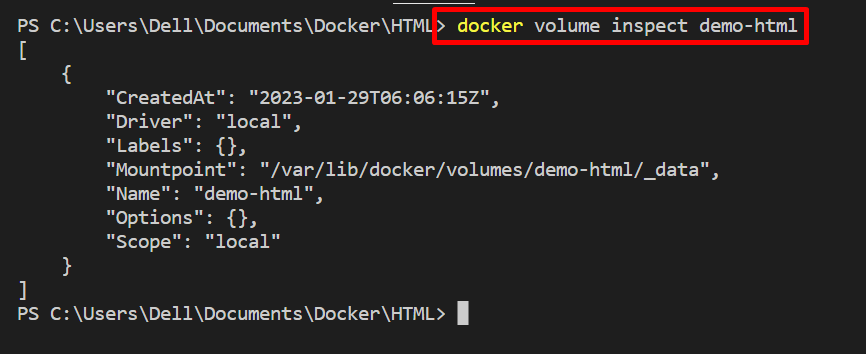
Step 2: Inspect Volume
Next, inspect the volume to view its mounting point and other essential details. For this purpose, utilize the “docker volume inspect” command:
Step 3: Mount the Volume to Container
Next, mount the volume while creating and running the container through the provided command. In the given command, “-v” specify the “<volume>:<target path>” to mount the newly created volume:

Alternatively, you can use the “–mount” option along with “source” and “target” variables. The following syntax will be used to mount a volume with the “–mount” option:
Here, the “source” is specifying the volume name and the “target” is the destination path where the volume will be mounted with the container:

Method 3: Mount Volume in Dockerfile
Another way to mount the Docker volume is through the “Dockerfile”. The Dockerfile is a key component of Docker and is an instruction file. The users can mount the volume using the “VOLUME” command in Dockerfile.
Take a look at the given procedure for the proper guideline.
Step 1: Make Dockerfile
Make a Dockerfile and paste the below-mentioned instructions into the file:
RUN echo "<h1>Welcome to Linuxhint application</h1>" > /usr/share/nginx/html/new.html
VOLUME /usr/share/nginx/html
Here:
- “FROM” is used to allocate the base image.
- “RUN” command creates the new.html file in the “/usr/share/nginx/html/” directory.
- “VOLUME” mounts the “/usr/share/nginx/html” directory to the container:

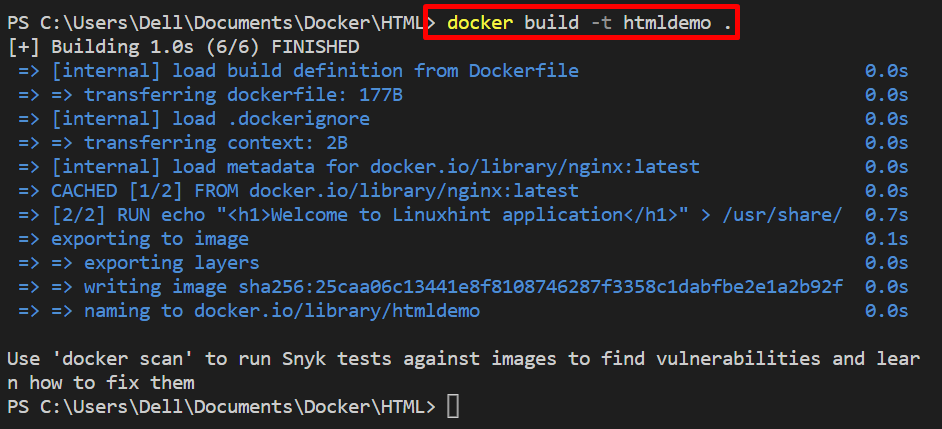
Step 2: Make Image
Next, generate the new Docker image using the mentioned command. In the given command, the “-t” option defines the image tag or name:
Method 4: Mount Volume in Docker Compose
The Docker compose is another essential component of the Docker environment. It is mostly utilized to manage and run multi-container applications. However, Docker volume can also bind with the compose container through the “volumes” key.
To mount a volume in a compose file, check out the given steps.
Step 1: Create a “docker-compose.yml” File
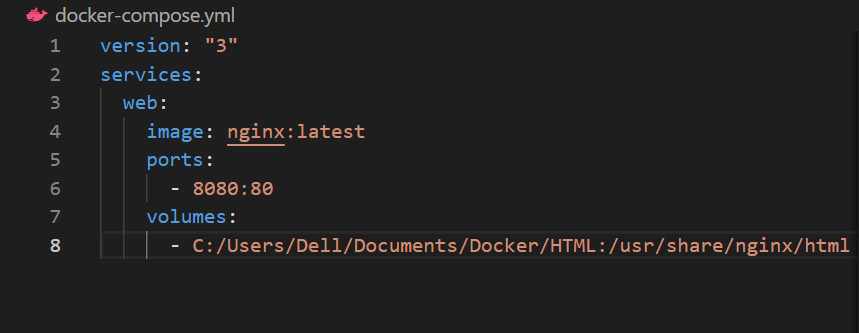
Paste the below-coded instructions into the “docker-compose.yml” file:
services:
web:
image: nginx:latest
ports:
- 8080:80
volumes:
- C:/Users/Dell/Documents/Docker/HTML:/usr/share/nginx/html
The description of the “docker-compose.yml” file is as follows:
- We have configured the “web” service under the “services” key.
- The “web” service uses the “nginx:latest” image as the base image.
- The “web” service expose on the “8080” port.
- “volumes” key is used to mount the volume with the “web” service. This key passes “source volume path: target destination”:
Step 2: Create and Start Container
Next, containerize the “web” service and start the container with the help of the “docker-compose up” command:

Next, visit the specified port of localhost for the “web” service and verify if the service is started and the specified volume is mounted or not:
From the above output, you can see that we have successfully mounted the volume in the compose file.
Conclusion
Docker volume is referred to as an external file system for containers. The data produced by the Docker containers are preserved and managed using Docker volume. The volume can be mounted with a container in different ways, such as mounting volume using the “–mount” or “-v” option with the “docker run” command, or use the “VOLUME” command in Dockerfile, or configuring the “volumes” key in “docker-compose.yml” file. This blog has demonstrated a basic understanding of Docker volume.