How to Turn on Your Laptop’s Camera?
You can turn on the camera on your laptop by simply following two steps:
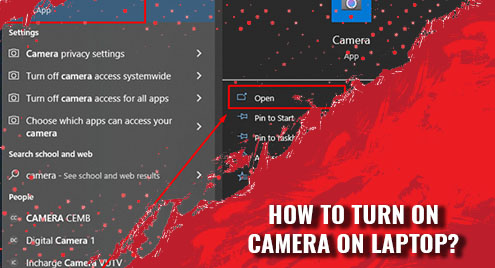
Step 1: Search for the Camera app in the search bar of your laptop:
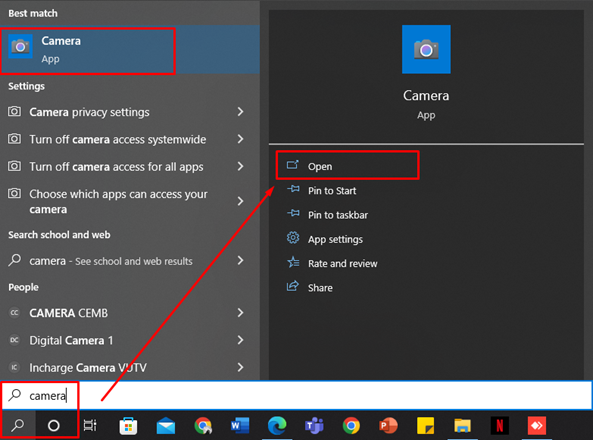
Step 2: Open the camera app; it will turn on automatically:
Before capturing the photo on your laptop, you can adjust the built-in settings of the camera, like the resolution, shooting mode, by clicking on the settings button on the left corner of the screen:
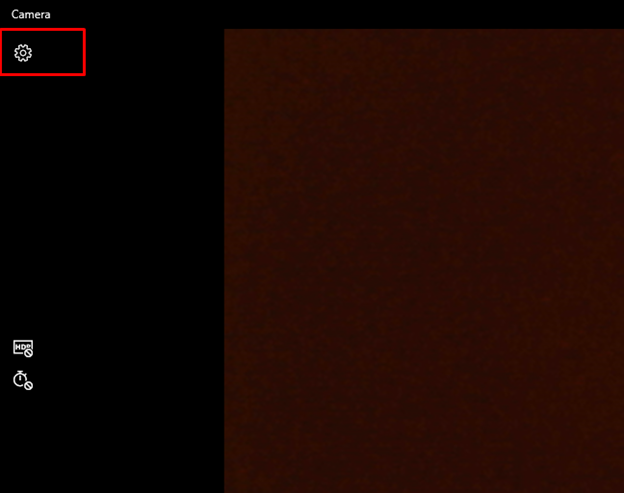
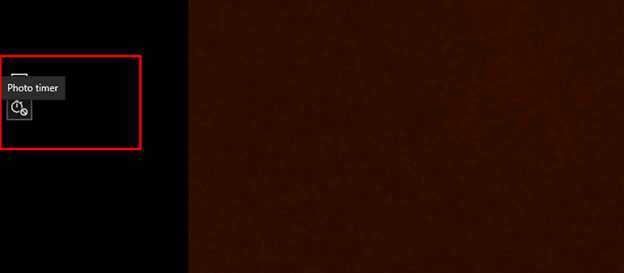
You can adjust the time by clicking on the timer icon from the left corner of the screen:
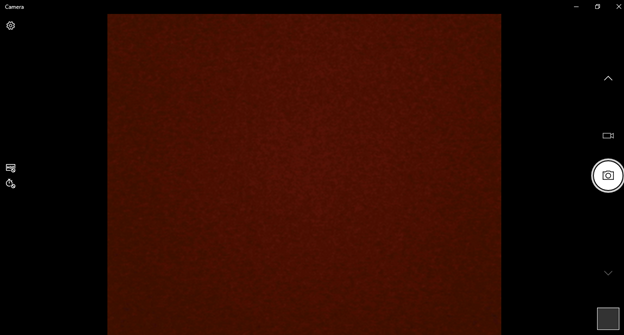
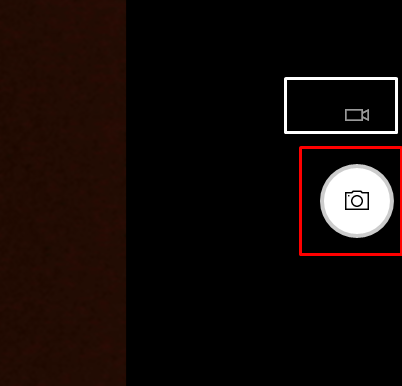
Click on the Red highlighted camera icon to capture the picture or the White highlighted icon to record the video:
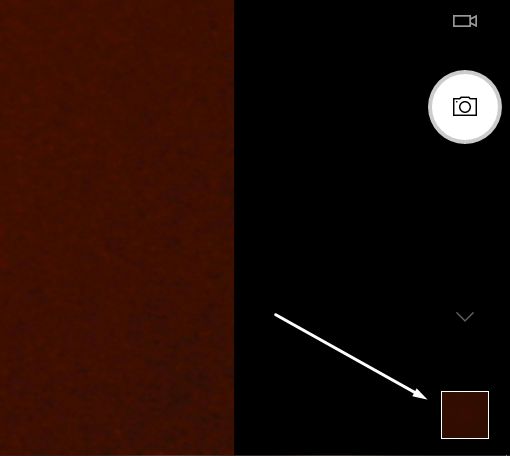
Click on the Square present on the bottom right corner to access your Captured pictures:
How to Use Laptop’s Camera on other Apps?
We can allow the applications from the laptop’s settings to use the laptop’s camera. Follow these steps to use the camera on other apps:
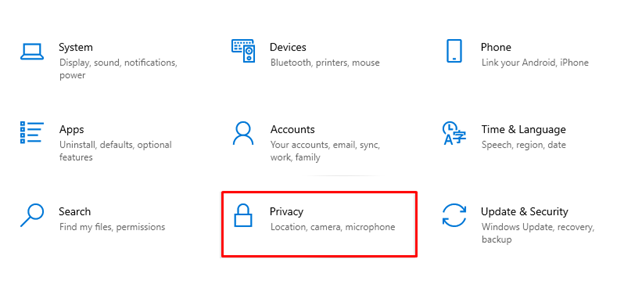
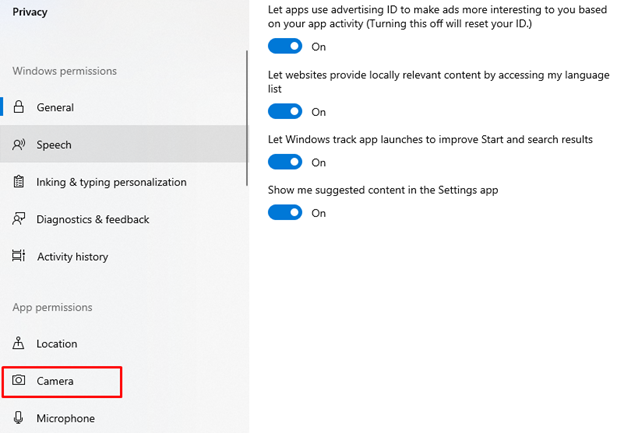
Step 1: Press Windows+I key to Open Settings and Click on Privacy:
Step 2: Select the Camera option from the left panel under App permission:
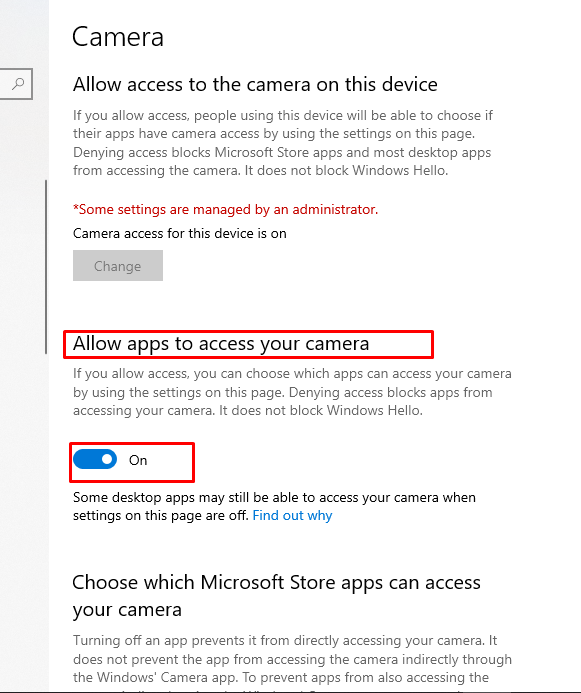
Step 3: Turn the toggle on and off to Allow the Apps to Access your camera:
Enable or Disable the Camera Using Device Manager
You can also enable or disable the camera for use from the device manager of your laptop, repeat following steps to enable or disable the camera:
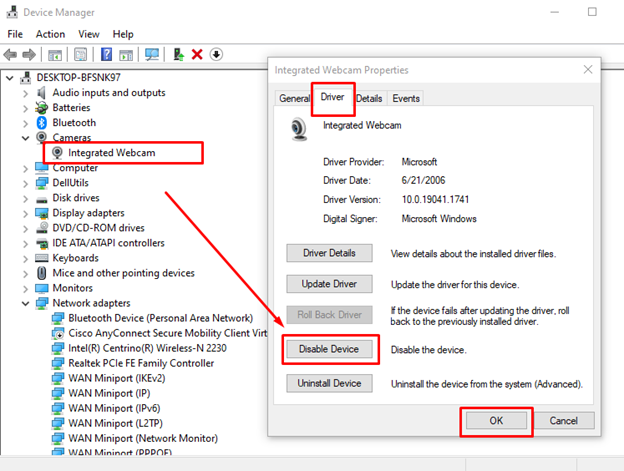
Step 1: Right-click on the Start icon to open the Device Manager:

Step 2: Click on the arrow of Cameras:

Step 3: Right-click on the integrated Webcam to Enable or disable it:
Use External Webcam With Your Laptop
Many laptops are there that do not have a quality camera in them by default; in that case, you can use an external webcam for better quality. Follow these steps to use the external webcam on your laptop:
Step 1: Connect the webcam to your laptop via a USB port
Step 2: Right-Click on the Start Icon to open the Device Manager
Step 3: Click on the arrow of cameras
Step 4: Enable the external webcam by right-clicking on it
Camera Not Working Properly? How to Fix it?
In some cases, the webcam of laptop does not work properly. Well, this can be because of several reasons:
- Check whether the Camera Driver is enabled or not; if enabled, update your integrated webcam driver.
- Check for windows updates from the settings of your laptop
- Restart your laptop
- In some laptops, there is a physical switch present next to the webcam; check if it is On or not.
Conclusion
Almost every laptop has an integrated webcam installed; you can use them to capture pictures and attend meetings. But you can only do that if you know the correct process of accessing your laptop’s webcam. So, in this guide, we have shared some of the most common ways you can use to access your laptop webcam easily.