Common Problems with Webcam
Following are the problems that are faced by most of the users:
- The laptop’s camera is showing a black screen or a blank webcam
- No audio when the webcam is turned on
- The laptop cannot detect the webcam
- The laptop camera is glitchy
Why is the Webcam not Functioning Properly
There can be numerous reasons why your Webcam is not working:
- Incompatible or outdated drivers
- Webcam is disabled
- Camera permissions
- Hardware issues
- Antivirus permissions
How do you Troubleshoot Webcam Issues
Windows laptops allow you to troubleshoot the issues you are facing while using it; if your webcam is not functioning properly, then, in that case, you can try these fixes:
- Reset the camera settings
- Re-enable the device from the device manager
- Update the webcam driver
- Re-install the driver
- Roll back driver
- Update Windows
- Check Camera privacy settings
- Check your antivirus settings
1: Reset the Camera Settings
If the webcam is not working properly, then try reset the settings by these steps:
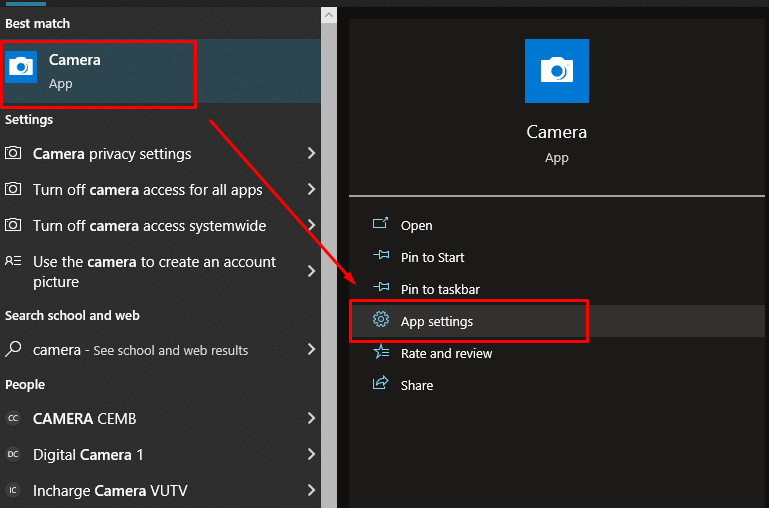
Step 1: Search for the Camera in the search bar and select App settings:
Step 2: Scroll down to Reset option and click on the Reset button:

2: Re-enable the Device from Device Manager
In most cases, when the webcam is not working properly, the issue is related to the driver of the device, as in most cases the issue it rarely a hardware issue; perform the following steps to re-enable the webcam driver:
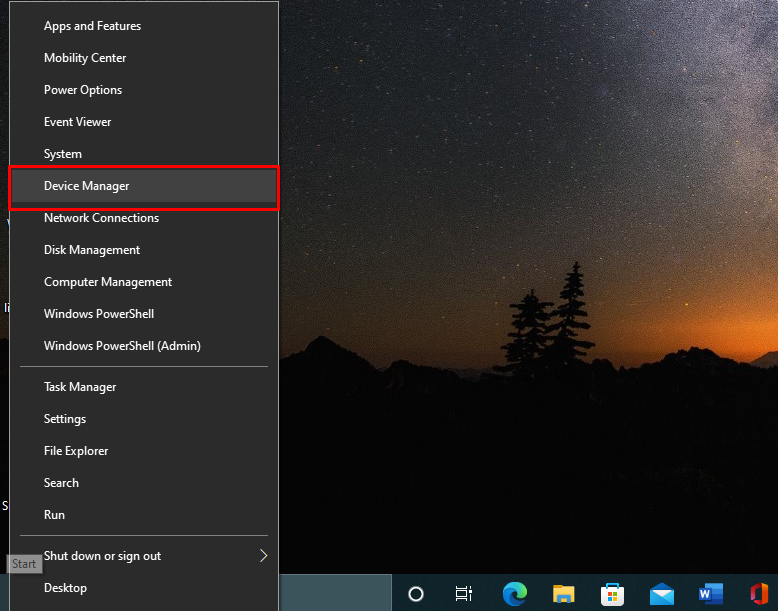
Step 1: Press Windows + X and click on the Device Manager from the pop-up menu:

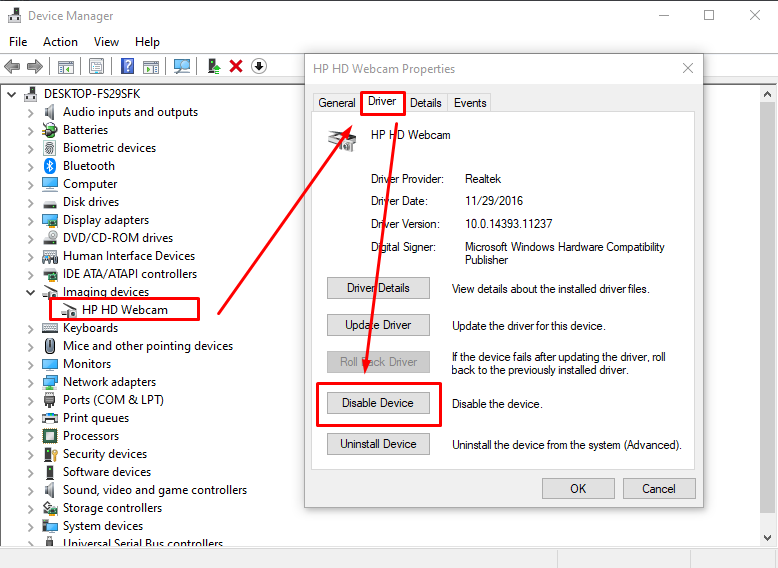
Step 2: Click on Imaging devices or Camera as the option varies from system to system then go to the properties of Webcam, and after that click on Disable Device to disable it:
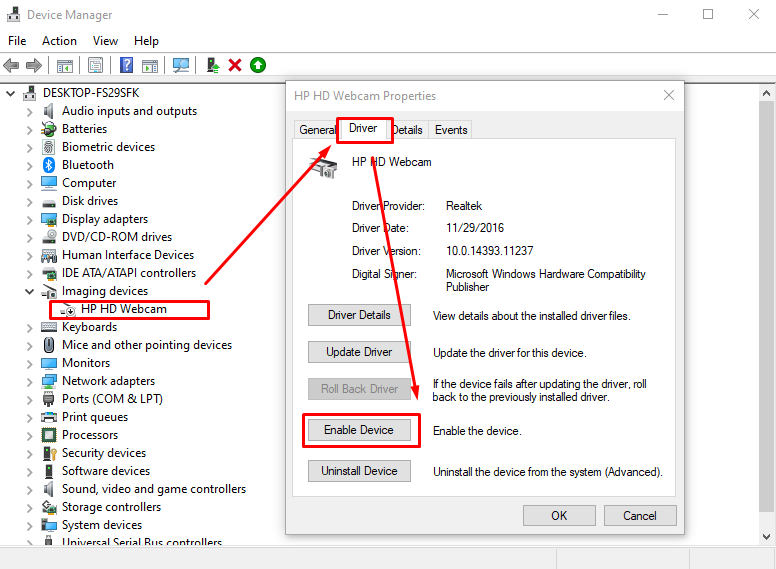
Step 3: Now again go to the properties of the webcam and click on Enable Driver to re-enable it:
3: Update Webcam Driver
If the webcam driver is outdated it can also cause issues with the webcam:
Step 1: Right-click on the Start icon and from there click on the Device Manager:

Step 2: Next, click on the camera or imaging devices, right-click on the Webcam and go to properties from where you can select the Update driver:

4: Reinstall the Driver
If you have updated your webcam’s driver, but still, it is not working properly, then the other way to fix it to reinstall the driver:
Step 1: Launch the Device Manager on your device by pressing Windows + X key from the keyboard:
Step 2: Next, click on the camera or imaging devices, then right-click on the Webcam, and select the Properties, next choose the driver, and click on the Uninstall device option:

Install the driver again from the official website, or restart your device, and the webcam driver will automatically be installed.
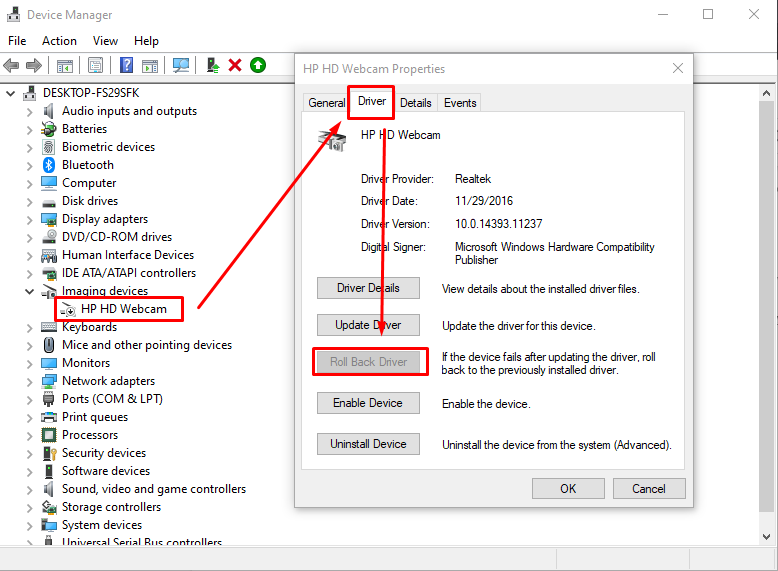
5: Roll Back the Driver
If you have updated your driver but still the issue is same or worse than in that case, you can simply roll back the driver to the previous one:
Step 1: Press Windows +X and from there click on the Device Manager:

Step 2: Double-click on the camera or imaging devices, right-click on the Webcam and go to properties from where you can select the Rollback Driver option:
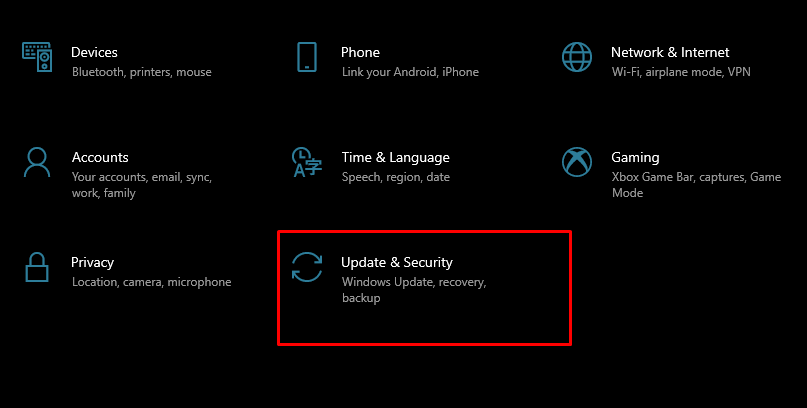
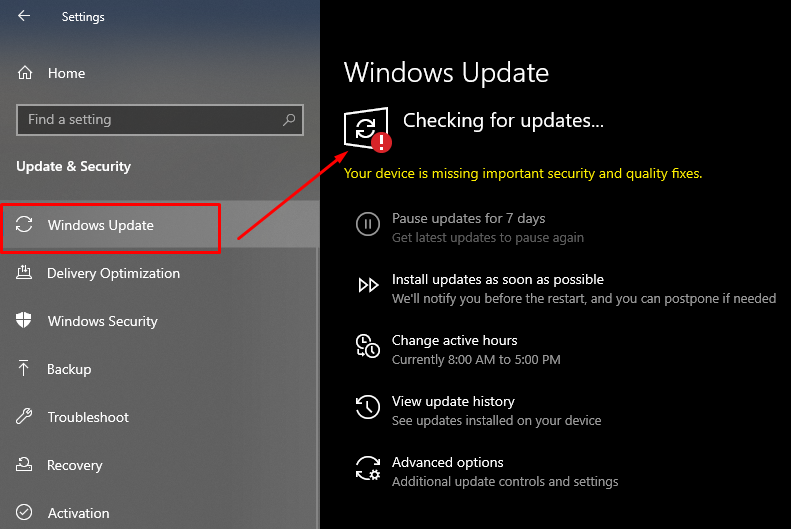
6: Update Windows
The older version of Windows might be causing the freezing of the webcam, the update removes the glitches and viruses from the device; check for the latest update of the Windows:
Step 1: Press Windows + I to open Settings of your laptop and select Update & Security
Step 2: Click on the Windows Update and check for the latest update options:
7: Check Camera Privacy Settings
When you launch the camera on your laptop, and it shows a black screen, then in that case there might be an issue with the camera privacy settings. On a Windows laptop you can change the settings of the webcam by denying the permissions to use the camera by different applications so check the change the settings following the steps:
Step 1: Open Settings, type Camera, and select the Camera privacy settings:

Step 2: Turn the toggle on for Allow the Apps to access camera:

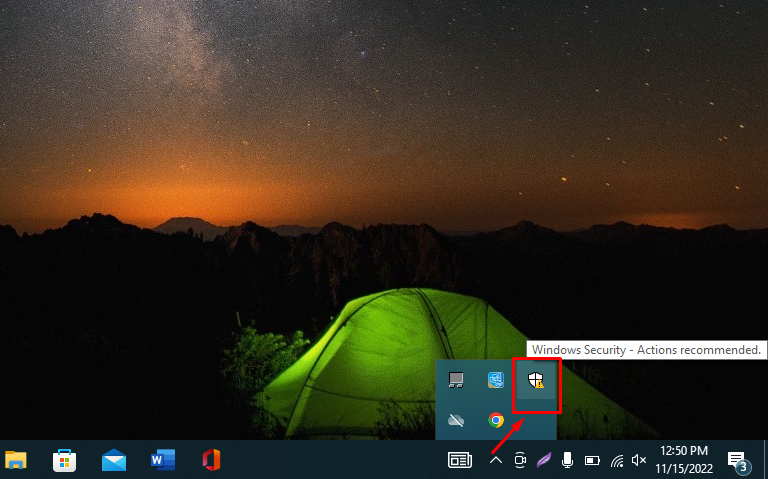
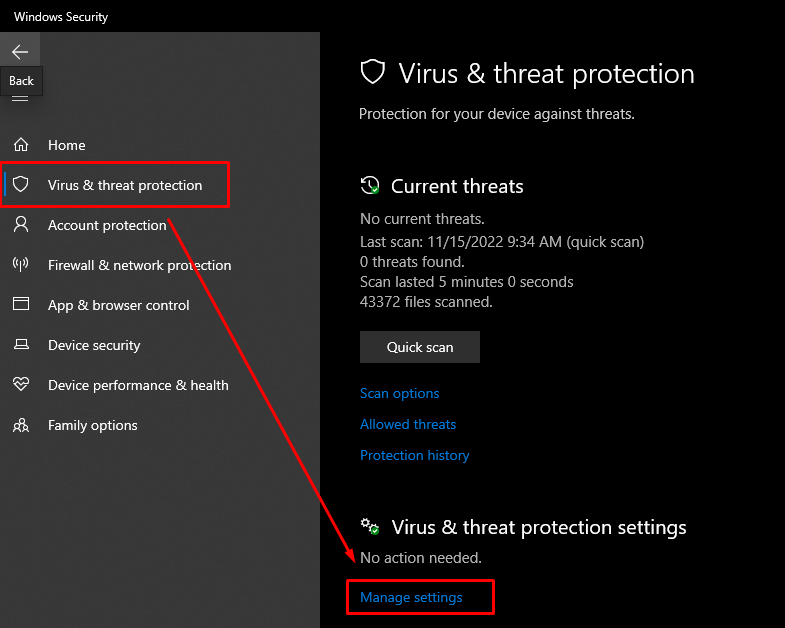
8: Check Your Antivirus Settings
The default antivirus of the laptop can interfere with the webcam settings, disable it and launch the camera again by performing the following steps:
Step 1: Click on the Windows taskbar tray and form there click on the Windows defender shield icon:
Step 2: Next, click on the Virus & threat protection and choose Manage settings:
Step 3: Turn the toggle off for Real-time protection and re-access the camera:

Conclusion
Default laptop webcams can face some issues with time, this can be because of corrupted drivers, privacy issues or there can be an anti-virus that is disturbing the proper working of the webcam. You can simply resolve these issues; no need to replace the webcam or attach an external webcam. Follow the fixes mentioned above to resolve the issues.