One of the most important aspects of project development is managing project data, connecting it to apps, and many other things. For this reason, developers typically utilize DBMS to manage and store data, and PostgreSQL is one of them. PostgreSQL is a well-known open-source RDBMS that manages data through SQL queries. It is also included in the Docker platform for data processing.
This blog will demonstrate three easy steps to install Docker PostgreSQL.
Three Easy Steps to Install Docker PostgreSQL
To install PostgreSQL in Docker, we have offered three simple steps that will be enough:
- Step 1: Download Docker and Log in to Docker Hub Registry
- Step 2: Pull PostgreSQL Image and Install Docker PostgreSQL
- Step 3: Access PostgreSQL on Server
Step 1: Download Docker and Log in to Docker Hub Registry
Docker is a well-established platform that is widely used to develop and deploy applications in containers. To install Docker, navigate to its official website. After that, install the WSL package updater by hitting the attached link:
Next, open the Docker official registry and “Sign In” to the Docker Hub. In order to register a new account, click on the “Register” button or utilize highlighted “Get Started Today for Free” menu:
Step 2: Pull PostgreSQL Image and Install Docker PostgreSQL
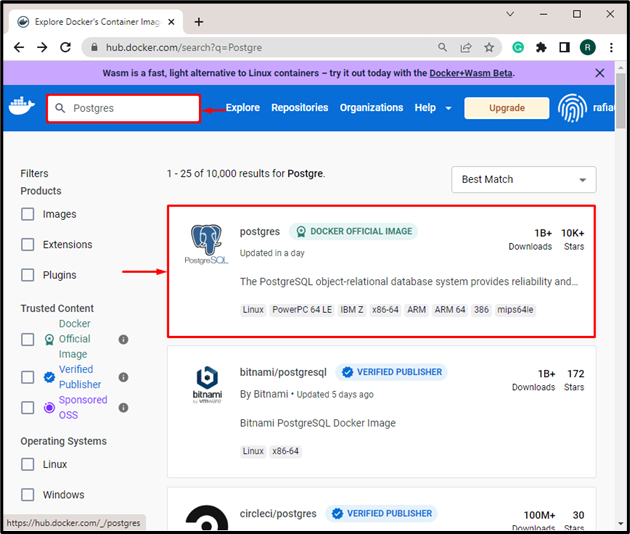
In the next step, search for “Postgres” in the Docker Hub registry. Then, open the “Postgres” Docker official image as shown below:
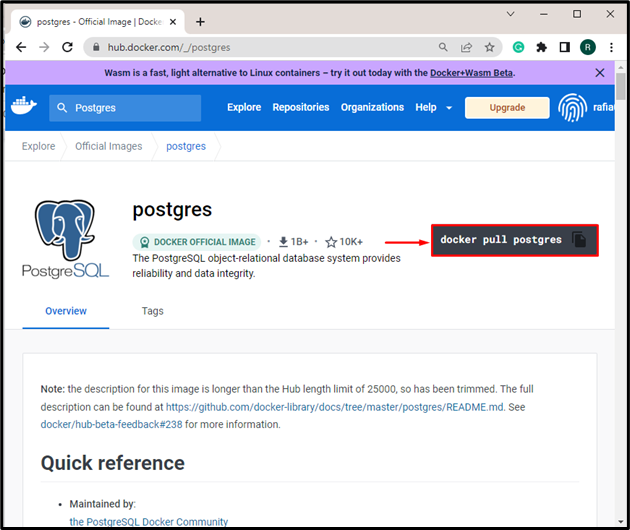
Copy the highlighted command that will be used to pull the Postgres image:
From the Windows Start menu, open the Command Prompt:
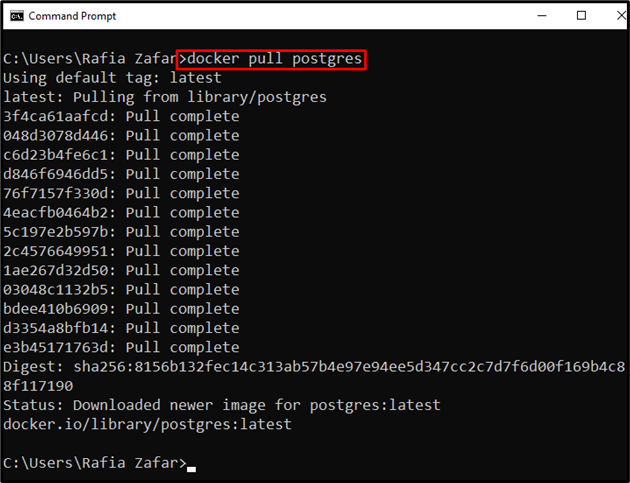
Paste the copied command to pull the Postgres image:
From the below output, you can see that we have successfully pulled the PostgreSQL image:
Next, verify whether the postgres image is downloaded or not:
It can be observed that we have successfully pulled the postgres image:
Now, create the Docker container by executing the postgres image:
In the above command, we have specified the postgres password, and the “-d” option is used to execute the container in detached mode:
List down all containers and check if the “postgres” container is running:
Start Postgres Container
Users can start the “postgres” container with the help of the “docker start” command:
Stop Postgres Container
In order to stop postgres container, the “docker stop” command will be used:
Customize PostgreSQL
Docker users can also customize the Docker container by including the following information:
- Container name using “–name” tag.
- PostgreSQL username by utilizing “POSTGRES_USER”.
- PostgreSQL password through “POSTGRES_PASSWORD”.
- The “-p” option to specify the port number.
- The path where the postgres data will be stored:
Step 3: Access PostgreSQL on Server
To access the PostgreSQL or to run the postgres image from Docker compose, create a YAML file named “stack.yml” and paste the following instructions:
services:
db:
image: postgres
restart: always
environment:
POSTGRES_PASSWORD: root
adminer:
image: adminer
restart: always
ports:
- 8080:8080
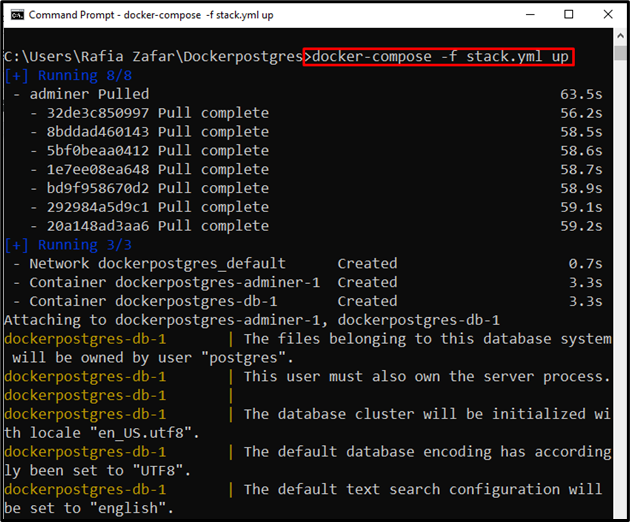
Next, to start the container executes the “docker-compose” command and access the PostgreSQL from a local host on the specified port:
Open your favorite browser, navigate to “http:\\localhost:8080” and start using postgresQL:
We have offered the three easy steps to install Docker PostgresQL.
Conclusion
To install Docker PostgreSQL, first, install Docker on your system and log in to the Docker official registry. Next, search for Postgres in Docker Hub, open the official PostgreSQL image, and copy the command to pull it. After that, open the system terminal and execute the copied command. Run the image to create and run postgresql Docker containers. In order to access PostgreSQL using docker-compose, first create a “stack.yml” file and execute it to access PostgreSQL from localhost. This blog has demonstrated the three easy steps to install Docker PostgreSQL.


