This write-up will demonstrate how to test an API using Postman. Moreover, the procedure of using POST, GET and DELETE HTTP requests for creating, updating, retrieving, and deleting the information from the MongoDB database will also be provided. So, let’s start!
How to test an API using Postman
We have already created a simple Employee Management System application with the React.js front end, Node.js server, and established a connection between the server and the MongoDB database. After doing so, we added two models: “employee.model” and “designation.model” with their related schema. These models are then utilized for defining “routes” containing the endpoints for the HTTP requests.
Now, we will test the API using Postman and check if our added endpoints are working. Want to do so? If yes, then firstly, install it on your system using its official website:
After installing Postman, move towards the procedure of testing the requests working.
How to test a POST request using Postman
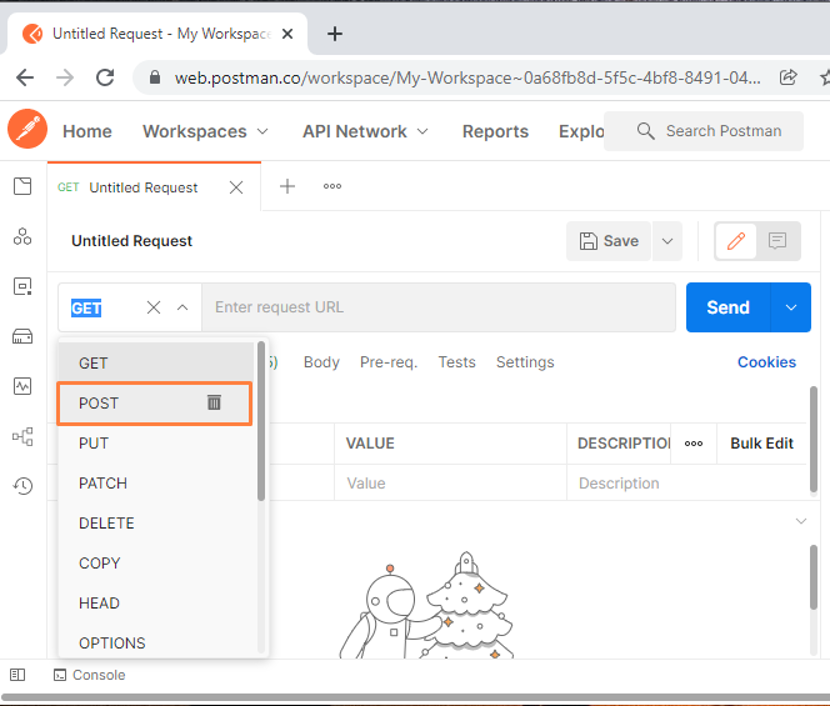
Postman supports various endpoint interaction methods, and “POST” is one of them. It is utilized to create and update a resource or send data to a server. Also, POST requests do not have any restrictions related to the data length.
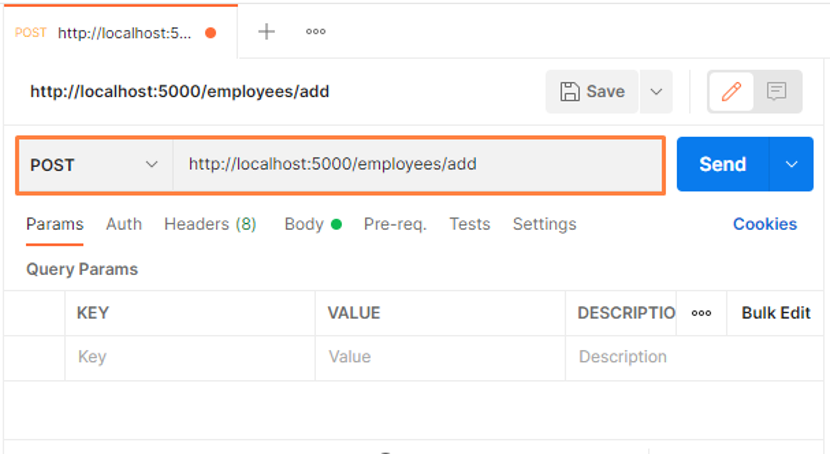
To test a POST request using Postman, firstly, select “POST” from the HTTP request drop-down menu:
We will add the below-given link in the request URL field in the next step. The specified link will access the “employees” route file, which handles the “POST” request:
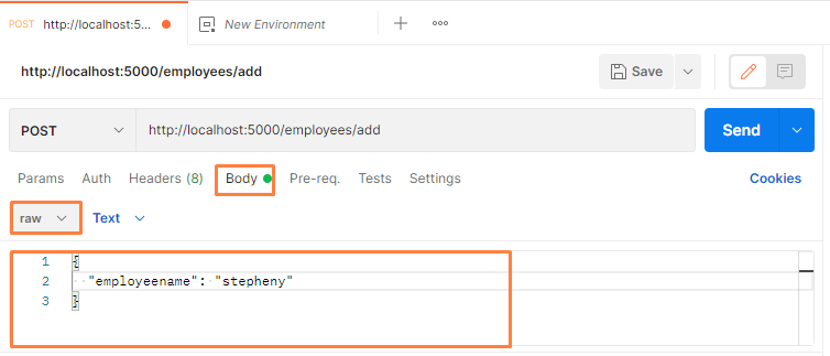
Now, switch to the “Body” tab, select “raw”, and add the body of your POST requests. Here, we are adding a new employee, “Stepheny” to our database:
"employeename": "Stepheny"
}
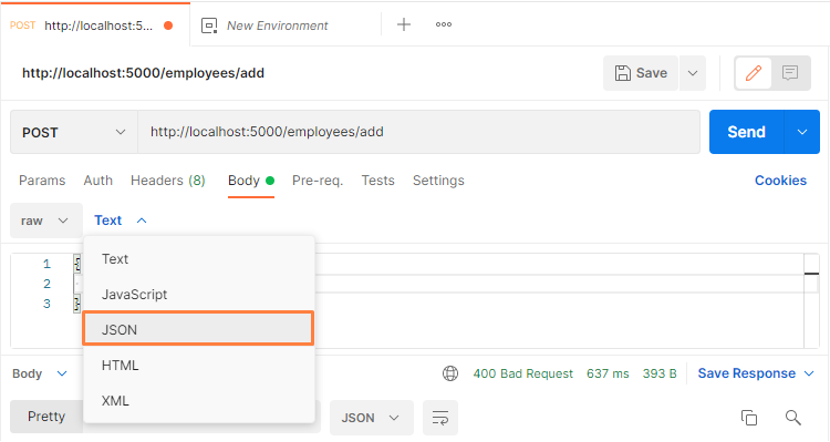
In the next step, choose “JSON” as the parameter of the request body:
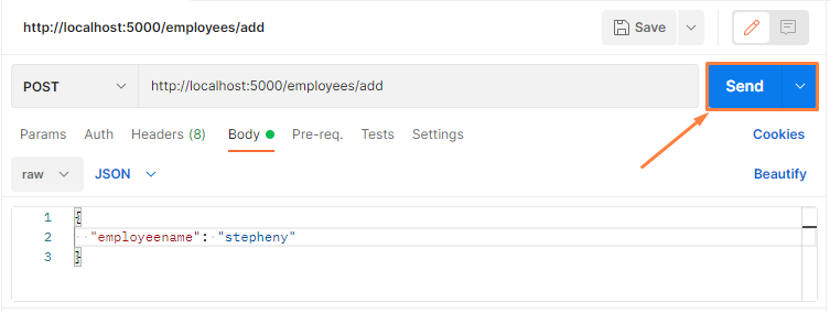
Then, click on the “Send” button to send the added POST request to the Node.js server:
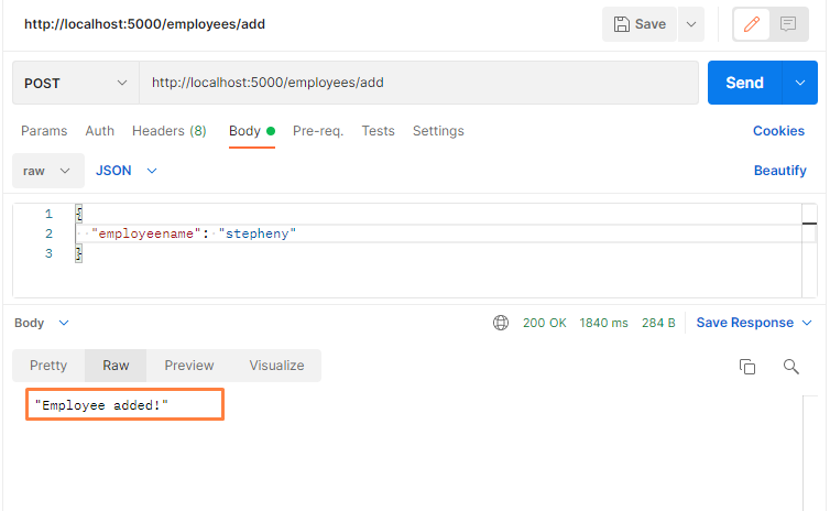
After performing the specified operation, you will see “Employee added” text as the response to the POST request:
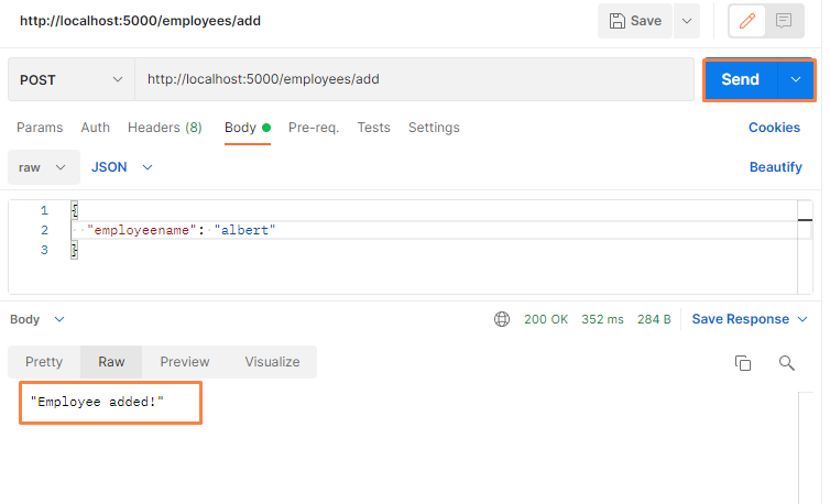
The previous POST request added “Stepheny” to the “employee” database. By following the same method, we will add another employee named “albert”:
"employeename": "albert"
}
The below-given output indicates that we have successfully added “albert” as a new employee:
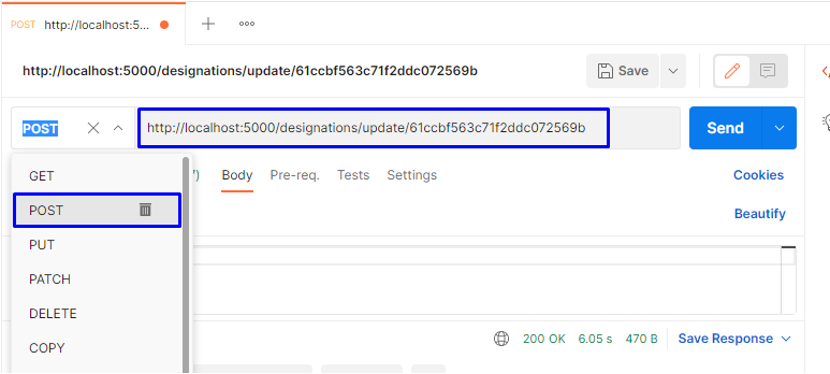
You can also utilize the “POST” request for updating the information related to any specific ID. For instance, to update the fields values of the designation ID “61ccbf563c71f2ddc072569b”, we will send a POST request having the following URL:
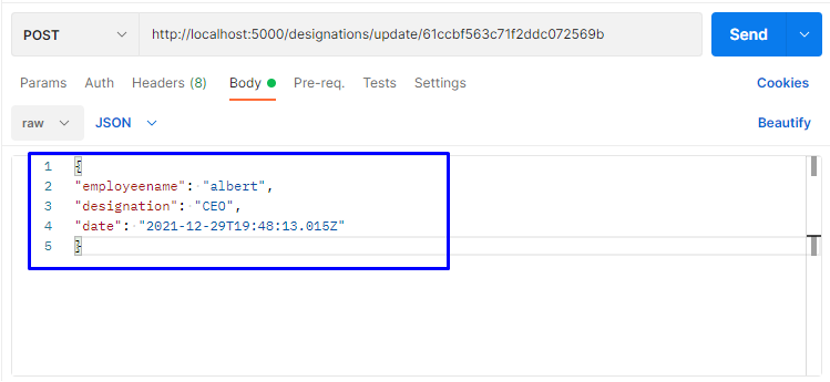
In the POST request body, we will add the updated values according to the “designation” model:
"employeename": "albert",
"designation": "CEO",
"date": "2021-12-29T19:48:13.015Z"
}
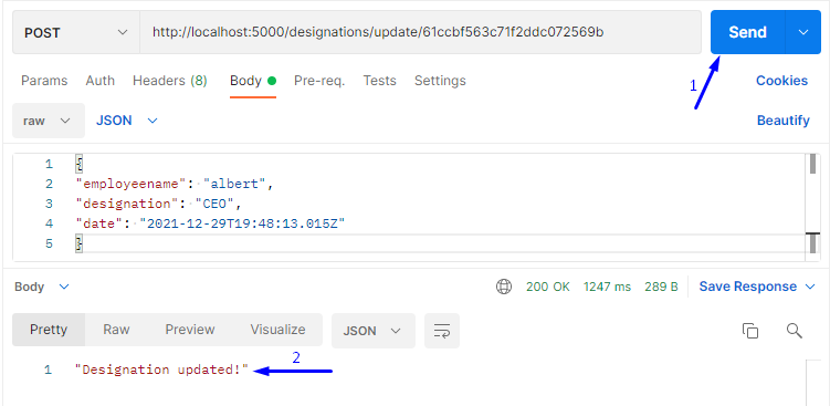
By clicking the “Send” button, you will see the “Designation updated!” text in the response section:
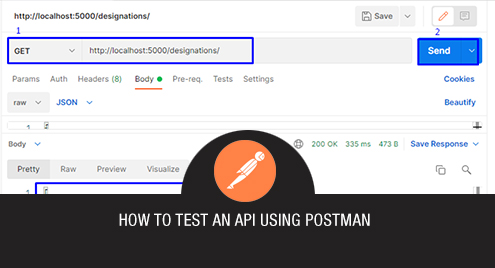
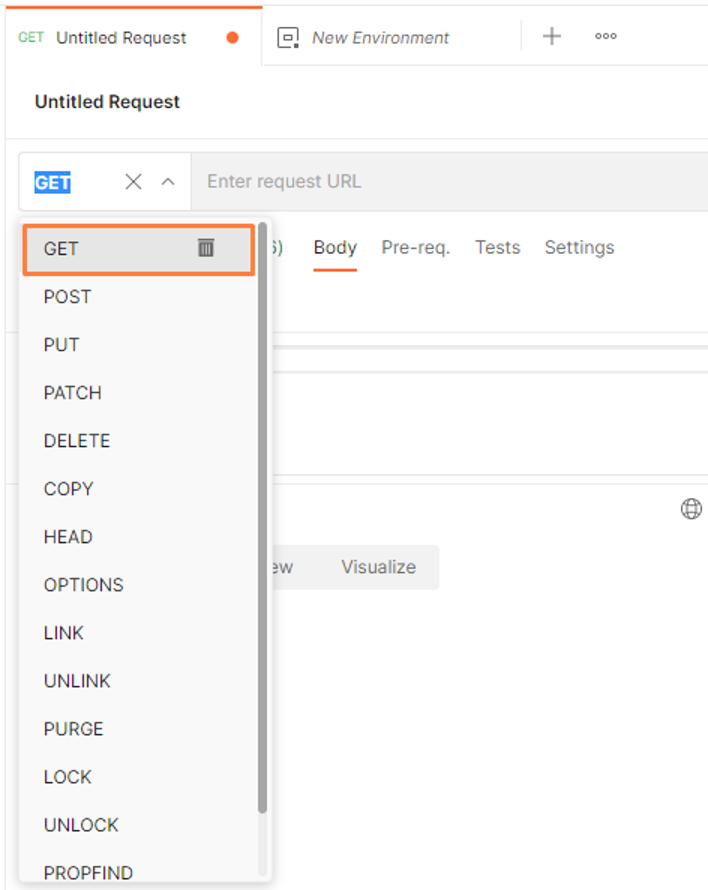
How to test a GET request using Postman
In Postman, a GET request retrieves the data from the specified URL. This type of HTTP request will not make any changes to the endpoint.
To test a GET request using Postman, select “GET” as the endpoint interaction method:
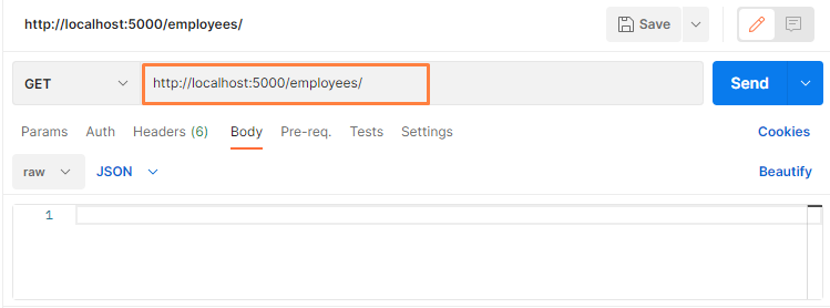
Next, we will paste the following URL in the input link field:
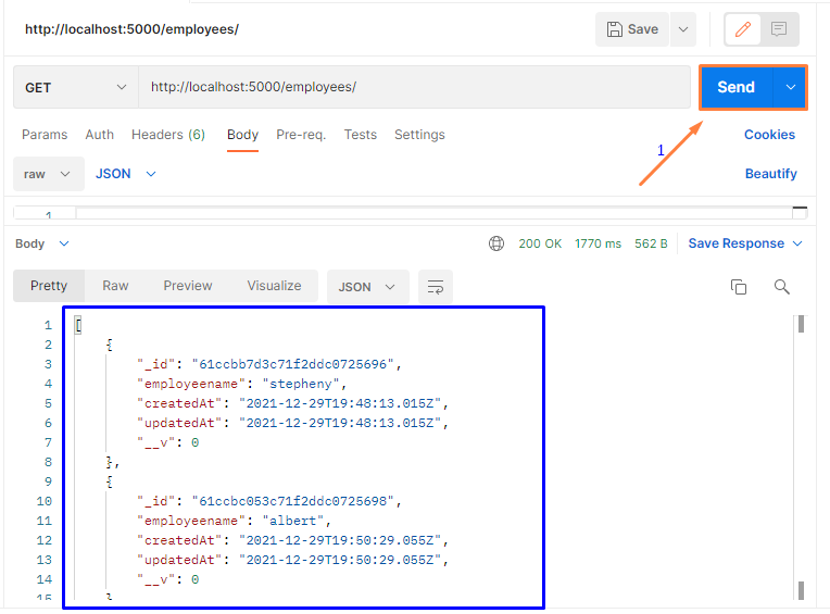
Then, click on the Send button to make the GET HTTP request. This GET request will obtain all of the data related to the “employee” collection of our MongoDB database and show you the added employees data with respect to the defined schema:
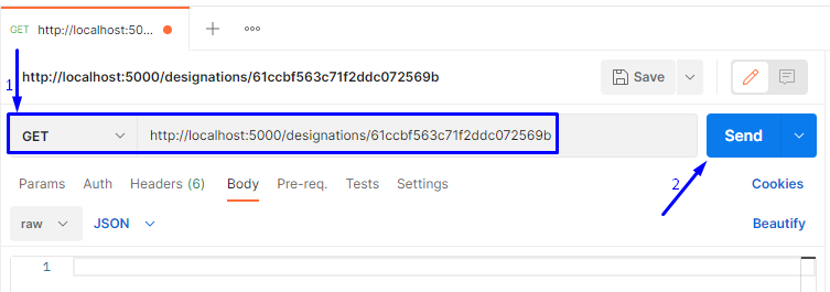
You can also use the “GET” request to obtain information related to a specific record based on its ID.
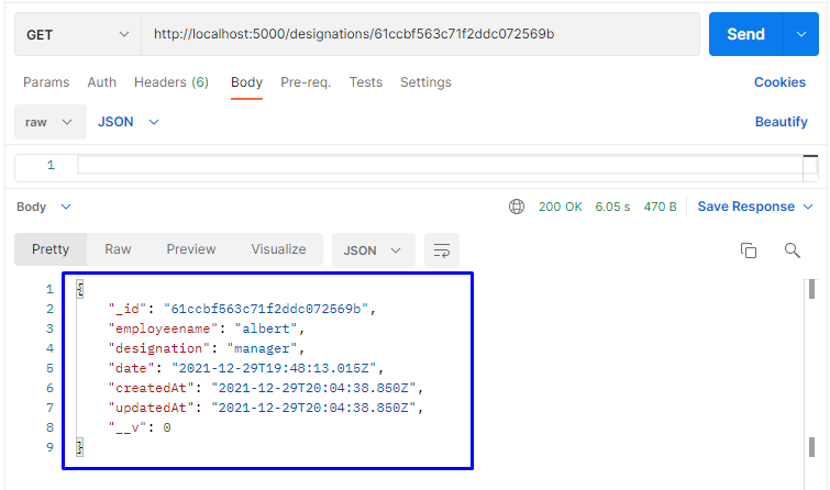
For instance, adding the below-given link and then sending the “GET” request will fetch the data of the designation ID “61ccbf563c71f2ddc072569b”:
As you can see, that response of the “GET” request shows its field values in the defined schema:
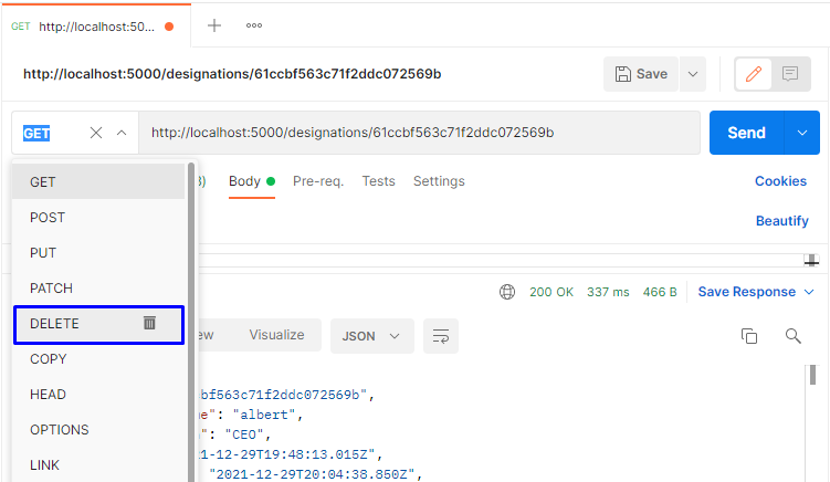
How to test a DELETE request using Postman
The HTTP DELETE request in Postman is used for deleting information from the database collection. For instance, at this time, we have two employee records in the “designations” collection of the database, and to delete any of them, we will utilize their ID.
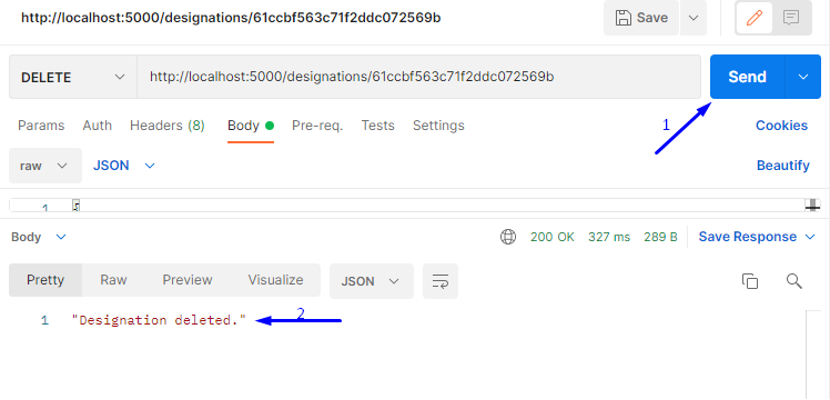
Now, to delete the “albert” information, we will use its ID, which is “61ccbf563c71f2ddc072569b,” and then make a “DELETE” request:
Click on the “Send” button, and you will notice that within a few seconds, the information deleted to the added “ID” will get deleted, and a “Designation deleted.” text will be shown as a response to the request we made:
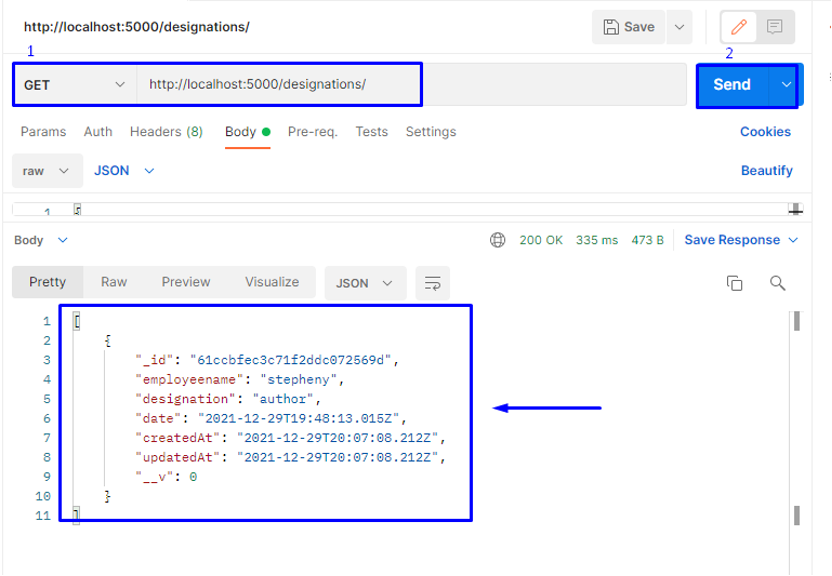
For the verification purpose, you can send a “GET” request for showing the information stored in the “designations” MongoDB collection:
From the below-given image, you can see that only information related to “Stepheny” is displayed as a response, which declares that the previous “DELETE” request worked:
Conclusion
Postman is software that is utilized for testing APIs. It is a type of HTTP client that uses a graphical user interface, through which you can send different types of requests and obtain their responses that validates the request result. This write-up demonstrated how to test API using Postman. Moreover, the procedure of using POST, GET and DELETE HTTP requests to create, update, retrieve, and delete the information from the MongoDB database is also provided.