This article will demonstrate the steps to run the Pi-Hole as a Docker container.
What are the Steps to Run Pi-Hole as a Docker Container?
To run Pi-Hole as a Docker container, try out the given-provided steps:
- Pull the Pi-Hole image using the “docker pull pihole/pihole:latest” command.
- Verify the downloaded image.
- Run the Pi-Hole image as a container via the “docker run -d –name pihole-cont -p 53:53/tcp -p 53:53/udp -p 67:67/udp -p 80:80 -p 443:443 -v “${DOCKER_CONFIGS}/pihole/:/etc/pihole/” -v “${DOCKER_CONFIGS}/dnsmasq.d/:/etc/dnsmasq.d/” -e ServerIP=<your-IP> –restart=unless-stopped –cap-add=NET_ADMIN –dns=127.0.0.1 –dns=1.1.1.1 pihole/pihole:latest” command.
- View running Pi-Hole container.
- View the web interface of Pi-Hole.
Step 1: Pull Pi-Hole Image
First, pull the Pi-Hole image from Docker Hub with the help of the below-listed command:
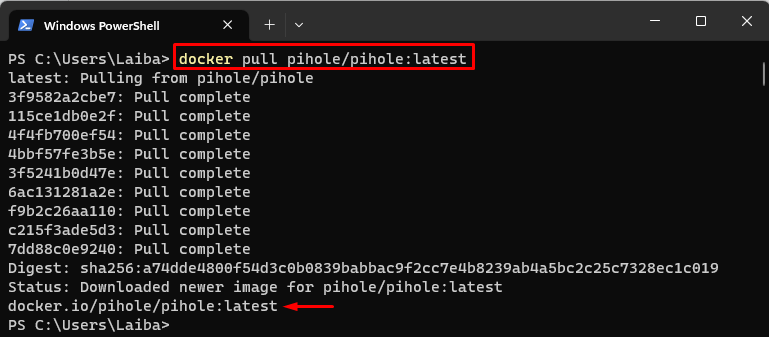
The above output shows that the Pi-Hole image has been downloaded successfully.
Step 2: Verify Pulled Image
Next, utilize the provided command to ensure that the image has been downloaded:
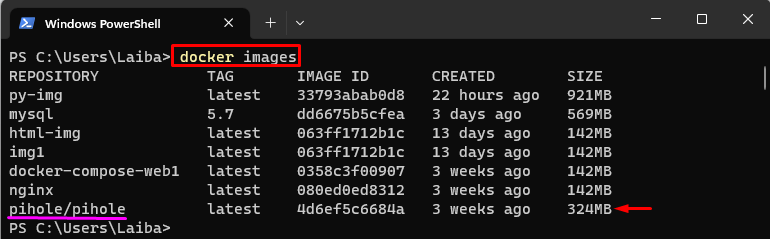
The above output shows a Pi-Hole image that has been downloaded.
Step 3: Run Pi-Hole as Docker Container
Now, run the Pi-Hole image as a Docker container via the following command:
Here:
- “-d” runs the docker container in detached mode.
- “–name” specifies the container name i.e., “pihole-cont”.
- “-p” option is used to assign ports. For instance, we have assigned “53/53/tcp” and “53:53/udp” ports for DNS traffic, “67:67/udp” port for DHCP traffic, “80:80” port for HTTP traffic and “443:443” port for HTTPS traffic.
- “-v” option is used to specify the volumes to be mounted within the container. For instance, we have specified the “${DOCKER_CONFIGS}/pihole/:/etc/pihole/” volume where Pi-hole stores its configuration files and the “${DOCKER_CONFIGS}/dnsmasq.d/:/etc/dnsmasq.d/” volume where Pi-hole stores its DNS server configuration files.
- “ServerIP” is used to specify the IP address of the Docker host machine.
- “–restart=unless-stopped” sets the container to automatically restart unless stopped.
- “–cap-add=NET_ADMIN” capability is used to manipulate network settings.
- “–dns=127.0.0.1” and “–dns=1.1.1.1” are the DNS server configurations.
- “pihole/pihole:latest” is the Docker image to use.
Note: Make sure to replace “<your-IP>” with your server IP:

Step 4: View Running Pi-Hole Container
Finally, view the Pi-Hole container by listing all running containers:

In the above output, the Pi-Hole is successfully running as a Docker container.
Step 5: View Pi-Hole Web Interface
Lastly, navigate to the browser and use your server IP to view the web interface of Pi-Hole:
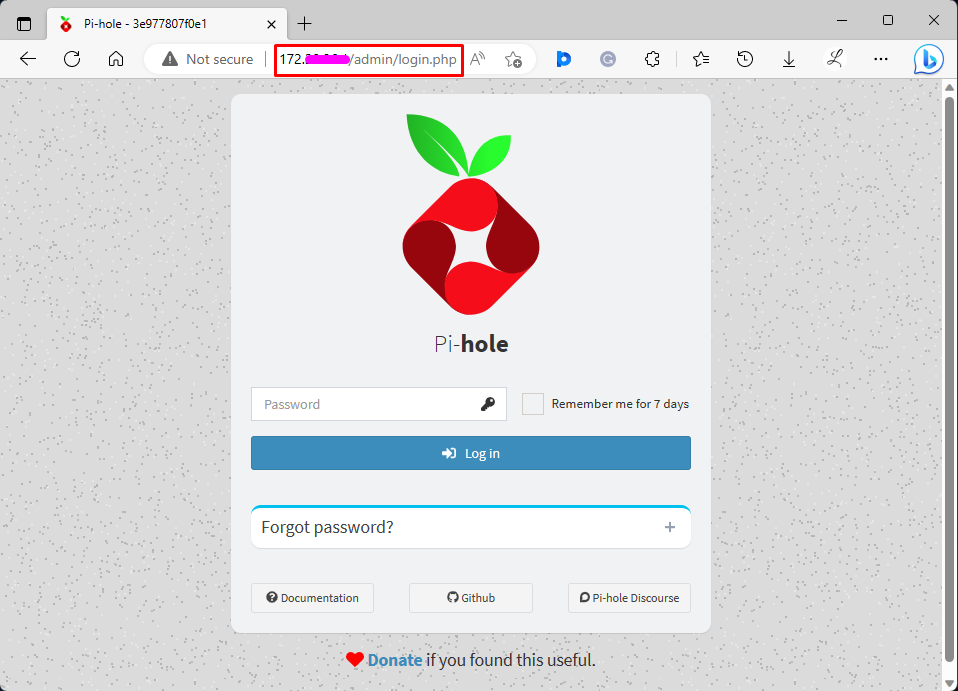
The output shows that the Pi-Hole has been running successfully as a Docker container.
Conclusion
To run Pi-Hole as a Docker container, first, pull the Pi-Hole image using the “docker pull pihole/pihole:latest” command and verify it. Then, run the Pi-Hole image as a container. Lastly, view the running Pi-Hole container and its web interface. This article has demonstrated the step-by-step procedure to run the Pi-Hole as a Docker container.