This tutorial will examine:
How to Add Text in HTML?
In HTML, text can be added in different ways, such as a heading element “<h1>” is used to add heading text, or the “<p>” element is used to embed some text or paragraph.
Go through the provided instructions to add the text to the HTML document.
Step 1: Create a “div” Container
Make a “div” element with the help of the “<div>” tag. Furthermore, insert an “id” attribute to allocate a specific name to an element.
Step 2: Add Text
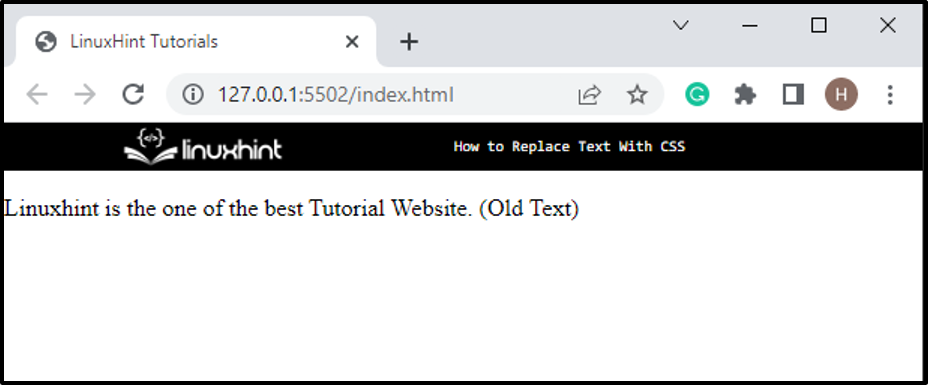
Next, utilize the paragraph tag “<p>” and assign it a “class” attribute. Then, embed some text in between the paragraph tags:
It can be observed that the text has been added successfully:
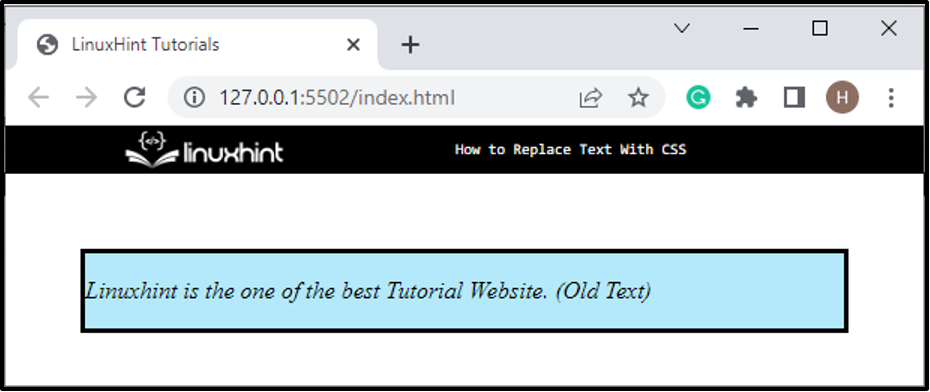
Step 3: Style “div” Element
Now, utilize the “id” selector and id “#main-div” to access the “div” element. Then, apply the below-stated properties:
border: 3px solid black;
background-color: rgb(179, 233, 250);
margin: 50px;
font-style: italic;
}
Here:
- “border” property is used to define a boundary around the element.
- “background-color” property allocates a color at the element’s backside.
- “margin” specifies a space around the boundary of the element.
- “font-style” determines the specific style for a text as “italic”:
How to Replace Text With CSS?
To replace text with CSS, first, hide the previous text by utilizing the “visibility” property. Then, embed the text using the “content” property.
To replace the text in CSS, try out the given procedure.
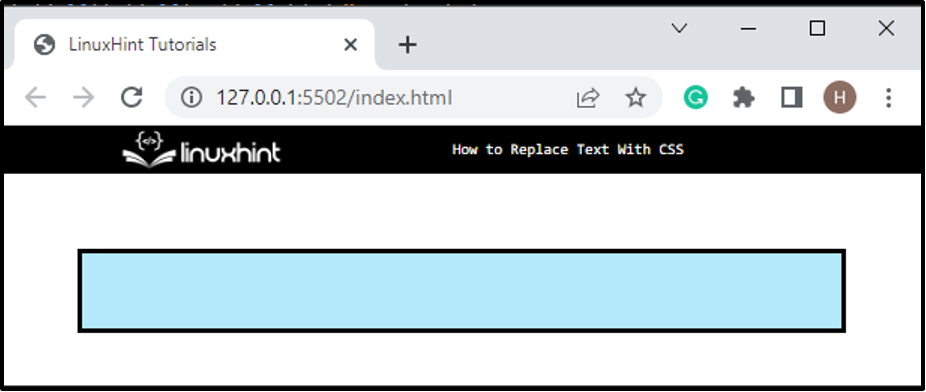
Step 1: Hide the Old Text
First, access the element where you have embedded the text. In our scenario, we will access the “<p>” element by the class name “.replace-text”. Then, apply the “position” and “visibility” properties:
position: relative;
visibility: hidden;
}
Here, the “position” specifies the element will be positioned relative to its normal position on the web page, and the “visibility” property is used to hide the element.
Output
Step 2: Replace Text
Access the text of the “<p>” tag by class “.replace-text”. Also, utilize the pseudo-class “:after” which will insert text after the content of the selected element:
content: "Linuxhint is a UK based Organization. (New Text)";
position: absolute;
visibility: visible;
left: 0;
top: 0;
}
The description of above-mentioned properties is as follows:
- “content” property is utilized to add the content in the selected element.
- “left” in CSS is used to allocate the horizontal position of an element that is positioned.
- “top” specifies the position at the top side of an element.
- “visibility” is set as “visible” to show the content inside the div.
Output
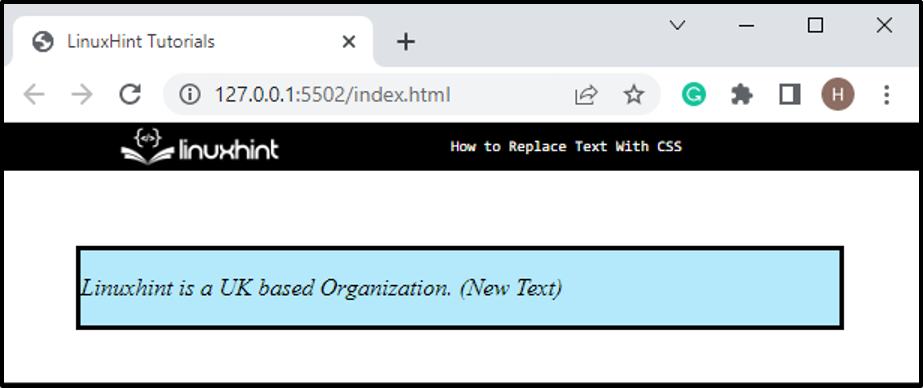
It can be noticed that the text is replaced successfully using CSS.
Conclusion
To replace text with CSS, first, add the text by utilizing the “<p>” tag. Then, access the “<p>” element in CSS using the assigned class and apply the “visibility” property with the value “hidden” to hide the old text. After that, use the pseudo-class “:after” with the assigned class of the “<p>” element. Replace the text with the help of the “content” property, and again set the “visibility” property as “visible”. This post has explained the method for replacing the text of HTML using CSS.