While creating an application in Docker, there are certain situations where the developer needs to make changes from time to time as per the requirements. While applying the changes or rebuilding an application, some garbage or dangling images are generated that need to be omitted to get rid of junk.
This article will include the below-stated aspects:
What is a Dangling Docker Image?
A “Dangling Image” corresponds to an image that has no repository name, and a tag is evident in Docker image listings in the form of “<none>:<none>” where the former “none” represents the repository name and the latter “none” is a tag.
These images are generated when an application image is built and tagged as for instance, “sample-image:x”. After that, some updates are made to the image, and a new image is built, but with the same tag. In such a situation, Docker removes the tag from the previous/last image and then allocates it to the new image. Resultantly, the previous/last image that lost its tag results in a “Dangling Image”.
How to Remove Dangling Docker Images?
The “Dangling Docker Images” can be detected and omitted via the “prune” command automatically.
Follow the below-given methodologies to create and remove a dangling image:
Creating a Dangling Image
To create a “Dangling Image”, consider the below-explained methodologies:
Step 1: Edit “Dockerfile” File
First of all, let’s create a dangling image. To do so, write/paste the following code lines in the “Dockerfile” named file:
ENTRYPOINT ["echo", "Hello World"]
Note: Here, “18.04” signifies the Ubuntu version.
Step 2: Build the Image
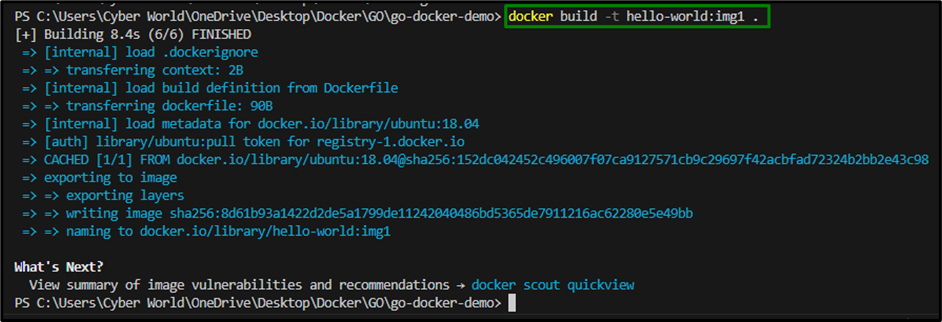
Now, execute the below-given cmdlet to build the image named “hello-world:img1”:
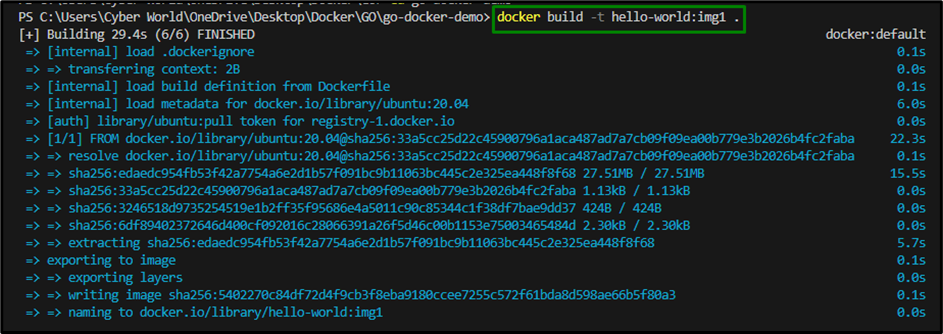
The above cmdlet creates a Docker image that displays “Hello World” on the terminal when it is executed as a container.
Step 3: List the Images
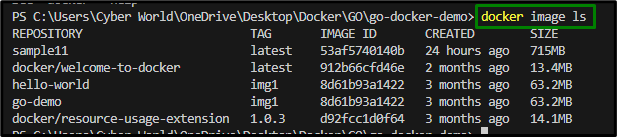
Verify if the image is created by executing the below-stated cmdlet:

Here, it can be verified that an image tagged with “hello-world” with the “img1” tag has been built successfully.
Step 4: Modify the Base image’s Version
Now, update the base image’s version from Ubuntu “18.04” to “20.04” and build a new image with the identical tag i.e., “hello-world:img1”. To do so, modify/edit the code in the “Dockerfile” file, written below:
ENTRYPOINT ["echo", "Hello World"]
Step 5: Build the Image Again
Here, execute the below provided cmdlet again to build a new image:
Now, run the below-provided cmdlet to list the images on the system:
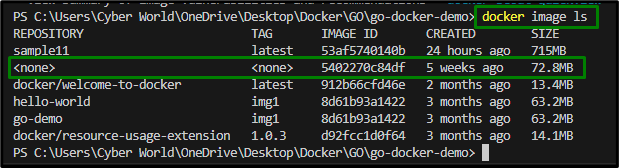
Here, it can be seen that the highlighted image has both the name of the repository and tag set as “<none>”. This image is referred to as a “dangling” image.
This image was first built via the Ubuntu “18.04” base image. After that, a new image was built with the same tag (hello-world:img1) utilizing the Ubuntu “20.04” base image. Therefore, Docker automatically removed the tag from the original/former image and allocated it to the new image, thereby generating a dangling image.
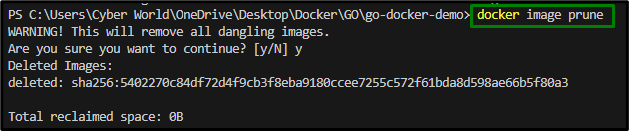
How to Remove/Omit Dangling Images?
The dangling image can be omitted via the below-stated cmdlet:
Lastly, list all the images using the discussed cmdlet:
From the above listed images, it can be implied that the dangling image has been detected and removed and so it is not listed here appropriately.
How to Remove Unused Images?
If there is a need to remove unused images, apply the following cmdlet:

Conclusion
A “Dangling Image” corresponds to an image that has no repository name as well as tag and can be removed with the help of the “docker image prune” cmdlet. These types of images are generated after making updates to the application and rebuilding it. In this write-up, we have provided detailed information about the dandling Docker images and the possible way to remove them.