This blog will explain:
How to Make an HTML-Nested List?
To make an HTML nested list, follow the given step-by-step procedure.
Step 1: Insert a Heading
First, insert a heading by utilizing any heading tag from “<h1>” to “<h6>”. In this scenario, we have used the “<h2>” heading tag and embedded text for the heading in between the tag.
Step 2: Create “div” Container
Next, create a div container with the help of the “<div>” element and insert an “id” attribute inside the div opening tag with a particular name.
Step 3: Add Unordered List
Now, utilize the “<ul>” tag for adding an unordered list. Then, add the test with the help of the “<li>” tag. Next, add a nested unordered list and add data for the list in between the “<ul>” tag.
Step 4: Create an Ordered List
Next, inside the first unordered list, create an ordered list by using the “<ol>” tag and embed data in the form of an ordered list with the “<li>” tag:
<div id="nested-list">
<ul>
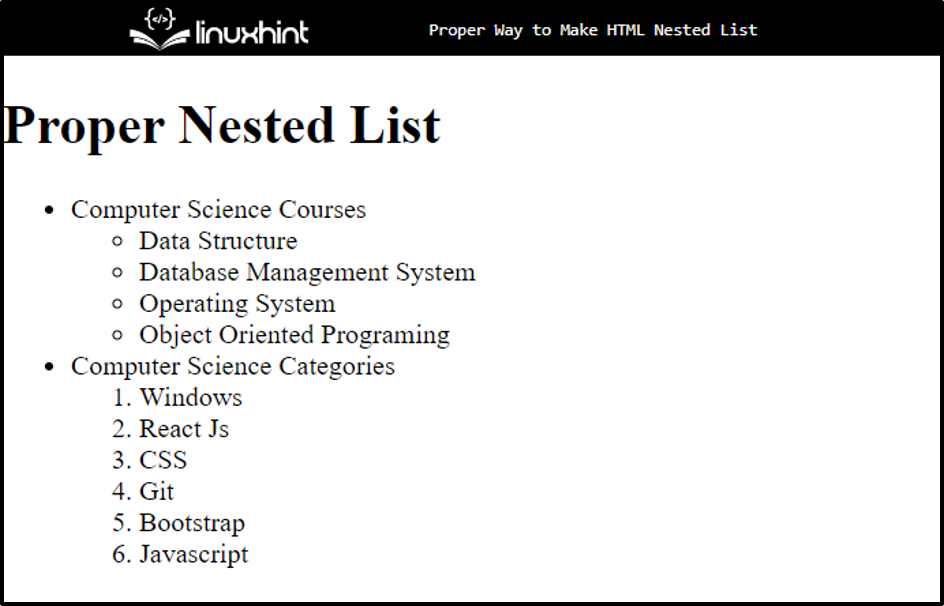
<li>Computer Science Courses</li>
<ul>
<li>Data Structure</li>
<li>Database Management System</li>
<li>Operating System</li>
<li>Object Oriented Programming</li>
</ul>
<li>Computer Science Categories</li>
<ol>
<li>Windows</li>
<li>React Js</li>
<li>CSS</li>
<li>Git</li>
<li>Bootstrap</li>
<li>Javascript</li>
</ol>
</ul>
</div>
It can be observed that the HTML nested list has been created successfully:
If the user wants to apply styling on the list, move toward the next section.
How to Apply Styling on Nested List in CSS?
To apply styling on a nested list in CSS, check out the given steps.
Step 1: Style Heading
Access the heading by using the “h1” tag name and apply the given properties:
text-align center;
color: blue;
}
Here:
- “text-align” is utilized for setting the center alignment of the text.
- The CSS “color” property specifies the color of the defined text.
Step 2: Style Main div Container
Access the main div with the help of the name of “id” as “#nested-list” and apply the following properties mentioned in the code block:
background-color: rgb(182, 250, 227);
margin: 20px 70px;
padding: 30px;
border: dotted blue;
}
The details of the above-stated properties are as follows:
- “background-color” property is utilized for setting the color at the backside of the element.
- “margin” specifies space outside of the defined boundary.
- “padding” is used to add space inside the defined element.
- “border” determines a boundary around the element.
Output
That’s the property way for making HTML nested list.
Conclusion
To make a nested list, users can utilize ordered and unordered lists. To do so, insert the first list with the help of the “<ul>” or “<ol>” tag and embed data. Then, define another list within the first list. This write-up has examined the procedure for making the proper nested list in HTML.