Things You Need:
In order to setup OpenMediaVault on Raspberry Pi, you need
- A Raspberry Pi 3 Model B or Raspberry Pi 3 Model B+
- An Android smartphone charger.
- A microSD card and a card reader for installing OpenMediaVault.
- A piece of Ethernet cable to connect your Raspberry Pi to your Switch or Router.
- A USB hard drive or a USB thumb drive for data storage.

Downloading OpenMediaVault for Raspberry Pi 3:
You can download OpenMediaVault Raspberry Pi 3 image from the official sourceforge.net repository of OpenMediaVault.
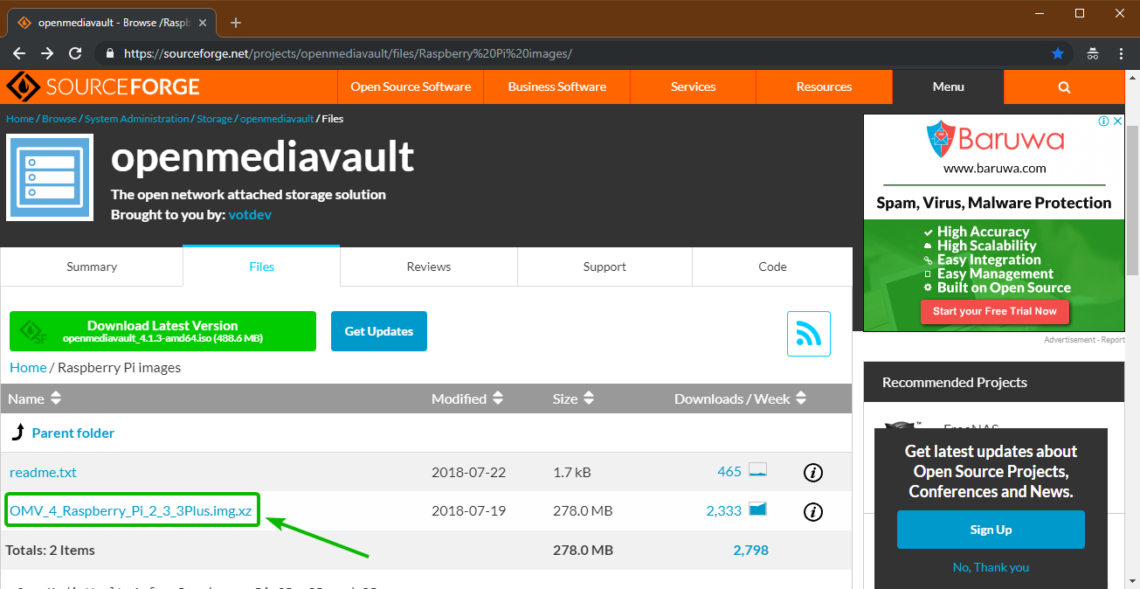
First, visit the official sourceforge.net repository of OpenMediaVault at https://sourceforge.net/projects/openmediavault/files/Raspberry%20Pi%20images/
Once the page loads, click on OMV_4_Raspberry_Pi_2_3_3_Plus.img.xz as marked in the screenshot below.
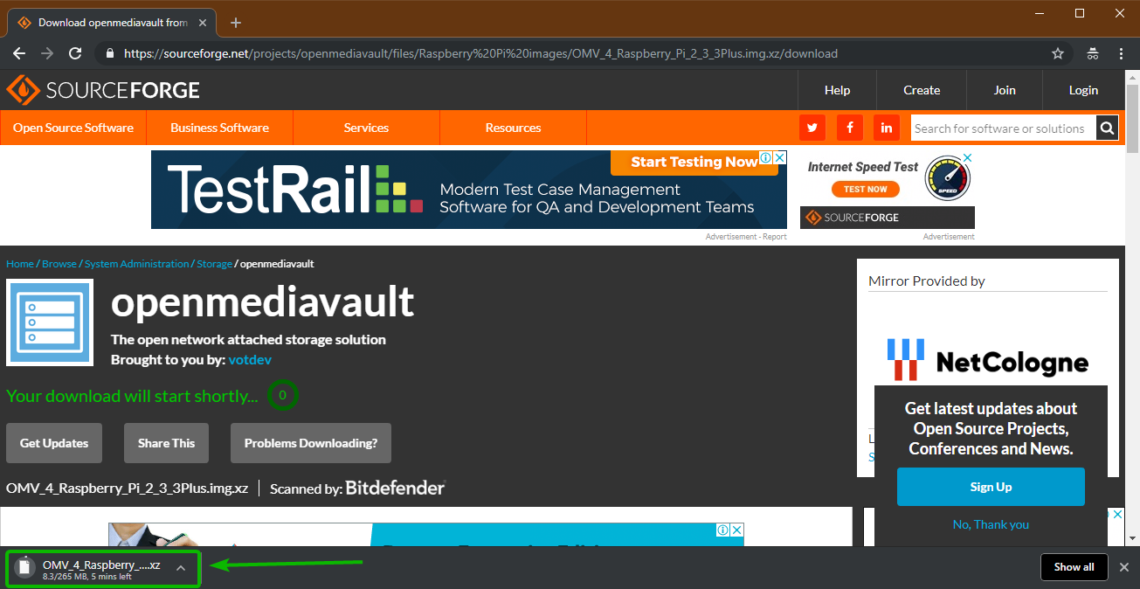
Your browser should start downloading the OpenMediaVault Raspberry Pi 3 image as you can see in the screenshot below. It may take a while to complete.
Flashing OpenMediaVault Raspberry Pi 3 image on SD card:
Etcher is used to flash the OpenMediaVault Raspberry Pi 3 image that you just downloaded to your SD card. You can download Etcher for free from https://www.balena.io/etcher/. Etcher is available for Windows, macOS and Linux.
I have written a dedicated article on installing Etcher on Linux. You can check it at https://linuxhint.com/install_etcher_linux/
Once you have Etcher downloaded and installed,
- Insert microSD card to your SD card reader.
- Insert the SD card reader to your computer.
- Run Etcher.
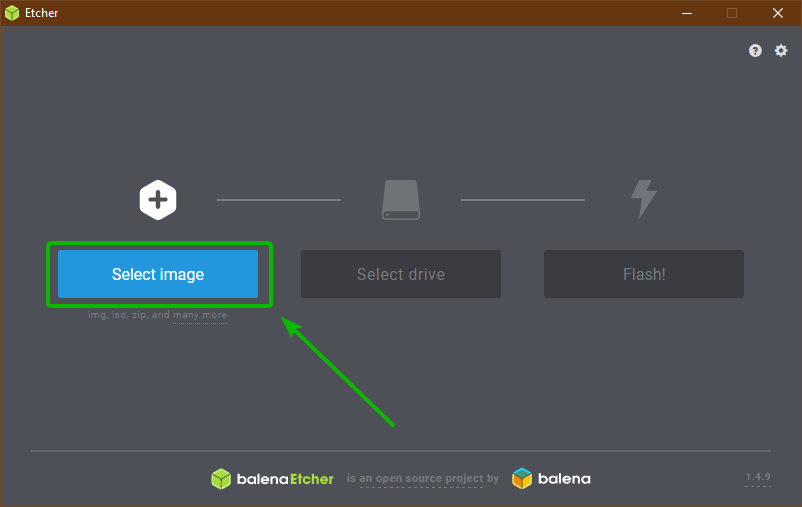
Now, click on Select image.
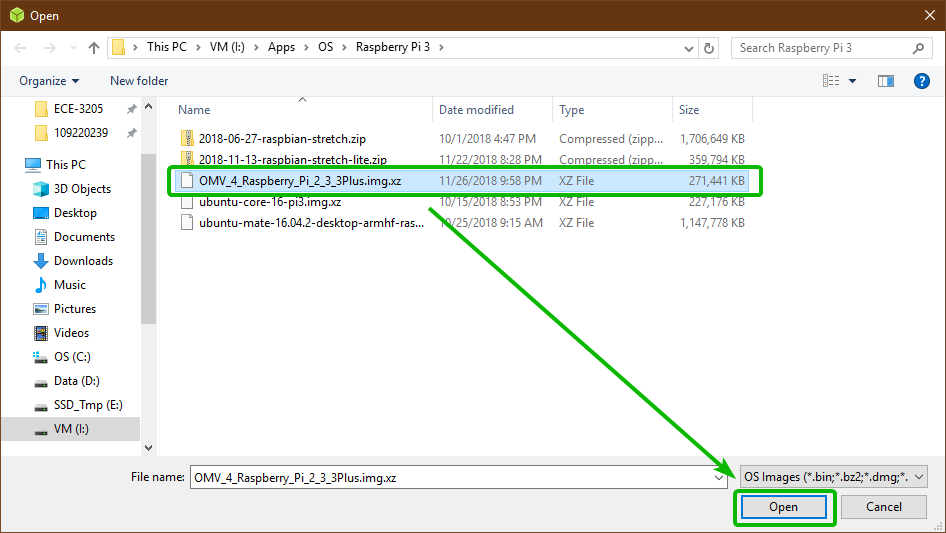
A file picker should be opened. Select the OpenMediaVault Raspberry Pi 3 image that you just downloaded and click on Open.
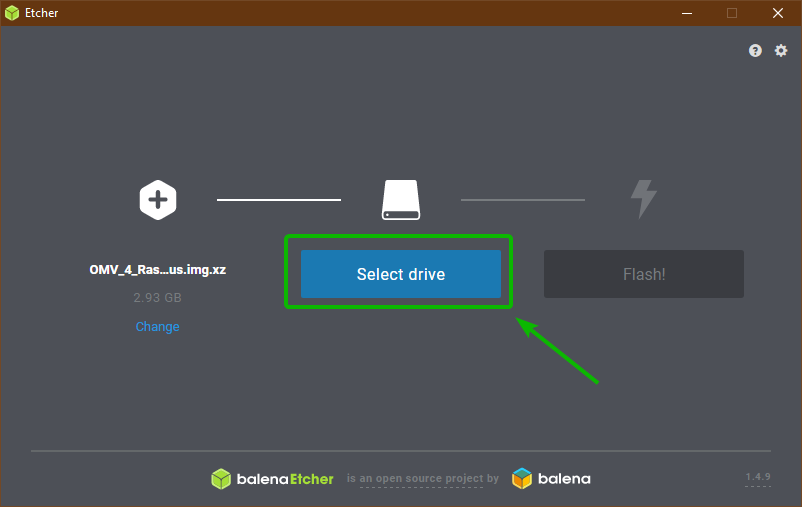
Now, click on Select drive.
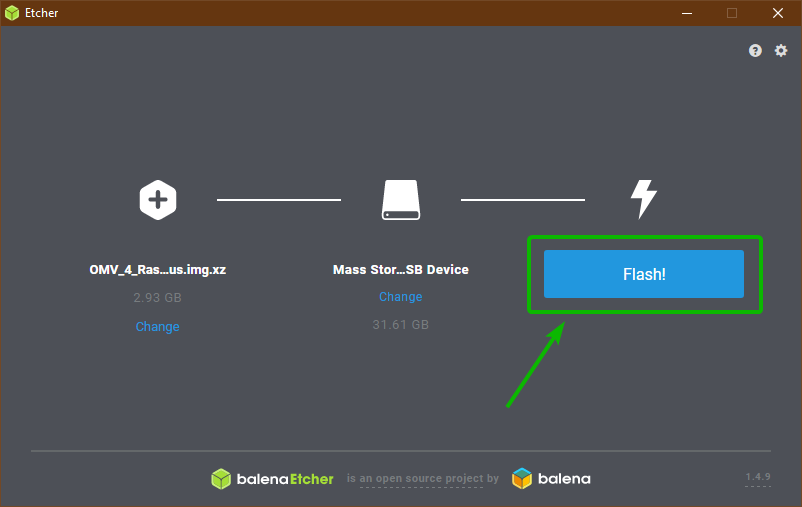
Now, click to select your microSD card from the list and click on Continue.
Now, click on Flash!.
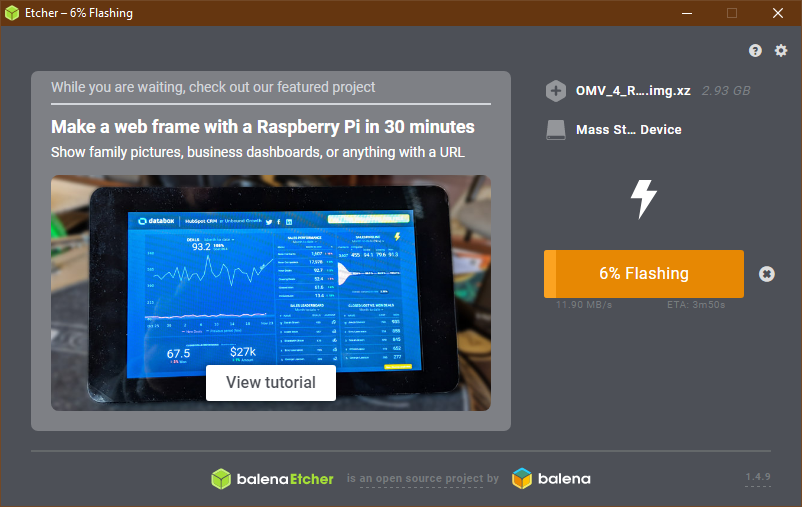
Etcher should start flashing your microSD card.
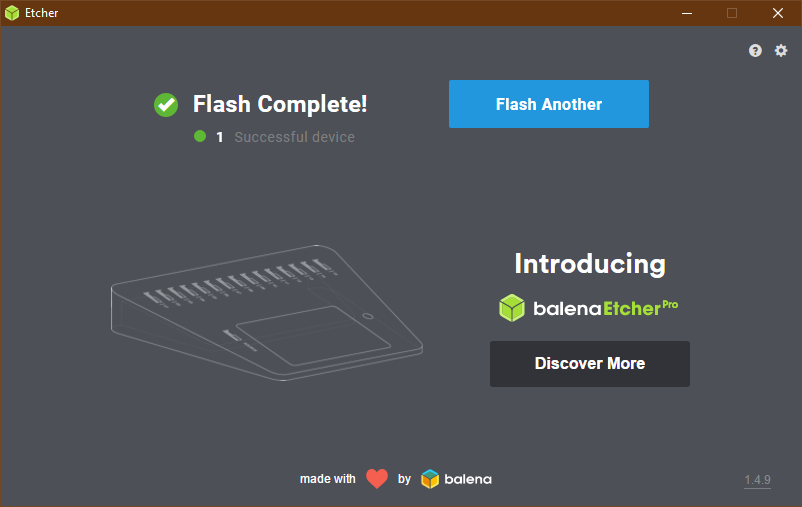
Once your microSD card is flashed, close Etcher and insert the microSD card to your Raspberry Pi 3.
Starting Raspberry Pi 3:
Now, connect the USB hard drive or USB thumb drive to your Raspberry Pi 3, connect the Ethernet cable and finally the microUSB power adapter and power on your Raspberry Pi 3.
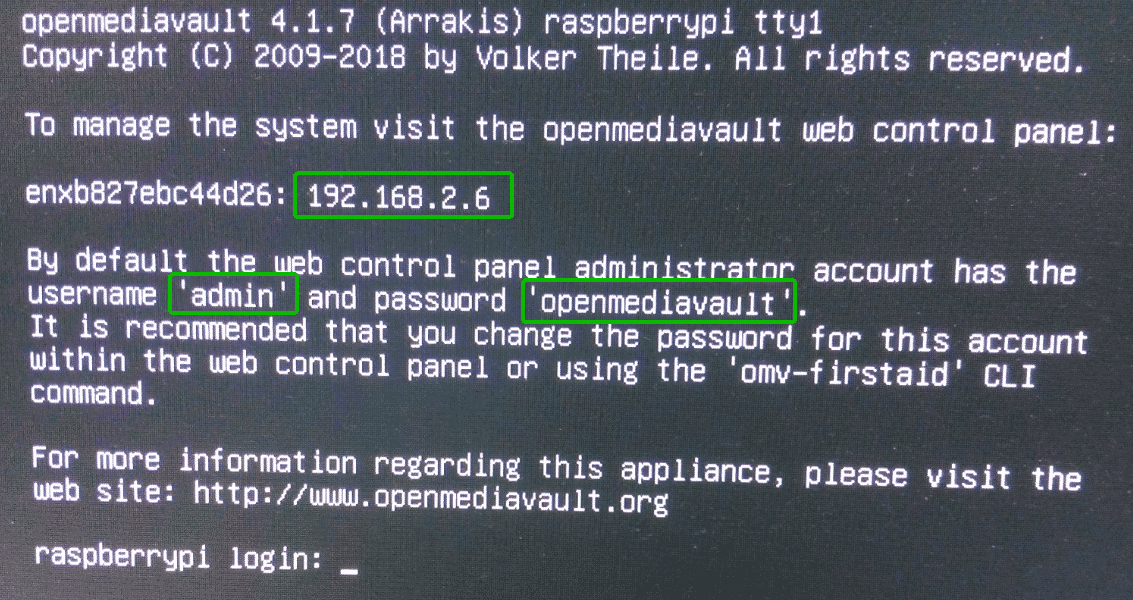
OpenMediaVault should boot. If you have your Raspberry Pi 3 connected to your monitor through the HDMI cable, then you should see the following window. Here, the OpenMediaVault’s assigned IP address and default username and password is printed.
You can also check what IP address is assigned to your Raspberry Pi from your Router’s admin panel. The default username is admin and password is openmediavault. You don’t need a monitor here. Just knowing the IP address is enough.
Configuring OpenMediaVault:
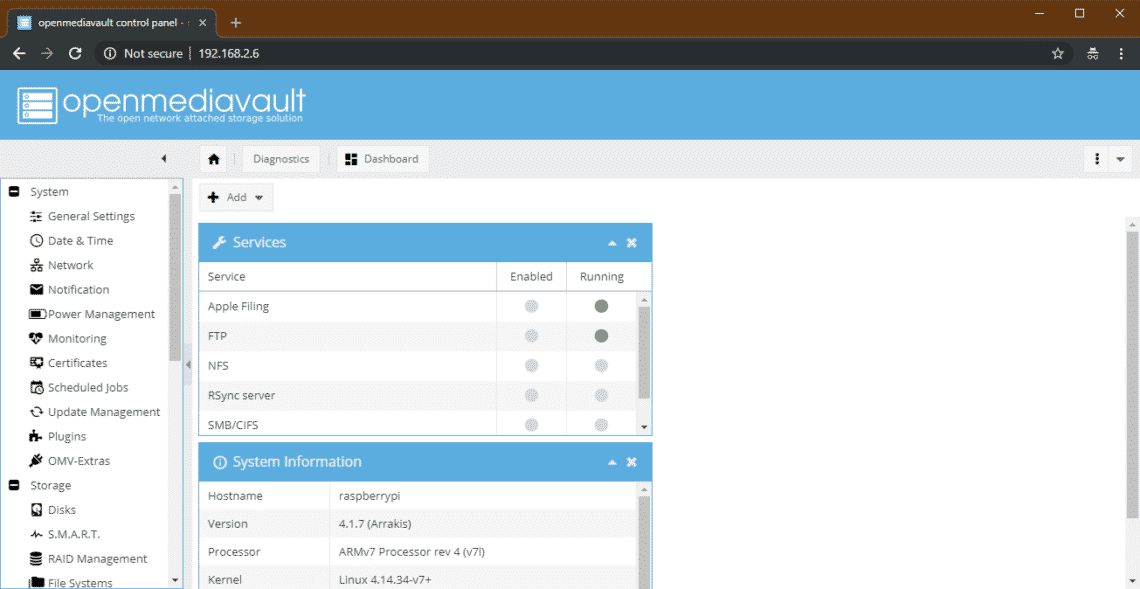
OpenMediaVault can be configured from the web browser. Just open a web browser of your choice and visit the IP address of your Raspberry Pi 3 (In my case http://192.168.2.6).
Now, type in the username admin and the password openmediavault and click on Login.
You should be logged in to the OpenMediaVault control panel.
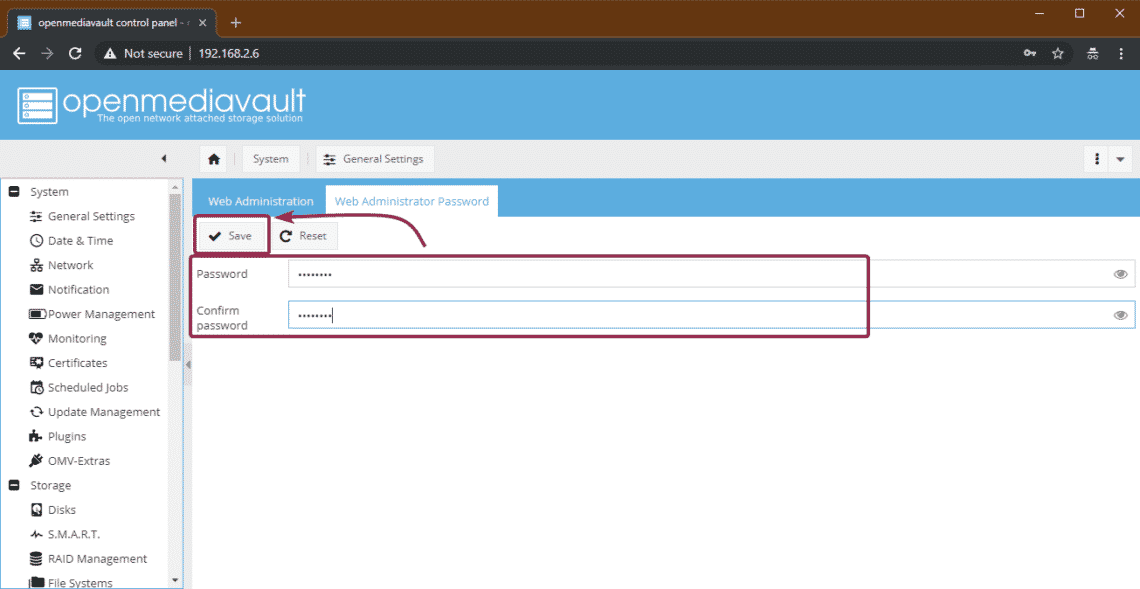
If you want to change the default password, then go to System > General Settings > Web Administrator Password as marked in the screenshot below.
Then, type in your new password and click on Save. The password should be changed.
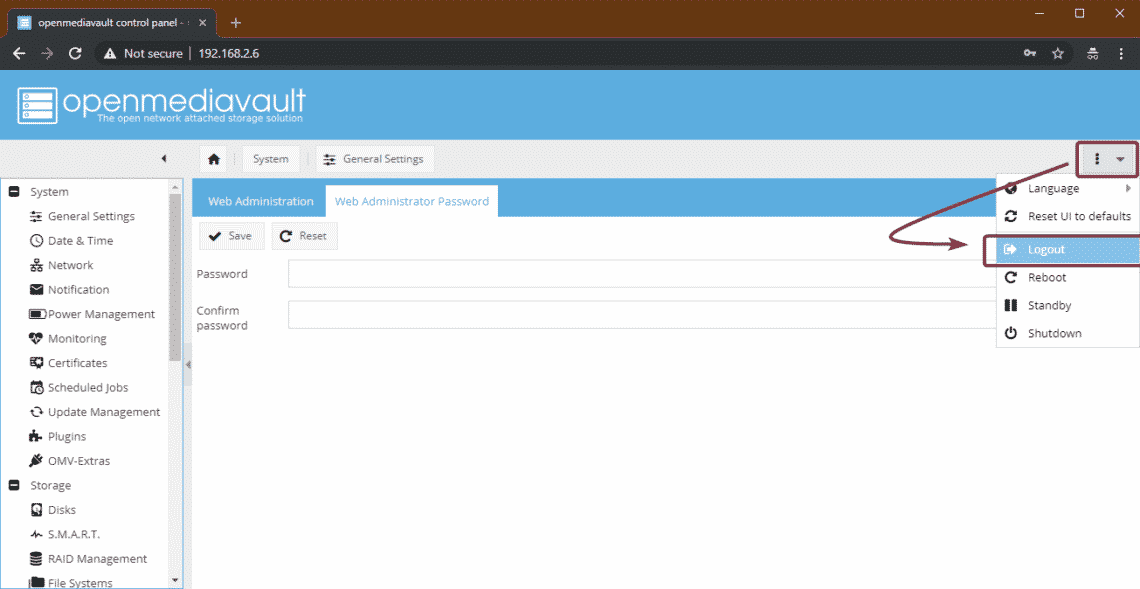
Now, for the changes to take effect, Logout of the OpenMediaVault web interface and log back in.
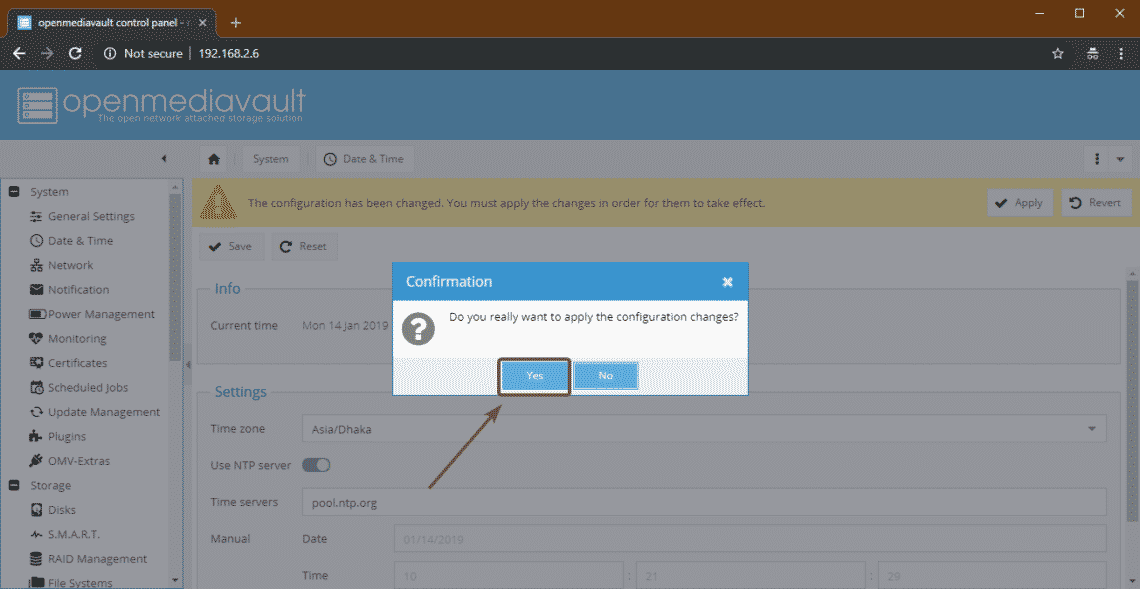
Now, to change the time zone, go to System > Date & Time. Then, select your Time zone from the dropdown menu and click on Save.
To apply the changes, click on Apply.
Then, click on Yes. The changes should be applied.
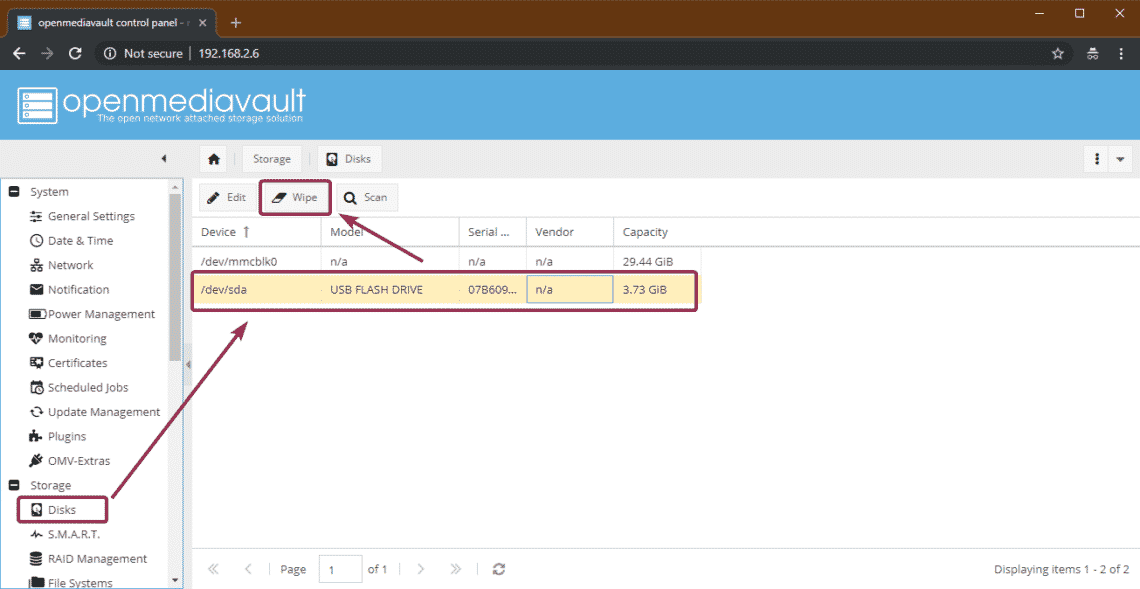
If you want to use a USB hard drive or thumb drive as data storage for OpenMediaVault, you have to format it first. To do that, go to Storage > Disks and select the USB hard drive or thumb drive that you want to use as data storage and click on Wipe.
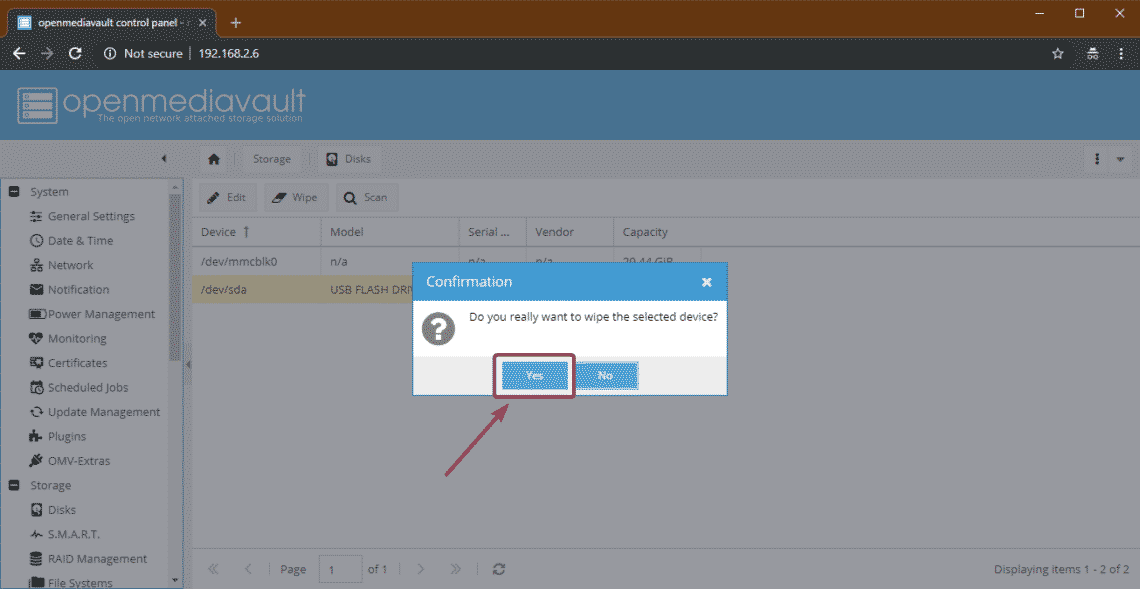
Then, click on Yes.
Then, click on Quick.
Once it’s complete, click on Close. The USB hard drive or thumb drive should be wiped clean.
Now you have to create a file system. To do that, go to Storage > File Systems and click on Create.
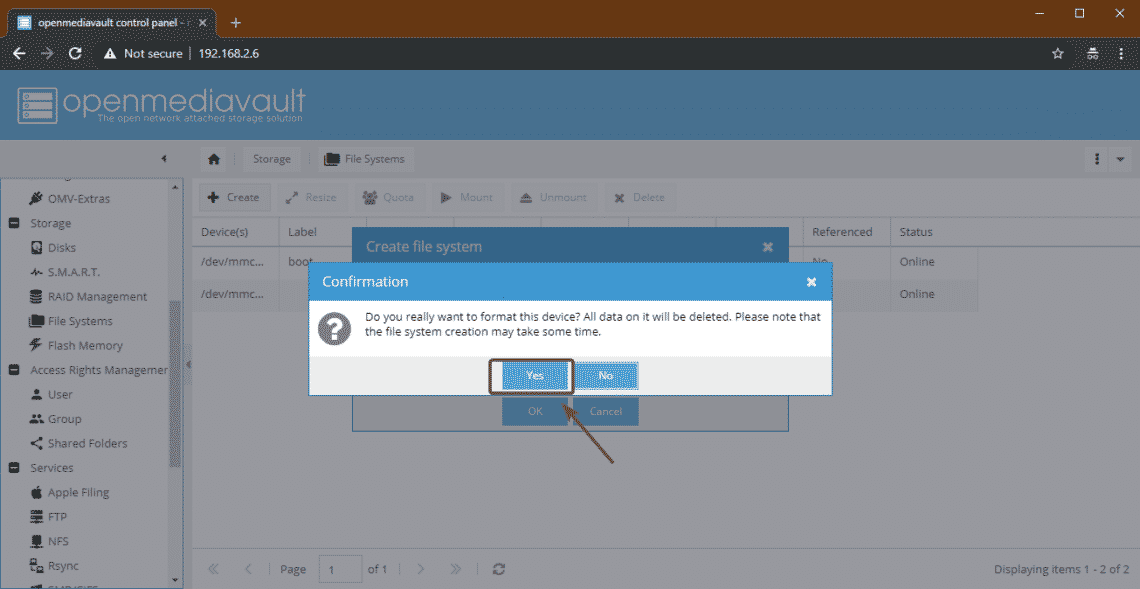
Now, select your USB hard drive or thumb drive from the Device drop down menu, type in a Label, select the File System format and click on OK.
Now, click on Yes.
Once it’s done, click on Close.
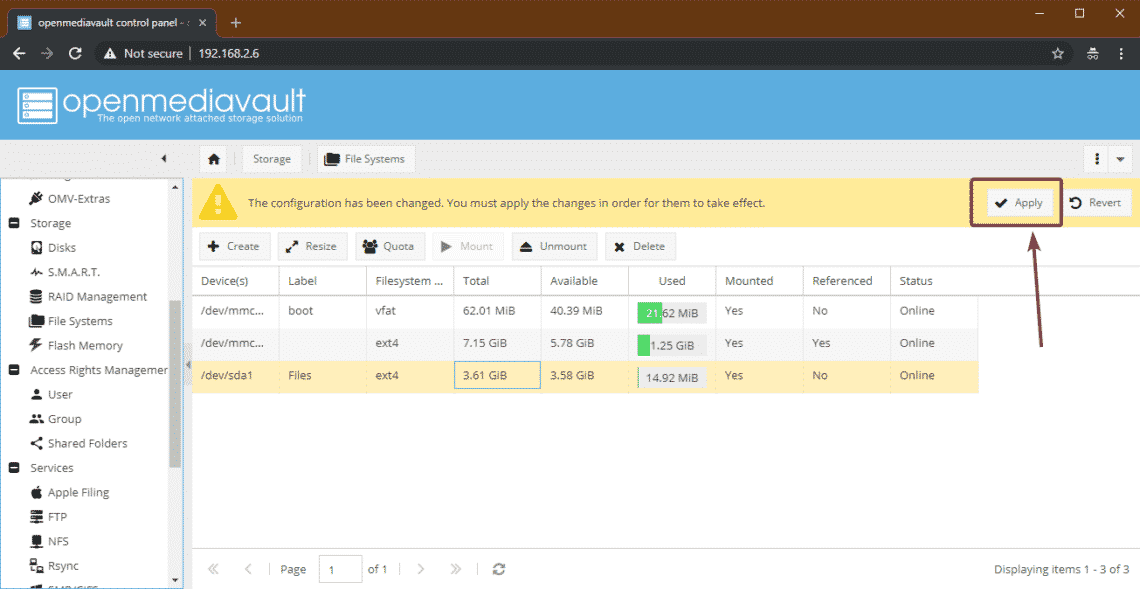
Now, select the newly created file system and click on Mount.
Then, click on Apply.
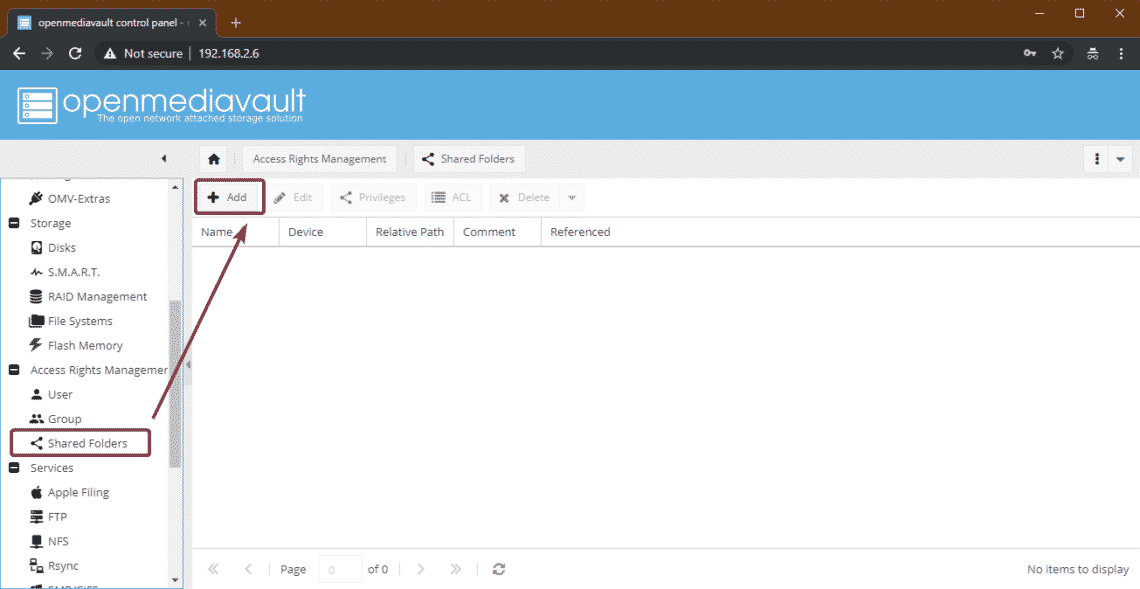
Now to share a folder, go to Access Rights Management > Shared Folders and click on Add.
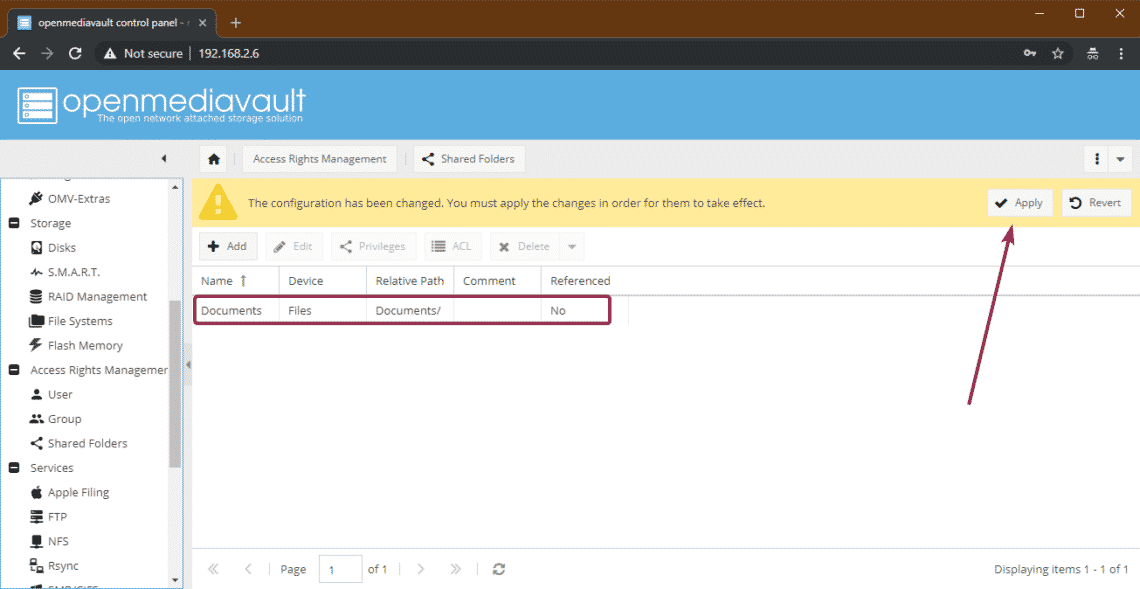
Now, type in the Name of your shared folder, select the file system that you just created from the Device drop down menu and select the permissions for your shared folder using the Permissions drop down menu.
Your shared folder should be created. Now, click on Apply.
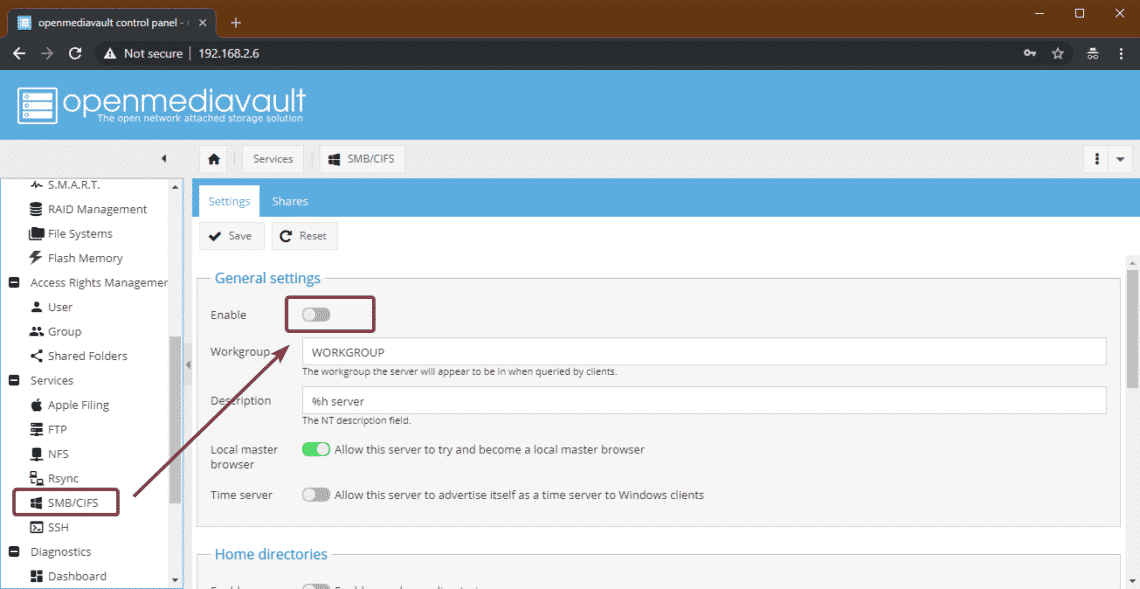
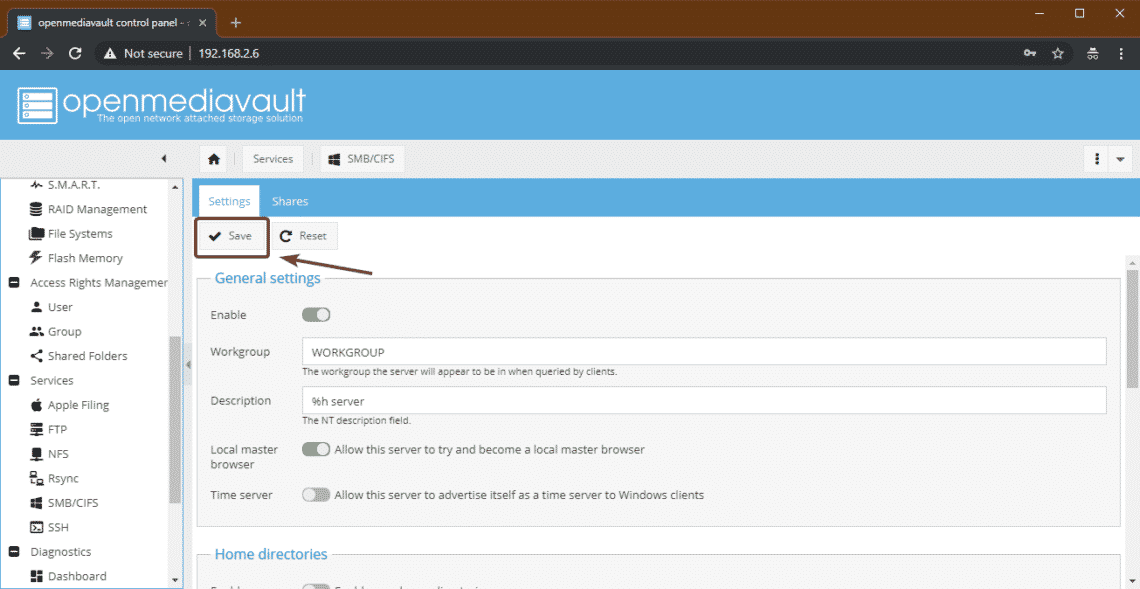
Now, to enable Windows share, go to Services > SMB/CIFS and then click on the marked toggle button.
Then, click on Save.
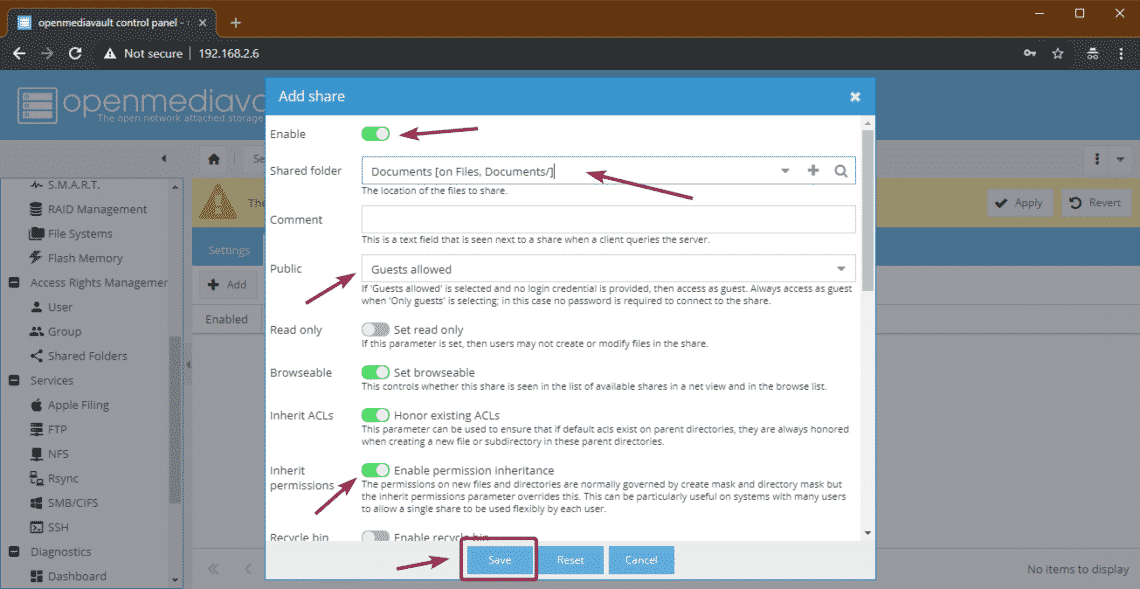
Now, navigate to the Shares tab and click on Add.
Then, select the Shared folder you just created from the dropdown menu. There are a lot of options. You can configure your share just the way you want. Once you’re done, click on Save.
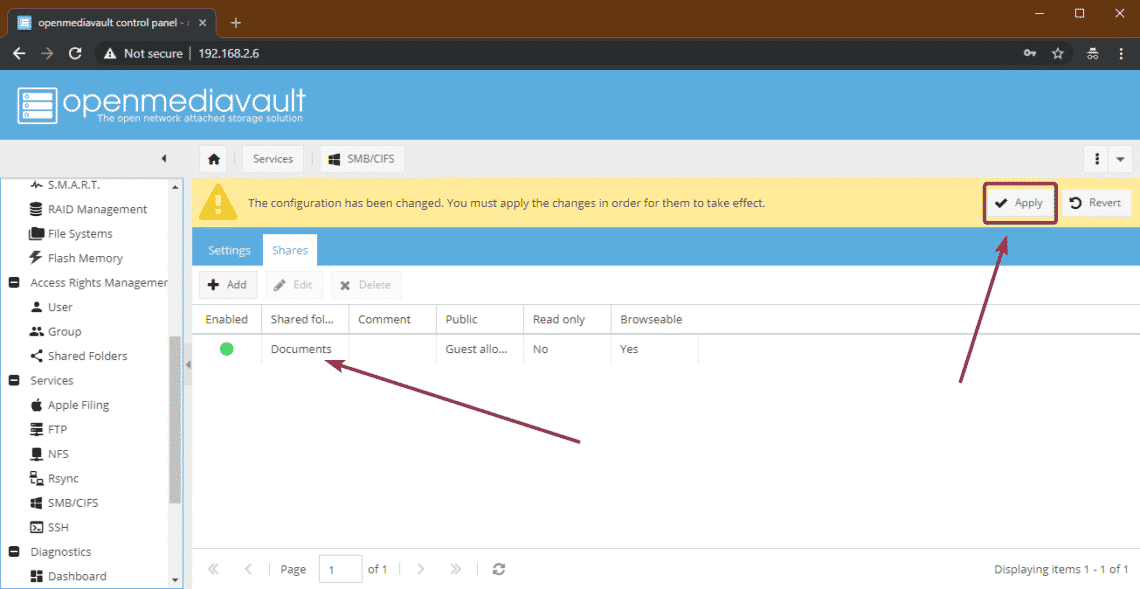
Now, click on Apply.
Accessing the Shares from Windows:
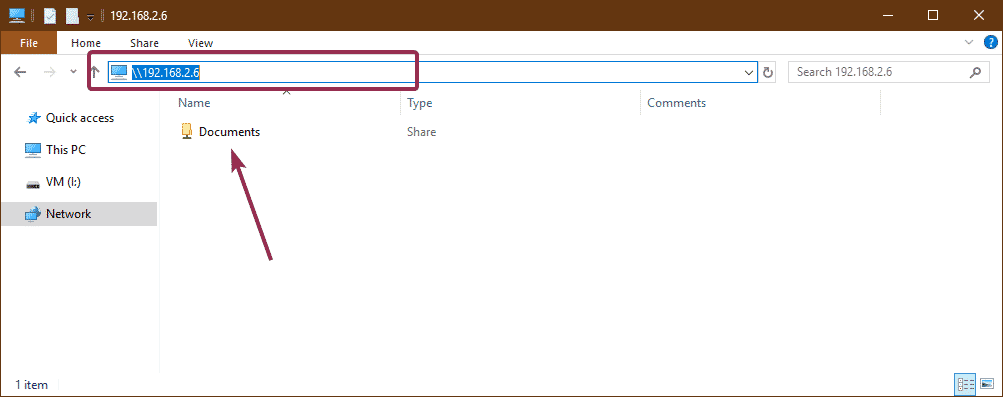
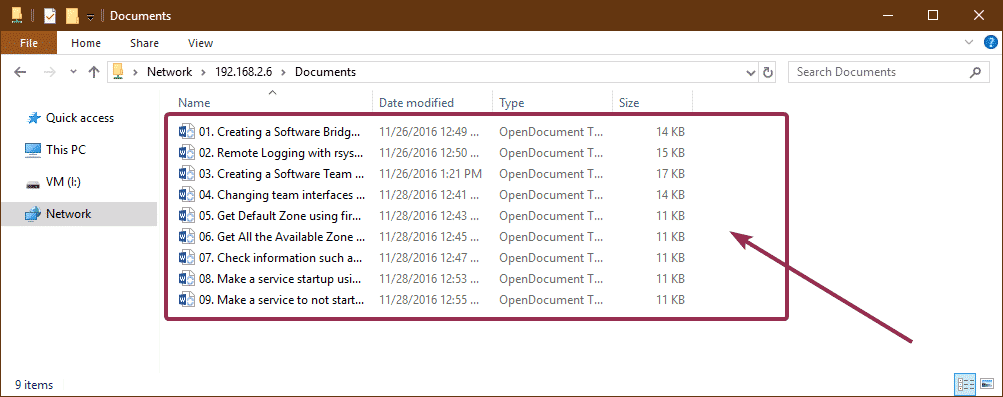
Now, you can access your shared folders from your Windows machines. Just type in the IP address of your Raspberry Pi 3 as \\192.168.2.6 in the File Explorer and press <Enter>. You should see your shared folders as you can see in the screenshot below.
As you can see, I copied some of the files in the shared folder and it works.
So, that’s how you install and configure OpenMediaVault on Raspberry Pi 3. Thanks for reading this article.

