MYROUTER.LOCAL is a default web address that is used for interacting with a router’s web management window. It is also used for interacting with different settings and features of a router. If you have to visit a web utility window of your router, use this web address. But if you encounter an error with your myrouter.local/login, use the LAN IP address of your router.
How to Log in to MYROUTER.LOCAL?
The router’s login process plays a crucial role in letting users interact with the router’s web interface. Only when you have the approval, you can log in by using the right login credentials in the respective field. After you are done with the setup process, you are advised to change the default login password.
Now, take a look at the steps you have to follow to log in MY ROUTER LOCAL interface.
- Open your preferred browser on your desktop connected to the router’s network. The desktop shouldn’t be connected to any other extended or wireless networks.
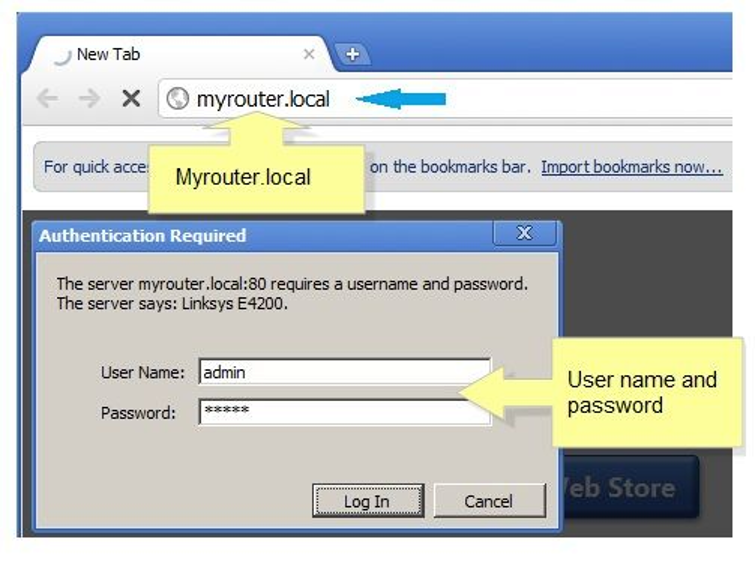
- In the address bar of the browser, type myrouter.local and press Enter. This will take you to the login page of the router.
- In the username tab, type ‘admin’ and enter the password you set during the setup process. In case you have not yet changed the password, type ‘admin’.
- When you are done, click on login to log into http://myrouter.local.
Note: In case you are accessing the router’s web interface for the first time, you don’t have to go through the router login window. As soon as you are connected to the Wi-Fi of the router, you will be redirected to the web interface of the router, automatically.
How to Access the Router’s Admin Page with MYROUTER.LOCAL?
There are multiple ways to access a router’s web-based setup page. Using the router’s setup page, you can opt for basic or advanced options. With the local web-based setup portal, you can enable Wi-Fi security, forward ports, and game console settings.
- The first step is to ensure that the LED corresponding to the port to which your desktop is connected is turned on. After connecting your desktop to the router, you can do this. By following the process carefully, you can get detailed instructions on the difficulties you face with myrouter local.
- Open the default browser and type the private IP address for accessing myrouterlocal/admin that gives you access to the advanced settings of the router. Do this by entering the sign address of myrouter local in the address bar of the browser.
- You will be directed to the myrouterlocal/login page for accessing the web page. Just fill-up the username and password tabs and you can visit the web-based setup page.
Tips: When you are doing these tasks, experts recommend you use the wired connection of the router and computer.
What to Do if MYROUTERLOCAL Does Not Work?
If this link doesn’t work, you won’t be able to interact with the web interface. It is not possible to make adjustments, repair, or change settings in the network setting without interacting with the Dashboard of this interface.
To resolve this problem, here are some troubleshooting options:
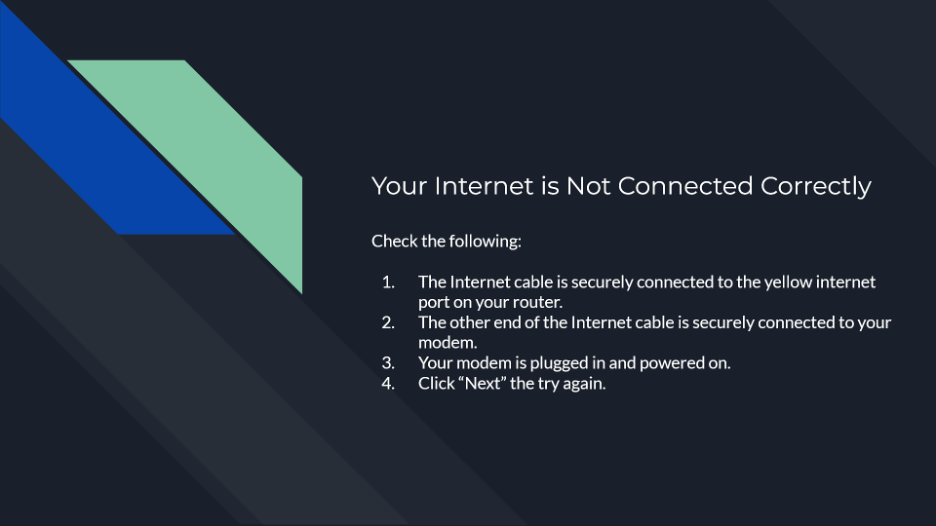
1. Check the Hardware Connection
Check the physical connection between your desktop and router. If the connection isn’t established properly, it will lead to some problems. Connect the router for accessing the router’s web interface.
2. IP Address Changed Automatically
Your router’s IP address might change automatically and this can lead to some issues. The DHCP used by the device function automatically assigns the computer’s IP address. In case the router has enabled the DHCP function, it might be why it has an IP address assigned to it automatically. Reset the router to solve the problem. When you are done resetting, you can use the default IP address for accessing the interface of your router. The router’s IP address is 192.168.1.1.
3. Use Only Authorized Browsers
You should always use an approved browser. Using an authorized browser might lead to myrouter.local issue. Use web browsers such as Internet Explorer, Mozilla Firefox, and Google Chrome. In case you are using some other browser, switch to an authorized browser.
4. Delete History
At times, filled-up cache and history might become a reason you are not getting access to this interface. So, delete the issue to find out if it solves the problem. As cache memory and the history of a browser pile up, delete them immediately.
5. DNS Hijacking Malware
A DNS hijacking might restrict a user from interacting with the interface of this URL. It can infect your desktop and might impact the router’s access. So, go over to Network Connection and then click on the option Network and Sharing Center. Choose the Change adapter settings, right-click on the option Local area connection, and ultimately click on Properties. Choose TCP/IPV4 and click on Properties. Now, type the required details in the Alternate DNS and Preferred DNS server fields. Scan for viruses and ensure that the antivirus is up-to-date.
Note: In case you are encountering a network issue, contact the ISP for resolving the problem. In case your troubleshooting steps fail, restore the default settings into the router through the reset process. Press and hold the reset button for 10 seconds to reset the router.
Steps to Change the MYROUTER.LOCAL Window Password
You can change the login password of the router login window whenever you want using the router’s web interface. While setting up the router, if you skip the admin password process, you have to use the default admin password to interact with the router’s web interface. The default password is ‘admin’.
The steps to change the router web interface’s password are as follows-
- Open your preferred browser on your desktop that is connected to the network of the router.
- On the web address bar, type http://myrouter.local. you also have the option to type 192.168.1.1. as the URL.
- Next, click on Sign-in and it will redirect to the setup page of the router.
- Go over to Router Settings and click on Connectivity.
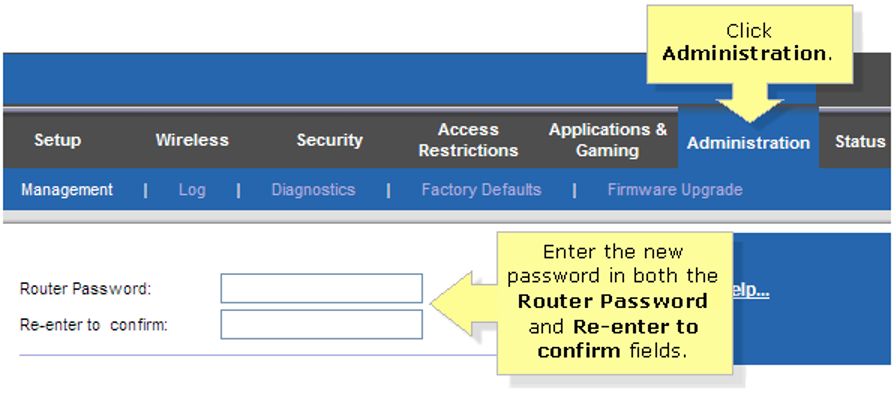
- Look for the Router Password option in the basic tab and then click on Edit.
- In the New Password field, type the password you prefer.
- Enter the hint of the router password in the given field.
- To save the settings, click on Apply.
Note: You have to fulfill all requirements when you assign the password for the login window. Remember, the password field is case-sensitive. If you make any mistake with the login password, you will not be able to access the interface.