
We will not get into the deeper workings of the mod_jk module as it is beyond the scope of this tutorial. Instead, we shall focus on how to integrate it with the Apache HTTP Server.
Learn more about how mod_jk works.
NOTE: In this tutorial, we assume you have Apache Tomcat, and Apache HTTPD servers installed and set up correctly. If not, check our tutorials on the topics.
Step 1: Download and Install mod_jk
The first step is downloading the mod_jk module for Linux and building it for the Apache Web server. If you are on Windows, you will find a pre-built binary to set up the mod_jk.
Open the terminal and enter the command:
Once you have the package downloaded, extract it as:
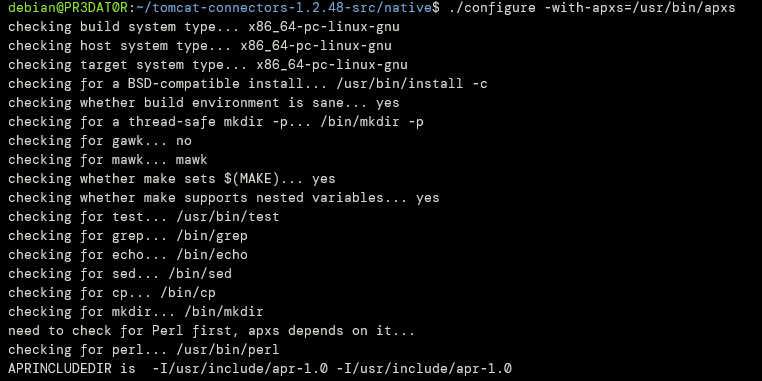
Next, navigate to the extracted directory/native as:
While in the native directory, run the command:
The above command sets the path for the apxs tools for the Apache HTTP server. If you do not know the apxs tools location, use the which command as:
/usr/bin/apxs
If you get an empty result, you need to install the apache dev package using the command:
# OR
yum install httpd-devel
Once you run the ./configure command, you will get an example output similar to the one shown below:
The next step is to make the system object file for the mod_jk module.
Use the make command in the native directory.
Upon successful completion, you should see an apache-2.0 directory created in the native directory.
You should see a mod_jk.so file in the directory.

Copy the mod_jk.so file into the apache modules directory. This should be located in the /usr/lib/apache2/modules or /etc/httpd/modules.
Step 2: Load mod_jk module
Once we have added the mod_jk module to the modules directory of the Apache HTTPD, we need to load it by editing the httpd.conf file.
In the conf directory, edit the httpd.conf file using your favorite text editor.
Next, we need to add an include directive in the apache config file to load the module. You can grep to get how to load modules.
The above command will give output such as the one shown:
IncludeOptional mods-enabled/*.conf
Include ports.conf
IncludeOptional conf-enabled/*.conf
IncludeOptional sites-enabled/*.conf
From the configuration file above, modules are located in the mods-enabled directory.
Navigate to the directory /etc/apache2/mods-enabled and create a mod_jk.conf file.
Inside the file, add the following entries.
JkWorkersFile /etc/apache2/conf-enabled/workers.properties
JkShmFile /etc/apache2/logs/mod_jk.shm
JkLogFile /etc/apache2/logs/mod_jk.log
JkLogLev JkMount /stat/* stat
JkMount /* balancer el debug
JkLogOptions +forwardKeySize +ForwardURICompat -ForwardDirectories
In the JkWorkersFile, we define the node information.
JkLogFile dictates the location of the log file.
JkLogLevel sets the log level to debug
Step 3: Setting Workers File
In the worker’s file specified in the path above, we define information about the running application servers.
Here is an example configuration:
worker.jk-status.type=status
worker.jk-status.read_only=true
worker.tomcat_1.type=ajp13
worker.tomcat_1.port=9001
worker.tomcat_1.host=127.0.0.1
worker.tomcat_2.type=ajp13
worker.tomcat_2.port=9002
worker.tomcat_2.host=127.0.0.1
worker.tomcat_3.type=ajp13
worker.tomcat_3.port=9003
worker.tomcat_3.host=1270.0.0.1
worker.list=balancer
worker.balancer.type=lb
worker.balancer.balance_workers=tomcat_1,tomcat_2,tomcat_3
With that, you should have the mod_jk module installed on the Apache Server and ready to go.
Conclusion
This tutorial showed you how to configure and use the mod_jk module on the Apache HTTPD server. You can learn more from the official docs.