Apache is one of the most popular web servers with a modular and process-based architecture. It comes packed with features enabled by default or installed as compiled modules for extended functionality. It is cross-platform and therefore usable on both Windows and Unix-based operating systems.
This tutorial will teach you how to install and configure the Apache HTTPD server on a Windows-based system. It is good to note that we only install the Apache Web server and not other packages such as PHP and MySQL as provided by tools such as Ampps or Xampp.
Requirements
To follow along with this guide, you will need the following:
- A fully updated installation of Windows 2000 and later.
- Microsoft Visual C++ libraries.
- Microsoft .NET 4.5 and later.
I tested all the instructions in this article on Microsoft Windows Server 2008, 2012, 2016, 2019, and 2022 (preview).
Step 1 – Installing .NET Framework
Before installing the Apache HTTPD, we need to ensure we have the .NET framework installed. Installing the .NET framework is not mandatory but is helpful if you plan to run a MySQL server with Apache.
NOTE: You may skip this step if you are running Microsoft Windows Server 2012 and higher.
Launch your browser and navigate to .NET 4 downloads page.
https://www.microsoft.com/en-us/download/details.aspx?id=17851
Once downloaded, launch the installer package and follow the instructions in the installer package.
Step 2 – Installing Microsoft Visual C++
Before installing Apache HTTPD, it is good to ensure you have the Visual C++ redistributable packages installed.
At the minimum, ensure you have the Microsoft Visual C++ 2008 redistributable package installed.
You can download the installer package in the resource provided below:
https://www.microsoft.com/en-us/download/details.aspx?id=26368
For easier usage, we have provided a resource with all the Visual C++ redist packages from 2005 to 2022. Download the zip package from the resource below and use the .bat file to perform the installation.
TPU Visual C++ Redis Download.
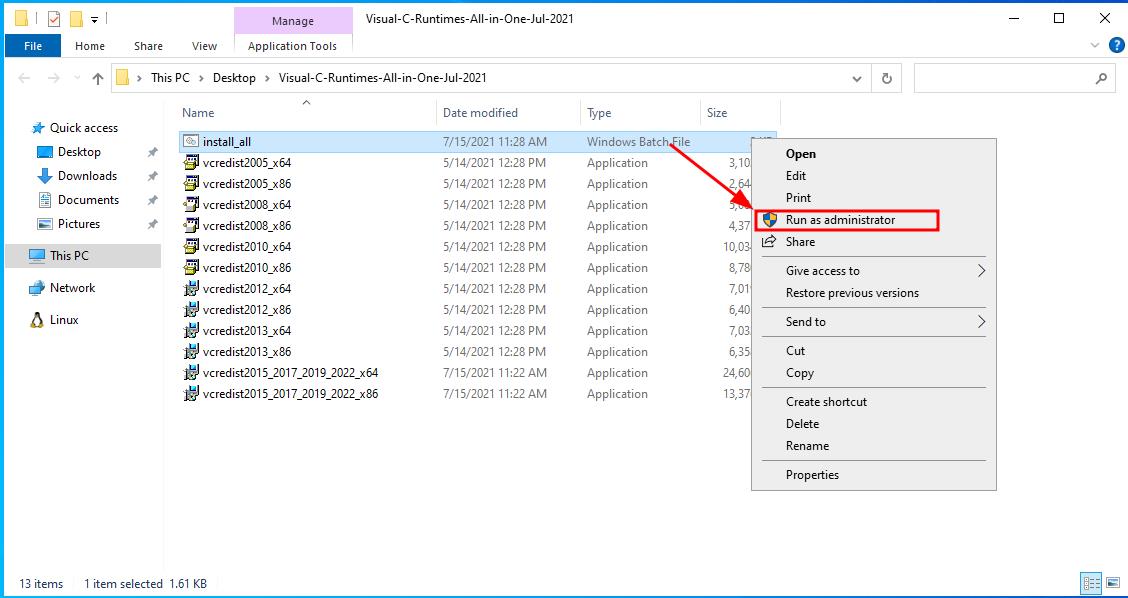
Once the installation is complete, restart your system to apply the changes.
Step 3 – Installing Apache Server
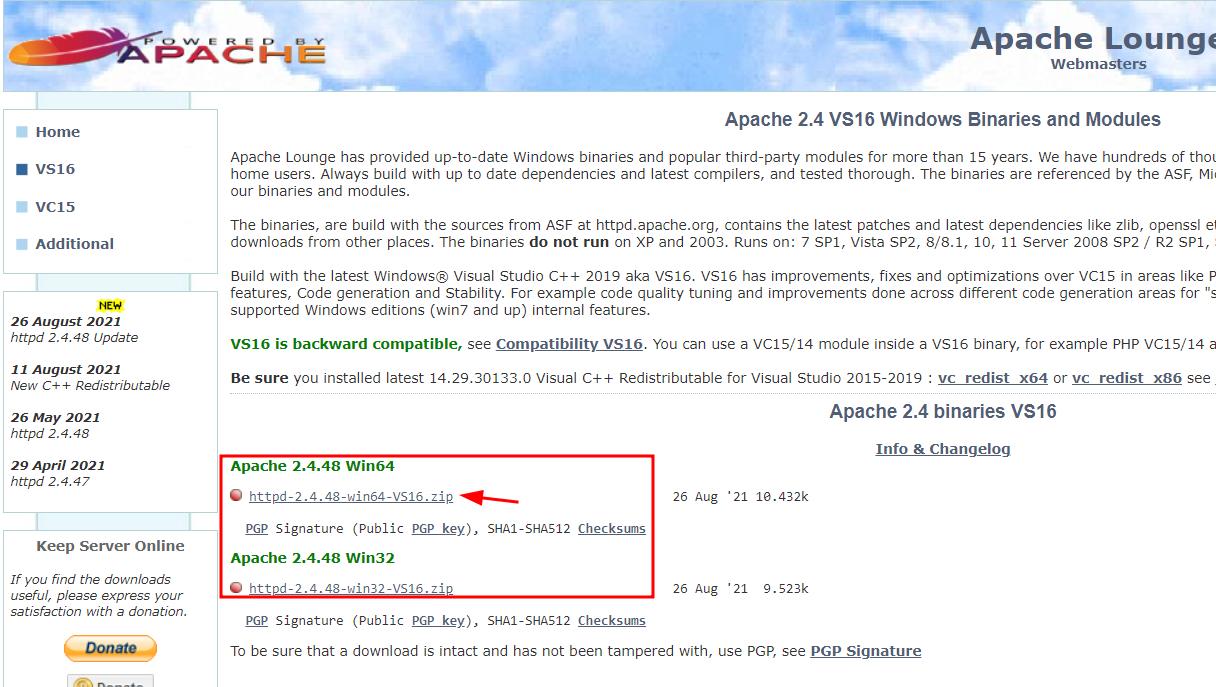
The next step is to download and install the Apache HTTPD server. You can download the Windows binary from the following resources.
Apachelounge – https://www.apachelounge.com/download/
Apache Haus – https://www.apachehaus.com/cgi-bin/download.plx
Next, create a HTTPD directory in the C:\ drive.
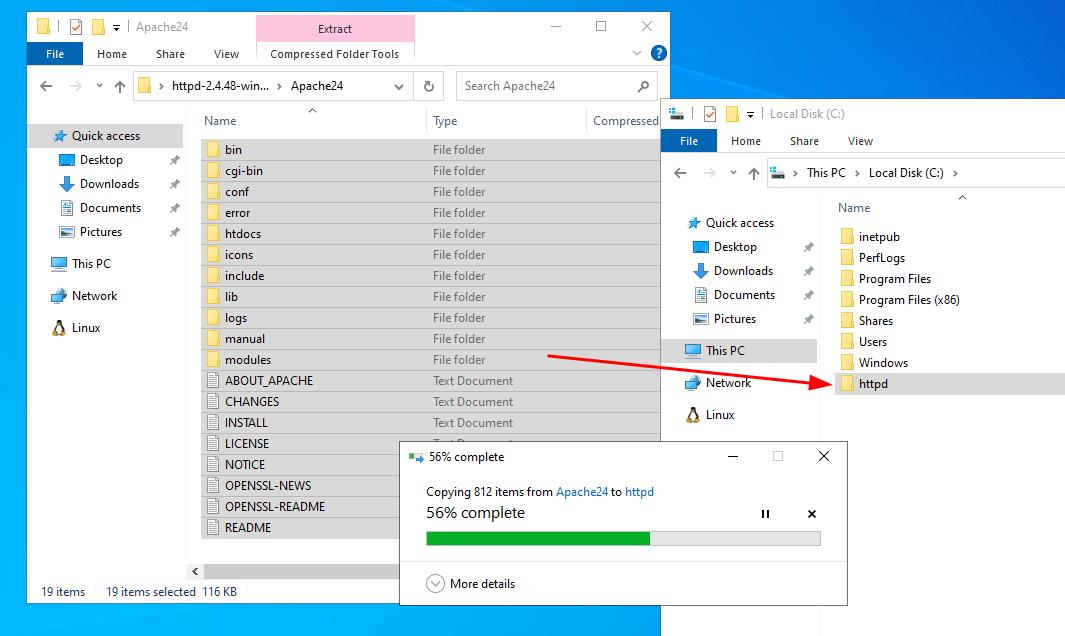
Next, open the apache binary archive and extract the contents of the Apache24 directory to the httpd directory.
Step 4 – Adding to Path
We need to add the bin directory to the path to run apache binaries from anywhere in the Windows file system.
Open the command prompt and enter the command below:
SUCCESS: Specified value was saved.
The above command will add the C:\httpd\bin to the Windows path.
Step 5 – Configuring Apache
By default, Apache assumes you install it in the C:\Apache24. However, since we installed it under a different directory name, we need to change the default ${SRVROOT} variable.
Open the file Explorer and navigate to C:\httpd\conf.
Next, open the httpd.conf file with your favorite text editor; since it’s a simple edit, feel free to use Notepad.

Locate the line:
Change the above entry to point to your root apache installation directory. In our example, it should resemble:

Next, locate the following entry:
And change it to the following:
The above directive tells Apache to load CGI/Perl scripts outside the cgi-bin directory.
Next, locate the directive:
Change the value to resemble the one shown below:
This will allow the Apache server to execute the .cgi/.pl files instead of displaying them in the browser.
Finally, navigate to the end of the httpd.conf file and add the following directive.
The above entry tells Apache to ignore the first line in .cgi/.pl.
Step 6 – Running Apache Server
After completing all the steps above, we can run the apache server. Open the command prompt and enter the command:
The above command will check the configuration files for any syntax. If there are any errors, fix them so Apache can start correctly.
If there are no errors, you should get “Syntax OK!”
Next, run the server by executing the command:
The command should run the apache http server on port 80. This may prompt you to configure the firewall.
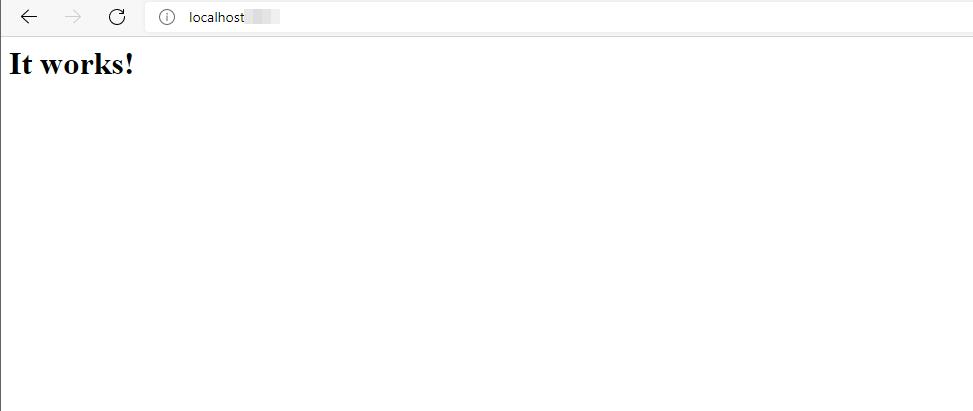
Once running, open the browser and navigate to the web address http://127.0.0.1
You should see the default apache HTTPD site:
Step 7 – Fix “could not bind to address” Error
In some instances, you may get the “could not bind to address” error. This is caused by another processing using port 80.
For example, if you are running a Microsoft IIS server, this will prevent Apache from starting up.
To view the ports and process, enter the command:
Locate the PID of the process using port 80 and enter the command:
In some instances, forcefully shutting down the IIS server may cause data loss. To shut it down gracefully, launch the IIS manager and press Stop.

If you still cannot run Apache on port 80, you can bind Apache to run on a different port by editing the httpd.conf.
Change the following line from port 80 to any desired port.
Save the configuration and re-run Apache as:
Step 8 – Install the Apache Service
Although you can run the apache server with a simple HTTPD command, the server will die once you close the command prompt window.
You can solve this by installing the Apache server as a service.
Open the command prompt and enter the command:
The command above will install the service with the name specified.
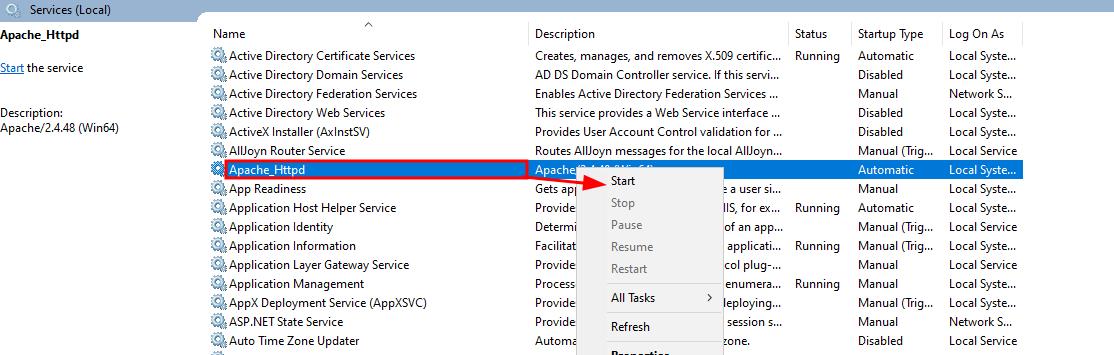
To start the service, open the services manager and locate the “Apache_Httpd” service. Right-click and select start.
Conclusion
This tutorial taught you how to fully install and configure the Apache HTTPD server on a Windows system.
Thank you for reading!