What Will We Talk About?
In this article, we’ll see how to authenticate a Linux user using the Microsoft Active Directory. For this tutorial, we use the Windows 2016 server and Ubuntu 20.04 OS.
Prerequisites:
- We won’t go into detail about the Active Directory including its functionality, setup, and maintenance. For this guide, we’ll assume that you know how to configure an Active Directory domain and you have access to the required credentials.
- The domain controller, the Windows server 2016 in this case, is configured as an primary and authoritative DNS resolver for the domain.
- Time is properly set up and in sync on both systems. It can be accomplished via services like chrony or ntp.
- For our tutorial, we use the mycompany.local domain.
Configuring the Hostname of the Client
First, we configure the Ubuntu’s hostname to point to the Active Directory domain. For example, let’s take it as myubuntu.mycompany.local. Now, modify the hostname file as follows:
Note: We cannot use the hostname as localhost as it points to 127.0.0.1.
Modifying the /etc/hosts File
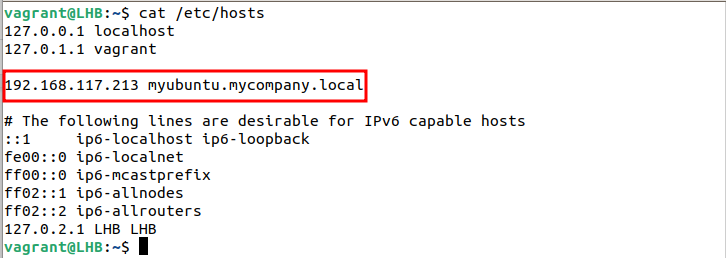
Now, open the /etc/hosts file and specify the IP address of our client with its domain controller specific hostname:
Modifying the /etc/resolv.conf File
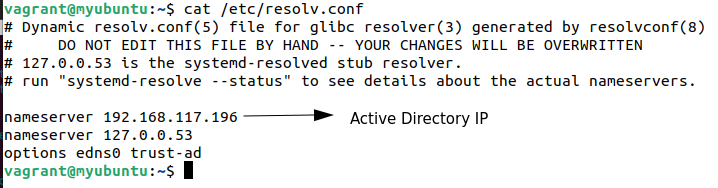
The DNS query should first reach the Domain Controller on our client machine. This can be accomplished using the resolv.conf file. However, this file is automatically updated when you restart the client. Consequently, all your manual edits will vanish.
Interestingly, we can solve this behavior using the resolvconf package. Go to this link to fix the resolv.conf issue.
The lookup of resolv.conf file in our case is as follows:
Time Synchronization
Unix and Linux systems rely on the Network Time Protocol (NTP) for their time synchronization needs. When it comes to Ubuntu, it’s centered around the default NTP server at ntp.ubuntu.com. If you want your Ubuntu machine to sync up perfectly with the Active Directory Controller, you can’t rely on an external timing source. So, what you need to do is configure your Ubuntu machine to utilize the Active Directory Controller as its NTP server. You can accomplish this task by installing and configuring a service such as NTP or chrony.
Note: Before we can continue to the next step in adding our Ubuntu system client to the Active Directory domain, test the network connectivity among them. We can do this by pinging the Domain name and Active Directory DNS name:
$ ping win-2rifamt88gr.mycompany.local
Having a reliable DNS and hostname resolution is crucial.
Installing the Realmd Package
Now, we install the realmd package and determine whether we are already part of the Active Directory domain. We shouldn’t have any domain membership since realmd wasn’t previously installed:
Now, run the following command:
Here, an empty result indicates that the host is not linked to the Active Directory Domain service yet.
Discovering the Domain
Moving on, we now discover our target domain using the following command:
Replace mycompany.local with your domain name. The output should be something like the following:
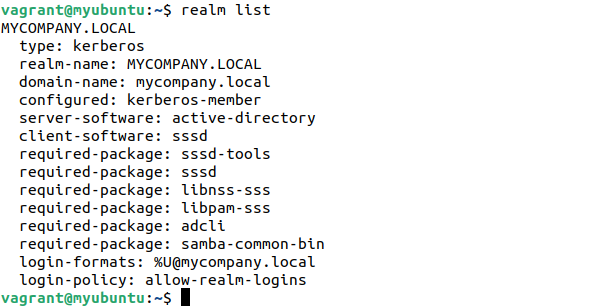
type: kerberos
realm-name: MYCOMPANY.LOCAL
domain-name: mycompany.local
configured: kerberos-member
server-software: active-directory
client-software: sssd
required-package: sssd-tools
required-package: sssd
required-package: libnss-sss
required-package: libpam-sss
required-package: adcli
required-package: samba-common-bin
login-formats: %U@mycompany.local
login-policy: allow-realm-logins
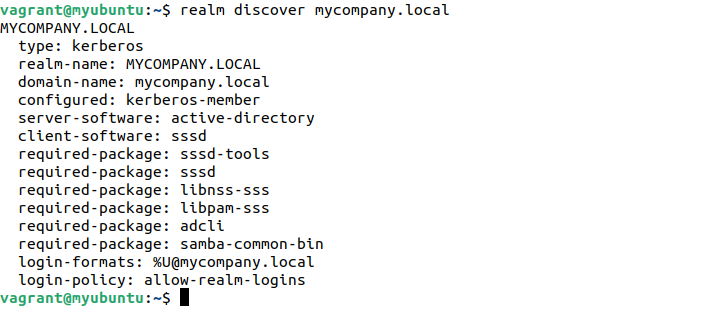
Notably, the output specifies the required packages to join the domain. Also, this checks the most apt packages to be installed with sssd.
Installing the Packages and Joining the Domain
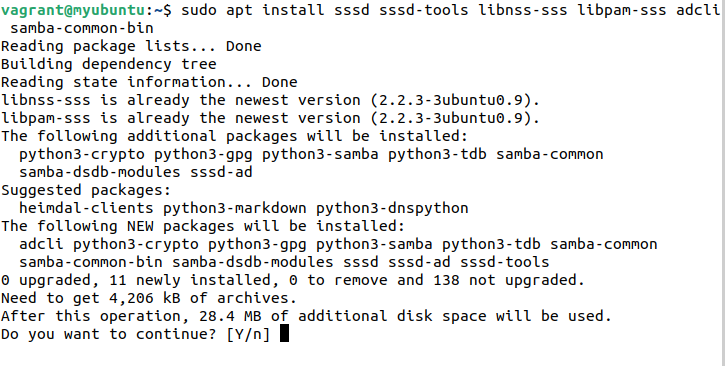
Let’s install the previous packages:
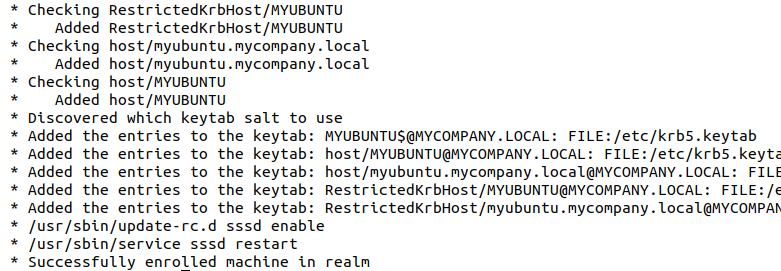
Now, to join the AD (Active Directory) domain and set up the sssd, we use the realm command again:
Enter the password for the Administrator when prompted. Also, you can specify another account using the -U flag:
If you run the realm list command again, you will see the output as follows:
We don’t need to touch the sssd configuration since this is already managed by the realm tool.
Creating the Home Directory
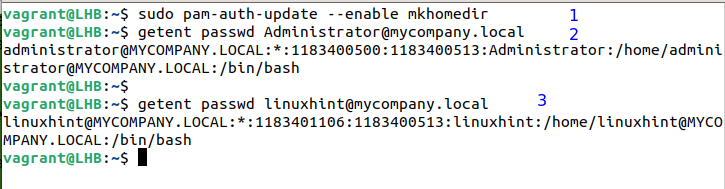
One thing that we need to do ourselves is to set the home directory for the AD users to log in our client machine. This can be done with the following command:
Similarly, we can retrieve the details of these AD users using the following command:
We can also specify the other users with their complete name. For example:
Logging with the AD Users Accounts
Finally, we can login with the AD users account:
This asks you to enter the details of the AD user: their username and passwords. When you login successfully, you’ll see the following screen:
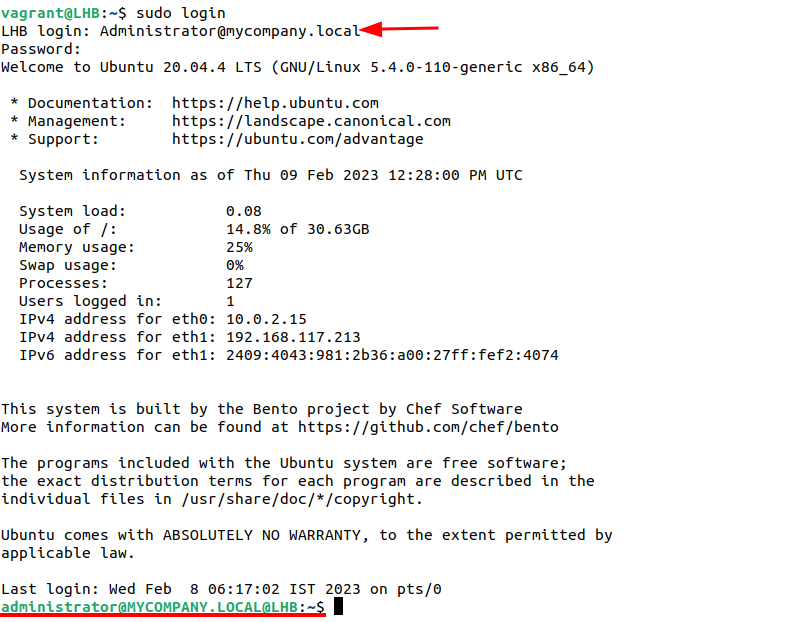
Notably, the home directory is automatically created here:

Conclusion
We now learned how to add a Linux host client to a Windows server. One may get the benefits of both systems by integrating Linux to an existing Active Directory domain. If you are having more than five systems, consider managing them with a directory service.