Humans prefer to remember names attached with things, whilst computers do like numbers. On the internet, we address machines by a specific name and these machines reside in a specific “domain”. To make it clear, consider a local computer “host1” inside the domain “linuxhint.com”. For humans, the address of this host in an easy to remember way is “host1.linuxhint.com”. However, to find this host on the internet, other computers will need its IP number.
To translate the machine or domain names into the numbers used for communication on the internet is done by a service called Domain Name service. If you happened to set up a PPP connection, you would have set the way on your Linux machine to get the hostname to IP address translation.
One way to accomplish this is to use the file “/etc/hosts/” and insert details of every host you want to connect to. This approach is totally unproductive and impossible in reality if the number of hosts is very large as in the case of the Internet. The other way is to use the IP addresses (numbers) in place of the names (which is practically not possible but for at most 8-9 computers).
The simplest way is to set up a server machine that will do this name to number translation tasks automatically. The Server machine or simply the Domain Name Server system is used for this purpose where we use the “/etc/resolv.conf” file and insert all the IP numbers in this file.
The “/etc/resolv.conf” File
On the Linux/Unix Operating system, the “resolv.conf” file contains the lists of nameservers (DNS servers) for name resolution. The contents of this file are added automatically by some networking application on your system. These entries are updated every time your system changes its location to a different networking domain. There is at least one nameserver entry which defines a DNS server. Priorities to nameservers are given in the order the system finds an entry in the file.
Whenever we change a network configuration files like “/etc/hosts”, we are required to restart the network service by:
Or by using:
How to Update “/etc/resolv.conf” File
This file is managed by a system service called systemd-resolved (for providing network name resolution to local applications) and can be updated by network service daemons and also manually by hand. But manual changes are overwritten on system or network reboot by various sources like:
- The resolvconf program
- The network-manager daemon
- DHCP clients
If you want to use your own custom list of nameservers and add these nameservers, then follow the steps below:
Method 1. Temporary solution for adding a nameserver
If you use this option to add a new DNS server, your settings will automatically reset whenever you log out or restart your system, reconnect to the network or restart networking service, run the dhclient command. Follow the steps mentioned below:
Step 1: Open the file “/etc/resolv.conf” with any text editor like ‘nano’:
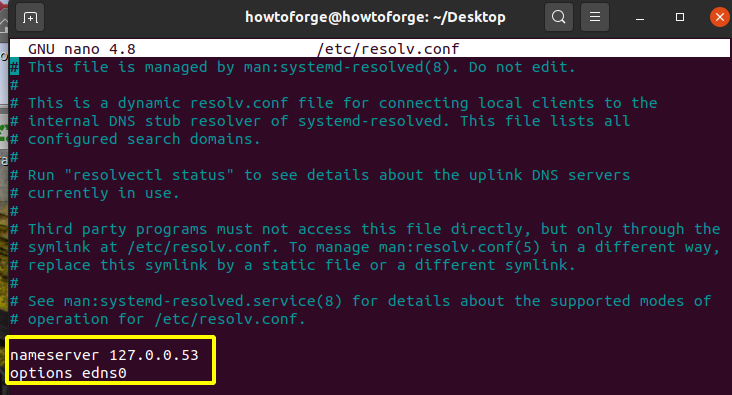
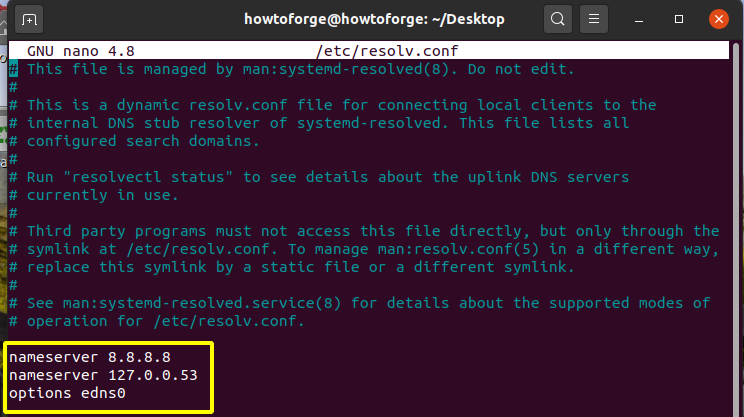
Step 2: Now, add a new nameserver directive at the top of all existing nameserver directives, as described below:
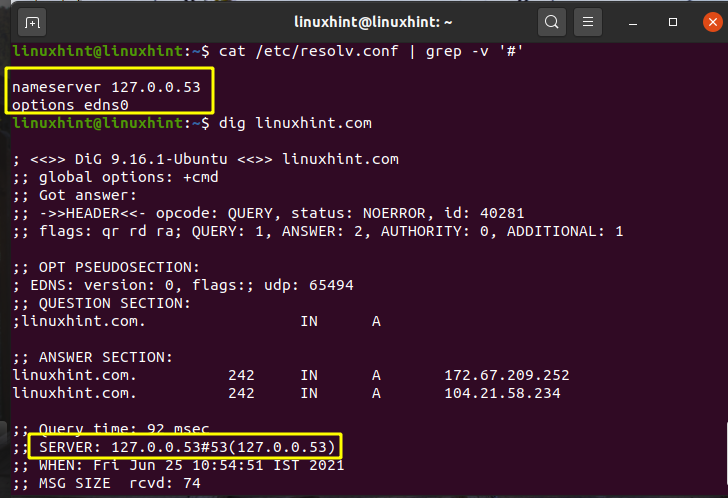
nameserver 127.0.0.53
options edns0
The file will now look like as:
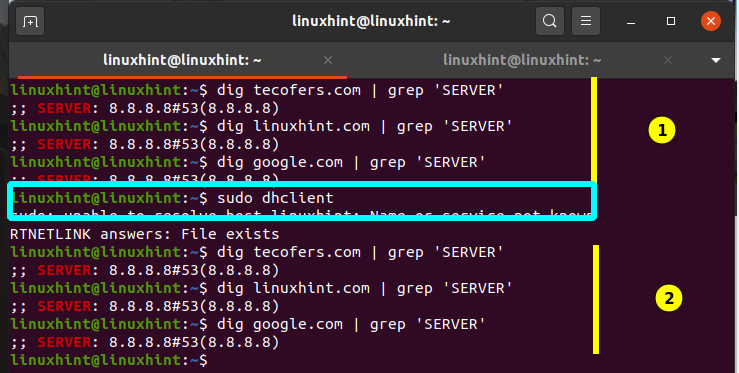
To check these settings, use the dig command. It will show you the DNS server IP address:
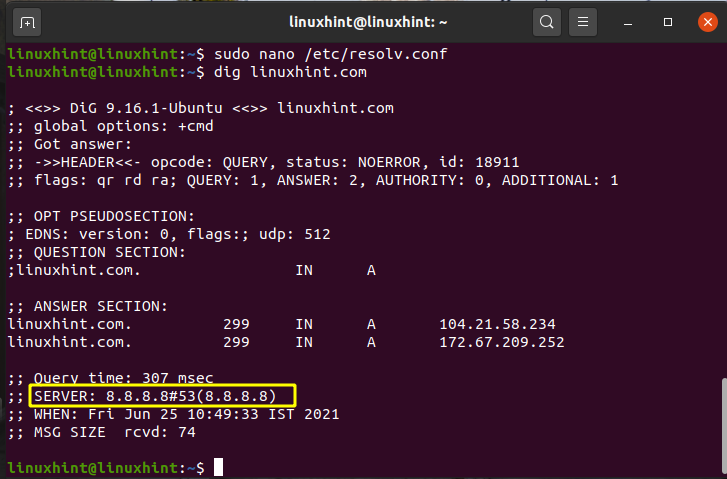
Now, if you run the dhclient command (maybe more than once) or reboot, the resolv.conf will reset and the DNS server will be set to old value. Verify with the ‘dig’ command:
Method 2. Permanent solution using Resolvconf
If you go by this way, you will need to reset the configuration if you want to revert to previous settings.
Step 1: First open the file “/etc/resolv.conf” and add the entry for the nameserver you want to use. For this guide we will be using the nameserver 8.8.8.8, you can choose to edit the file with editor like nano or use the one-shot command below:
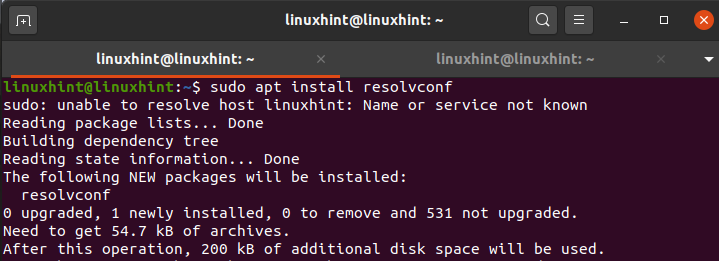
Step 2: Proceed by installing resolvconf package:
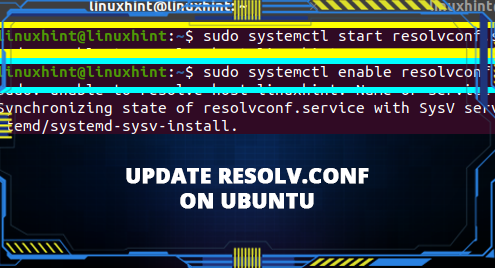
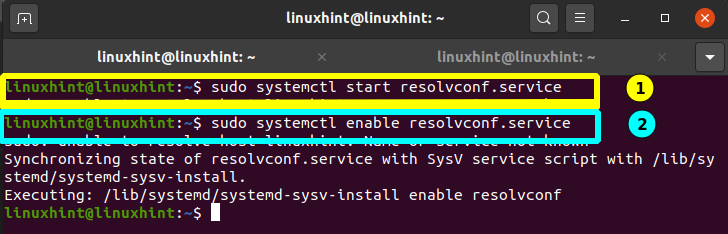
Step 3: Start and enable the service with:
$ sudo systemctl enable resolvconf.service
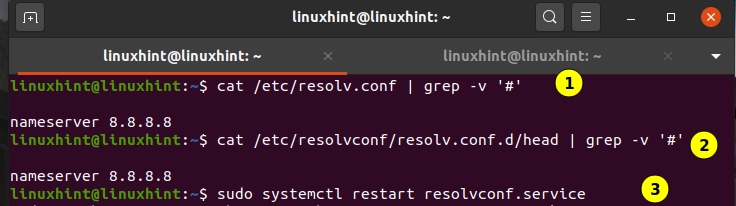
Step 4: Now, open the configuration file of Resolvconf “/etc/resolvconf/resolv.conf.d/head ”:
Now, add the following line to the above file and save it:
Step 5: Now, restart the resolvconf.service using:
Step 6: Verify the new DNS settings using the dig command as shown below: The content of “/etc/resolv.conf” should not change after any system reboot or after running “dhclient” command.
Conclusion
In this guide, we have learned different ways of updating a DNS resolver file. We have seen how we can permanently edit the file using the Resolvconf package.