ESP32 is a system-on-chip (SoC) microcontroller built for less power consuming applications. It features a dual-core 32-bit processor, Wi-Fi, Bluetooth, and a range of GPIO pins that can be used for a variety of tasks.
One of the most common uses of the ESP32 is to control LEDs, which can be used for lighting, display purposes, or as indicators. This article covers the pin number for the ESP32 built in LED and how to use it in projects.
What is the Pin Number for ESP32 LED?
The ESP32 has a number of GPIO pins that can control LEDs. These pins are labeled GPIO0 through GPIO39, with some pins having additional functionalities, such as pulse-width modulation (PWM) or analog input/output (ADC/DAC). The specific pin number for the ESP32 LED will depend on the ESP32 board version.
Generally, LEDs are connected to one of the GPIO pins through a resistor to limit the current flowing through the LED. The resistor value is decided depending on the input power supply and the LED’s forward voltage. Most of the ESP32 boards come with built-in LEDs connected to GPIO pin 2.
Here is a table that lists the built-in LED pin of all ESP32 boards:
| Board Name | Built-in LED Pin |
|---|---|
| ESP32 DevKit V1 | GPIO2 |
| ESP32 DevKit V2 | GPIO2 |
| ESP32-CAM | GPIO4 |
| ESP32-WROOM-32 | GPIO2 |
| ESP32-WROOM-32U | GPIO2 |
| ESP32-WROVER-KIT | GPIO2 |
| ESP32-WROVER-B | GPIO2 |
| ESP32-S2 DevKit DOIT | GPIO2 |
| ESP32-S2 Pico | GPIO2 |
| ESP32-S3 DevKit DOIT | GPIO2 |
| ESP32-S3 Pico | GPIO2 |
Note: Please note that this table does not include all ESP32 boards. It is always best to consult the board’s documentation to find the correct LED pin.
How to Use the ESP32 LED Pin
To use the ESP32 built-in LED, we must define it inside the ESP32 code. There are several programming languages, including Arduino, MicroPython, and C++. Here’s an example of how to turn an LED ON and OFF using the Arduino IDE:
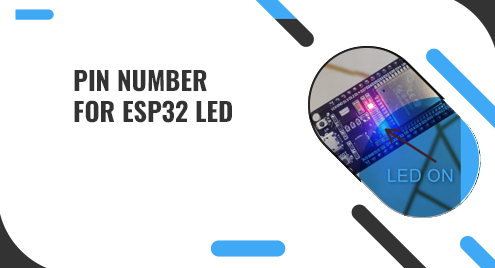
The default LED pin for the ESP32 DevKit is GPIO2. This GPIO pin is connected to an onboard LED on the DevKit. You can use this pin to blink the LED or to control it in other ways.
Code
#define LED 2
void setup() {
Serial.begin(115200); // SERIAL BAUD RATE
pinMode(LED, OUTPUT);
}
void loop() {
digitalWrite(LED, HIGH); //LED PIN SET HIGH
Serial.println("LED ON"); // LED TURN ON
delay(1000); // 1 SEC DELAY
digitalWrite(LED, LOW); //LED PIN SET LOW
Serial.println("LED OFF"); // LED TURN OFF
delay(1000); // 1 SEC DELAY
}
This code will cause the LED to blink on and off every second. We can also modify the delay time. This will make the LED blink faster or slower.

Conclusion
The ESP32 microcontroller can be used to control LEDs in a variety of applications. The specific pin number for the ESP32 LED will depend on which board we are using. However, most of the ESP32 boards including the ESP32-DEVKIT and ESP32 CAM have built-in LED at GPIO pin 2 and 4 respectively. Read more about ESP32 LED pin numbers in this article.