This tutorial will teach you how to install Kali Linux as a VM using Virtual Box. It is the first in a series of tutorials which will help you to setup the proper environment for using Kali Linux and then show you how to use it’s tools.The tutorials in the series include:
- Installing Kali Linux as a VM
- Creating a Kali Linux Live USB drive
- Configuring Kali Linux
- Package Management with Kali Linux
- Setting up a Kali Linux test lab
- Using the Kali Linux tools
Objectives
By the end of this session you will be able to: describe Kali Linux; decide if you should be using Kali Linux; download and verify the Kali Live ISO; install Oracle Virtual Box (VBox); and install Kali Linux in VBox.
Overview
Kali is a Linux distribution created by Offensive Security and is specifically designed for ethical hackers who want to do penetration testing.
It holds a repository of tools designed for hacking wireless networks, web applications and databases as well as for reverse engineering, password cracking and many others.
Is This For You?
This tutorial assumes you have some knowledge of Linux and are interested in learning more about penetration testing.
What is Kali Linux?
Kali is based on Debian and is aimed at penetration testing and security auditing. It contains hundreds of tools grouped into various information security tasks, such as penetration testing, security research, computer forensics and reverse engineering.
Kali Linux contains more than 600 penetration testing tools; is open source development; adheres to the Linux file system standard; supports many languages; is highly customizable; and has support for the Raspberry Pi.
Why is Kali Different?
Kali Linux was specifically created for professional penetration testing and security auditing and several core changes have been made which reflect this:
- It was originally designed to be used by a single, root user. However, the latest release requires the creation of a user during installation
- Network services are disabled by default using systemd hooks
- It contains a minimal and trusted set of repositories. Adding additional repositories runs a serious risk of corrupting the system
Is Kali Right For You?
If you have no experience of Linux or are looking for a desktop to use on a daily basis, then Kali Linux is probably not for you. However, if you want to be a penetration tester or are studying penetration testing then it’s probably the best choice around. If you are looking for a distribution for learning the basics of Linux then I would recommend starting with Mint or Ubuntu instead.
Download Kali Linux
Download the Kali image in either 32-bit or 64-bit format from the official website and then verify the checksums of the ISO.
The images are available both as directly downloadable ISO files or via torrent files. They can be found here: https://www.kali.org/downloads/.
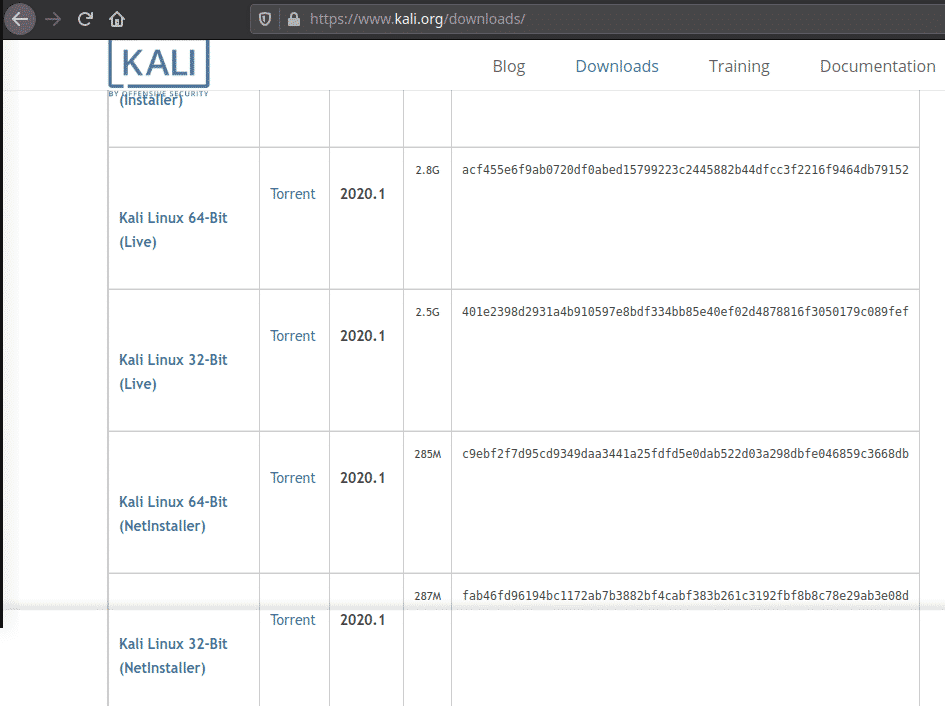
kali-linux-2020.1-live-amd64.iso although you can use the ‘installer’ version instead. I have downloaded it here:
Verifying the Download
Before you install Kali Linux you need to have confidence in the integrity of the download.
There are several ways of verifying the download. Each provides a level of assurance and involves a corresponding level of effort.
The quickest and easiest method and the one I’ll be using is to download an ISO image and then calculate the ISO’s SHA256 hash and compare it with the value listed on the Kali Linux web site. However, this assumes that the site to which the domain kali.org resolves is the real Kali Linux site.
Another method is to download an ISO image through the torrents and also download a file, unsigned, containing the calculated SHA256 signature. A third method, and the least prone to weakness, is to download both a cleartext signature file and a version of the same file that has been signed with the official Kali Linux private key. Details of these two methods are on the kali.org website.
Verify on Linux
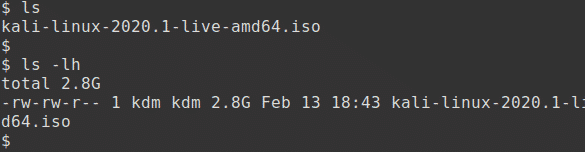
This is the first and simplest method. Generate the SHA256 checksum from the ISO image you’ve downloaded with the following command, assuming that the ISO image is named kali-linux-2020.1-live-amd64.iso and is the current directory.
The output should look something like this:

The resulting SHA256 signature should match the signature displayed in the sha256sum column on the official download page for the ISO that you have downloaded.
Bootable Live USB Drive
The quickest way to get up and running with Kali Linux is to run it live from a USB drive. This method is explained in the second tutorial in this series. Here we will be installing Kali Linux as a VM using Virtual Box.
Installing Virtual Box
VirtualBox is a powerful virtualization product for the enterprise as well as for home use. It is a feature rich, high performance product that is freely available as Open Source Software under the terms of the GNU General Public License. It allows you to create a VM, a virtual machine, and run one or more operating systems upon your desktop. It runs on Windows, Linux, MacOS and supports a large number of guest operating systems including Windows 10 and many Linux distributions.
Download and install the latest version for your platform. It can be found here: https://www.virtualbox.org/wiki/Downloads
Creating the Kali VM
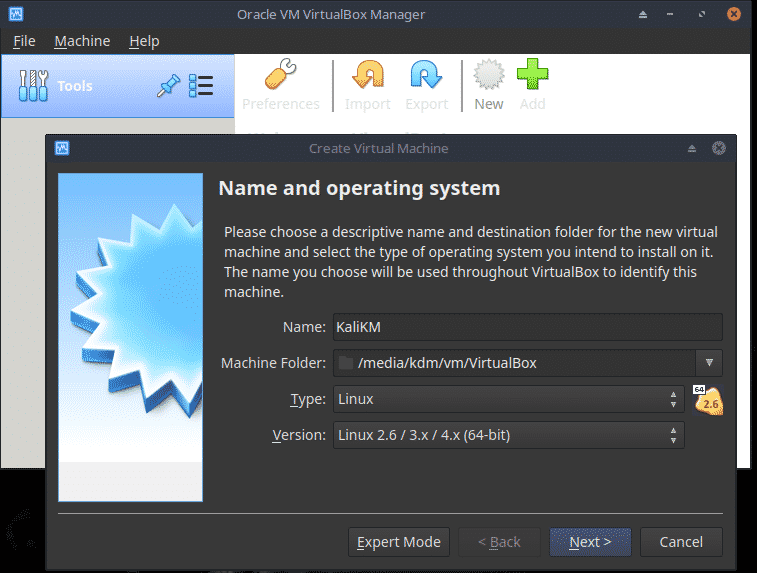
Open Virtual Box and click the New icon or choose Machine, New.
Enter a name such as KaliLinux and select the correct Type and Version. Click Next.
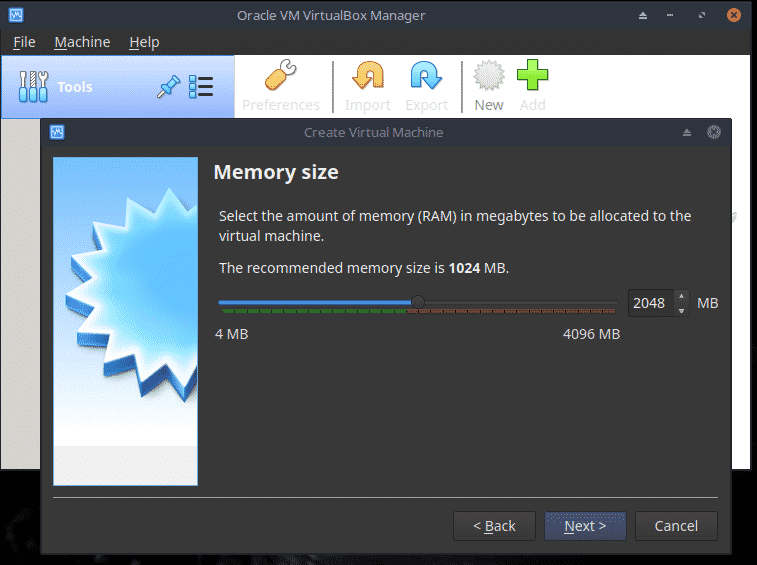
Set the Memory size to 50% of what is available although a maximum of 2GB may suffice. Click Next.
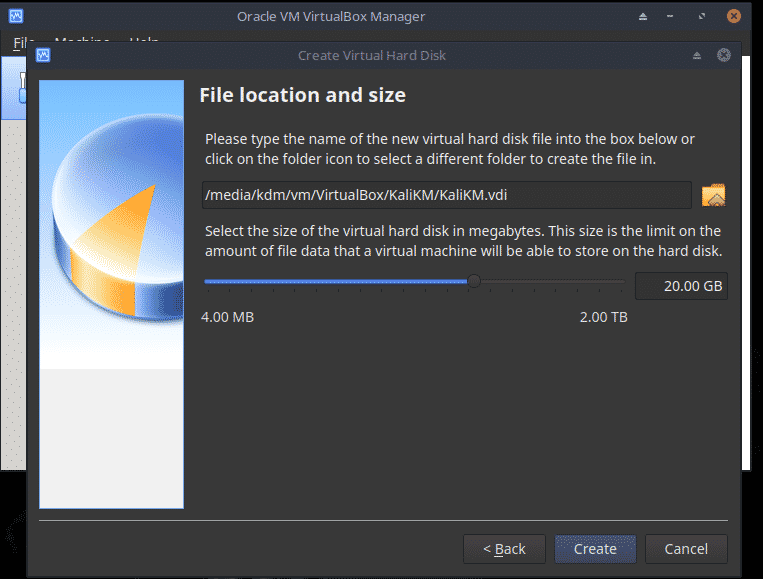
Choose Create a virtual hard disk now. Click Create.


Choose Dynamically allocated. Click Next.

Change the file location if required and set the size of the hard disk to 20GB. Since the disk is dynamically allocated, space will be used as and when needed.
Click Create.
Now from the Home screen, choose Settings, Storage and then the empty Optical Drive. Click on the Disc icon and choose the Kali Live ISO.
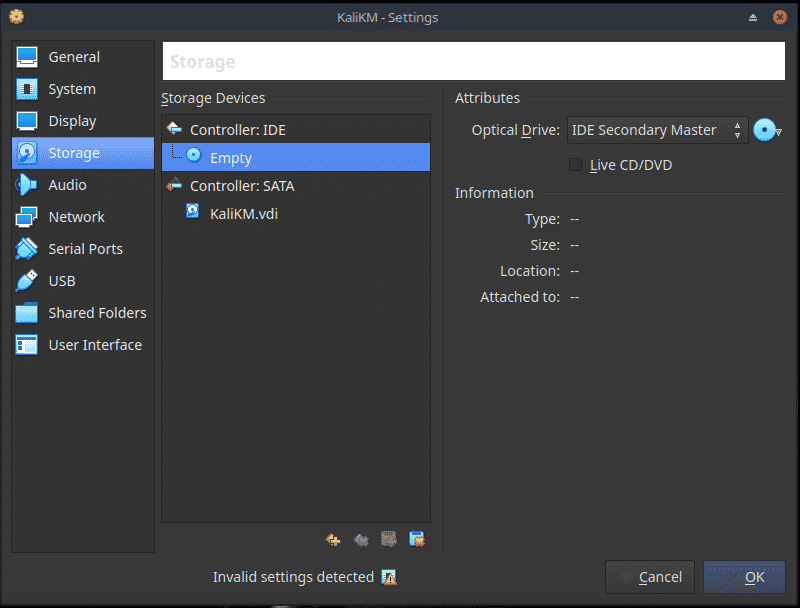
Now click OK to return to the home screen.

Installing Kali Linux
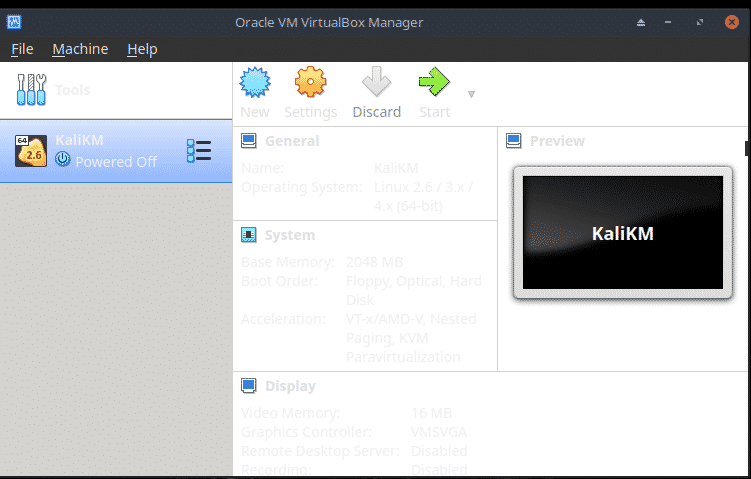
To boot the VM from the ISO click the big green Start icon.
At Please select a virtual optical disc…… click Start.
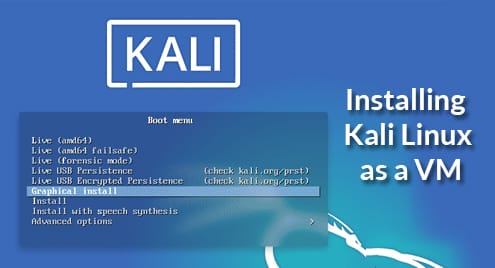
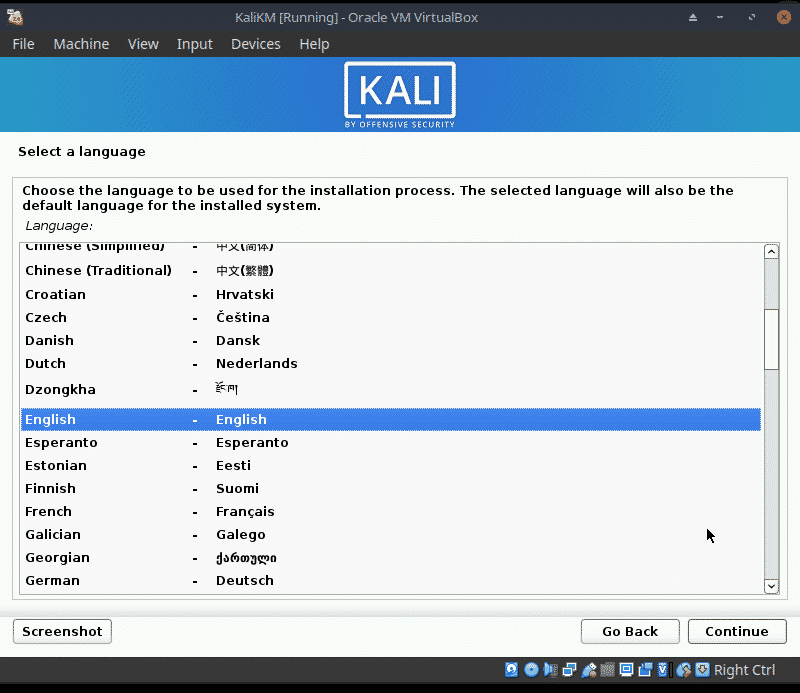
When the Kali menu appears, choose the option Graphical Install and press return.
Note: Until Guest Additions are installed, if you need to free the cursor from the VM, you must press the Right Control key.

The installation will begin.
The installation is very straight forward for a VM as we have only one disk and can choose not to use manual partioning. Because of this I will only be showing some screen shots.
Enter your choices on the next few screens. Mine are in brackets:
- Choose a language, (English), a location (United Kingdom) and a keyboard (British English)
- Choose a hostname, such as Kalitest, and a domain, such as home
- Add yourself as a user (ken marr), with username (kdm) and password
- As we are using a VM choose Guided – use entire disk and click Continue
- The disk is selected, click Continue
- Choose All files in one partition and click Continue
- Choose Finish partitioning and write changes and click Continue
Choose Yes and click Continue

The base system will now be installed.
- At Configure the package manager, click Continue
- At Software selection tick Gnome, click Continue
- At Configuring gdm3, click Continue
The main part of the installation continues.
- At Install the Grub boot loader, click Continue
- Now choose the hard disk and click Continue
- At Finish the installation, click Continue
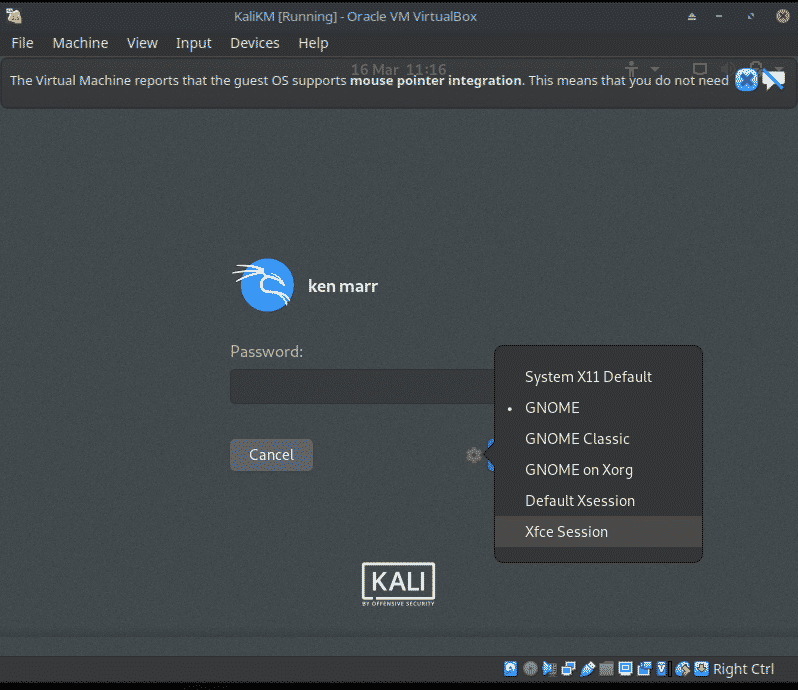
Kali Linux will now boot. Login using your username and passwd.
At the password screen you can choose Xfce rather than Gnome if required.
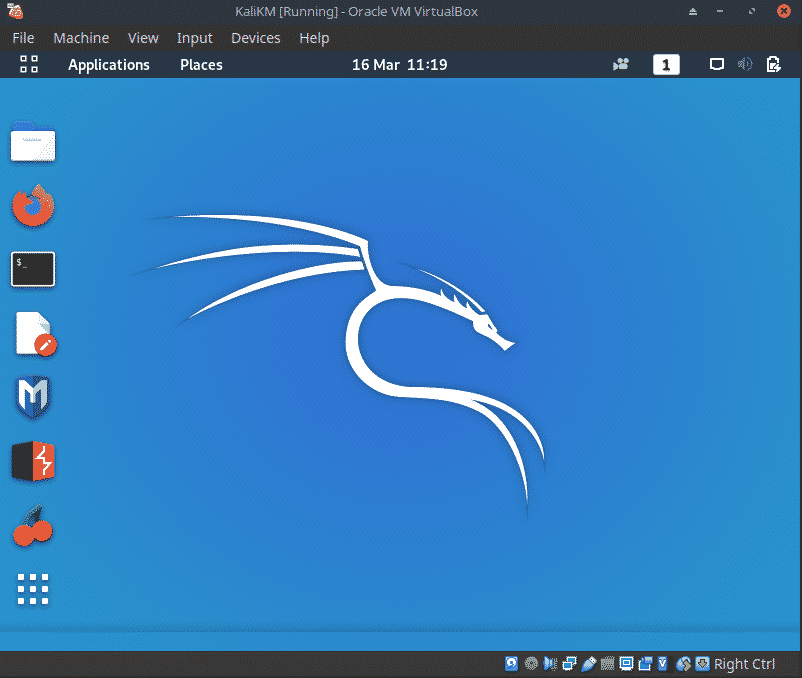
Kali Linux Desktop
This is the Kali desktop with Gnome.
VBox Guest Additions
If installing Kali Linux as a VBox VM, in order to use options such as Shared Folders and Shared Clipboard and to correct the behaviour of the mouse, the Guest Additions should be installed.
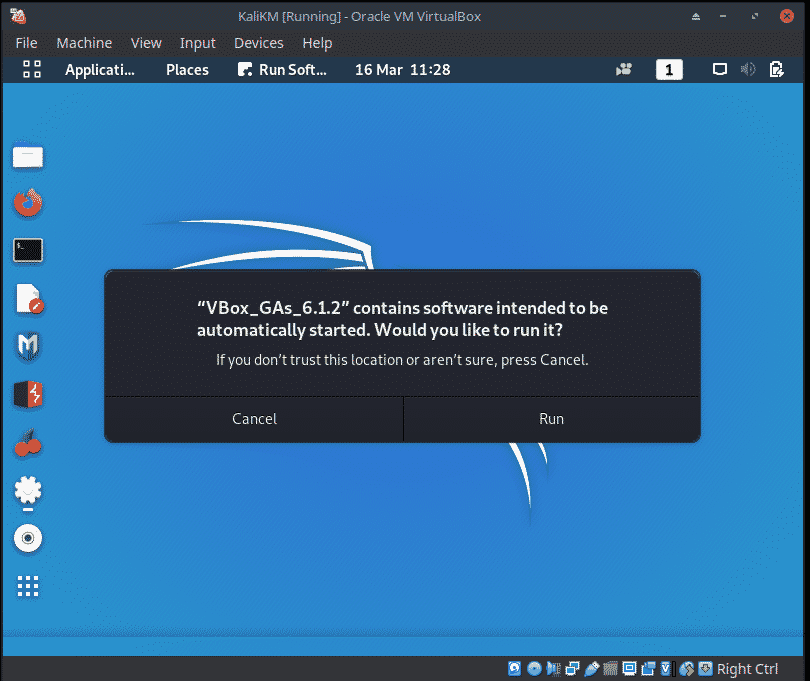
Start the Kali Linux virtual machine and attach the Guest Additions CD image, select Devices from the VirtualBox menu and then select Install Guest Additions. This will show the Guest Additions CD on the desktop.
If prompted to autorun the CD, click the Cancel button.
Mount Guest Additions
Mount the CD by double clicking on the desktop icon then close the window.

Add Execute Permissions
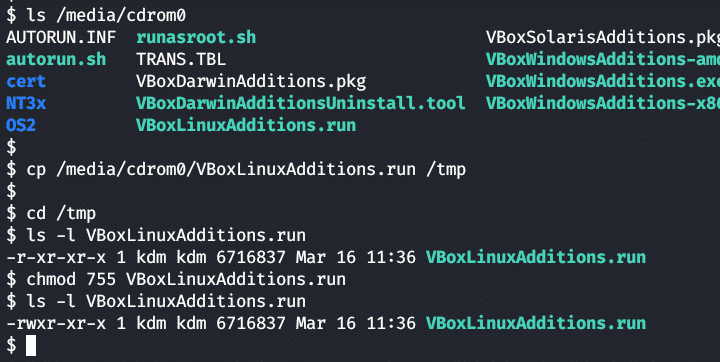
Open a terminal window and locate the Guest Additions cdrom.
Copy the VboxLinuxAdditions.run file from the cdrom to the /tmp directory:
$ cp /media/cdrom0/VBoxLinuxAdditions.run /tmp
Make the copied file executable.
$ ls -l VBoxLinuxAdditions
$ chmod 755 VboxLinuxAdditions.run
$ ls -l VBoxLinuxAdditions
Install Guest Additions
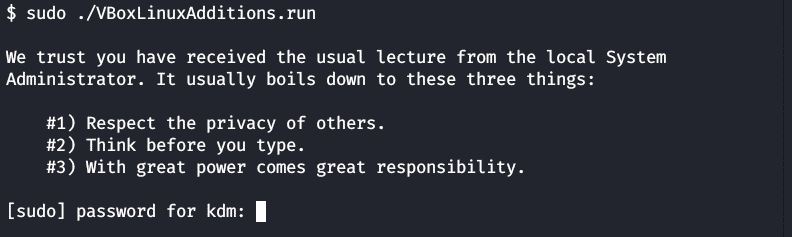
Run the following to install the Guest additions.
Enter your password and press return.
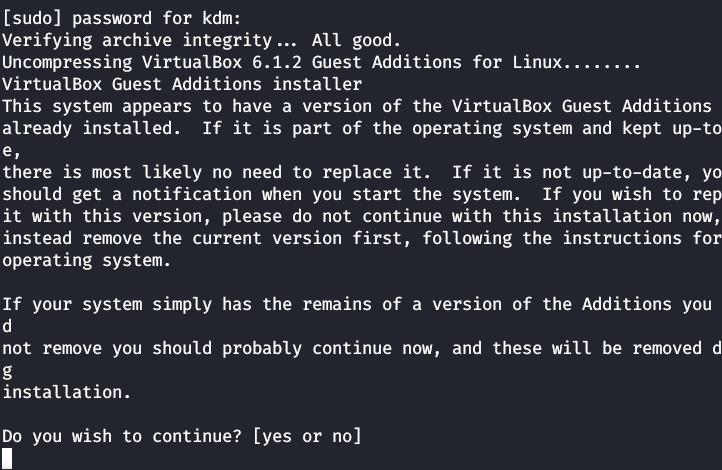
If asked to install the new version, answer Yes.
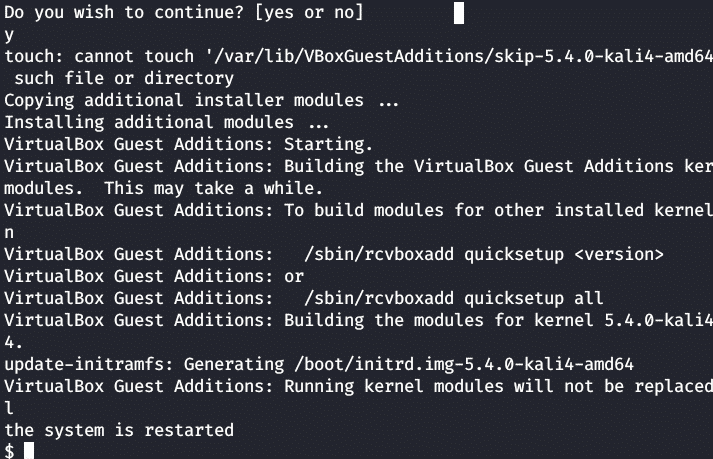
On completion, click on the battery icon at the top right of the screen, click on your name and choose restart to complete the installation.
Shared Clipboard
This allows text to be copied to and from the image. Choose Devices from the VBox menu, then Shared Clipboard and Bidirectional. Logout and login again to activate.

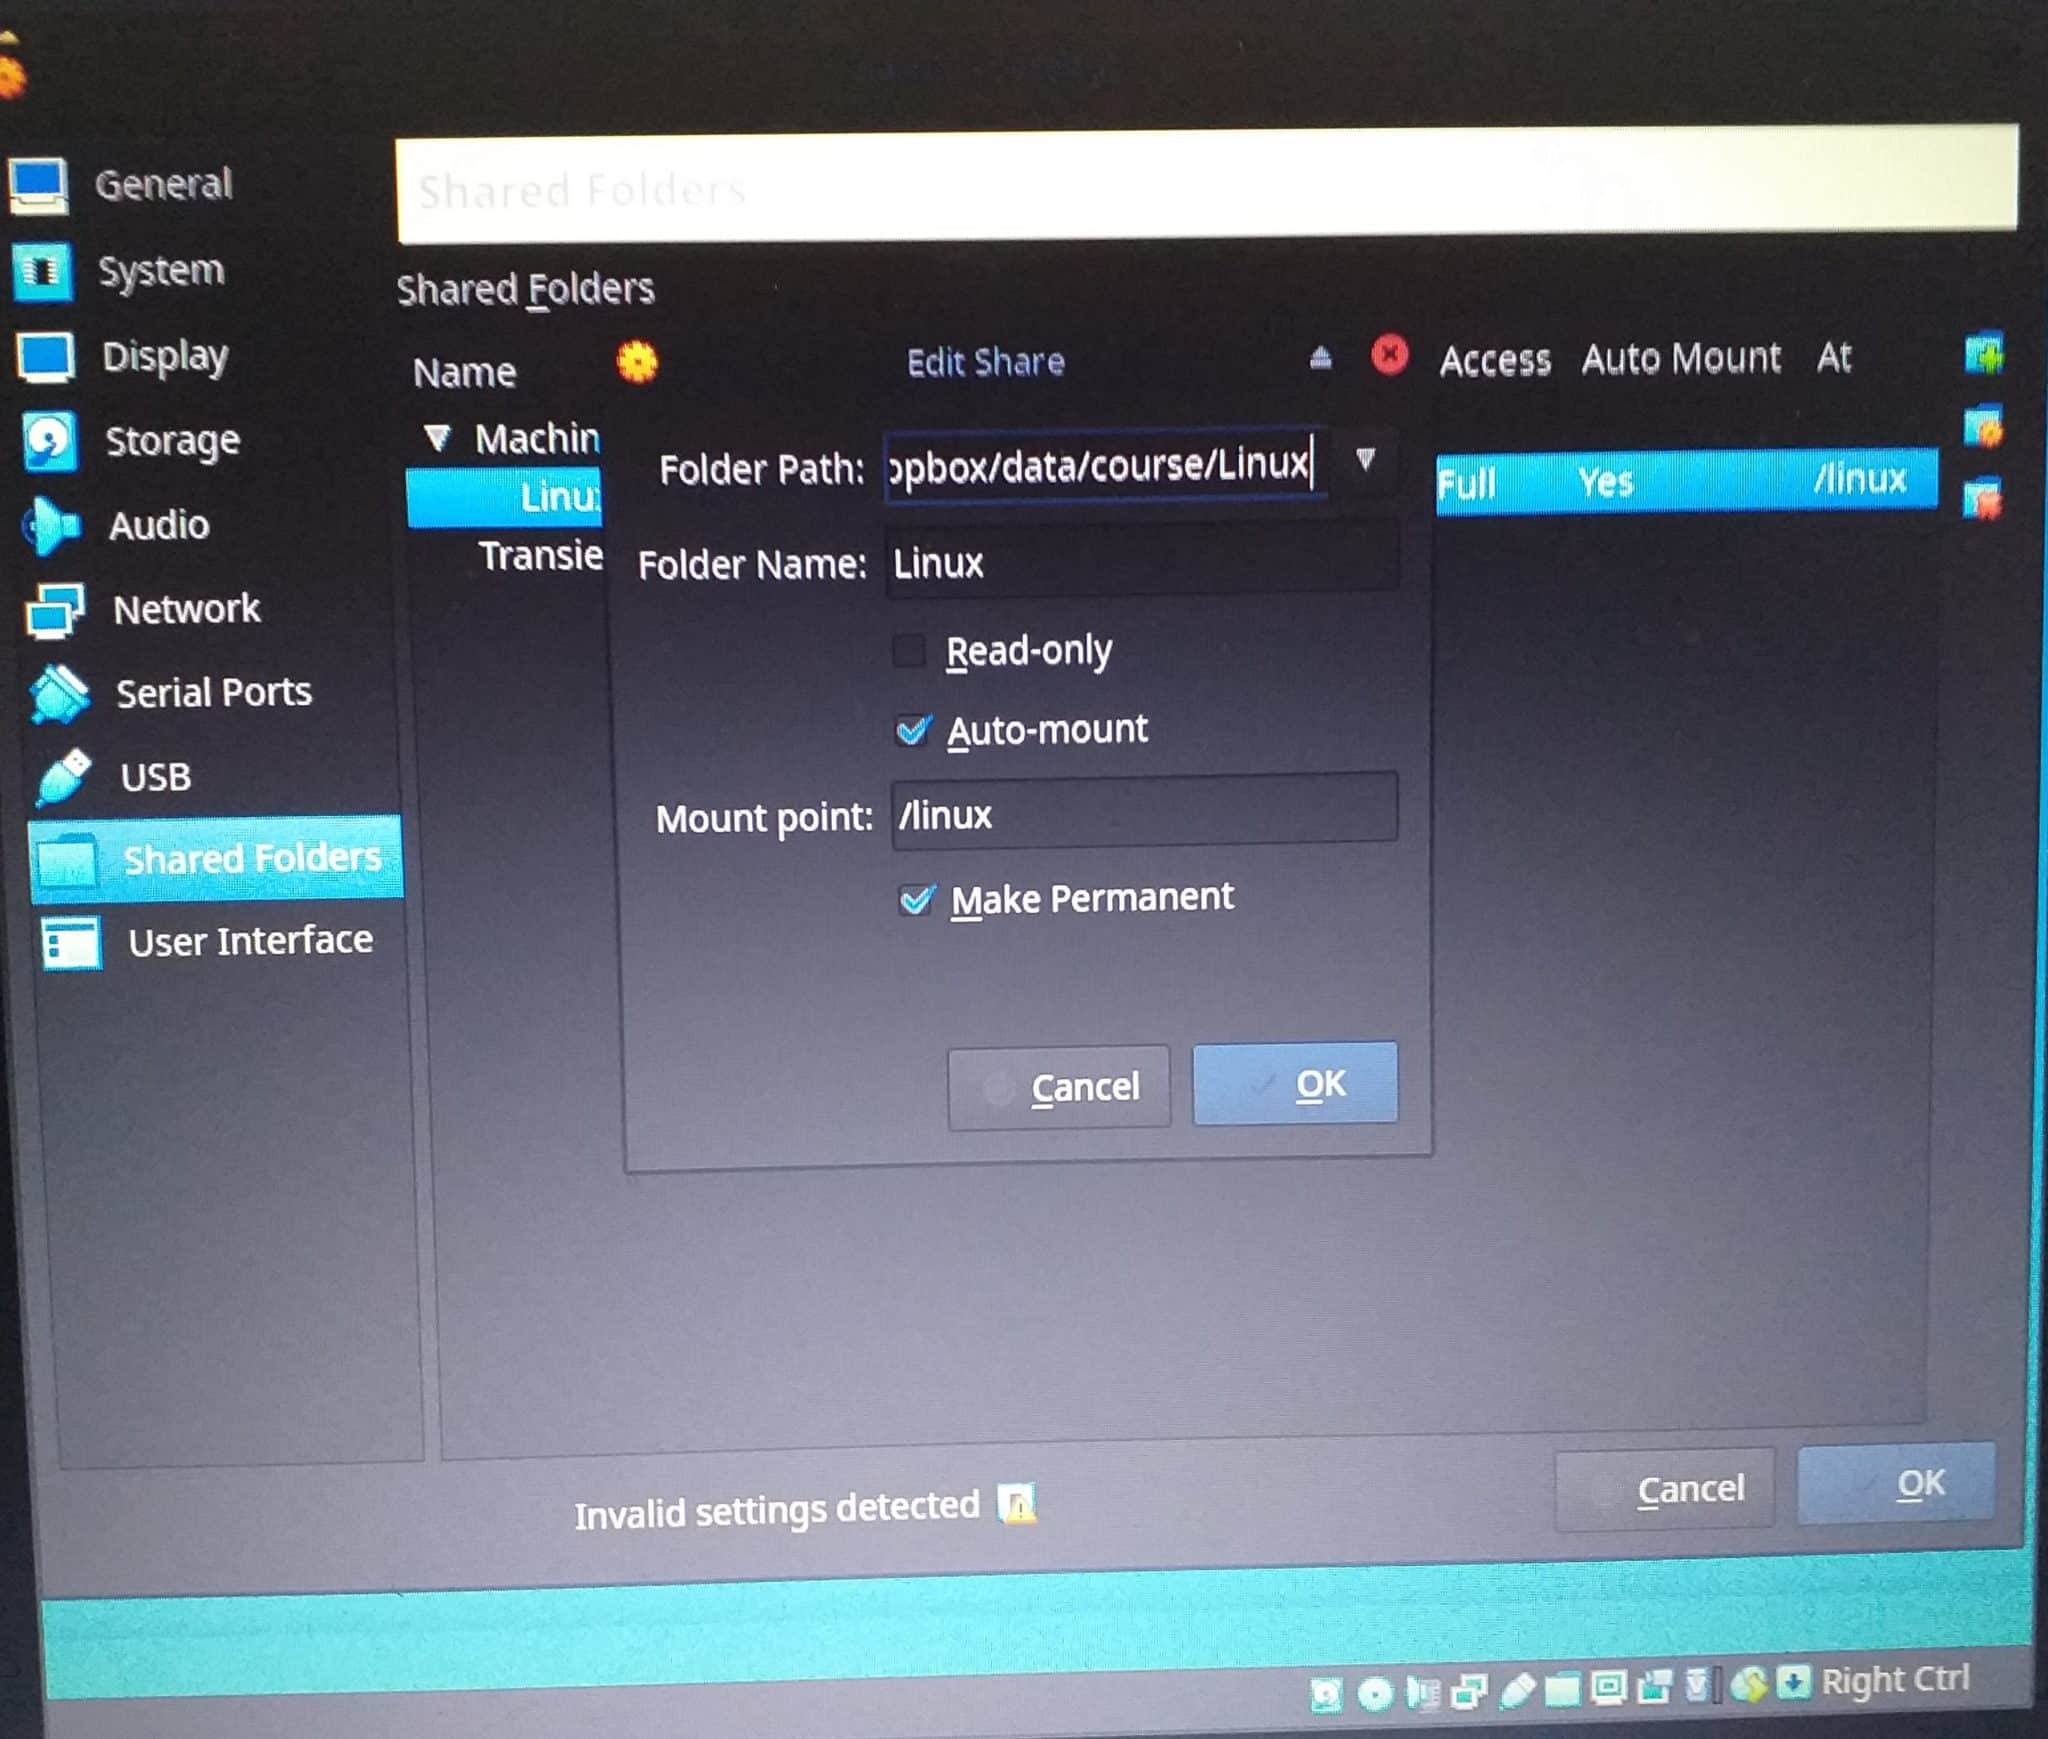
Shared Folders
This allows files to be copied to and from the image. Choose Devices from the VBox menu, then Shared Folders, Shared Folder Settings. Click on the plus sign to the right and select the required desktop folder. Set on Auto-mount and Make Permanent, then click OK.
To automount the new shared folder, reboot.
Snapshot VM
At this point it is recommended that you take a snapshot of the VM. This provides a point to return to in the event of a major error.
From the VBox menu choose Machine, Take Snapshot.

Conclusion
In this tutorial we first looked at how to decide if you should use Kali Linux. We then downloaded and verified the Kali Linux Live ISO, installed Vbox and installed Kali Linux as a VM.
Next Steps
I hope you will put the knowledge gained here to good use and attempt to set up Kali Linux in VBox. Then I suggest that you move on to the next part of this series, Creating a Kali Linux ‘Live’ USB drive.