
In this article, we will show you how to install the VirtualBox Guest Additions on the Debian 12 Oracle VirtualBox virtual machines.
Topic of Contents:
- Installing the GCC and Linux Kernel Headers on the Debian 12 VirtualBox Virtual Machine
- Mounting the VirtualBox Guest Additions CD Image on the Debian 12 Virtual Machine
- Installing the VirtualBox Guest Additions on the Debian 12 VirtualBox Virtual Machine
- Verifying If the VirtualBox Guest Additions Is Installed Correctly on the Debian 12 Virtual Machine
- Conclusion
Installing the GCC and Linux Kernel Headers on the Debian 12 VirtualBox Virtual Machine
To build the VirtualBox Guest Additions kernel modules on Debian 12, you must have the GCC C/C++ compiler and Linux kernel headers installed on your Debian 12 system.
If you need any assistance in installing the GCC C/C++ compiler on your Debian 12 system, read the article on How to Install the GCC C/C++ Compiler on Debian 12.
If you need any assistance in installing the correct Linux kernel headers on your Debian 12 system, read the article on How to Install the Linux Kernel Headers on Debian 12.
Mounting the VirtualBox Guest Additions CD Image on the Debian 12 Virtual Machine
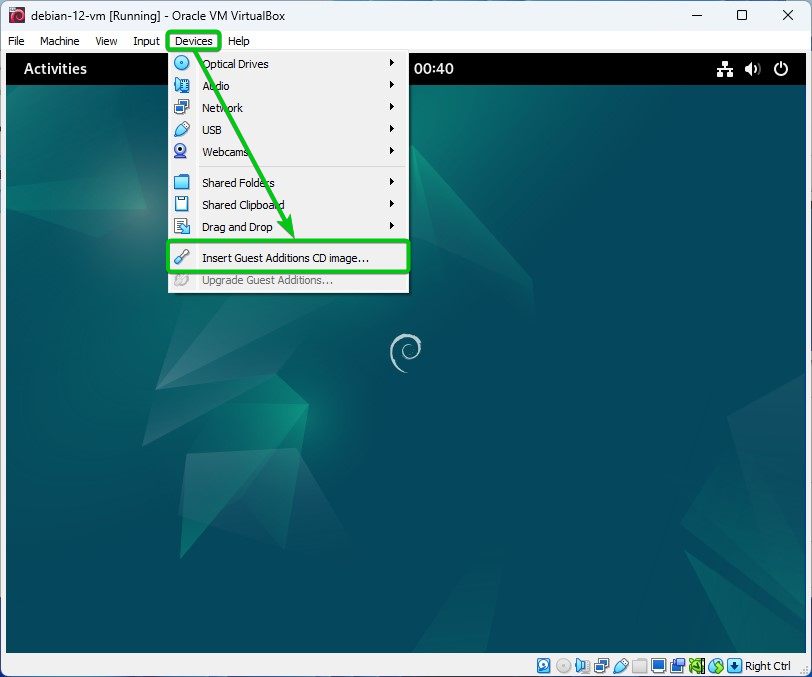
To mount the VirtualBox Guest Additions CD image on the Debian 12 VirtualBox virtual machine, run the Debian 12 VirtualBox virtual machine and click on Devices > Insert Guest Additions CD image as marked in the following screenshot:
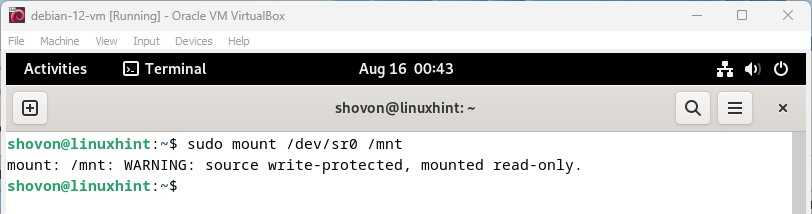
Once the VirtualBox Guest Additions CD image is inserted into the Debian 12 VirtualBox virtual machine, run the following command to mount the VirtualBox Guest Additions CD image on the “/mnt” directory of your Debian 12 virtual machine.
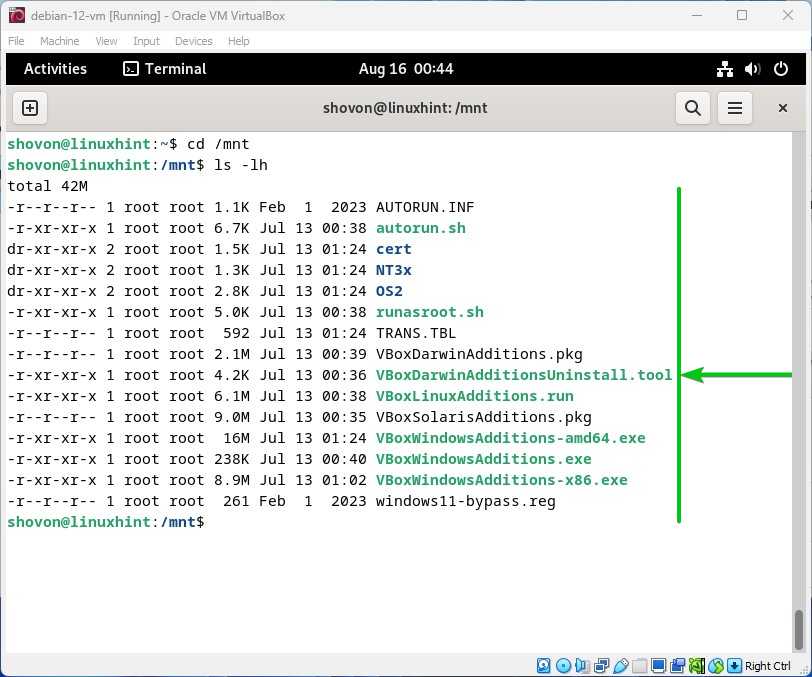
Once the VirtualBox Guest Additions CD image is mounted, you can navigate to the “/mnt” directory and see the contents of the VirtualBox Guest Additions CD image.
$ ls -lh
Installing the VirtualBox Guest Additions on the Debian 12 VirtualBox Virtual Machine
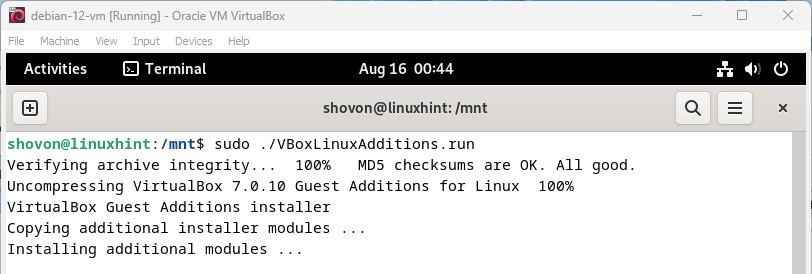
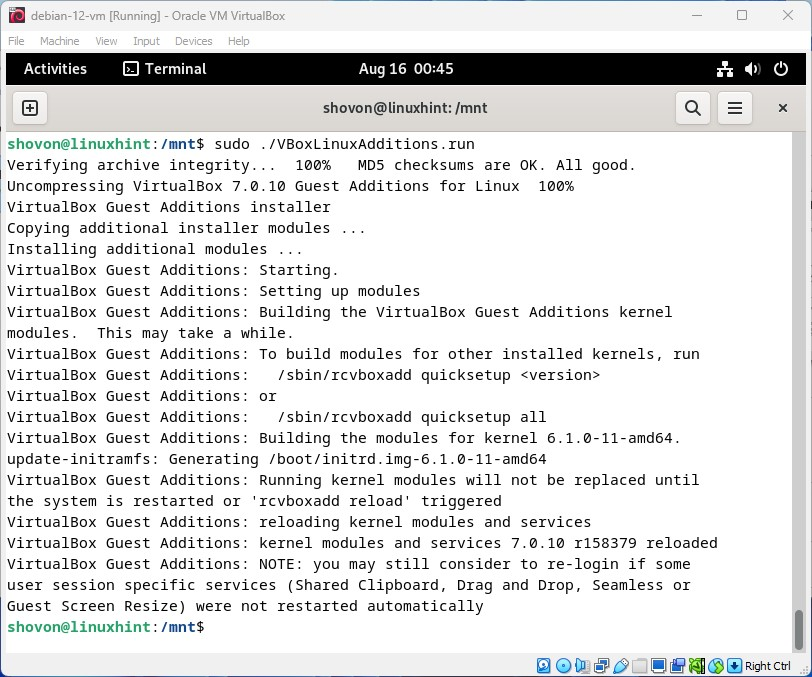
To install the VirtualBox Guest Additions on the Debian 12 VirtualBox virtual machine, run the following command from the “/mnt” directory:
VirtualBox Guest Additions is being installed on the Debian 12 VirtualBox virtual machine. It takes a few seconds to complete.
The VirtualBox Guest Additions should be installed on the Debian 12 VirtualBox virtual machine at this point.
For the changes to take effect, reboot your Debian 12 VirtualBox virtual machine with the following command:
Verifying If the VirtualBox Guest Additions Is Installed Correctly on the Debian 12 Virtual Machine
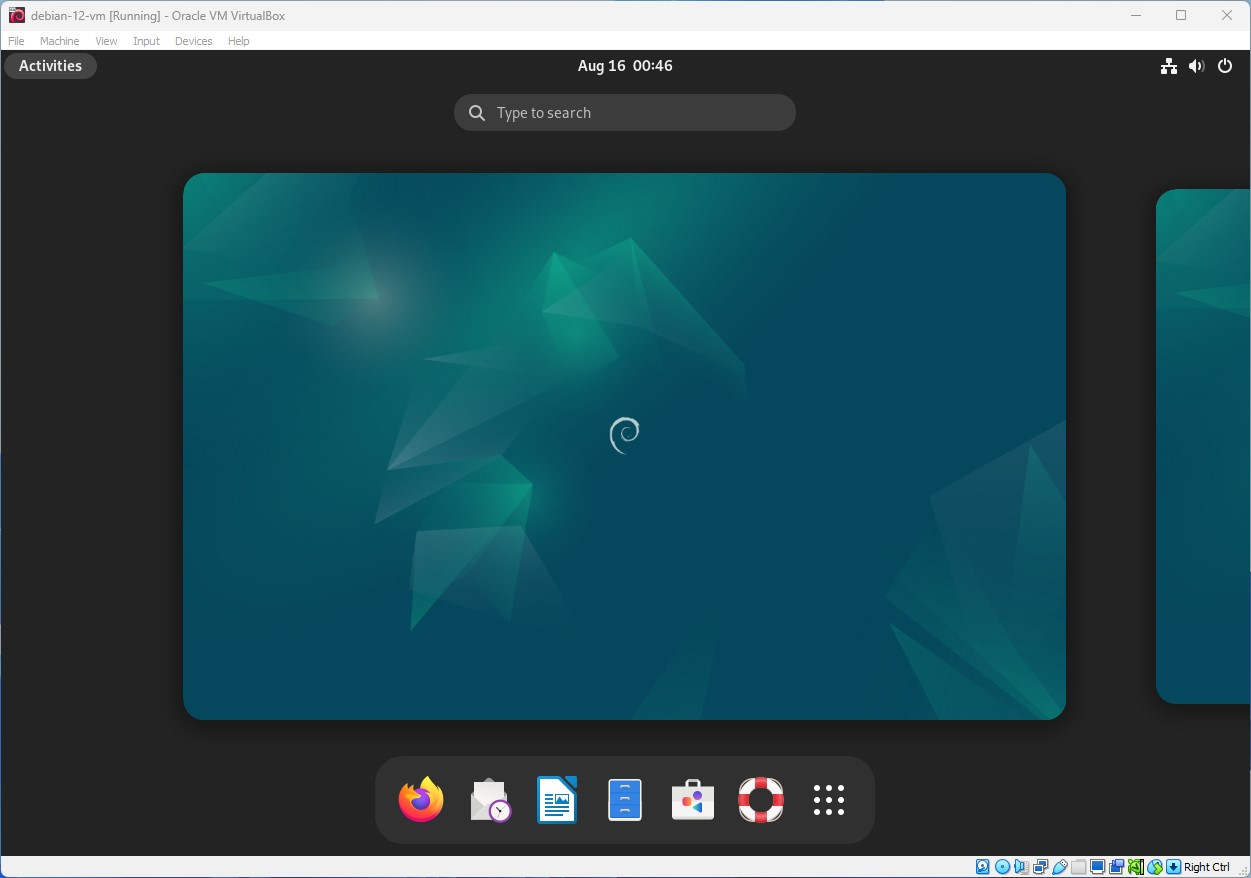
The easiest way to verify if the VirtualBox Guest Additions is working on the Debian 12 VirtualBox virtual machine is to resize the Debian 12 virtual machine window and see if the virtual machine screen is being resized automatically as well. If the screen auto-resizing works for the Debian 12 virtual machine, the VirtualBox Guest Additions is working on the Debian 12 VirtualBox virtual machine.
Conclusion
We showed you how to install the VirtualBox Guest Additions on the Debian 12 Oracle VirtualBox virtual machines so that you will have a better Debian 12 user experience on the Oracle VirtualBox virtual machines.