VirtualBox Extension Pack adds the following features to VirtualBox 7:
- RDP support for virtual machines: You can remotely connect to the VirtualBox 7 virtual machines using the Microsoft RDP (Remote Desktop Protocol) client on your Windows host (i.e. Windows 10/11 devices).
- Disk encryption: You can encrypt the virtual disks of the VirtualBox 7 virtual machines for securing the data of your virtual machines.
- NVMe support: NVMe storage devices can be added to the VirtualBox 7 virtual machines. This will improve the disk read/write performance of the VirtualBox 7 virtual machines.
- PXE boot for Intel NICs: Adds support for PXE booting if Intel network interface cards are used for the VirtualBox 7 virtual machines.
In this article, I will show you how to download and install the VirtualBox extension pack on VirtualBox 7.
Table of Contents
- Checking VirtualBox Version
- Downloading VirtualBox Extension Pack for VirtualBox 7
- Installing VirtualBox Extension Pack on VirtualBox 7
- Conclusion
Checking VirtualBox Version
The version number of the VirtualBox Extension Pack and VirtualBox should match for an error-free user experience. So, before you can download and install the VirtualBox Extension Pack on VirtualBox, it is a good idea to check the version number of the VirtualBox software that you have installed.
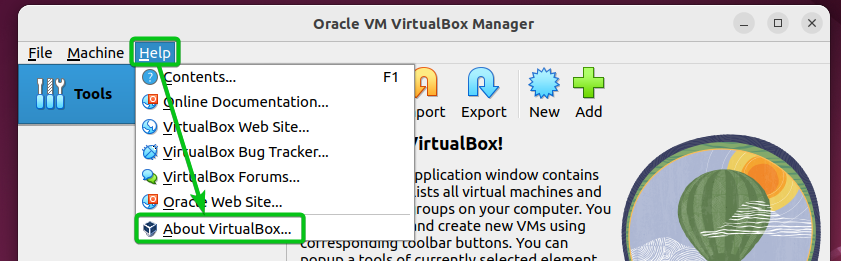
Open VirtualBox and click on Help > About VirtualBox to check the VirtualBox version number.
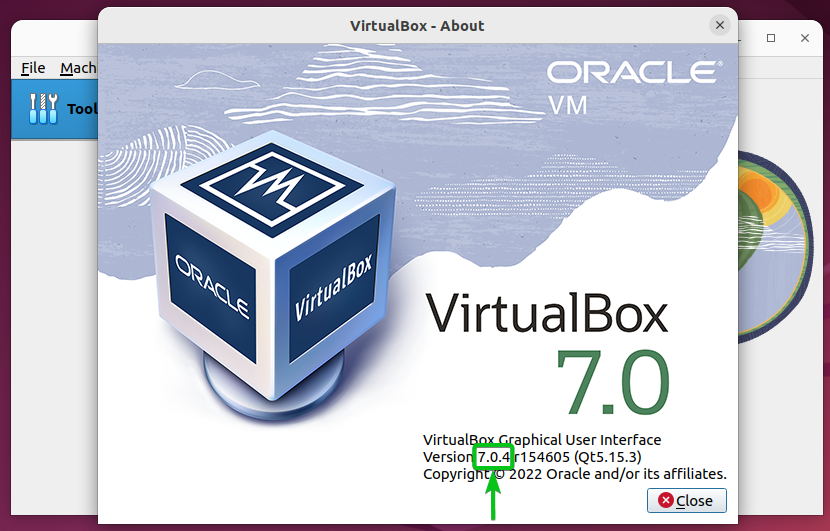
The version number of VirtualBox should be displayed in the bottom-right corner of the VirtualBox about window.
As you can see, I am running VirtualBox 7.0.4 (the latest one at the time of this writing). You may be using a later version of VirtualBox. In any case, make sure to replace this version number with yours from now on.
Downloading VirtualBox Extension Pack for VirtualBox 7
To download the VirtualBox Extension Pack for your VirtualBox version, open a web browser and visit the URL https://download.virtualbox.org/virtualbox/<version>/.
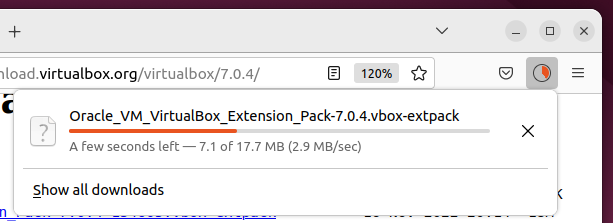
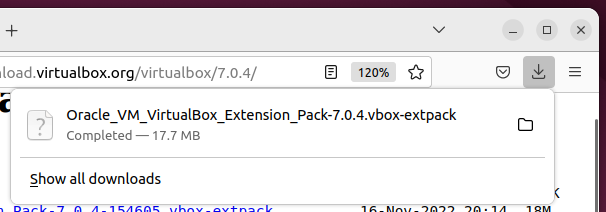
Once the page loads, click on the file “Oracle_VM_VirtualBox_Extension_Pack-<version>.vbox-extpack” as marked in the screenshot below.
NOTE: Make sure to replace <version> with the version number of the VirtualBox software you’re running. In my case, the URL is https://download.virtualbox.org/virtualbox/7.0.4/ and the file name is “Oracle_VM_VirtualBox_Extension_Pack-7.0.4.vbox-extpack”.

The VirtualBox 7 extension pack file is being downloaded. It will take a while to complete.
At this point, the VirtualBox 7 extension pack file should be downloaded.
Installing VirtualBox Extension Pack on VirtualBox 7
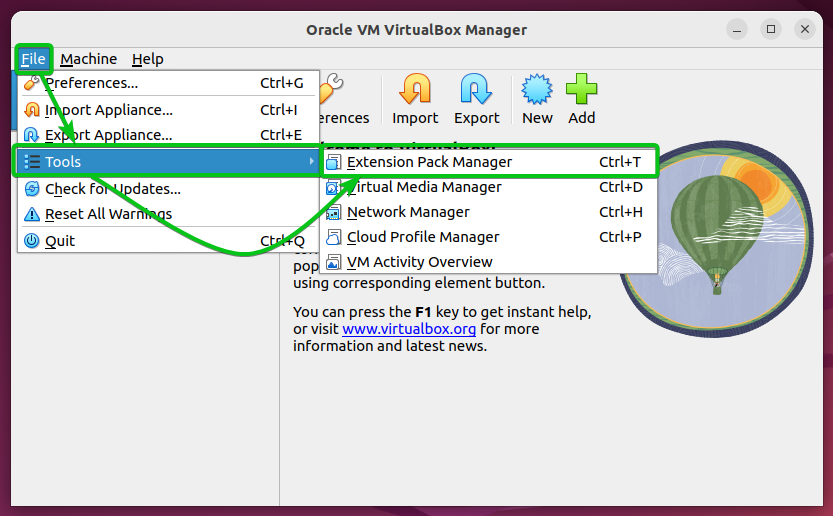
To install VirtualBox Extension Pack on VirtualBox 7, open VirtualBox 7 and click on File > Tools > Extension Pack Manager.
You can also press <Ctrl> + T or Click on
![]()
> Extensions.

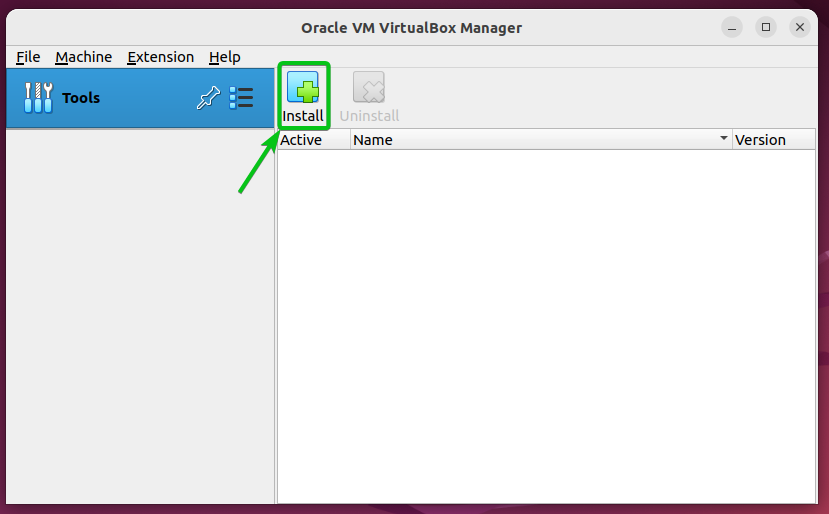
From the VirtualBox 7 Extensions window, click on Install.
Select the VirtualBox extension pack file that you have downloaded and click on Open.

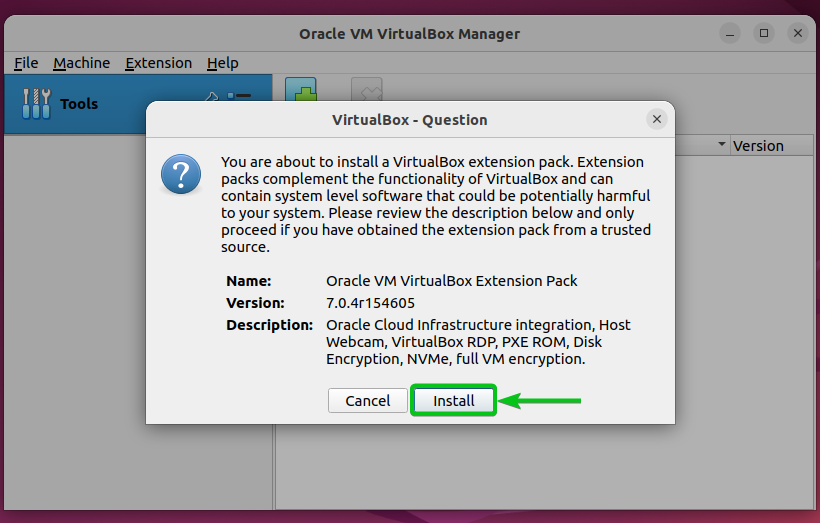
Click on Install.
Scroll all the way down and click on I Agree to accept the VirtualBox extension pack license agreement.

Type in your login password and click on Authenticate.

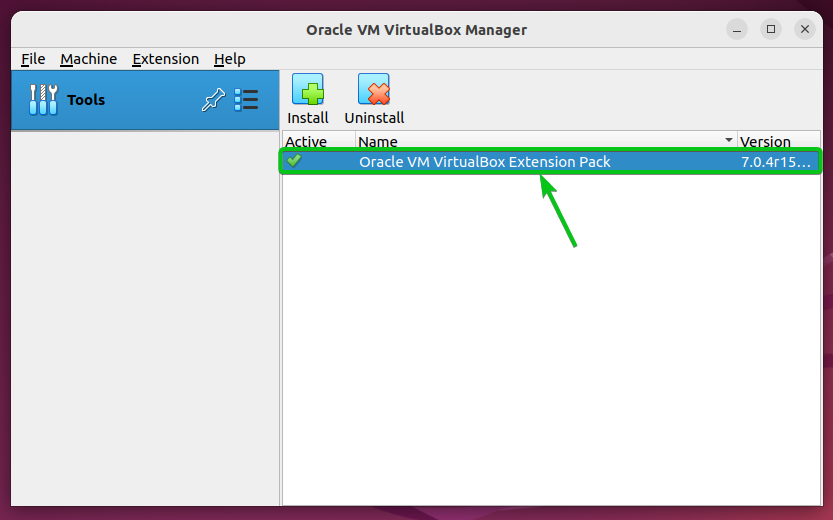
VirtualBox extension pack should be installed on VirtualBox 7.
Conclusion
In this article, I have shown you how to install the VirtualBox extension pack for your VirtualBox version and install it on VirtualBox 7.