This article contains following sections:
- 1. Setting Up uPyCraft IDE with ESP32
- 1.1. Installing Python 3
- 1.2. Downloading the uPyCraft IDE
- 1.3. Installing uPyCraft IDE
- 1.4. uPyCraft IDE Interface Overview
- 2. Downloading MicroPython Firmware for ESP32
- 3. Installing MicroPython Firmware in ESP32 Using uPyCraft IDE
- 3.1. Fix COM Port Is Not Detected in uPyCraft IDE
- 3.2. Flashing MicroPython Firmware in ESP32
- 4. How to Upload LED Blink Program in ESP32 Using MicroPython uPyCraft IDE
1. Setting Up uPyCraft IDE with ESP32
MicroPython is derived from Python 3 programming language specially designed for microcontroller-based boards. We can also program ESP32 with MicroPython using uPyCraft IDE.
Before we write our first MicroPython code for ESP32 we need to install some prerequisites in our PC.
- Python 3
- uPyCraft IDE
- MicroPython firmware for ESP32
1.1. Installing Python 3
To write a code of MicroPython we need an updated Python 3 version to be installed on our PC.
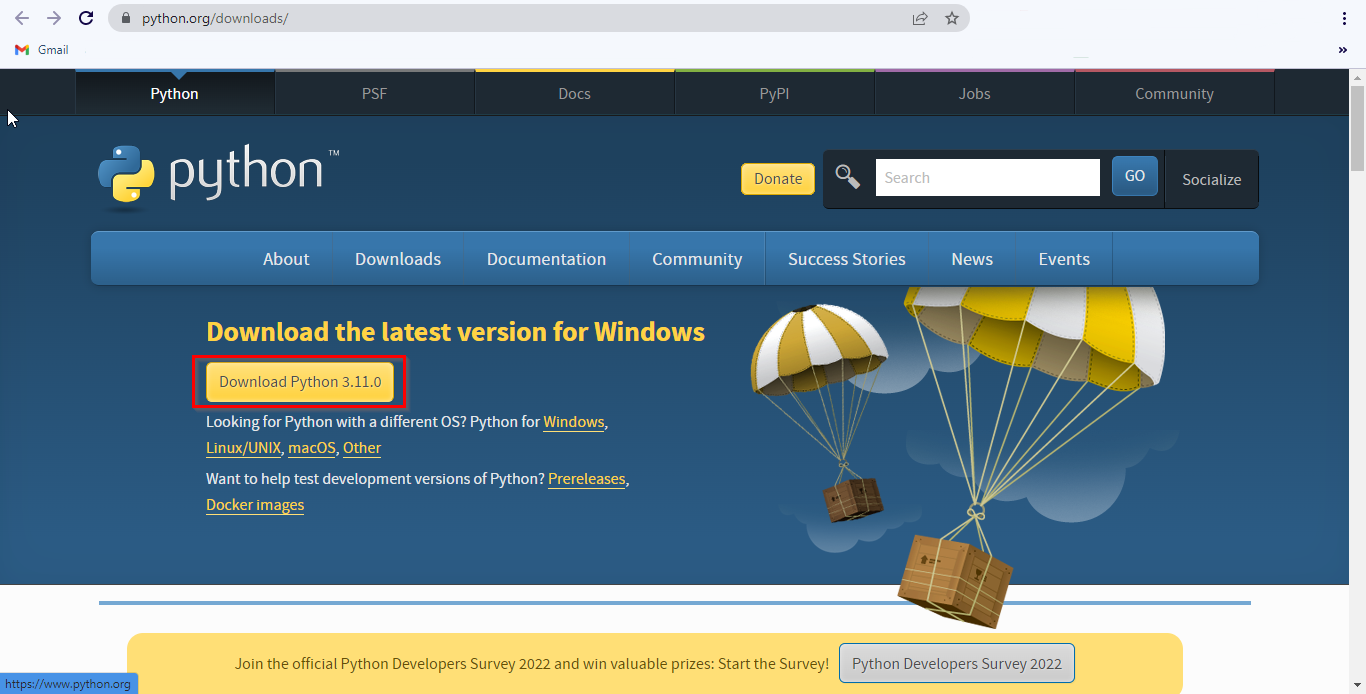
Step 1: Visit Python 3 download page or click here to download updated version. Here in our case, it is 3.11.0
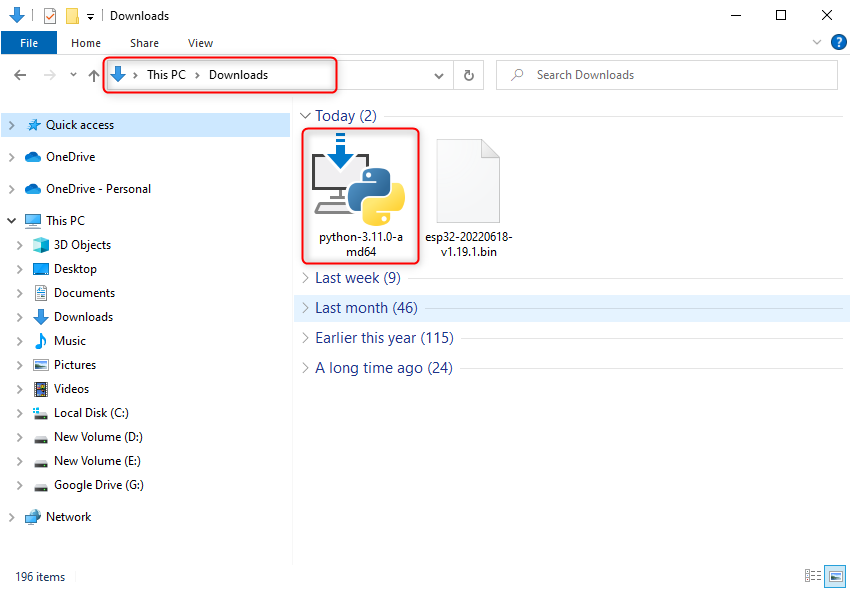
Step 2: Following file will be downloaded in the download directory.
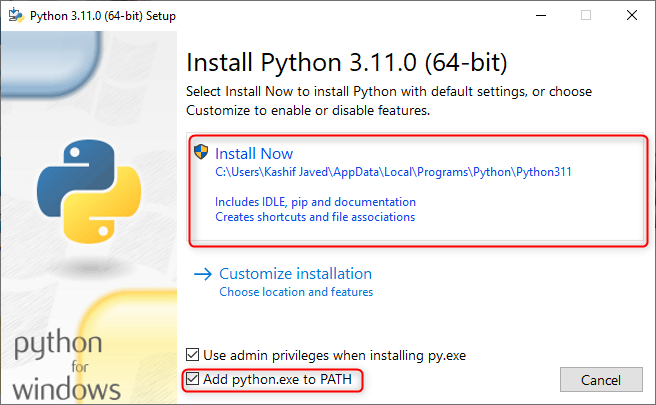
Step 3: Double click the file to start the installation of Python 3. Enable Add to PATH option and click Install Now. Once the installation is successful, close the setup.
As we have installed Python 3 now, we will continue towards the uPyCraft IDE installation part.
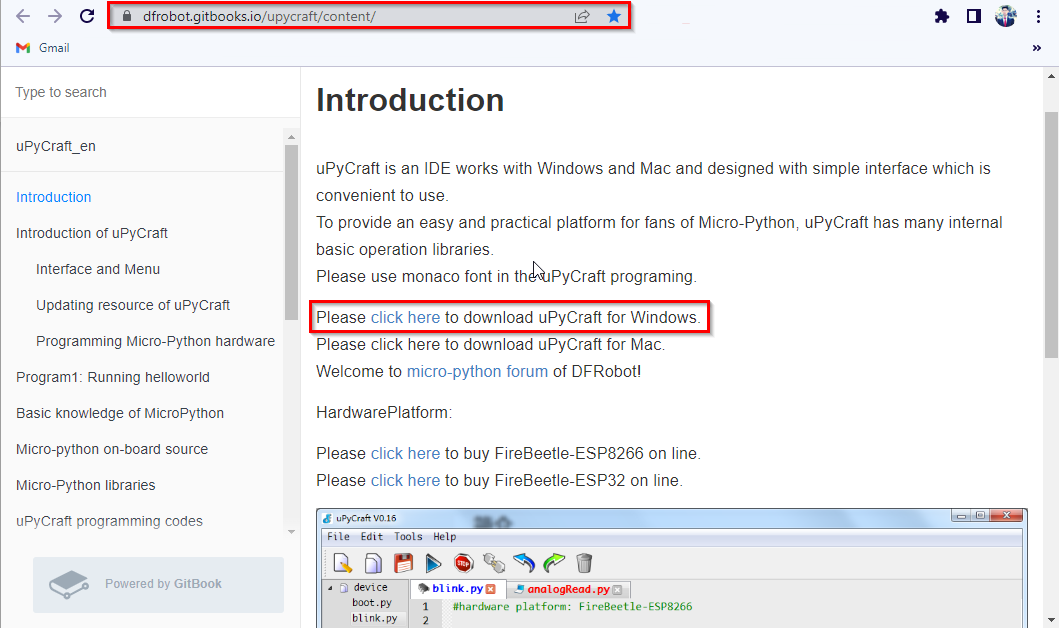
1.2. Downloading uPyCraft IDE
To program ESP32 we need to download uPyCraft IDE. Following are the two sources for downloading uPyCraft IDE:
To download from GitHub download the latest version using the above link.

To download uPyCraft IDE from the official site visit the link given above.
1.3. Installing uPyCraft IDE
Now we have successfully downloaded the next step is to install the uPyCraft IDE. Following file can be seen in the download folder.

To install click OK.
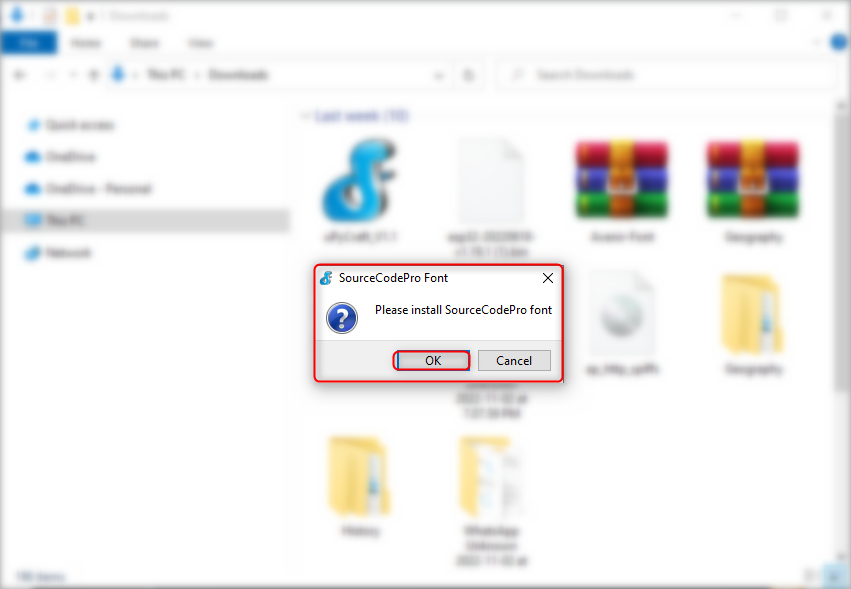
Once the uPyCraft IDE is installed the following interface will open.
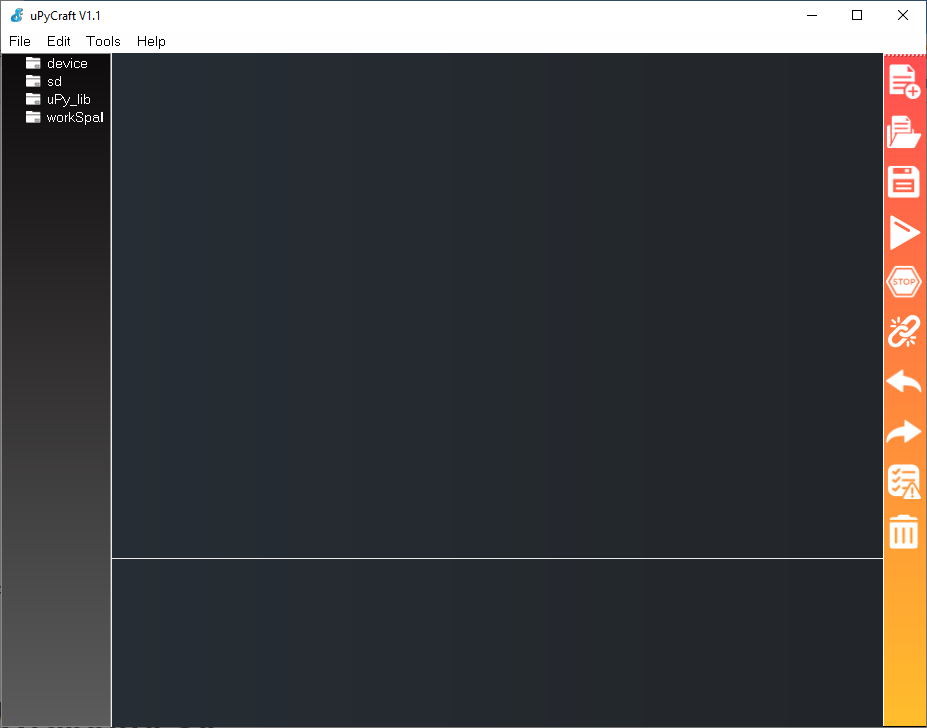
1.4. uPyCraft IDE Interface Overview
uPyCraft IDE interface consist of four different windows which are:
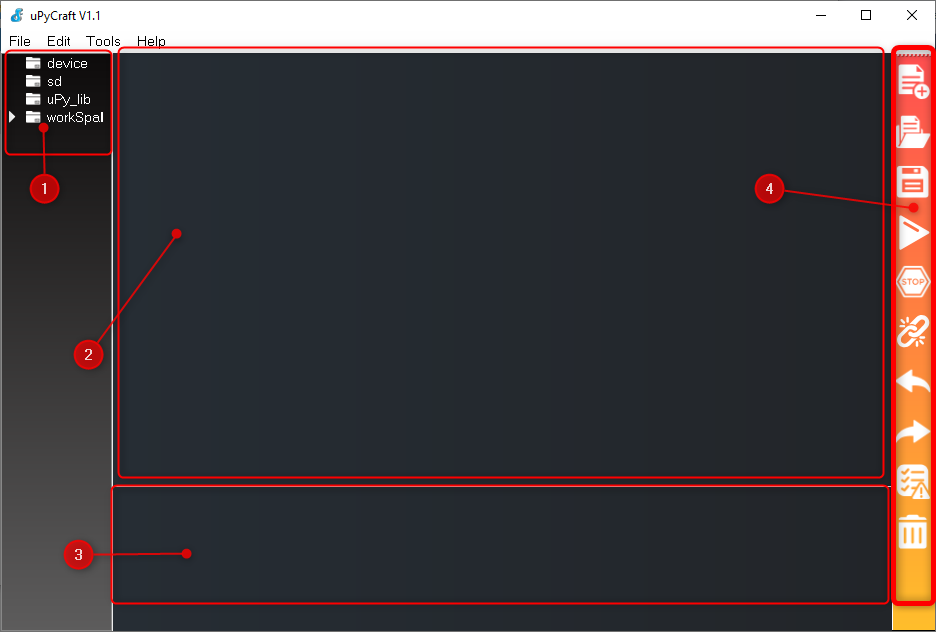
1: Files section
This window contains all the .py files and directory path which we are currently working on. Here the main files of MicroPython code such as main.py and boot.py can be seen.
This section further contains four different categories:
- device: Where all files are stored
- sd: This folder gives access to sd card files; it can only be used if a board has an sd card port.
- uPy_lib: This shows the builtin library files
- workspace: It is the directory where all MicroPython files are stored inside our computer. To change directory, go to: Tools>InitConfig
2: Editor Window
Next is the editor window where we can write MicroPython code and can create multiple .py files.
3: Shell/Terminal
Shell or terminal allows us to directly execute some commands without creating MicroPython files and uploading it to board. It also provides information related to the executed program.
4: Tools
Last section contains all the quick action tools required to run a code, such as pay, stop etc. Below we represented all tools using a number.

- New file>Create new file
- Open file>Open a file
- Save file>Save a file
- Download and Run>Upload code to connected board
- Stop>Stop the code alternatively can also be used using “Ctrl + C”
- Connect/Disconnect>Connect or disconnect board from serial
- Undo>Undo the change
- Redo>Redo the change
- Syntax Check>Check code syntax
- Clear>Clear shell/terminal
2. How to Download MicroPython Firmware for ESP32
We have completed installation of uPyCraft IDE. Next to program the ESP32 board we must flash the MicroPython firmware in the ESP32 board first. To download the firmware, go to the MicroPython download page and search for the ESP32 firmware section.
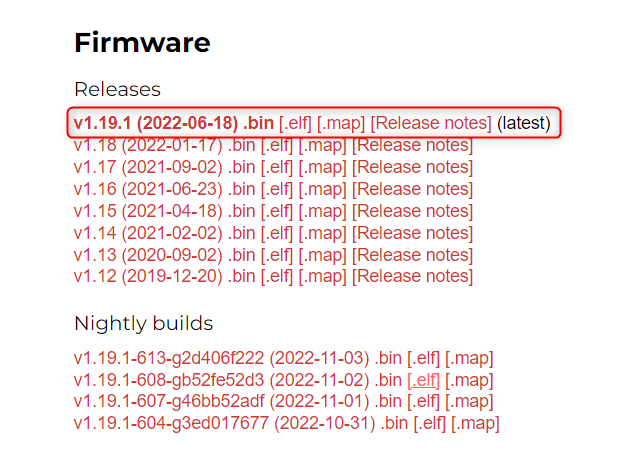
Download the latest released version available for ESP32 board and remember not to download the nightly build version as it mostly targets advanced programmers.
In case if you are using any other board such as PyBoard, WiPy go to MicroPython download page and search for respective board firmware.
3. Installing MicroPython Firmware in ESP32 Using uPyCraft IDE
After downloading firmware, the next step is to install it in ESP32 using the uPyCraft IDE. To do this connect the ESP32 board with the PC.
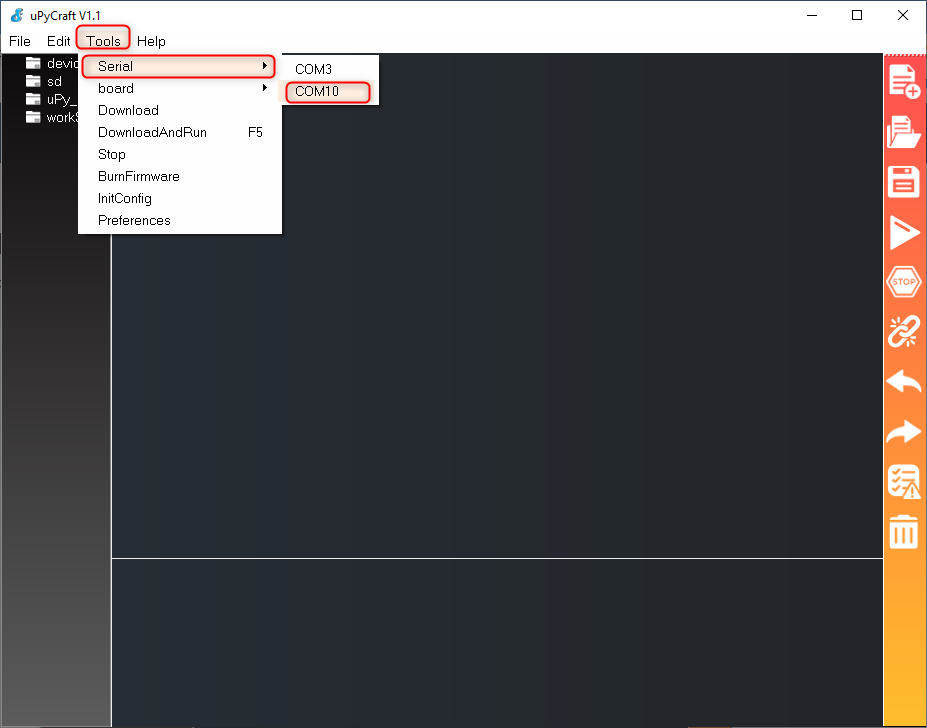
Select the board Go to: Tools>board>esp32

Next select the COM port Go to: Tools>Serial>COMX
3.1. Fix – COM Port Is Not Detected in uPyCraft IDE
Sometimes when using ESP32 for the first time the PC doesn’t detect it automatically so in that case we have to manually install the required drivers.
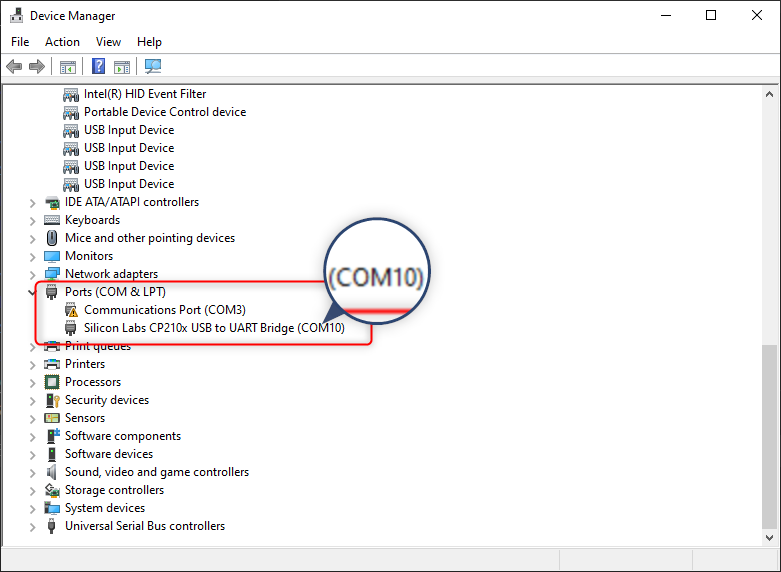
Before moving further first check for the COM port in device manager under the COM & LPT section. As our drivers are already installed, the COM port shown is COM10.
Incase if there is no COM port available for ESP32 then following are the two main reasons for missing ESP32 COM port:
- ESP32 CP2102 chip drivers missing
- Normal USB charging cable rather than data cable
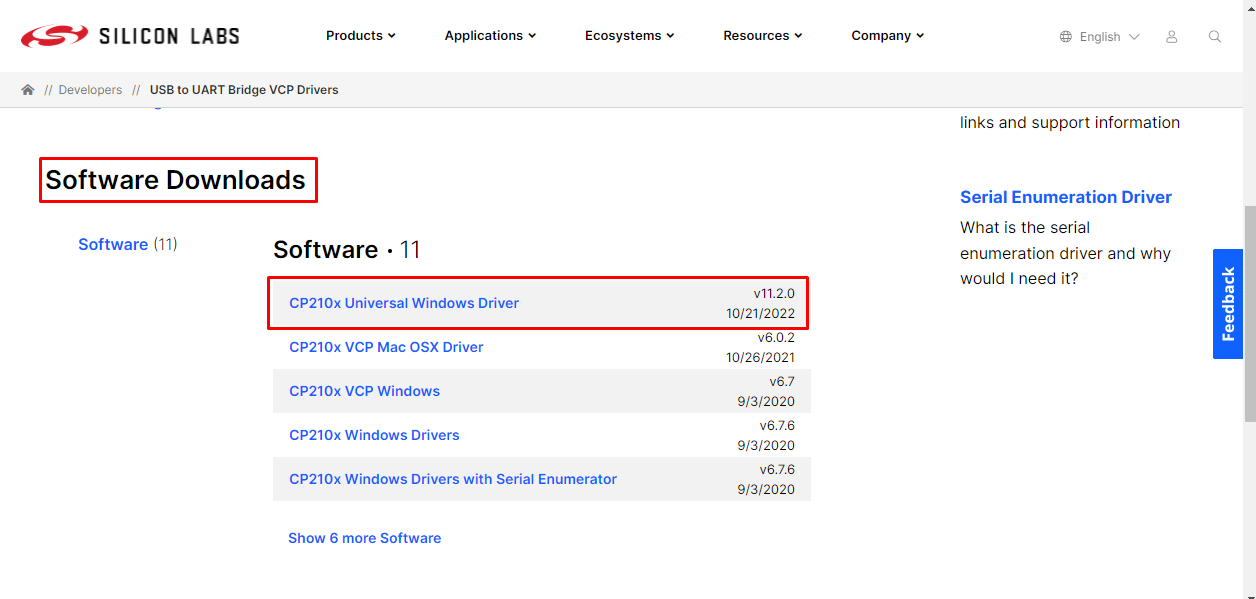
1: Most of the ESP32 DOIT DEVKIT board uses the CP2102 chip for USB communication. To install the ESP32 CP2102 chip driver search for the driver in Google search bar.
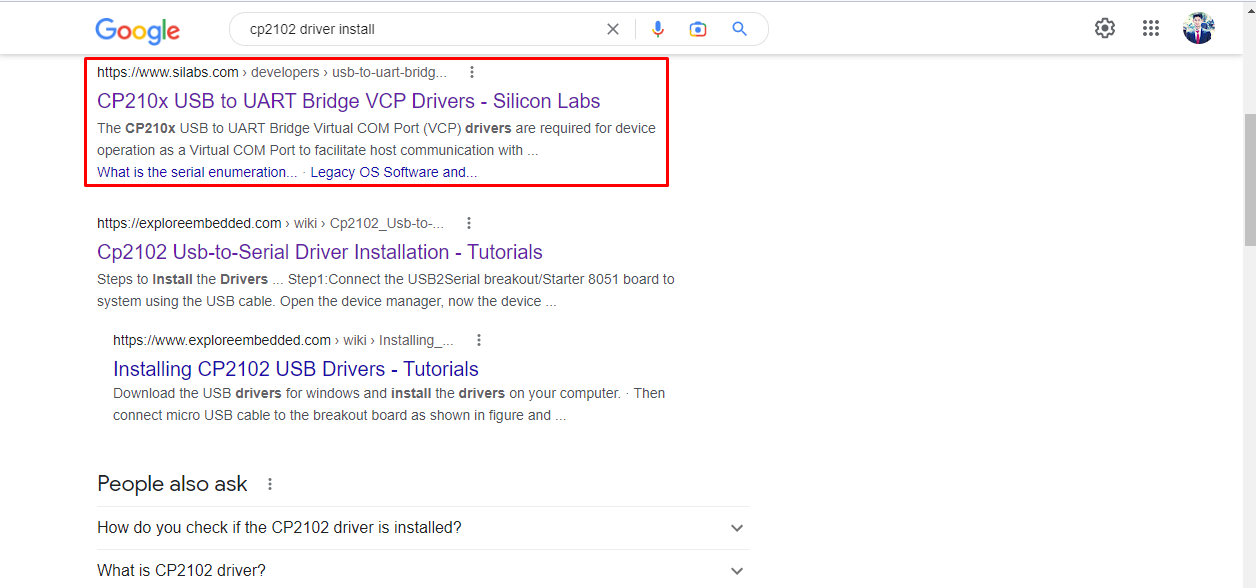
Click here to visit Silicon Labs website for latest CP2102 drivers.
Once the drivers are successfully installed, restart the Arduino IDE and connect the ESP32 board with the PC, now the COM port for ESP32 board will be visible. You can also see the COM port in Device Manager.
2: If drivers are installed but still you cannot see the ESP32 COM port then double check the USB cable you are using. There are multiple cables that cannot establish serial communication as their sole purpose is charging and most of these cables are missing the data wires.
3.2. Flashing MicroPython Firmware in ESP32
As we have sorted out the COM port issue now, we will continue towards the firmware installation.
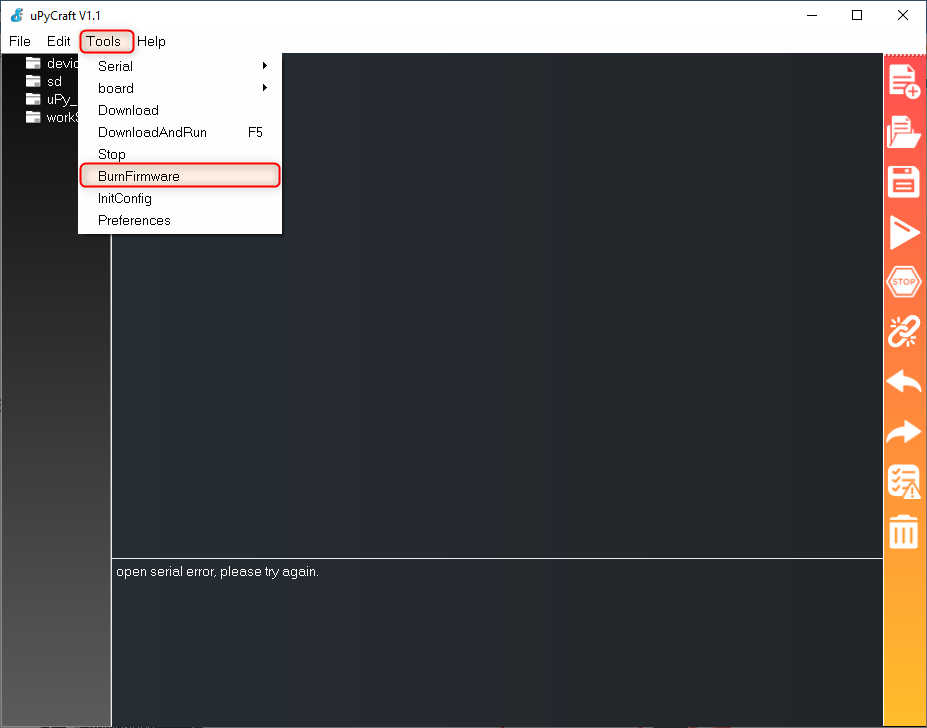
Step 1: Go to: Tools>BurnFirmware
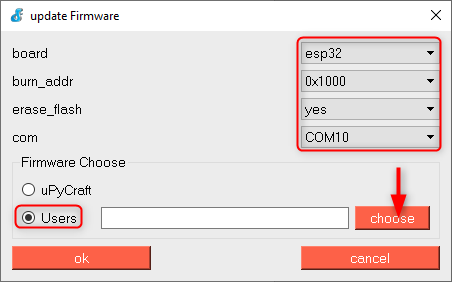
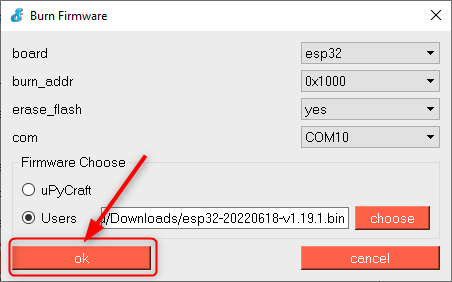
Step 2: A window will appear select the below given settings:
- board: esp32
- burn_addr: 0x1000
- erase_flash: yes
- com: COM10
Select the Users and browse for the MicroPython firmware file we downloaded earlier.
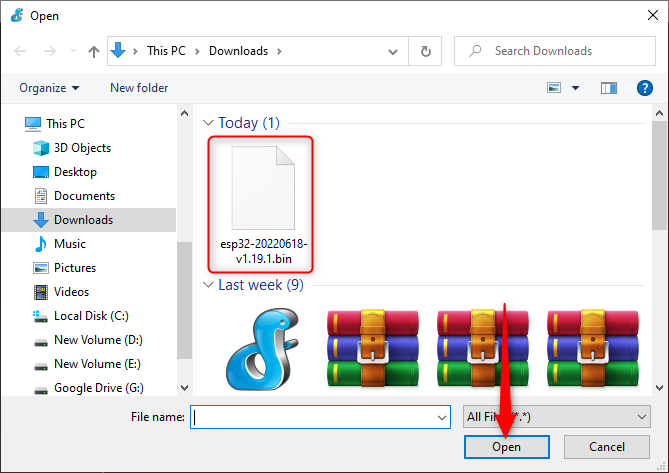
Step 3: Select file and click Open.
Step 4: We are just a single step away from flashing MicroPython into our very own ESP32 board. Now take the ESP32 board, press and hold the BOOT button.

Step 5: While pressing the ESP32 BOOT button click OK.
Step 6: If all steps go well ESP32 memory will start to flash. Once the erase flash starts you can release pressure on your finger by leaving the ESP32 BOOT button.

After successful installation of firmware, the above window will close automatically and now we are ready to upload our very first program to the ESP32 board.
Note: In case of any error repeat the above steps and remember to press and hold the BOOT button.
4. Uploading LED Blink Program in ESP32 Using MicroPython uPyCraft IDE
To test the installation of uPyCraft IDE we will upload the LED blink program. Follow the steps below:
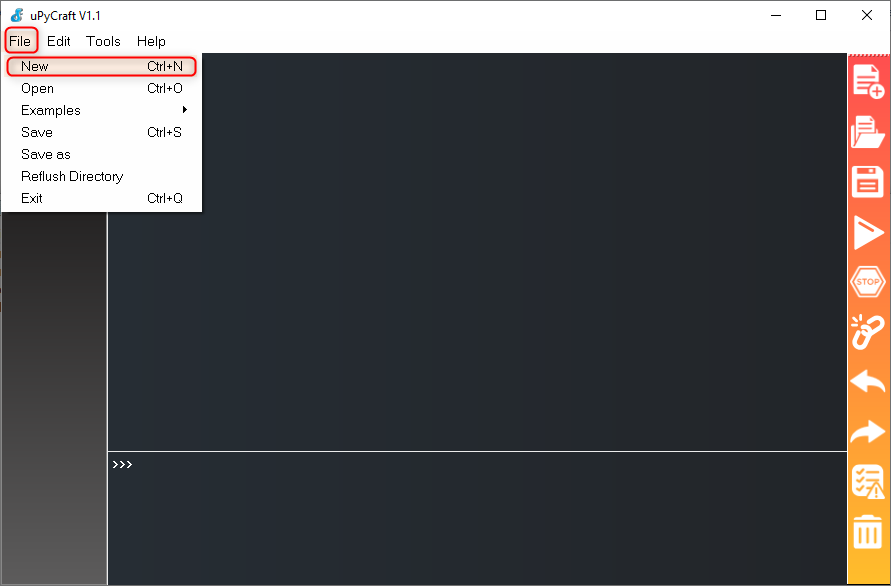
Step 1: Open a new file Go to: File>New or press Ctrl + N.
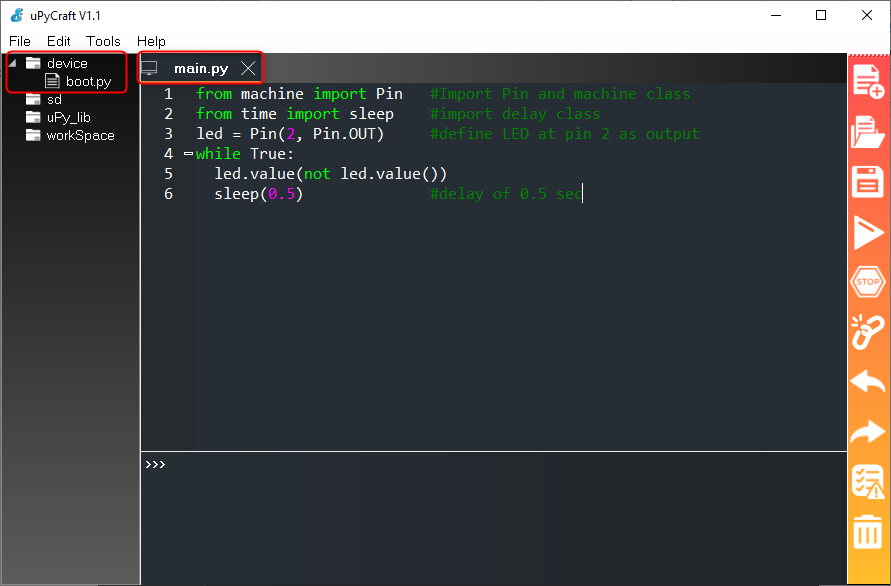
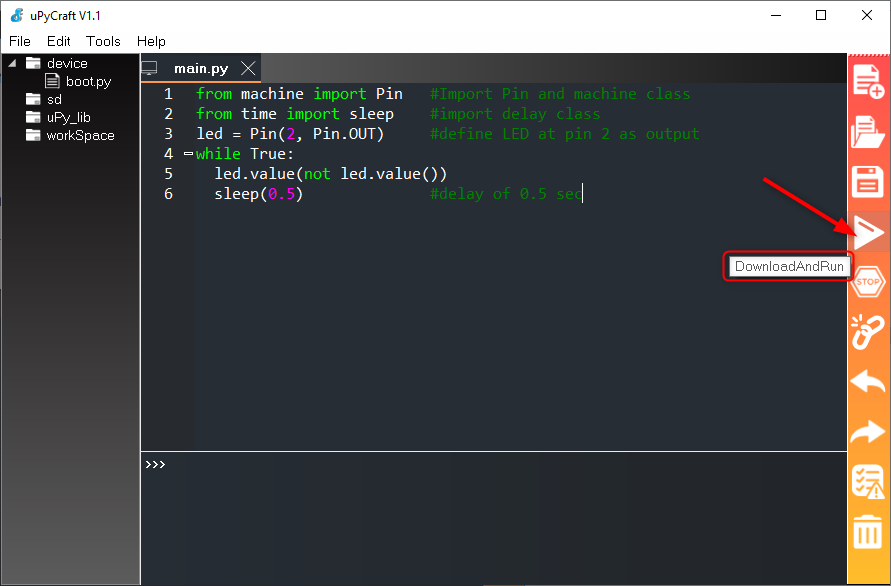
Write the code given below in the editor window of the newly created file.
from time import sleep #import delay class
led = Pin(2, Pin.OUT) #define LED at pin 2 as output
while True:
led.value(not led.value())
sleep(0.5) #delay of 0.5 sec
Step 2: After writing code save the file Go to: File>Save or press Ctrl + S.

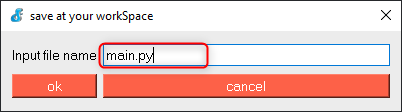
Step 3: Save the file with name main.py.
Step 4: Select the directory to save the file.

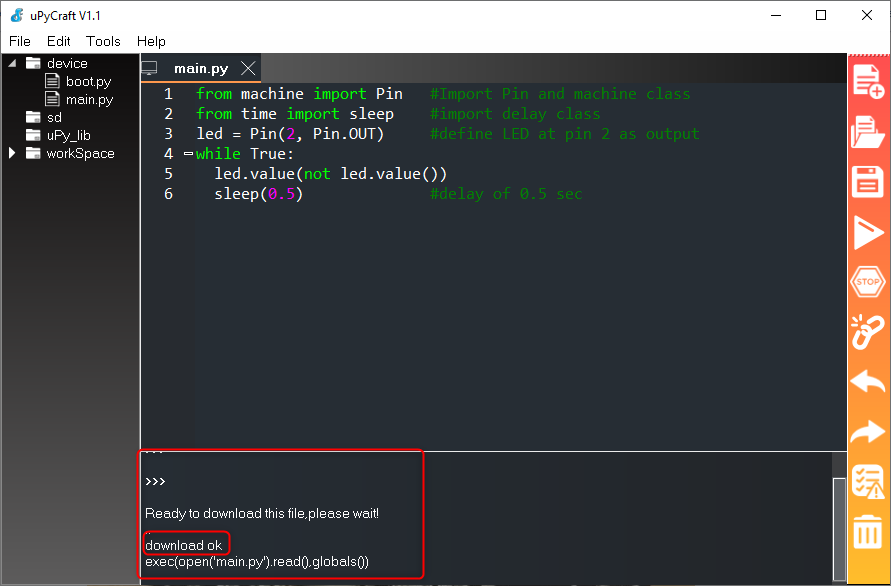
Step 5: Once the file is created you will see the following files under device section.
Step 6: Now to upload code press the Download And Run button.
Step 7: If the program runs successfully “download ok” message will appear in terminal/shell.
Output
A built in LED will start blinking which is connected at pin 2 of ESP32 board.

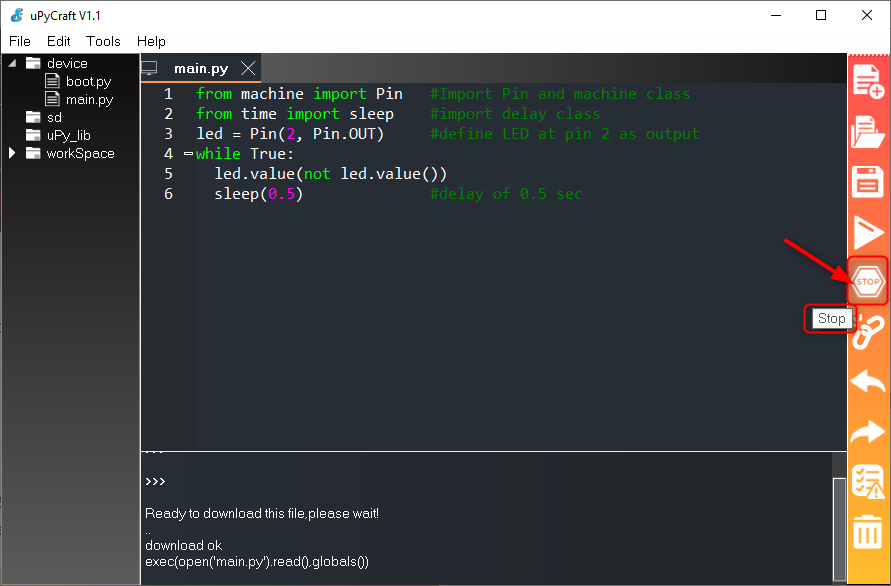
To stop the program click Stop.
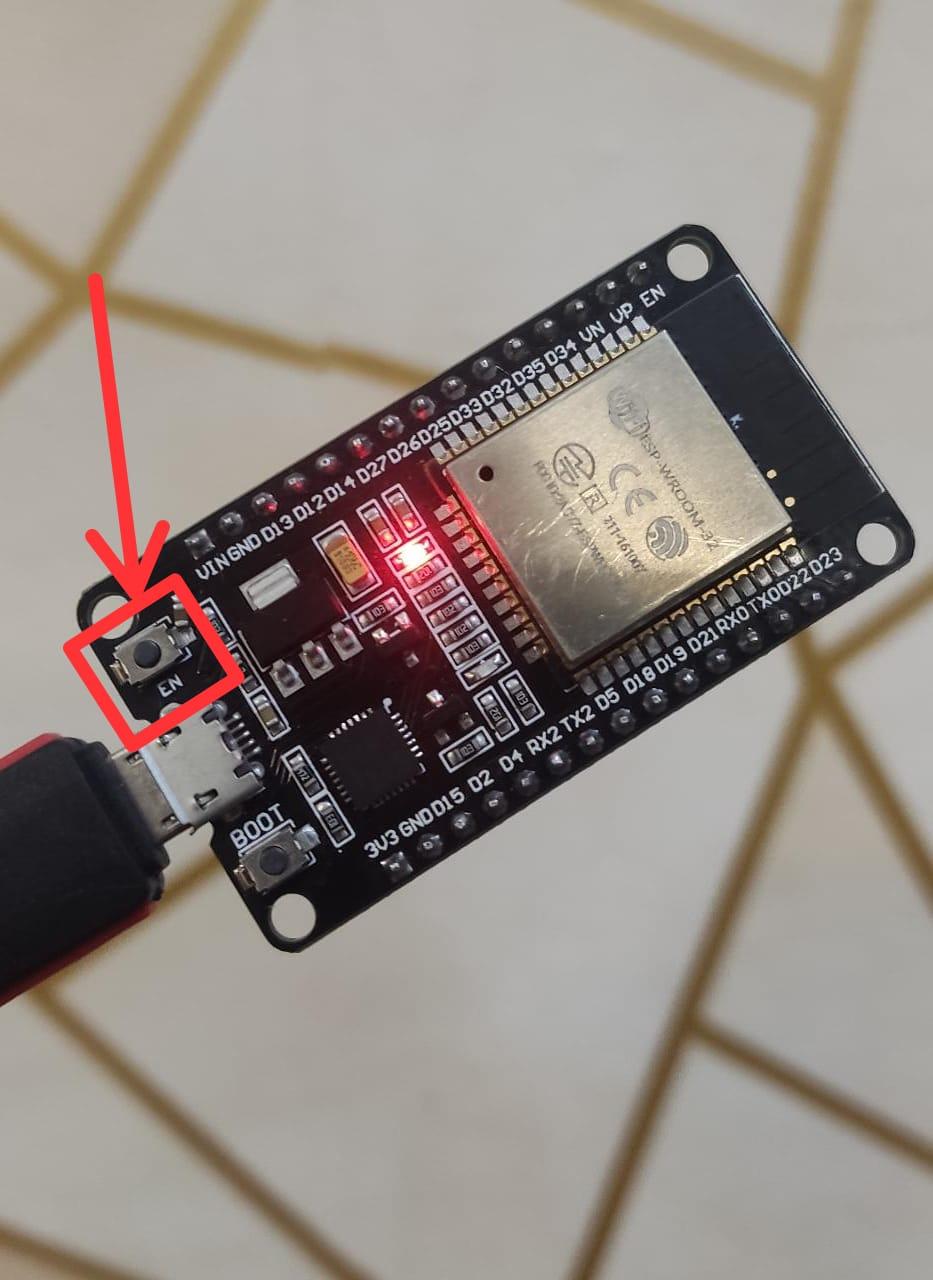
If you want to restart the compiled code press the Enable (EN) button on the ESP32 board.
If the program restarted the output similar to shown below can be seen on shell/terminal.

We have successfully installed uPyCraft IDE in PC and uploaded our first program after flashing ESP32 with MicroPython firmware.
Important Note: After installing MicroPython firmware in ESP32 board one can also program ESP32 by just uploading the code using the Arduino IDE, but if you want to use MicroPython again with ESP32 we need to flash MicroPython firmware again into ESP32 board because the Arduino IDE replaces the MicroPython firmware with its own firmware.
Conclusion
uPyCraft IDE can program ESP32 boards using MicroPython. This article assists you to download and setup uPyCraft IDE with MicroPython in ESP32. For writing MicroPython code the Python 3 programming language must be installed inside the PC. Next a ESP32 firmware is required to be flashed inside the ESP32 board.