This article contains following sections:
1. Setting Up uPyCraft IDE with ESP32 on macOS
- 1.1. Installing Python 3 on macOS
- 1.2. Downloading the uPyCraft IDE
- 1.3. Installing uPyCraft IDE on macOS
- 1.4. uPyCraft IDE Interface Overview
2. Downloading MicroPython Firmware for ESP32
3. Installing MicroPython Firmware in ESP32 Using uPyCraft IDE
4. Uploading LED Blink Program in ESP32 Using MicroPython uPyCraft IDE
1. Setting Up uPyCraft IDE with ESP32 on macOS
MicroPython is derived from Python 3 programming language specially designed for microcontroller-based boards. We can also program ESP32 with MicroPython using uPyCraft IDE.
Before we write our first MicroPython code for ESP32 we need to install some prerequisites in Mac.
- Python 3
- uPyCraft IDE
- MicroPython firmware for ESP32
1.1. Installing Python 3 on macOS
To write a code of MicroPython we need an updated Python 3 version to be installed on our Mac.
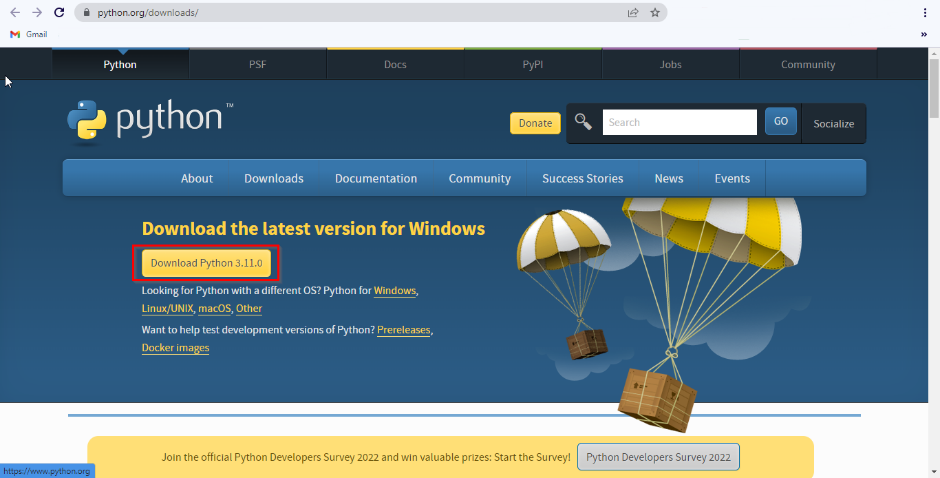
Step 1: Visit Python 3 download page or click here to download updated version. Here in our case, it is 3.11.0:
Or, you can download it using brew package manager. Open a terminal window and type the following command:

Wait a few seconds while the installation procedure is completed.
1.2. Downloading uPyCraft IDE
To program ESP32 we need to download uPyCraft IDE. Following are the two sources for downloading uPyCraft IDE:
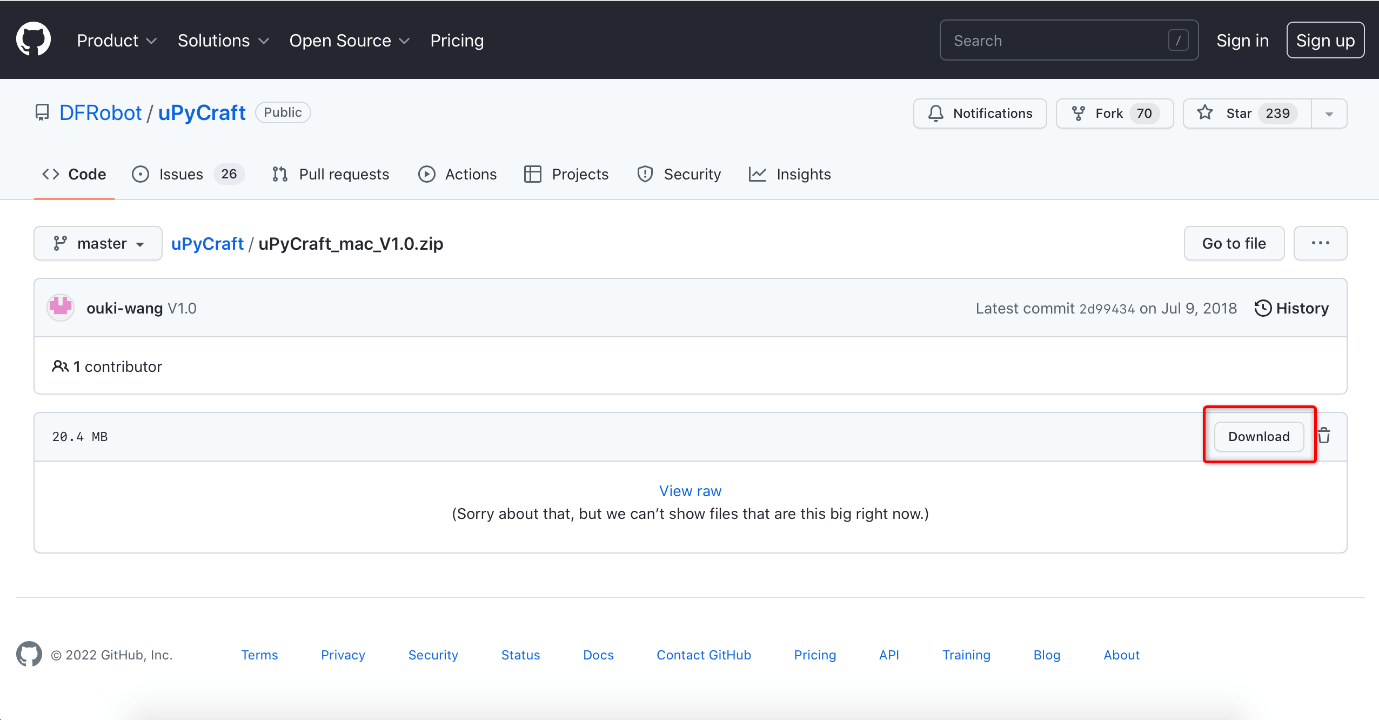
To download from GitHub, download the latest version using the above link.

Open the zip file and then click Download to start downloading the zip file for uPyCraft IDE.
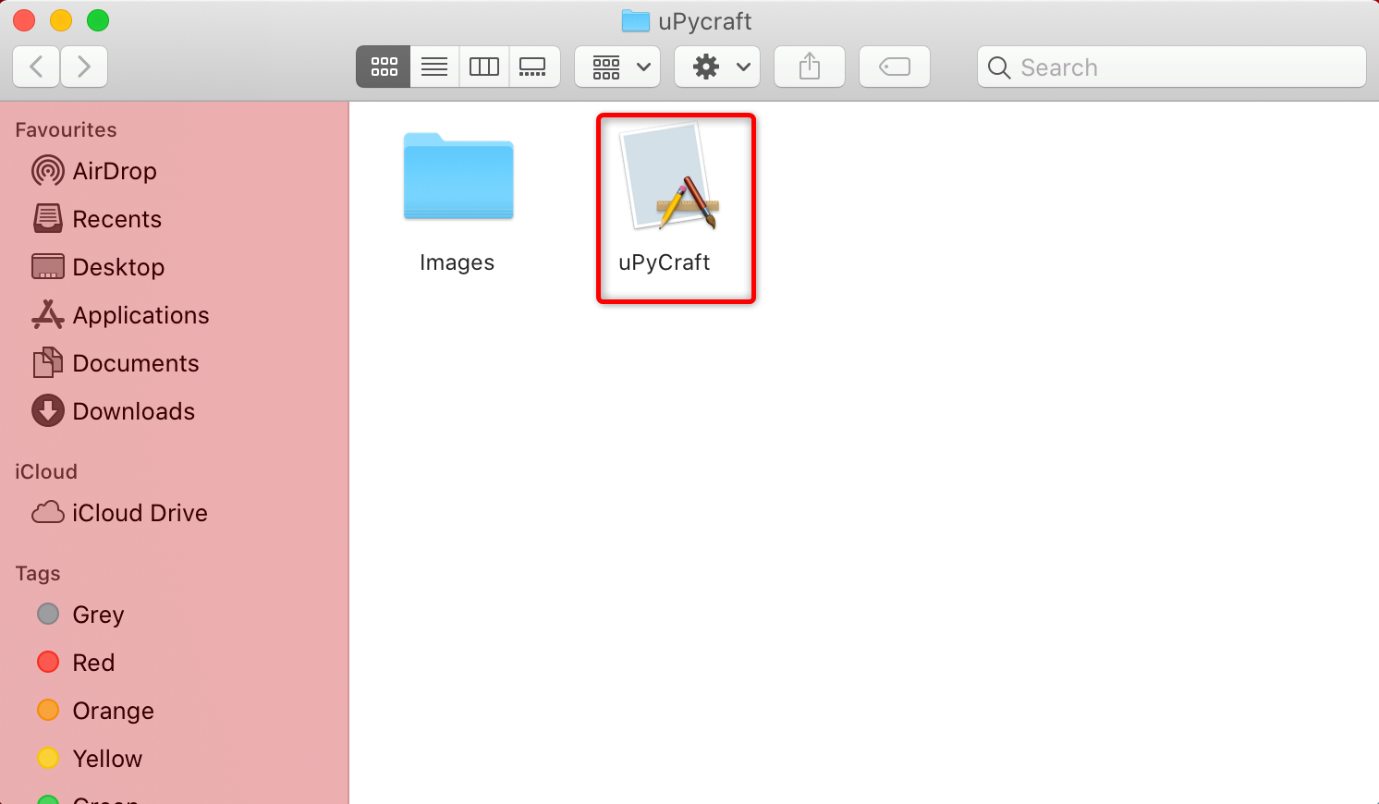
Once the download is complete, extract the zip file and uPyCraft file can be seen in the directory.
1.3. Installing uPyCraft IDE on macOS
Now we have successfully downloaded the next step is to open the uPyCraft IDE. Following file can be seen in the download folder. Follow the given steps to open the IDE.
Note: uPyCraft does not need to be installed on Mac, it can simply be opened in standalone mode.
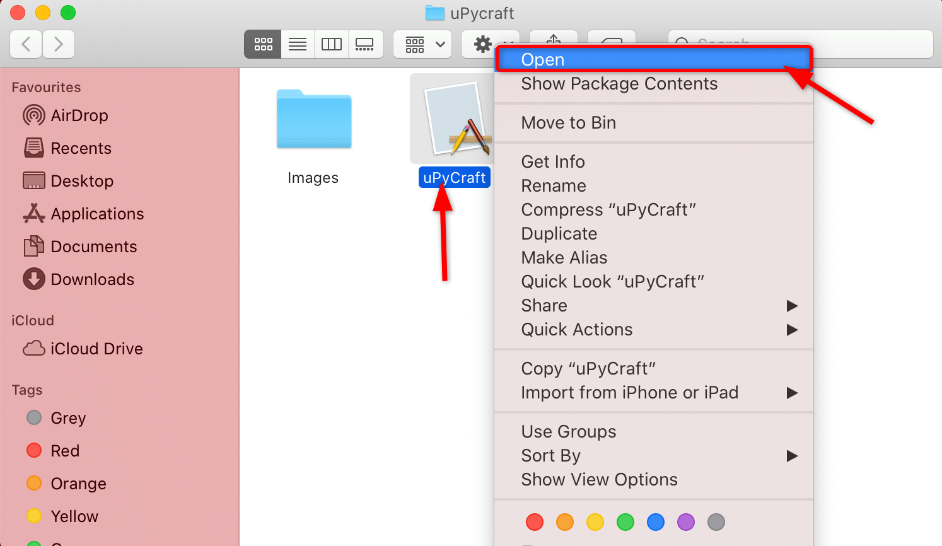
Step 1: uPyCraft does not need direct installation, double click or right click to open the file.
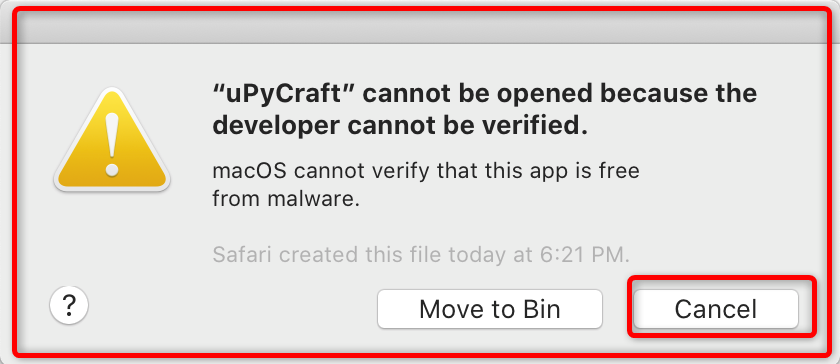
Step 2: Following message will appear so first we have to give permission to open the application from unknown sources, you cancel it.
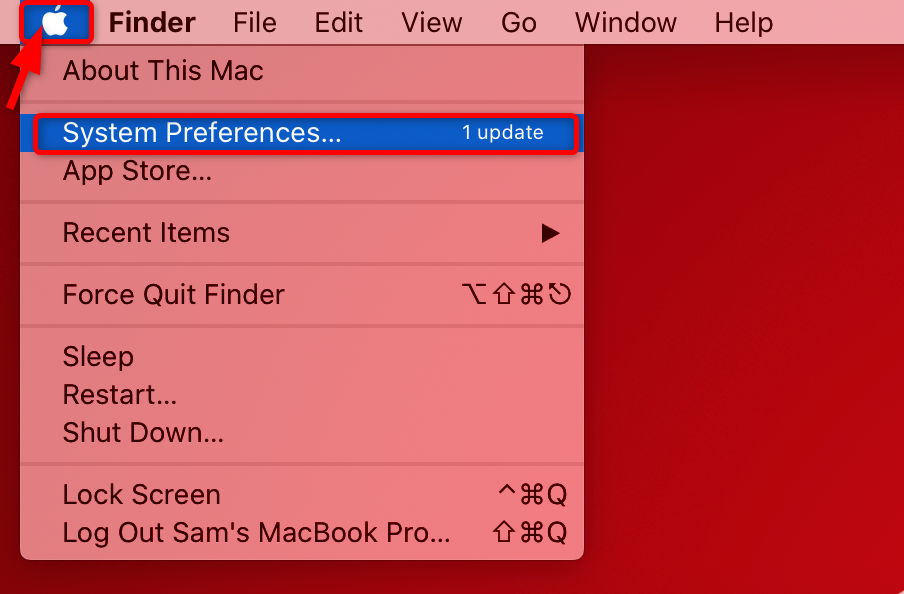
Step 3: Select System Preferences from the menu.
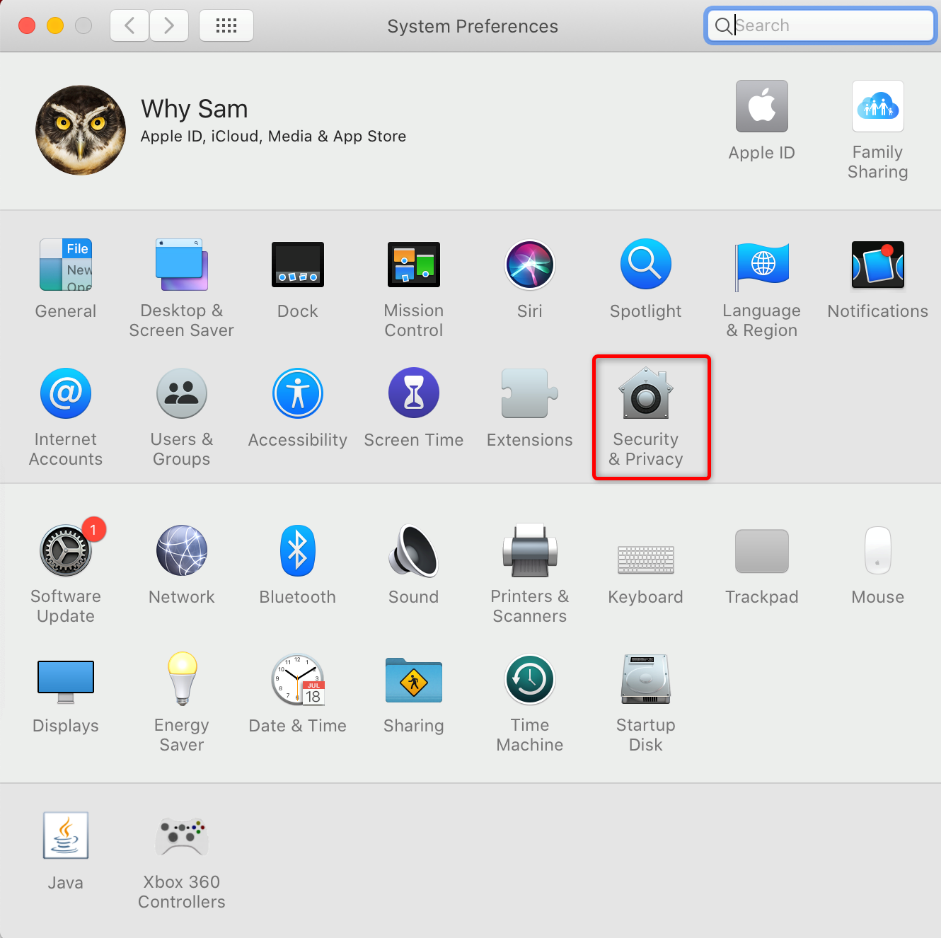
Step 4: Open Security & Privacy.
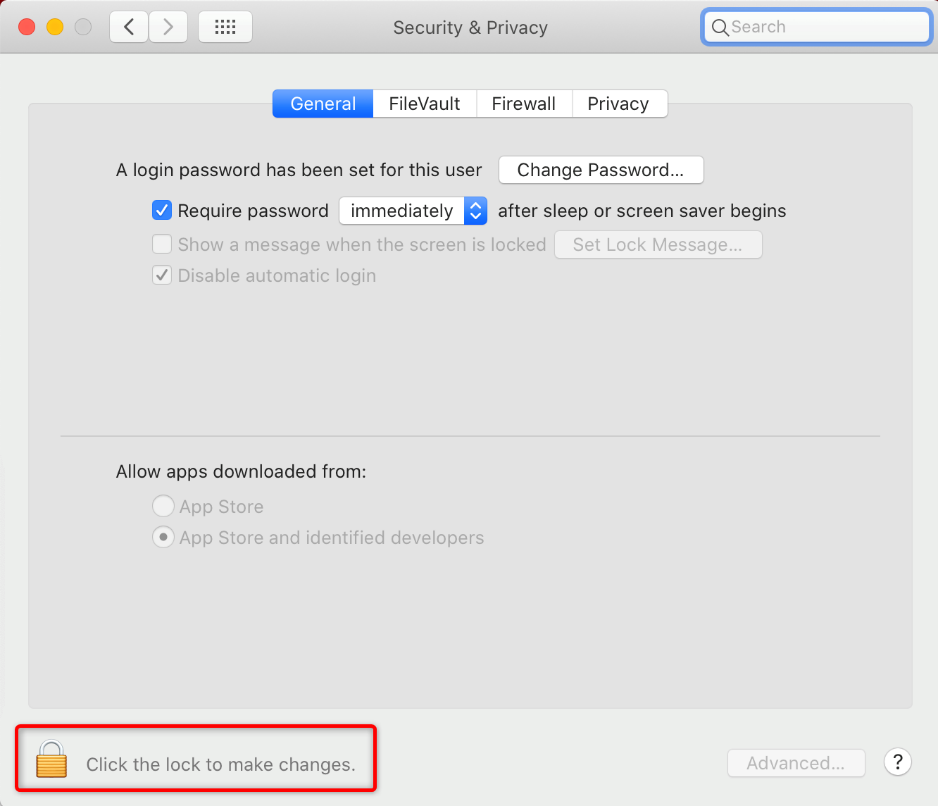
Step 5: Now at bottom click the lock icon to modify security and application installation permission.
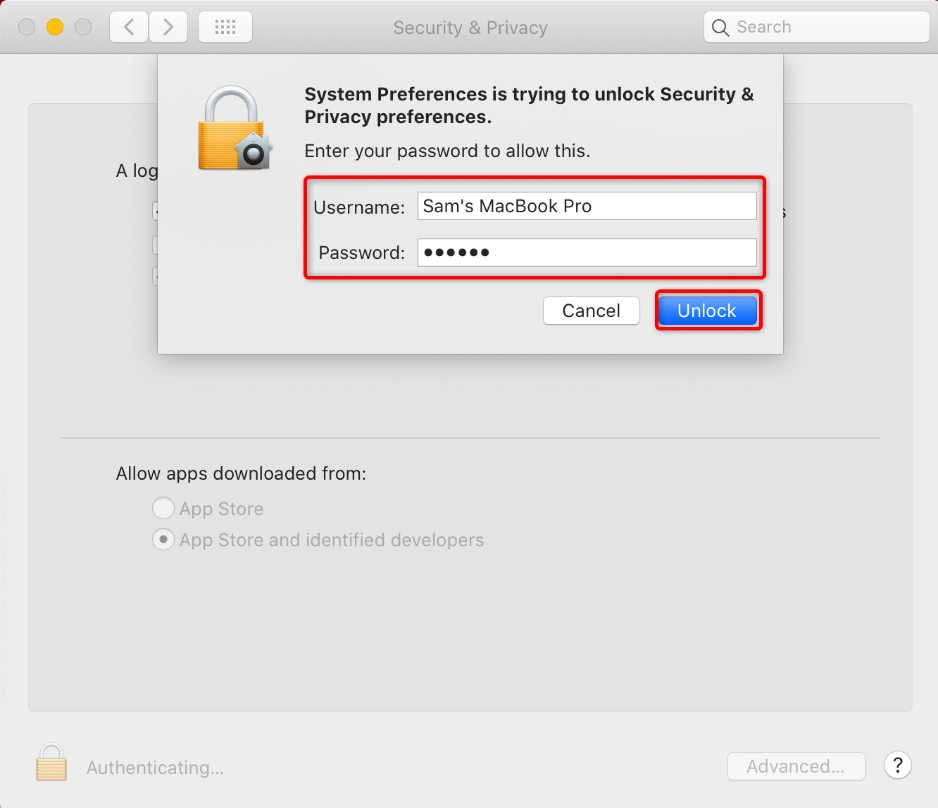
Step 6: Type username and password for macOS and click Unlock.
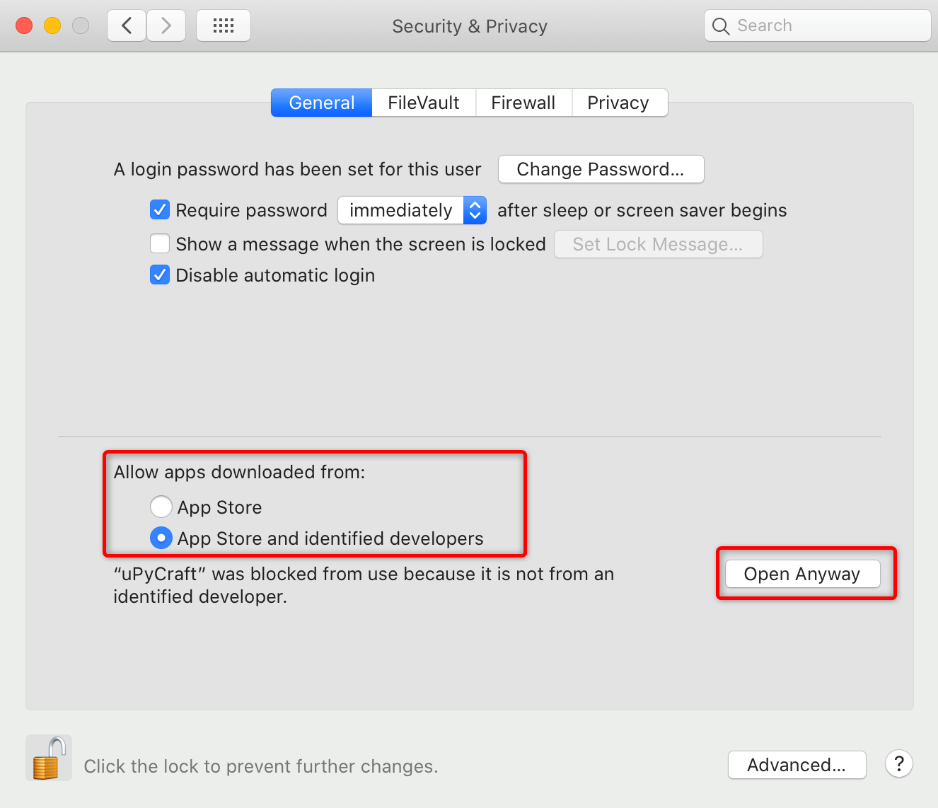
Step 7: Here allow apps to download from anywhere or App Store and identified developers then click Open Anyway.
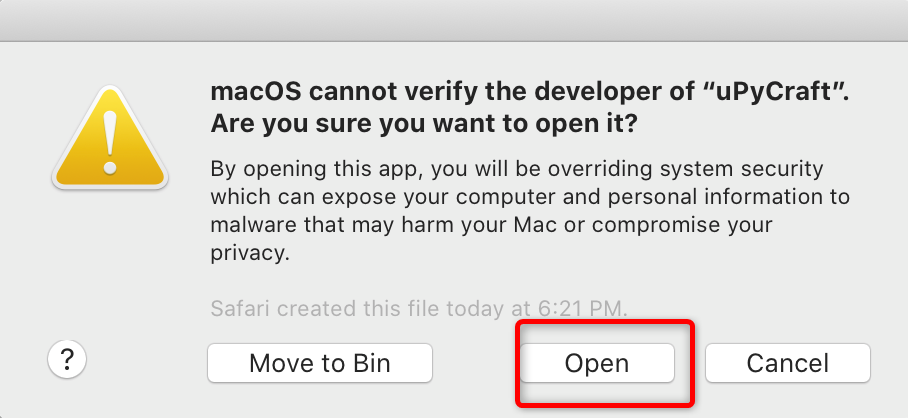
Step 8: After giving the permission, again open the uPyCraft IDE, and click on Open.
Once the uPyCraft IDE is installed the following interface will be opened.
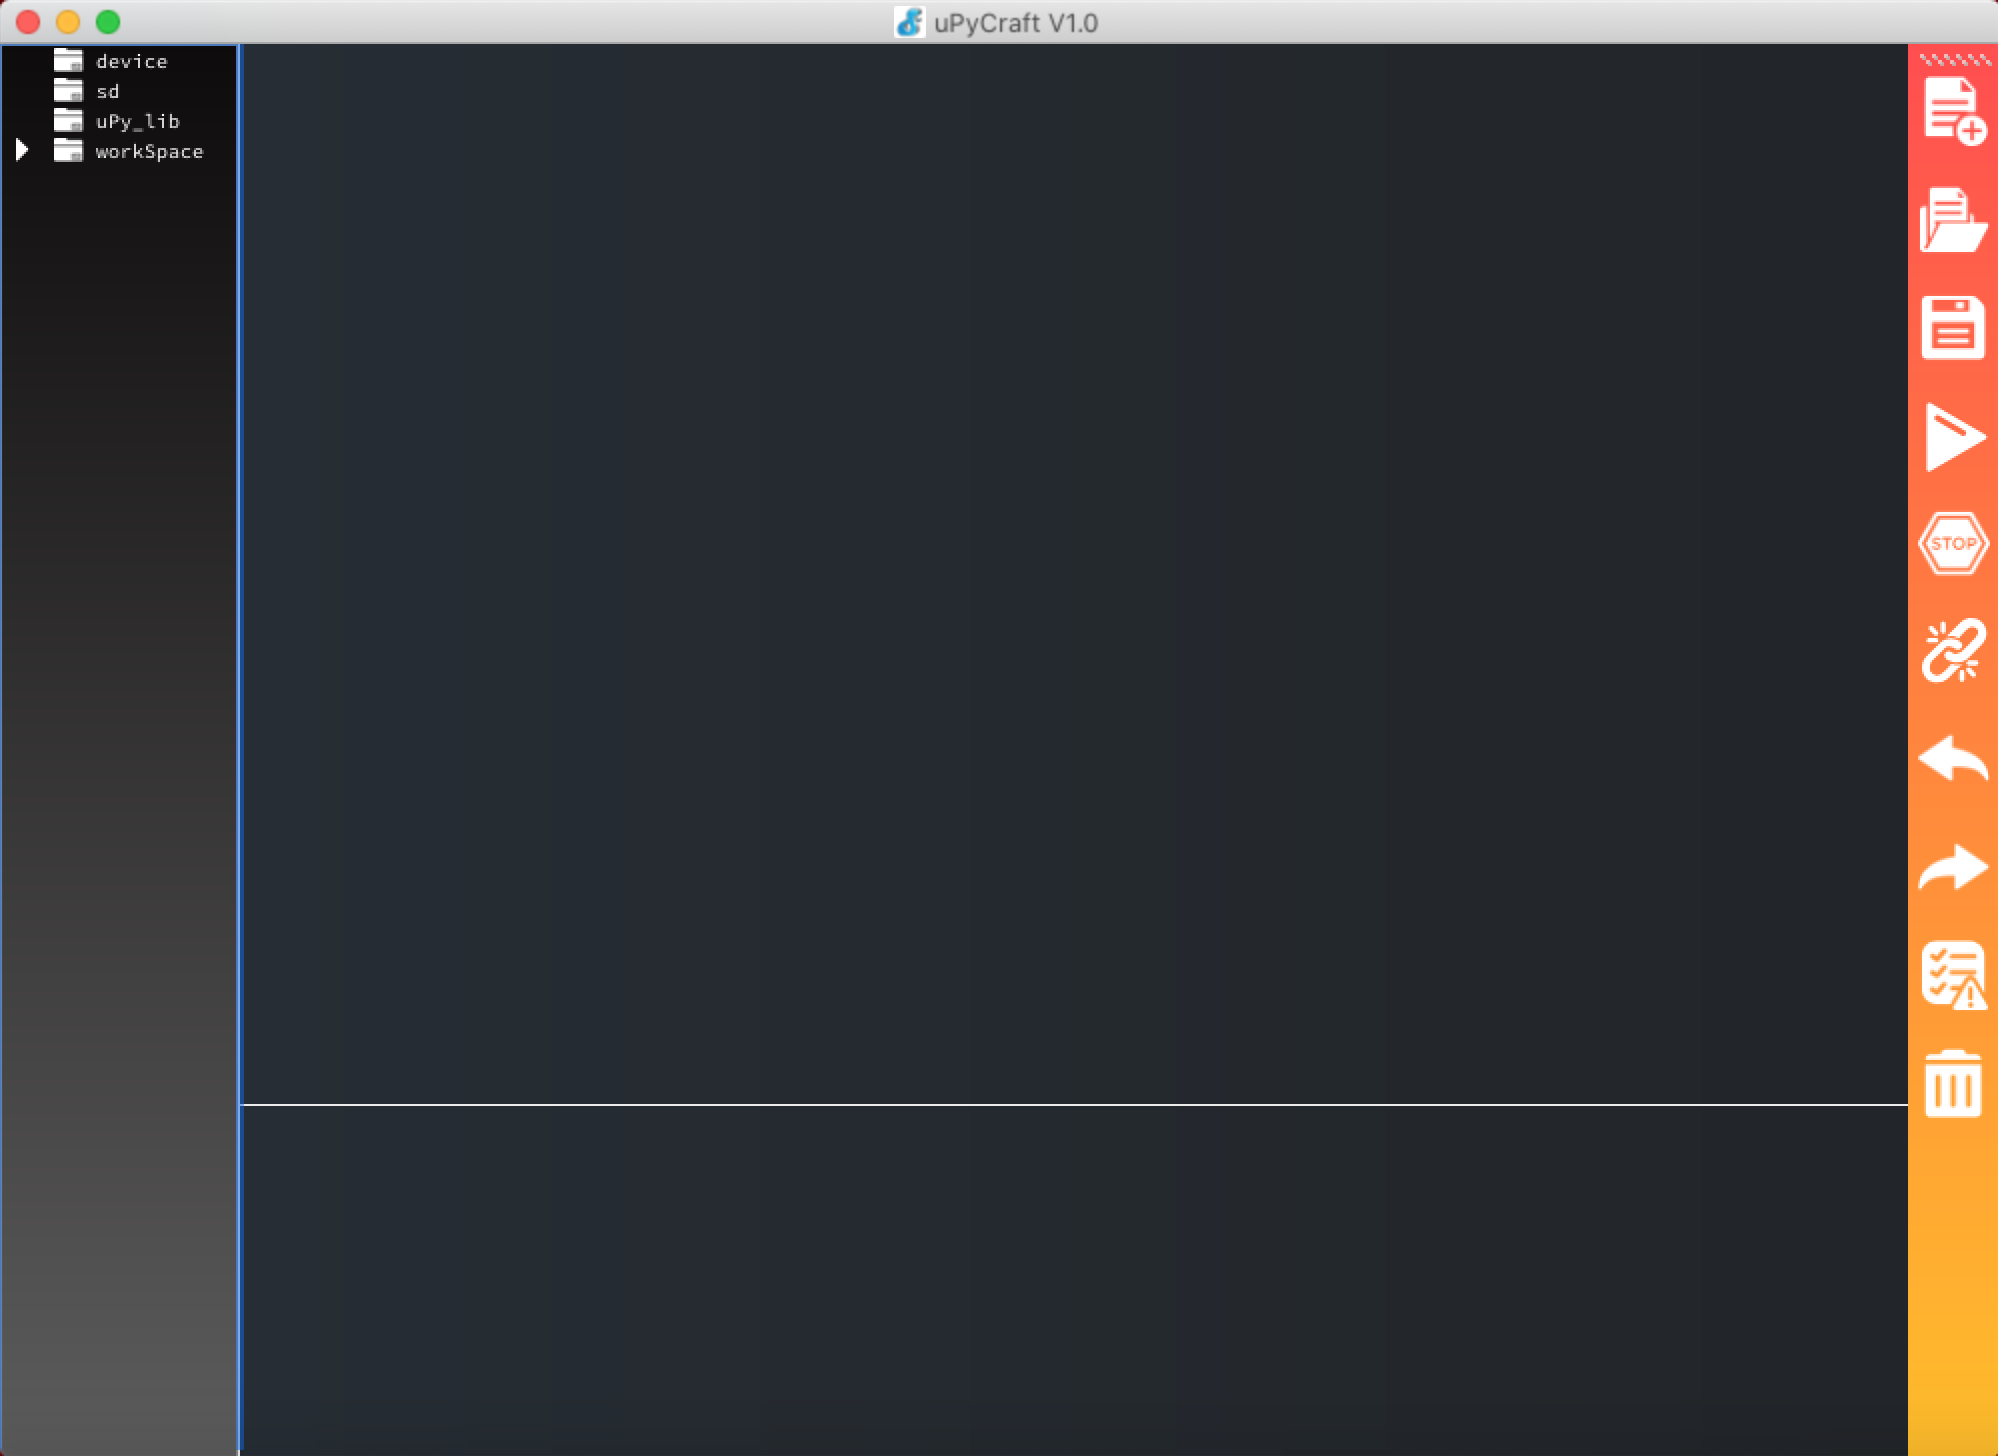
1.4. uPyCraft IDE Interface Overview
uPyCraft IDE interface consist of four different windows which are:
1: Files section
2: Editor Window
3: Shell/Terminal
4: Tools
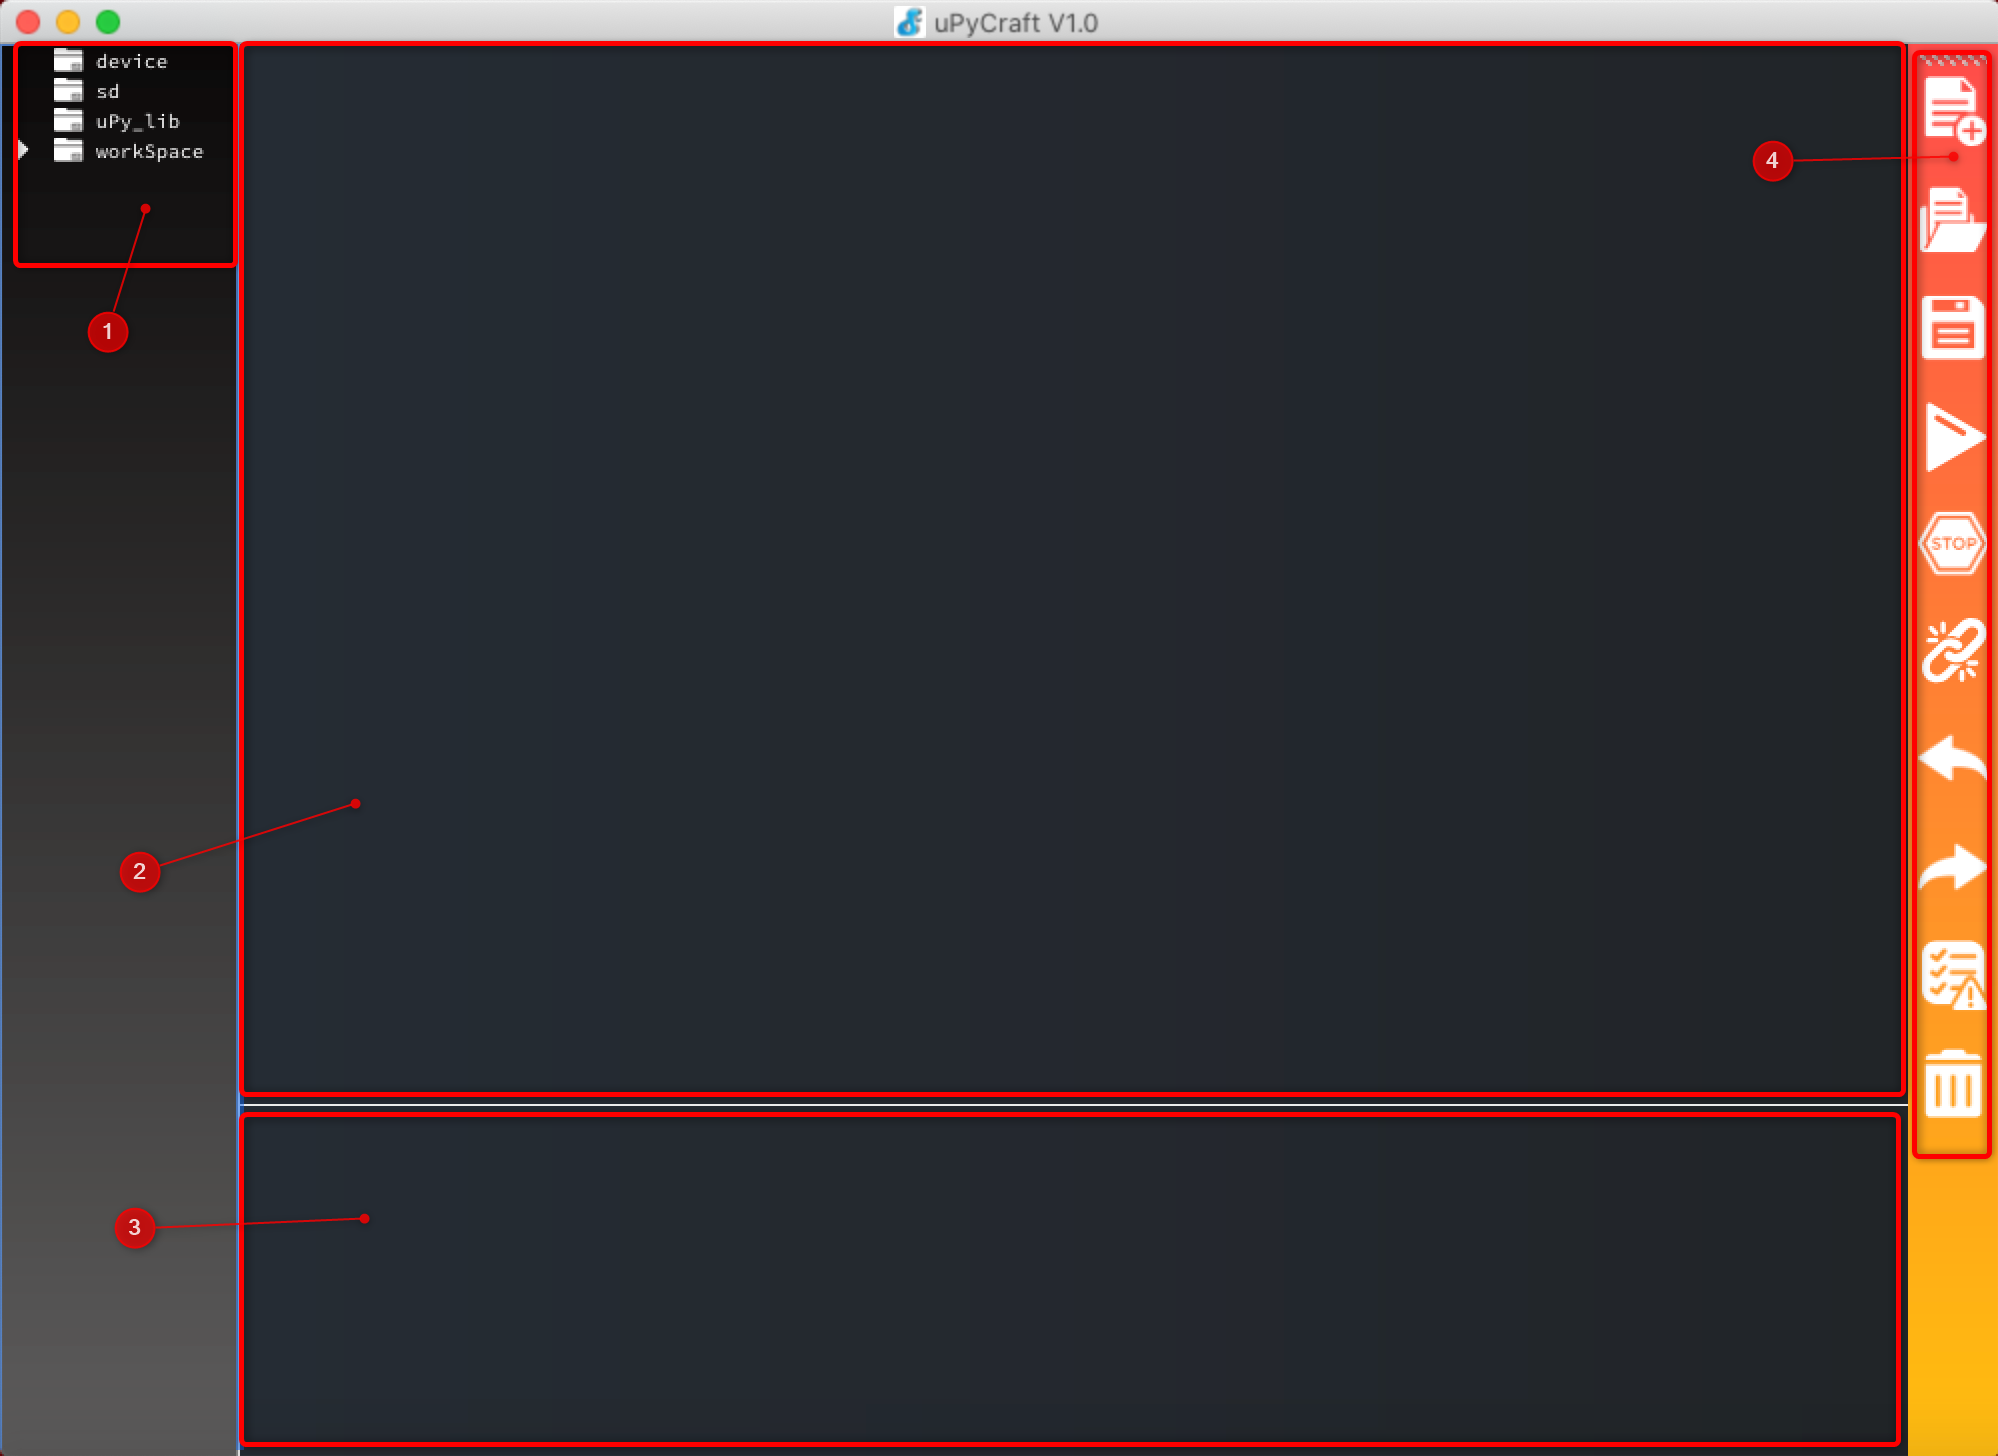
1: Files section
This window contains all the .py files and directory path which we are currently working on. Here the main files of MicroPython code such as main.py and boot.py can be seen.
This section further contains four different categories:
- device: Where all files are stored
- sd: This folder gives access to sd card files; it can only be used if a board has an sd card port.
- uPy_lib: This shows the builtin library files
- workspace: It is the directory where all MicroPython files are stored inside our computer. To change directory go to: Tools>InitConfig
2: Editor Window
Next is the editor window where we can write MicroPython code and can create multiple .py files.
3: Shell/Terminal
Shell or terminal allows us to directly execute some commands without creating MicroPython files and uploading it to board. It also provides information related to the executed program.
4: Tools
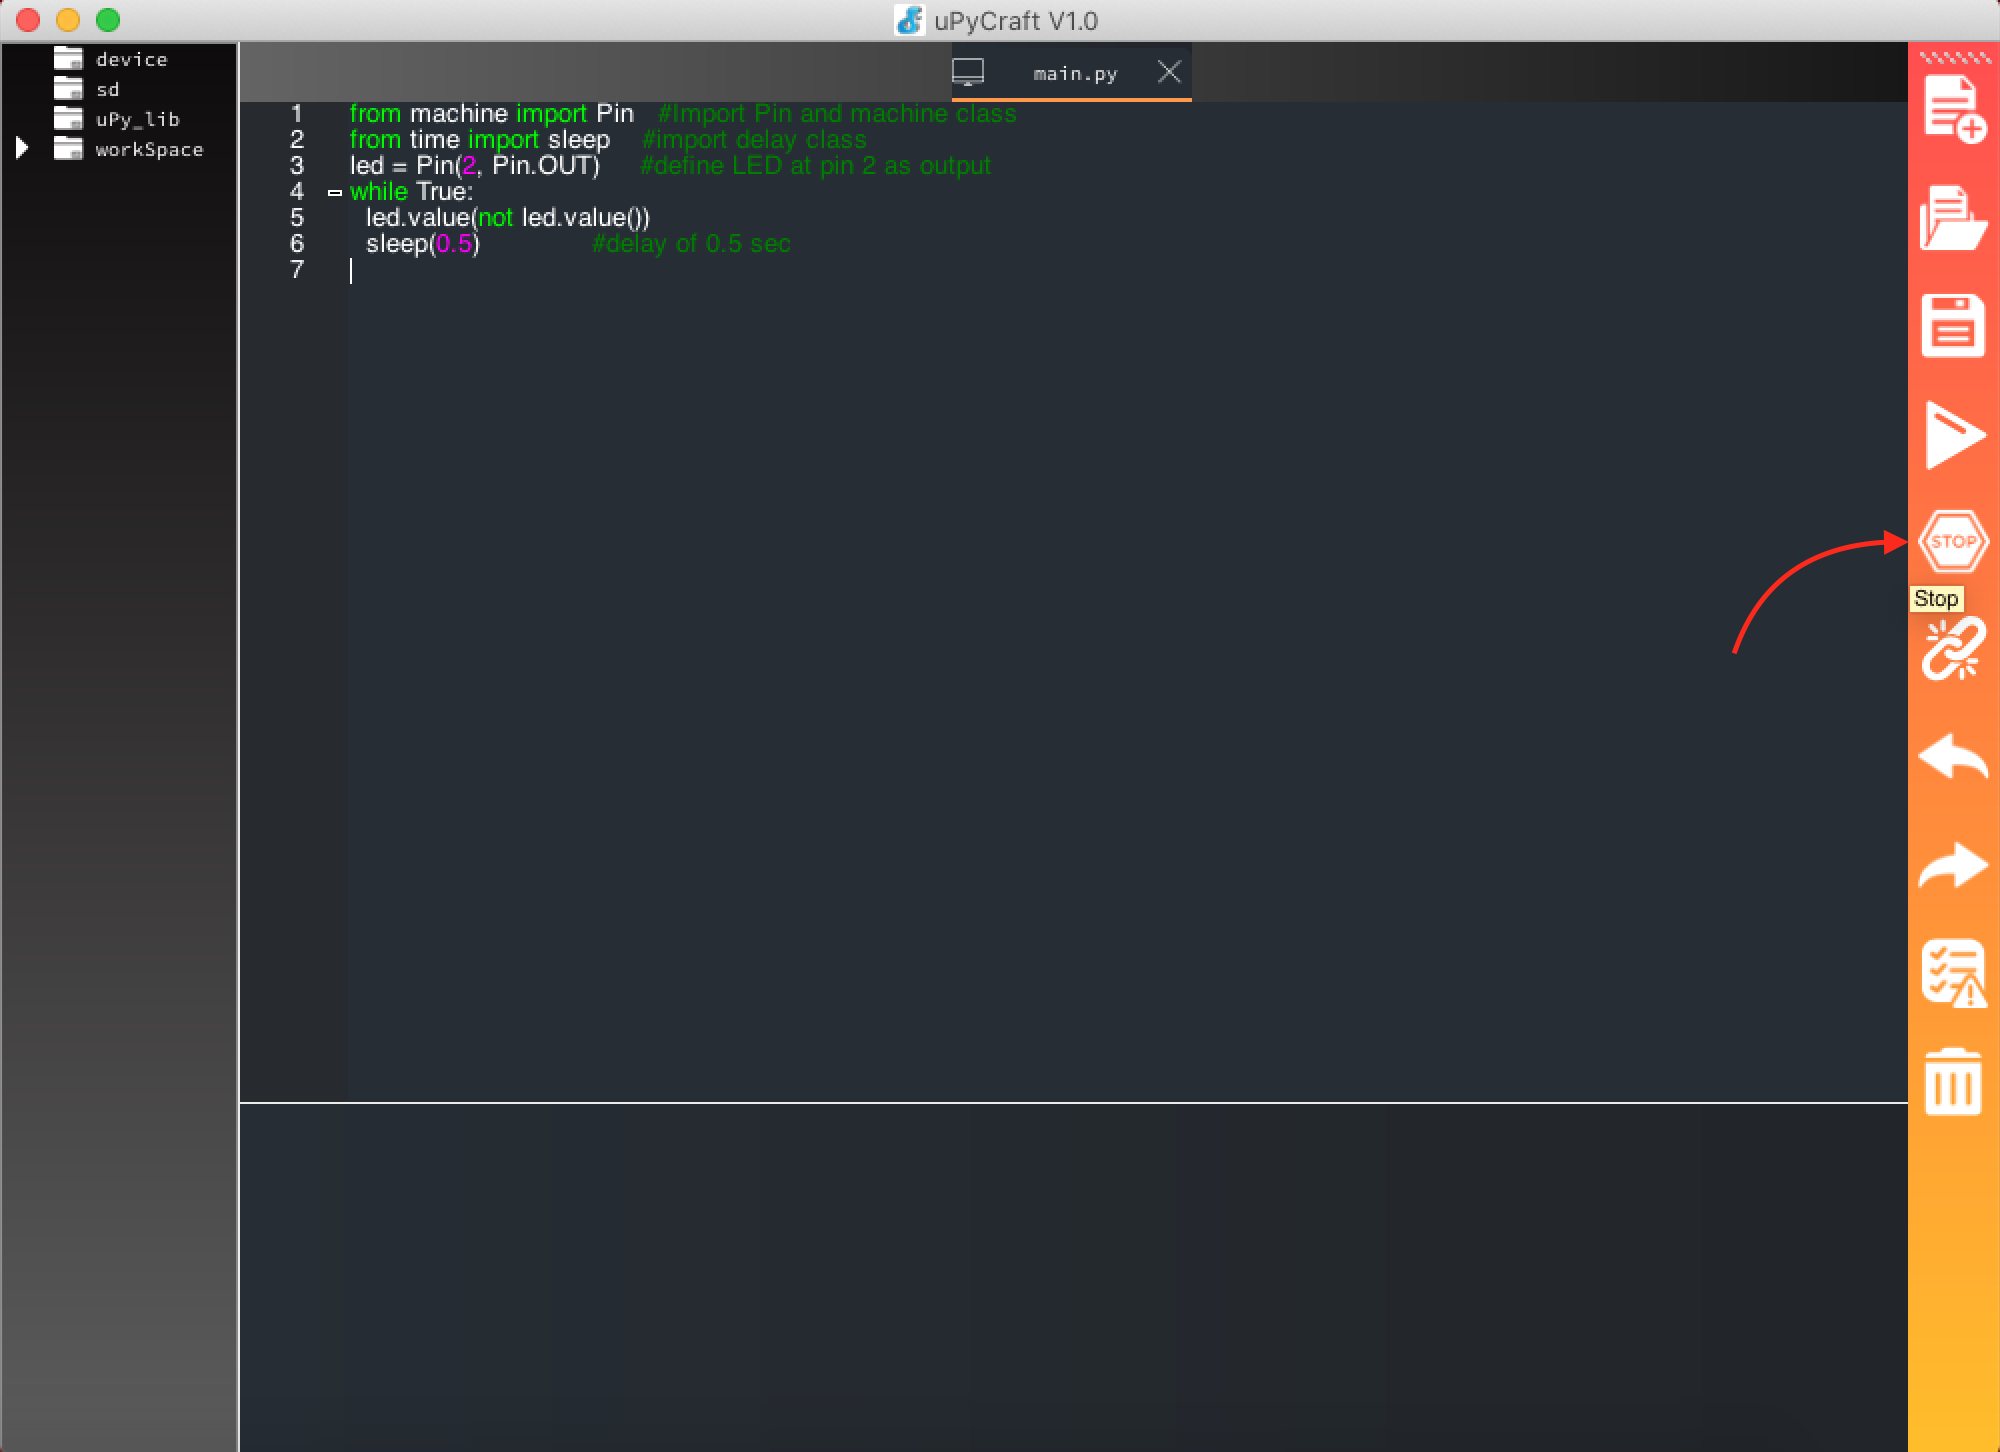
Last section contains all the quick action tools required to run a code, such as play, stop etc. Below we represented all tools using a number.
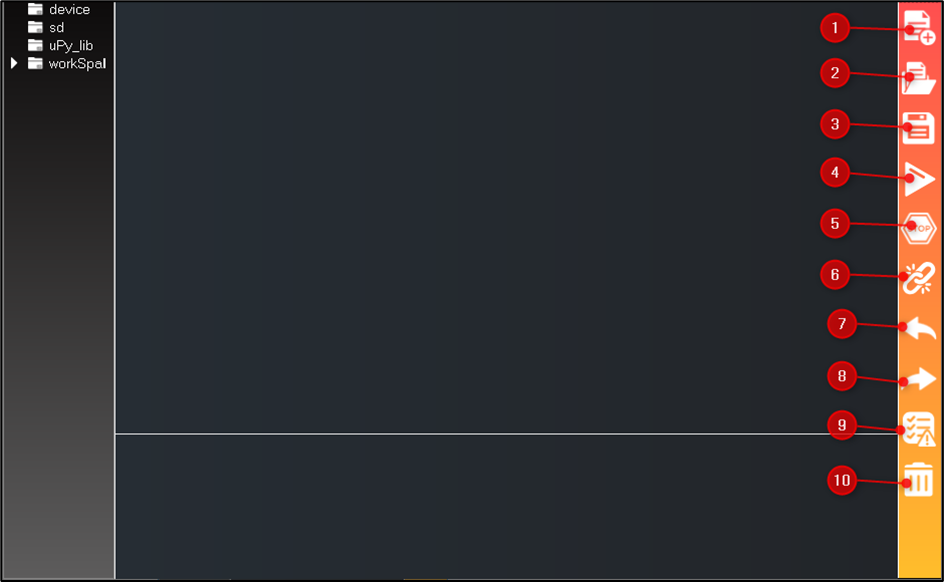
1: New file>Create new file
2: Open file>Open a file
3: Save file>Save a file
4: Download and Run>Upload code to connected board
5: Stop>Stop the code alternatively can also be used using “Ctrl + C”
6: Connect/Disconnect>Connect or disconnect board from serial
7: Undo>Undo the change
8: Redo>Redo the change
9: Syntax Check>Check code syntax
10: Clear>Clear shell/terminal
2. Downloading MicroPython Firmware for ESP32
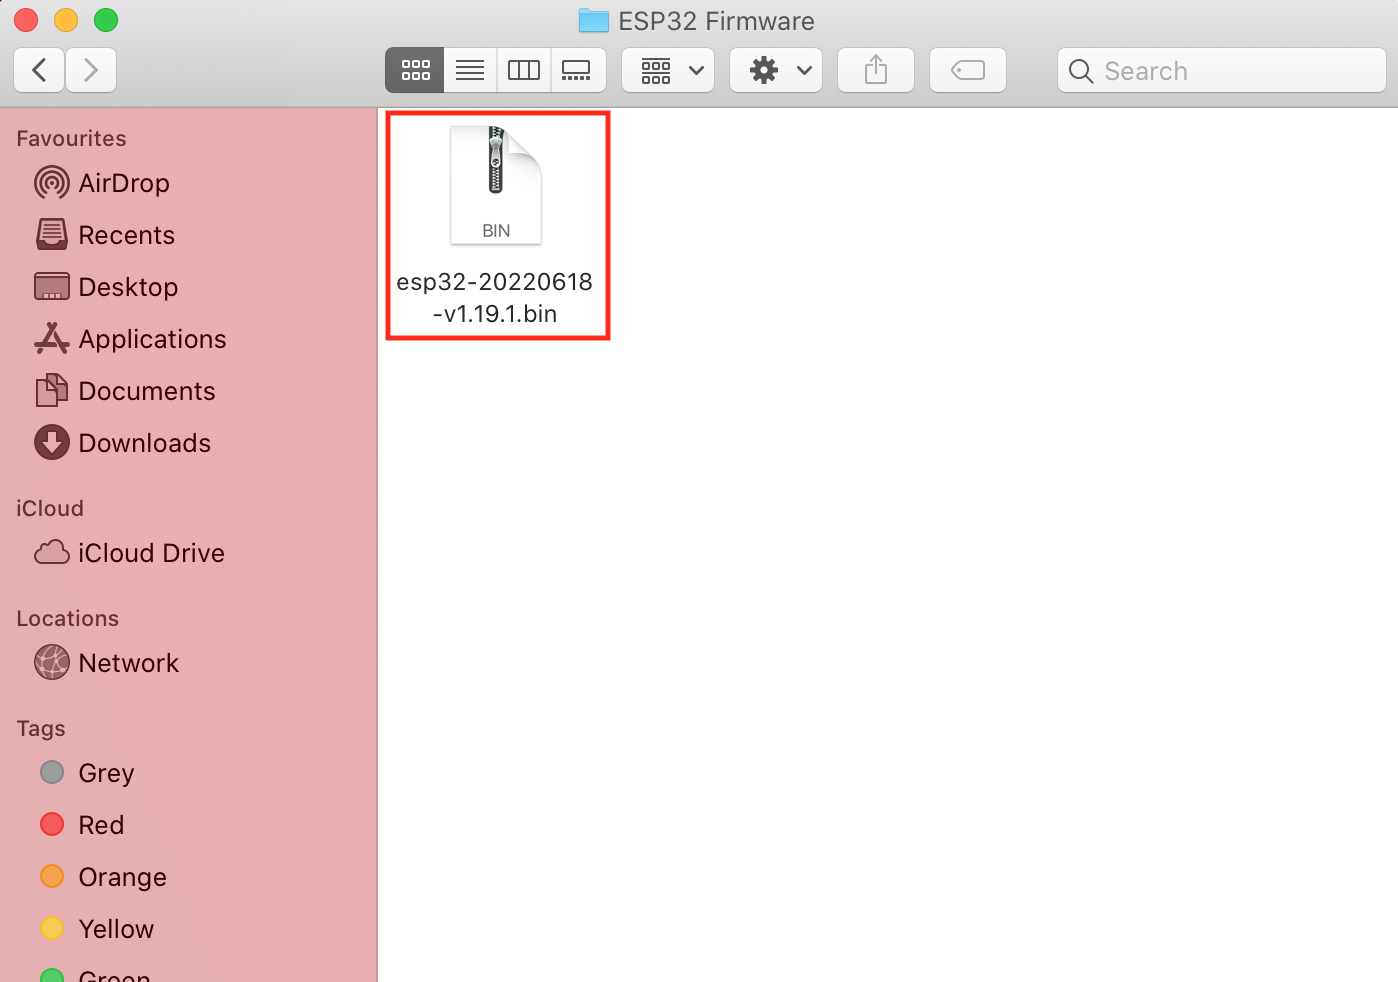
We have completed installation of uPyCraft IDE. Next to program the ESP32 board we have to flash the MicroPython firmware in the ESP32 board first. To download the firmware, go to the MicroPython download page and search for the ESP32 firmware section.
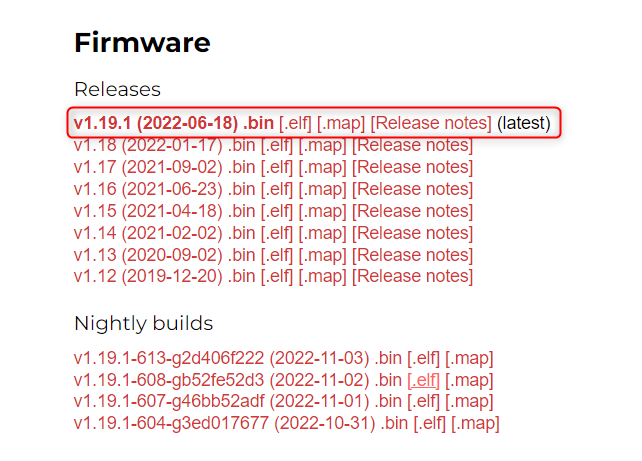
Download the latest released version available for ESP32 board and remember not to download the nightly build version as it mostly targets advanced programmers.
In case if you are using any other board such as PyBoard, WiPy go to MicroPython download page and search for respective board firmware.
3. Installing MicroPython Firmware in ESP32 Using uPyCraft IDE
After downloading firmware the next step is to install it in ESP32 using the uPyCraft IDE. To do this connect the ESP32 board with the macOS. Following steps will guide on flashing MicroPython firmware in ESP32.
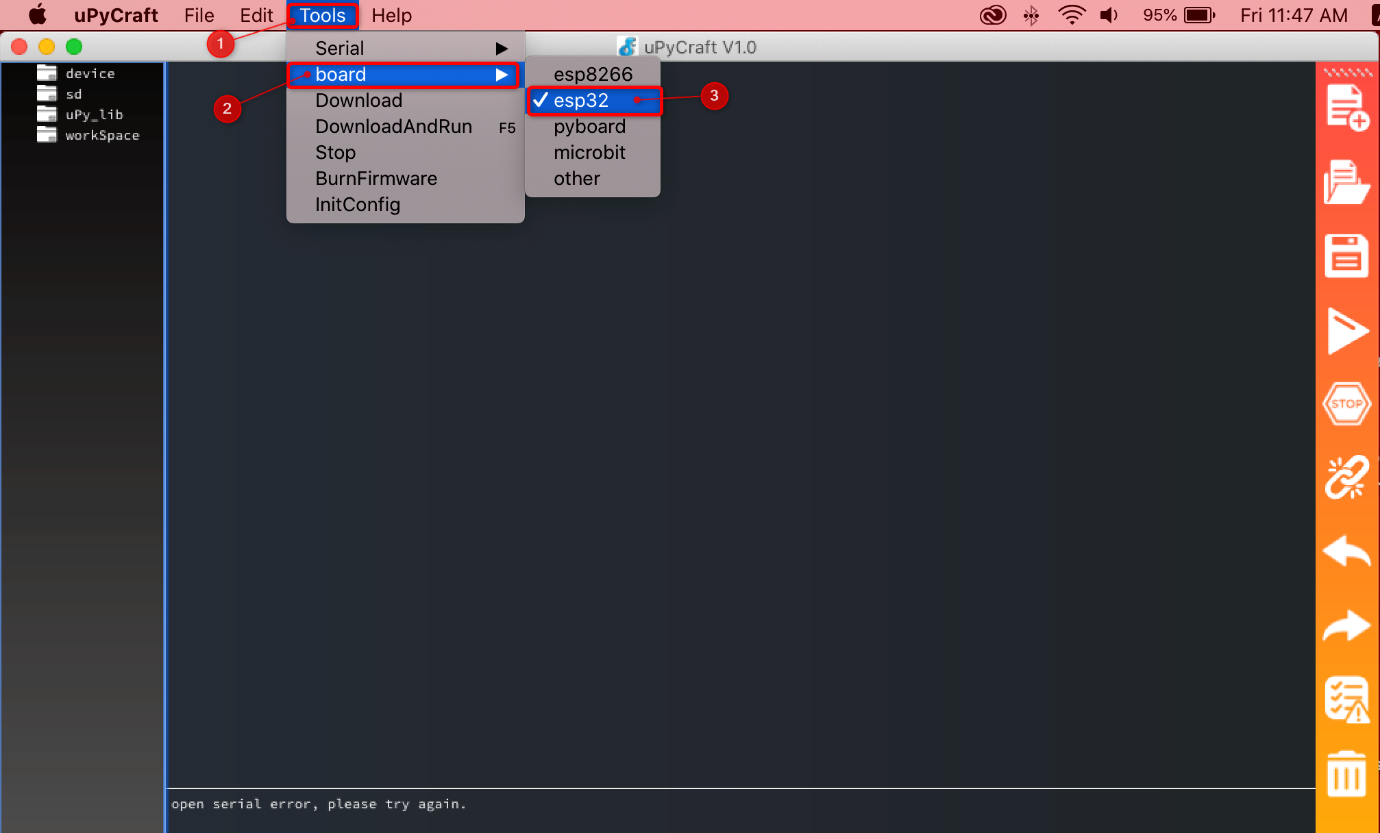
Step 1: Select the board Go to: Tools>board>esp32
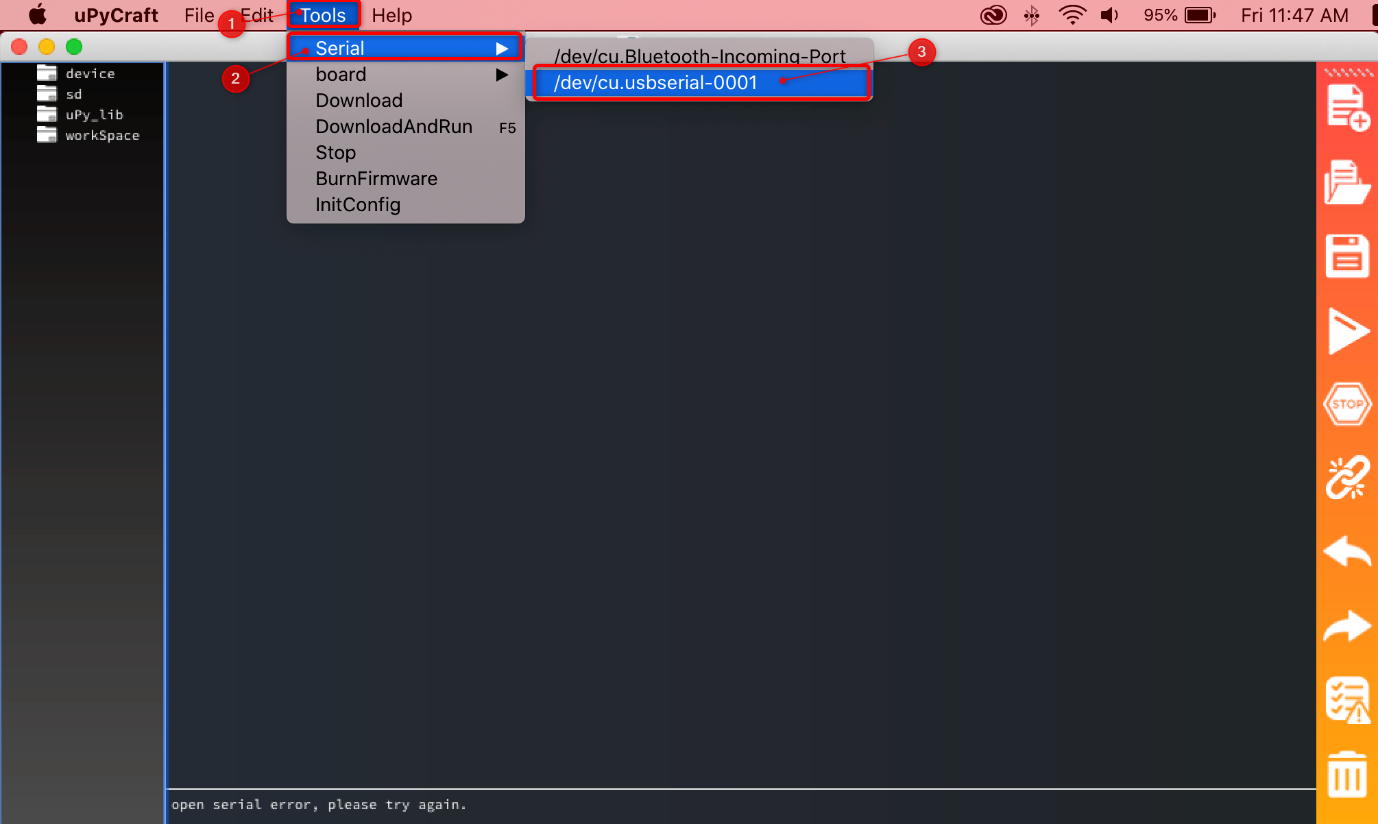
Step 2: Next select the COM port Go to: Tools>Serial>/dev/cu/usbserial-0001
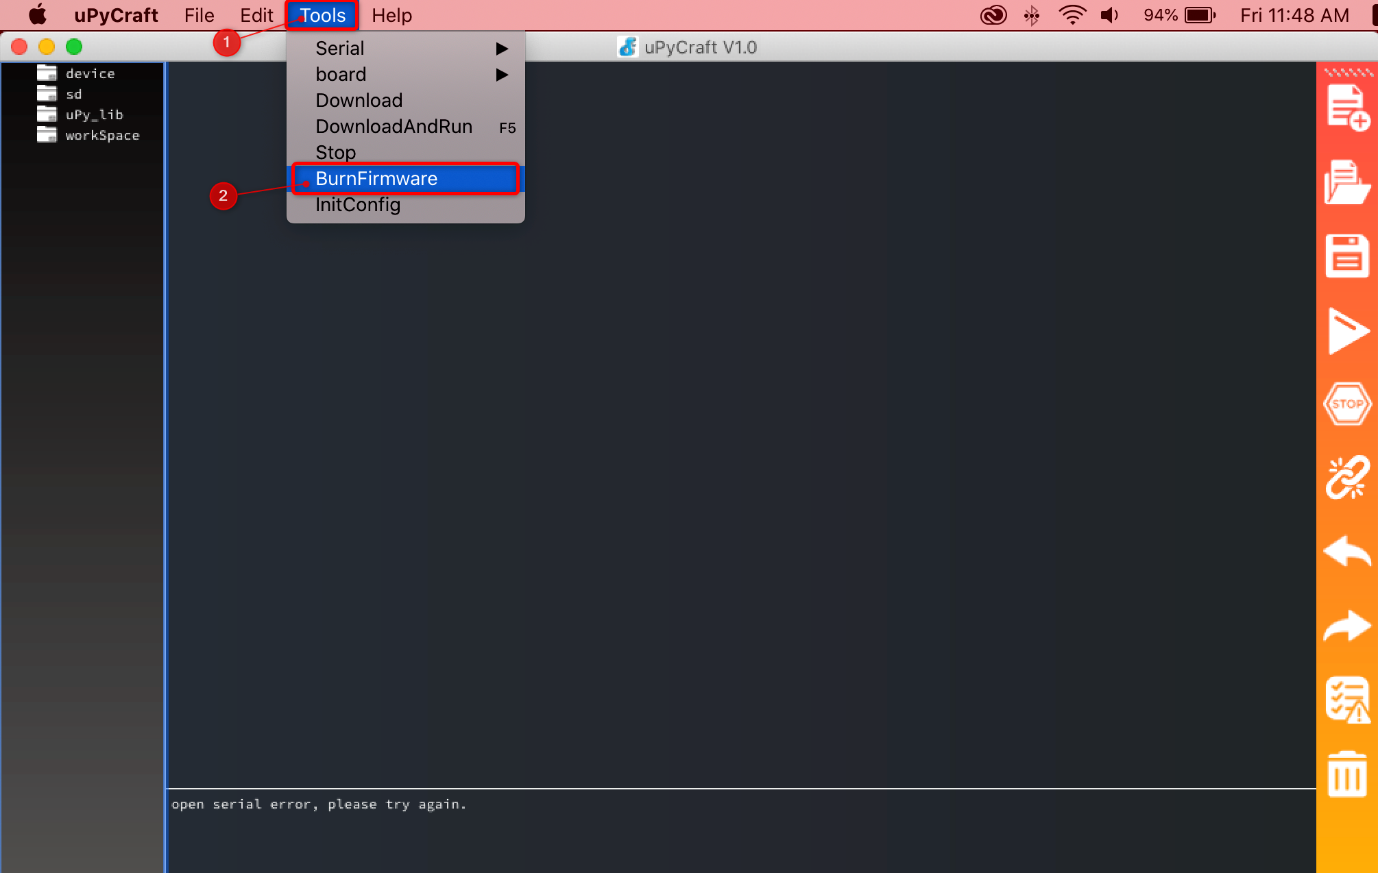
Step 3: As now we have selected the COM port and ESP32 board, the next step is to burn firmware. Go to: Tools>BurnFirmware
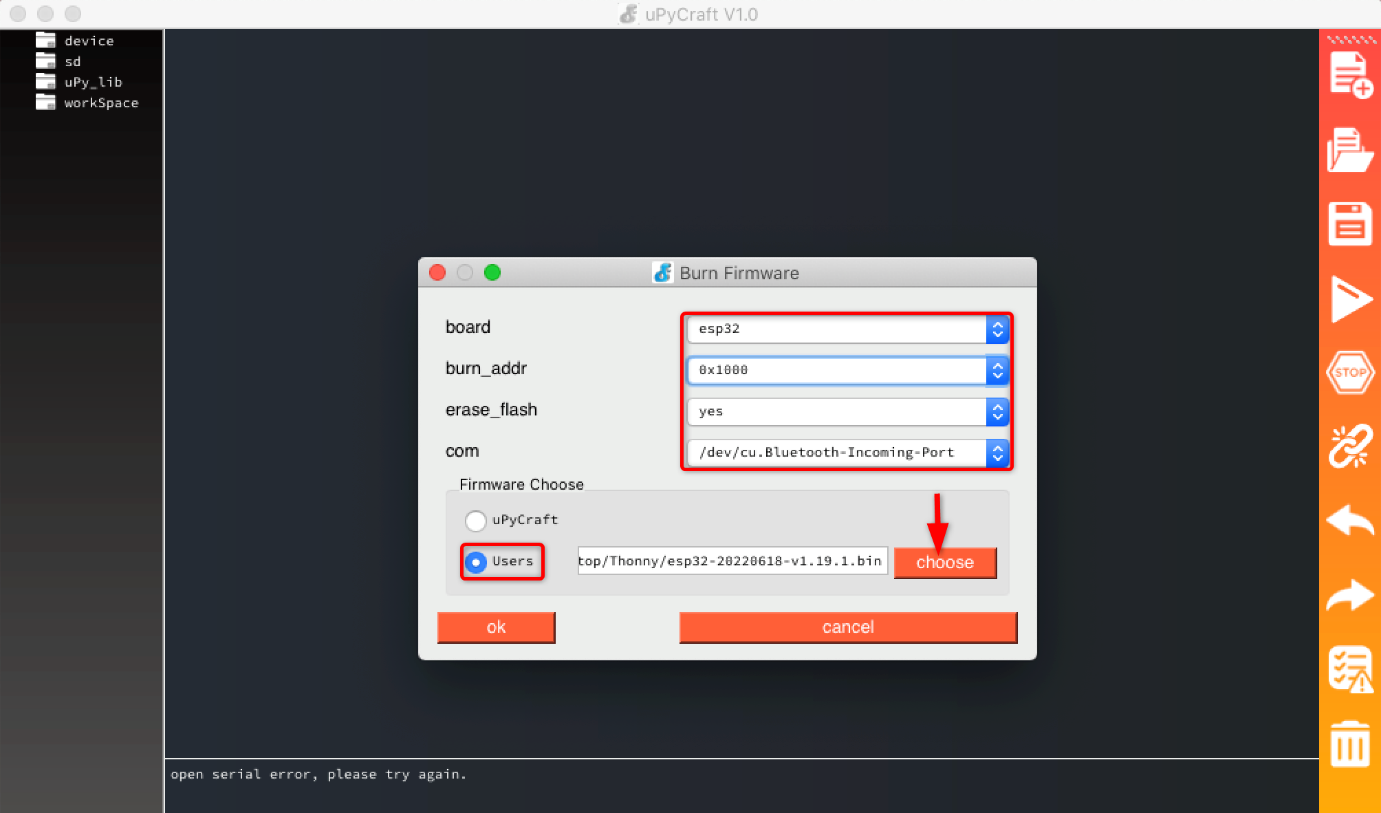
Step 4: A window will appear select the below given settings:
- board: esp32
- burn_addr: 0x1000
- erase_flash: yes
- com: /dev/cu/usbserial-0001
Select the Users and browse for the MicroPython firmware file we downloaded earlier.
Step 5: Select file and click Open.
Step 6: We are just a single step away from flashing MicroPython into our very own ESP32 board. Now take the ESP32 board, press and hold the BOOT button.
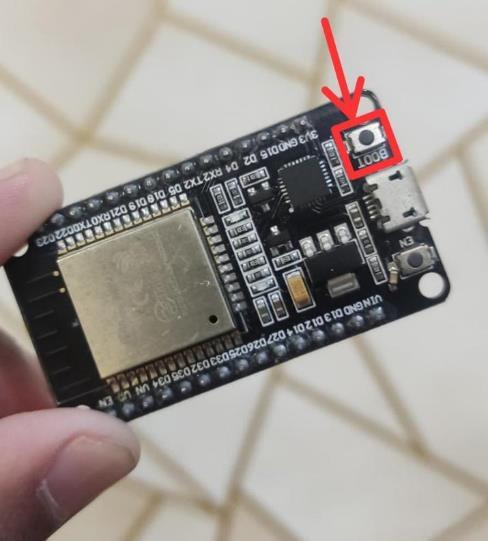
Step 7: While pressing the ESP32 BOOT button click OK.

Step 8: If all steps go well ESP32 memory will start to flash. Once the erase flash starts you can release pressure on your finger by leaving the ESP32 BOOT button.
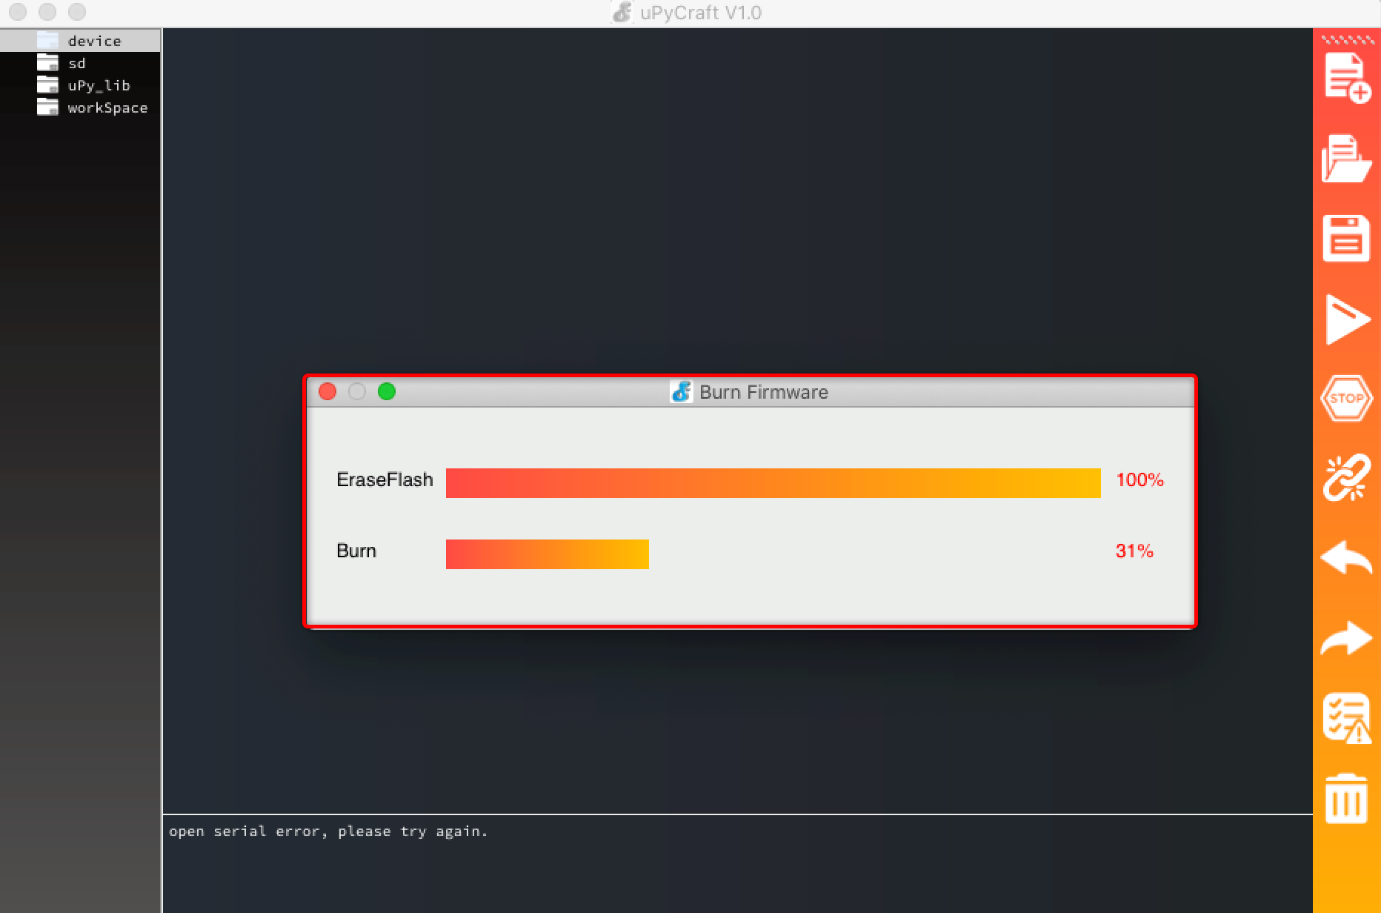
After successful installation of firmware, the above window will close automatically and now we are ready to upload our very first program to the ESP32 board.
Note: In case of any error repeat the above steps and remember to press and hold the BOOT button.
4. Uploading LED Blink Program in ESP32 Using MicroPython uPyCraft IDE
To test the installation of uPyCraft IDE we will upload the LED blink program. Follow the steps below:
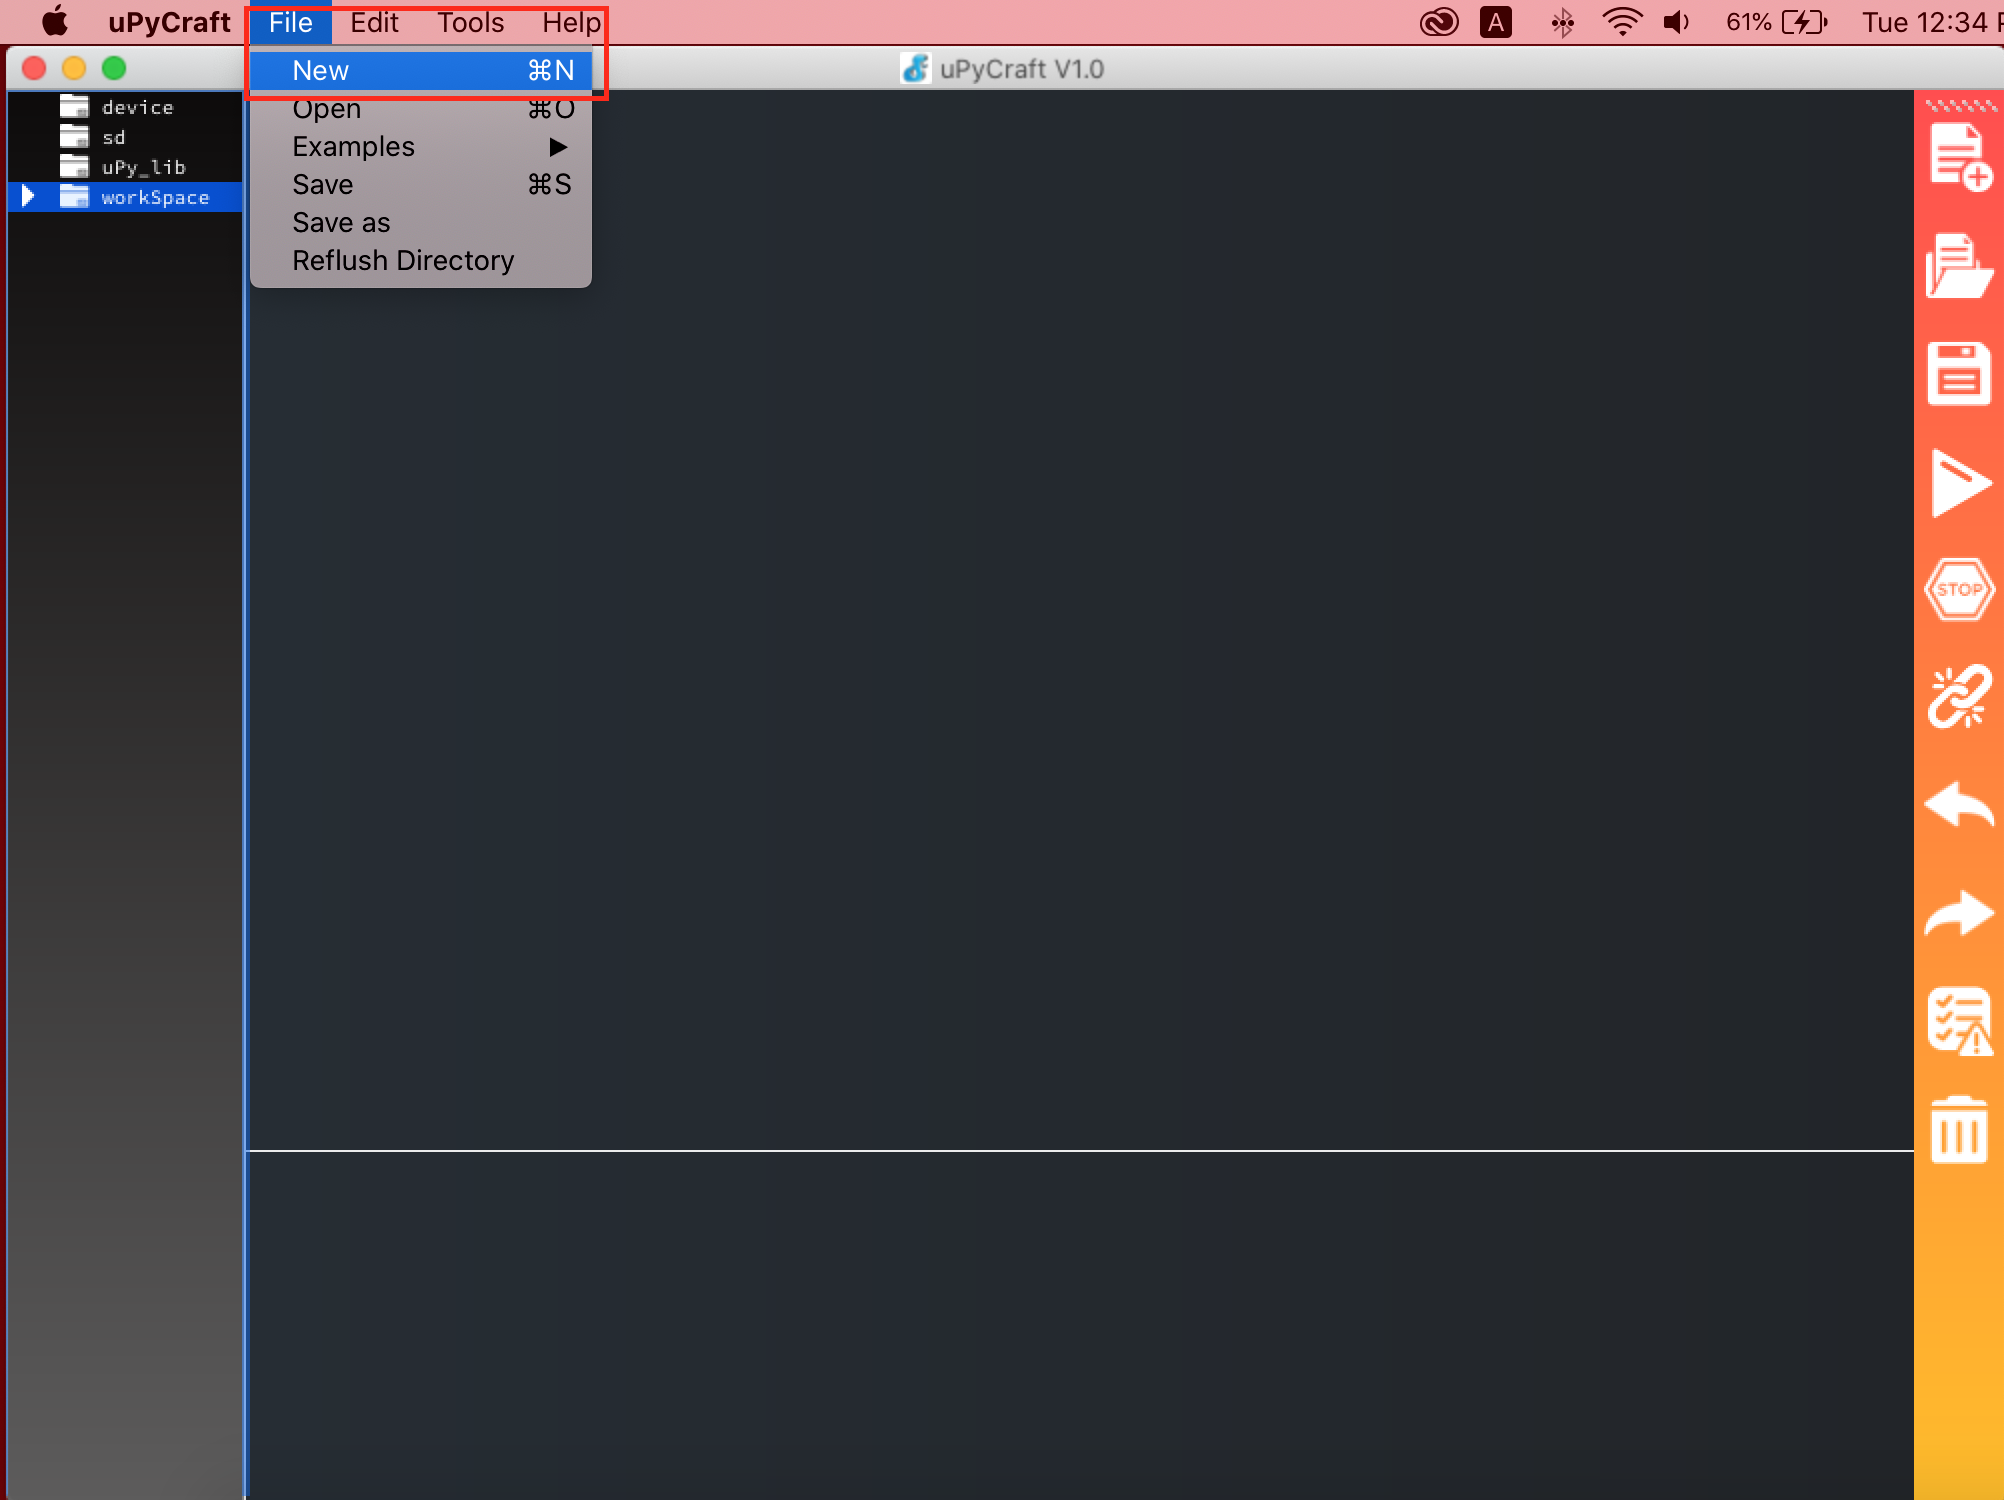
Step 1: Open a new file Go to: File>New or press Command + N.
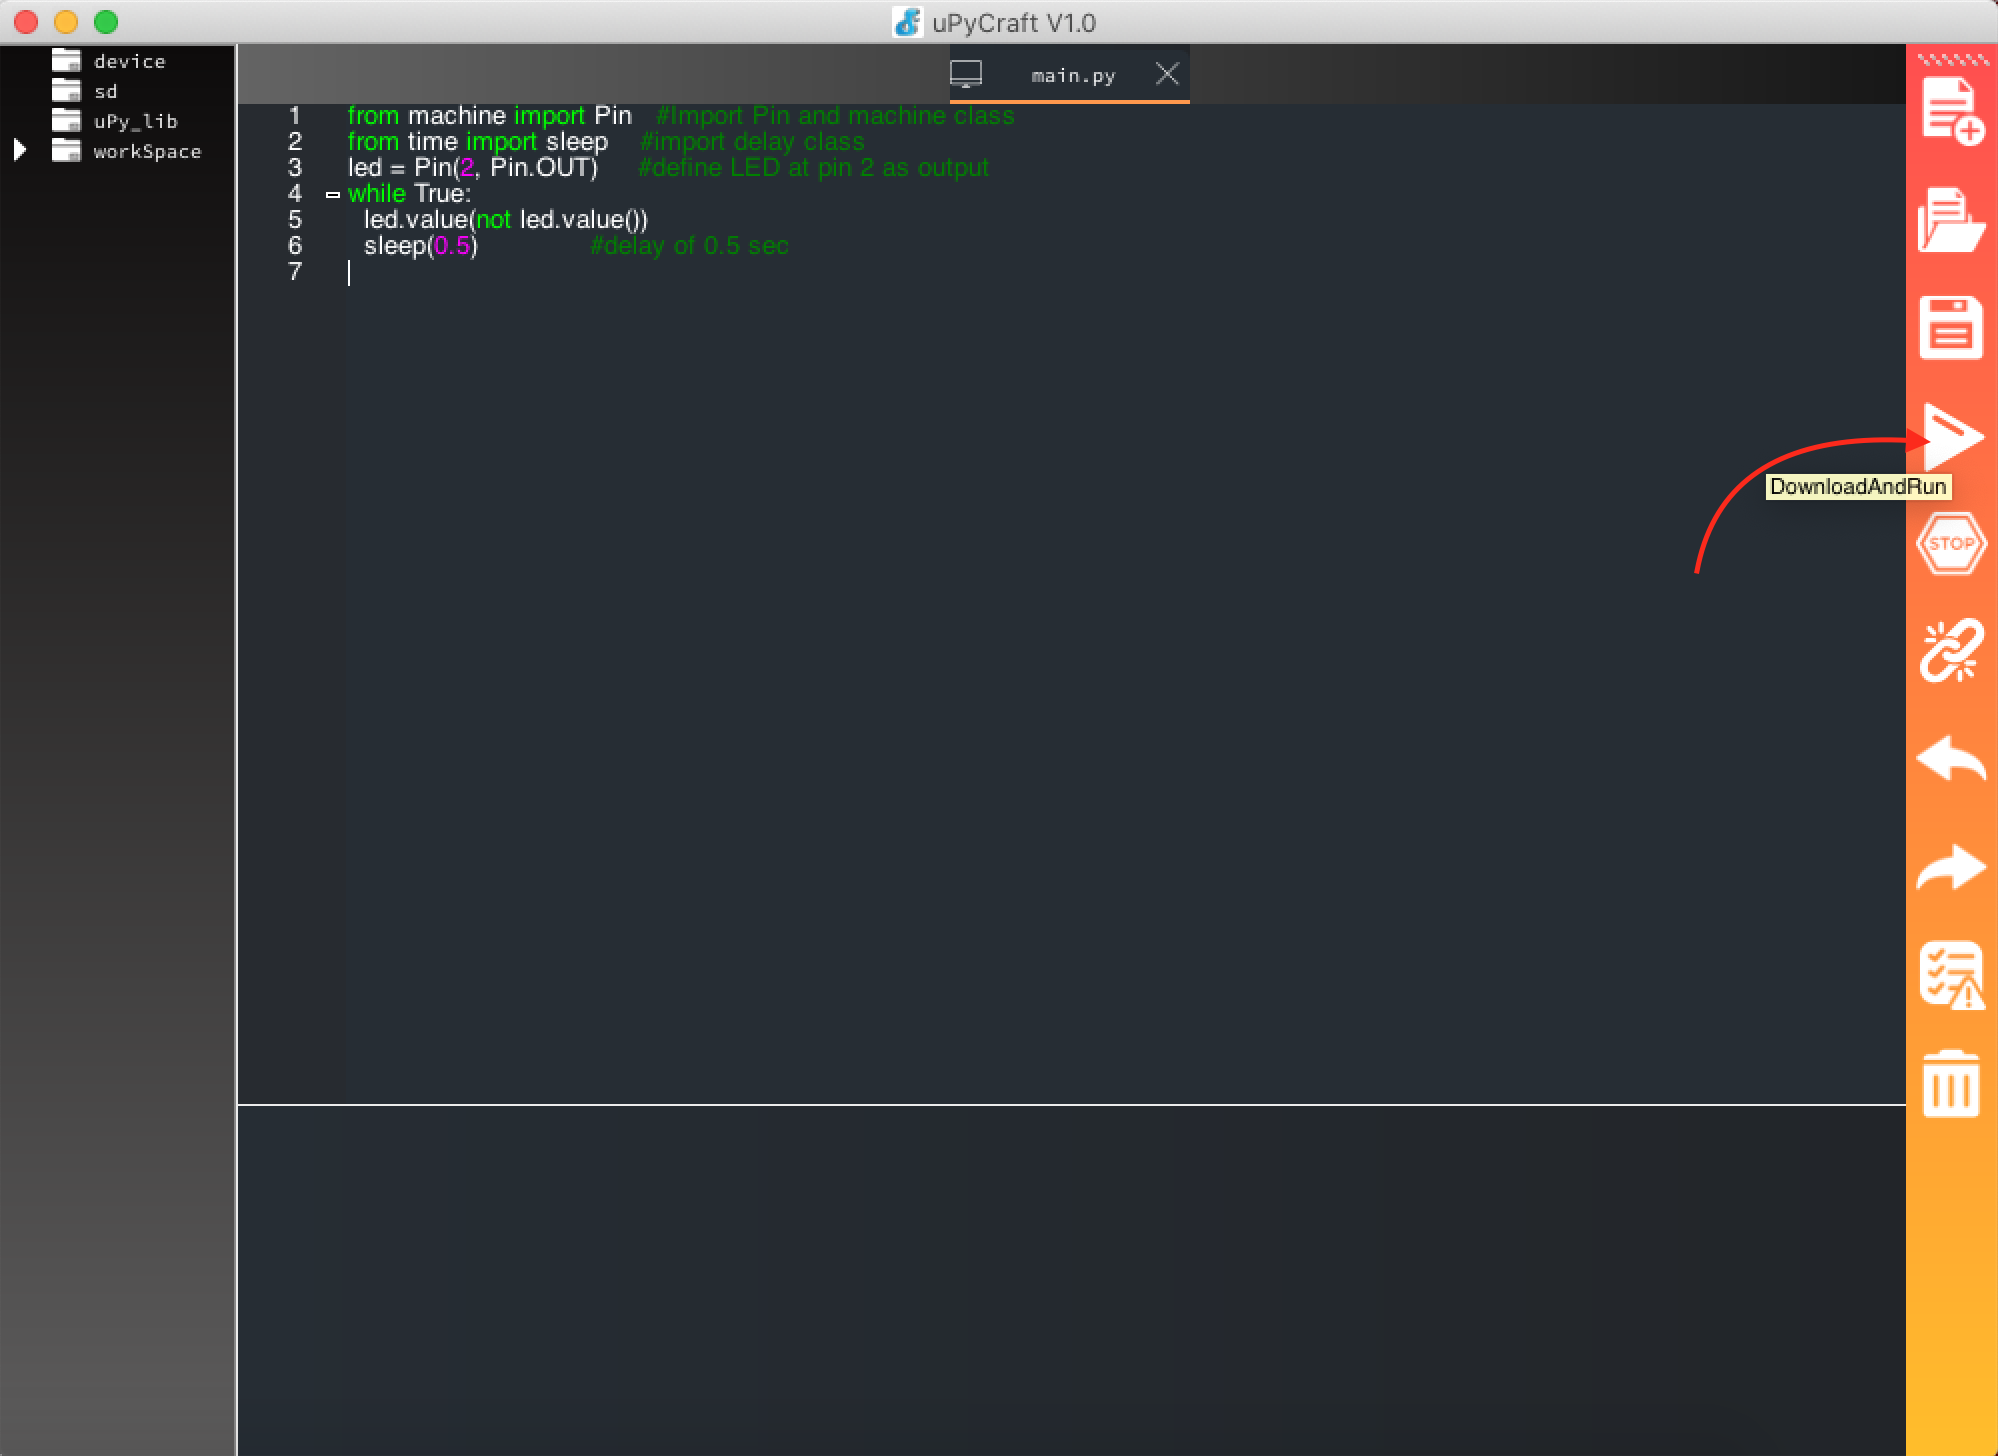
Write the code given below in the editor window of the newly created file.
from time import sleep #import delay class
led = Pin(2, Pin.OUT) #define LED at pin 2 as output
while True:
led.value(not led.value())
sleep(0.5) #delay of 0.5 sec
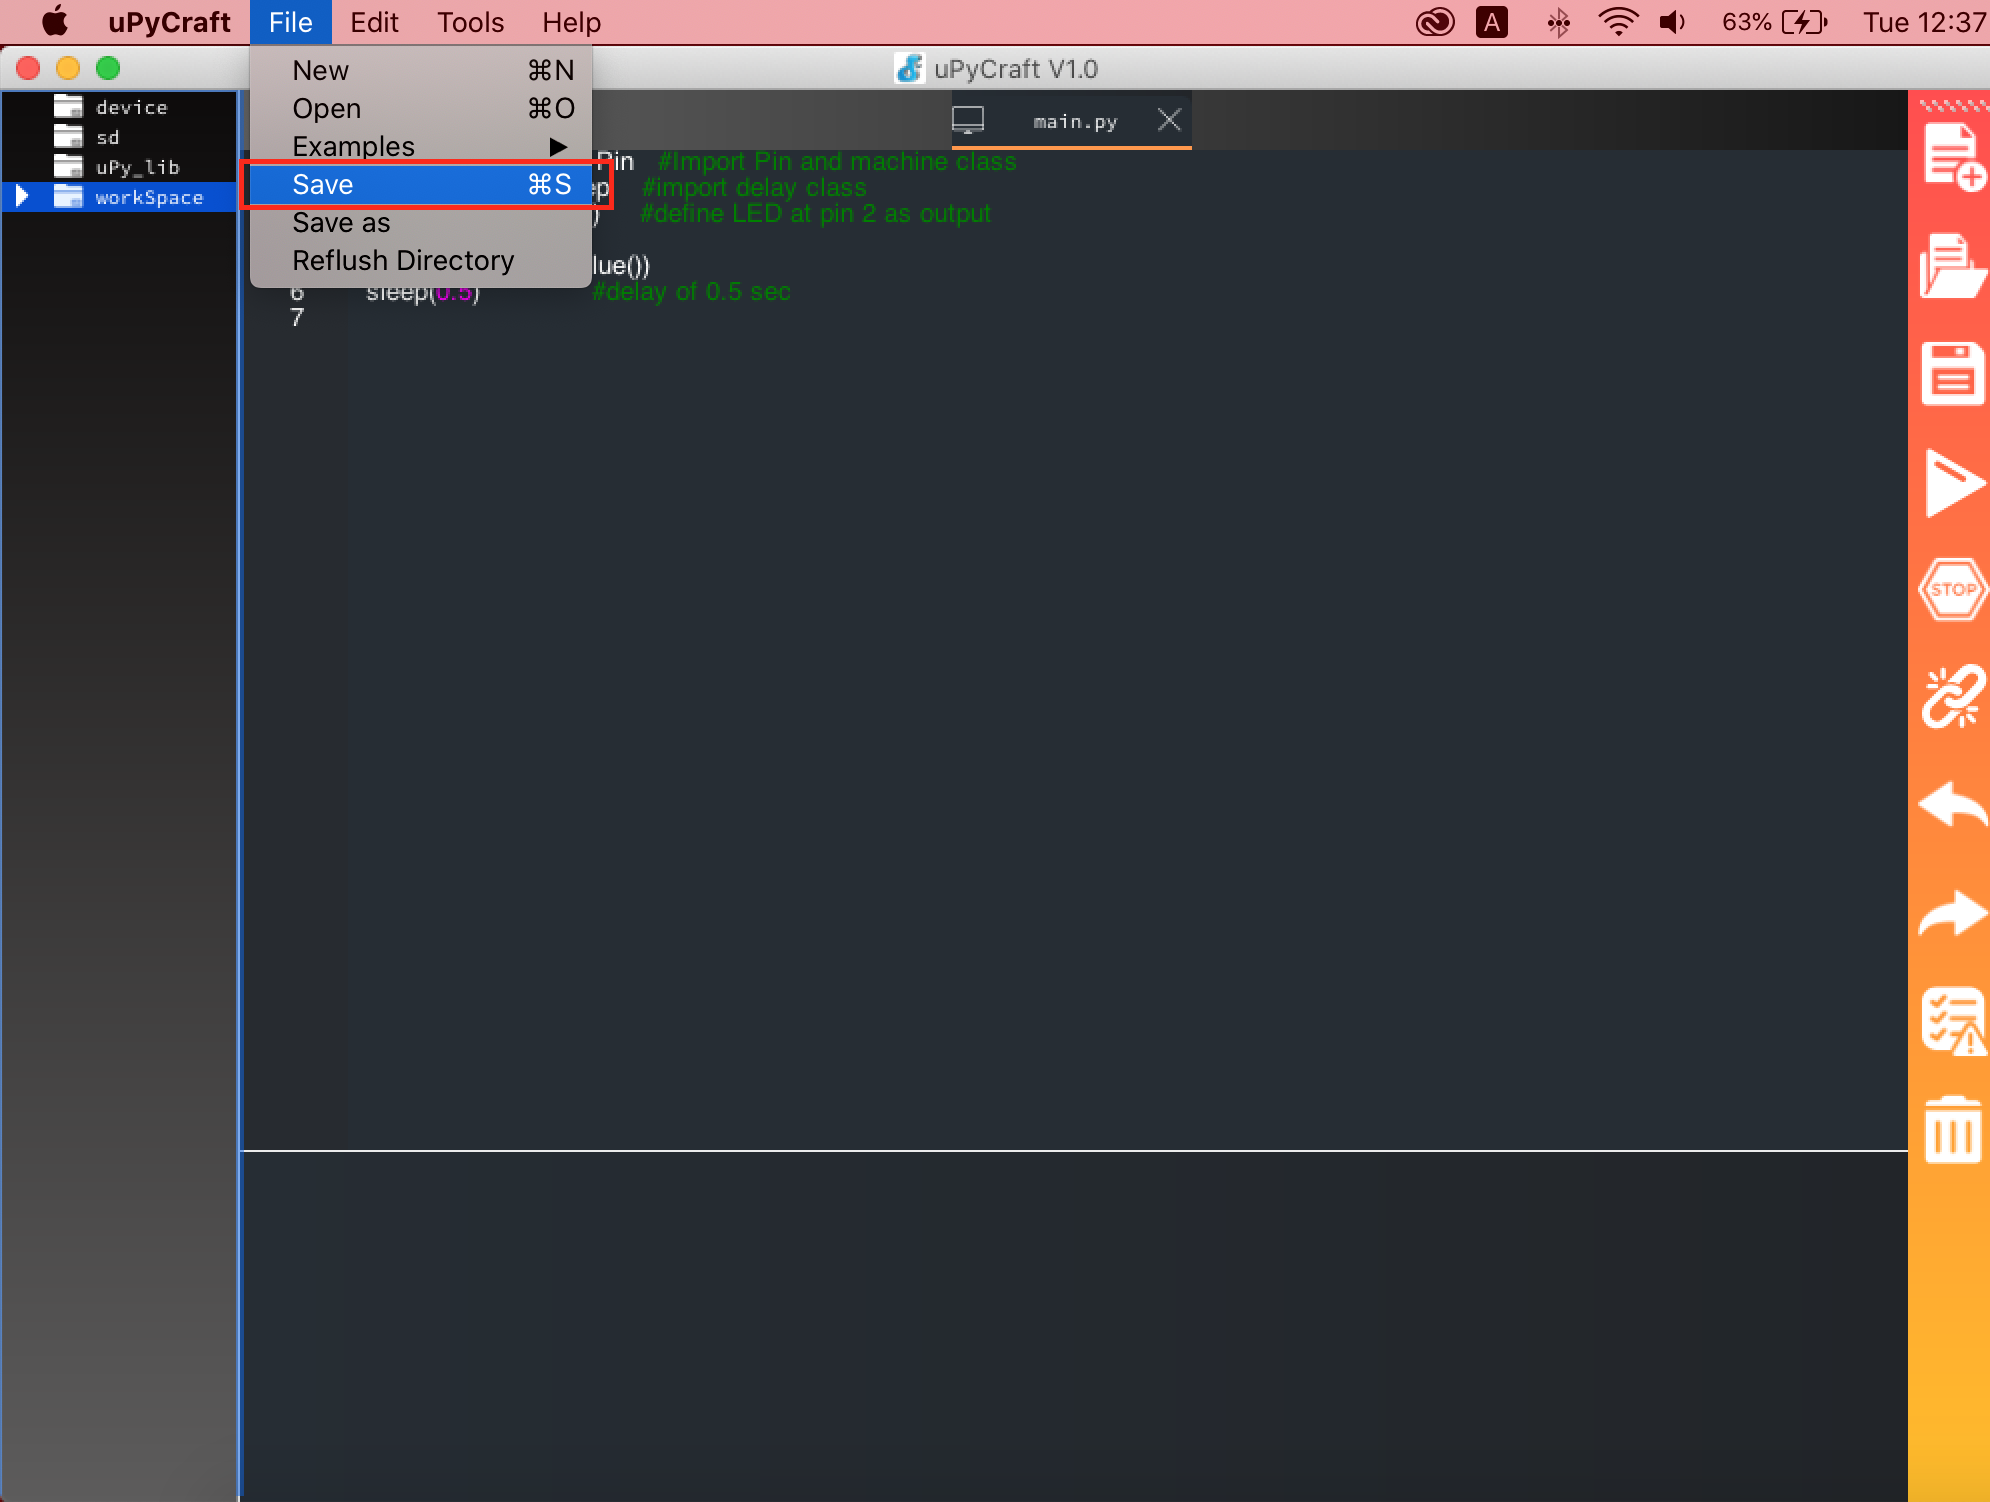
Step 2: After writing code save the file Go to: File>Save or press Command + S.
Step 3: Save the file with name main.py.

Step 4: Select the directory to save the file.
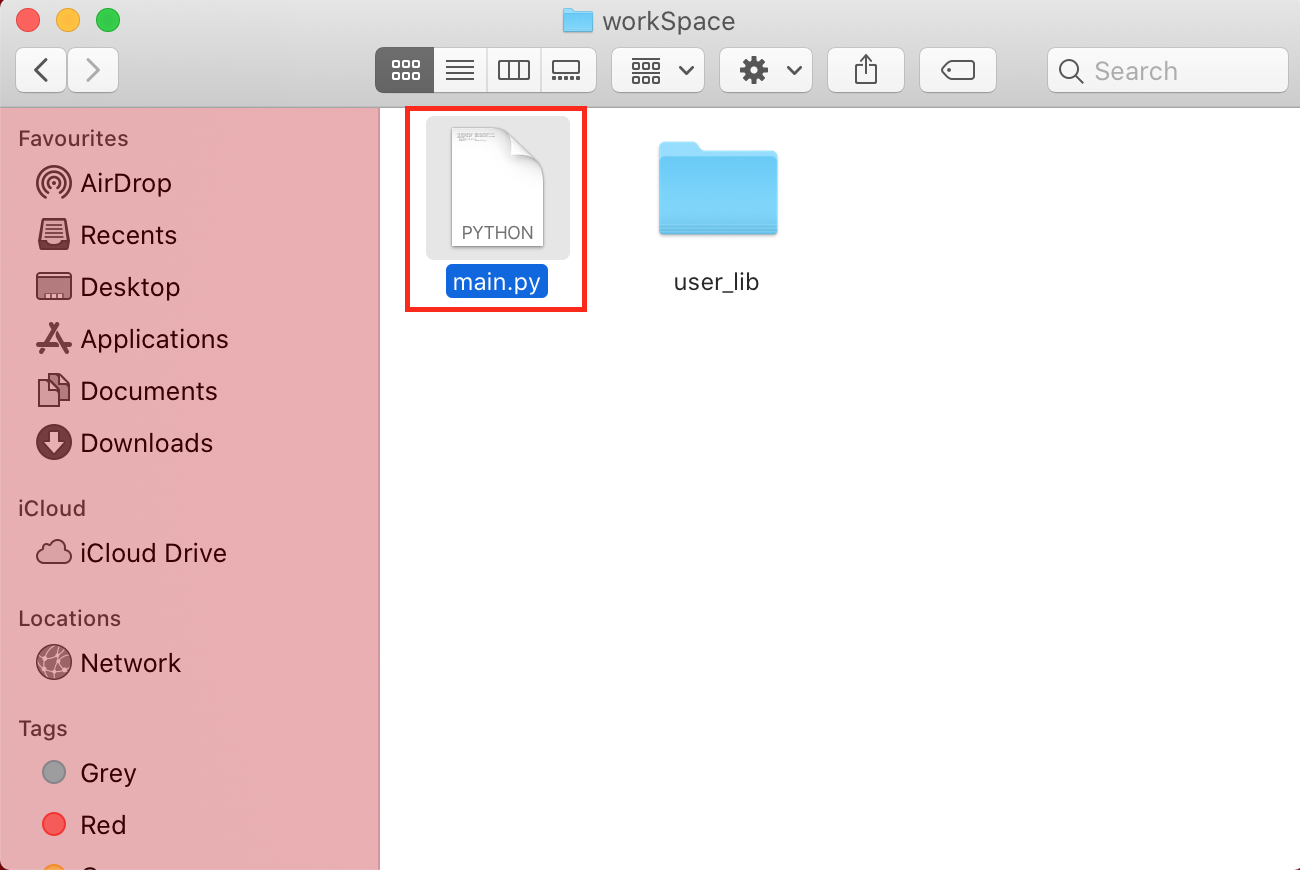
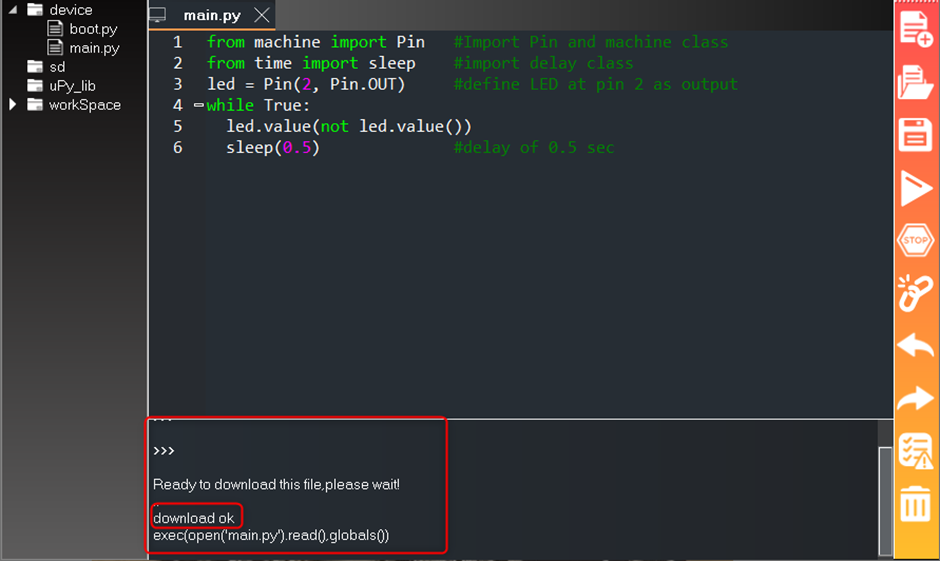
Step 5: Once the file is created you will see the following files under device section. Now to upload code press the Download And Run button.
Step 6: If the program runs successfully “download ok” message will appear in terminal/shell.
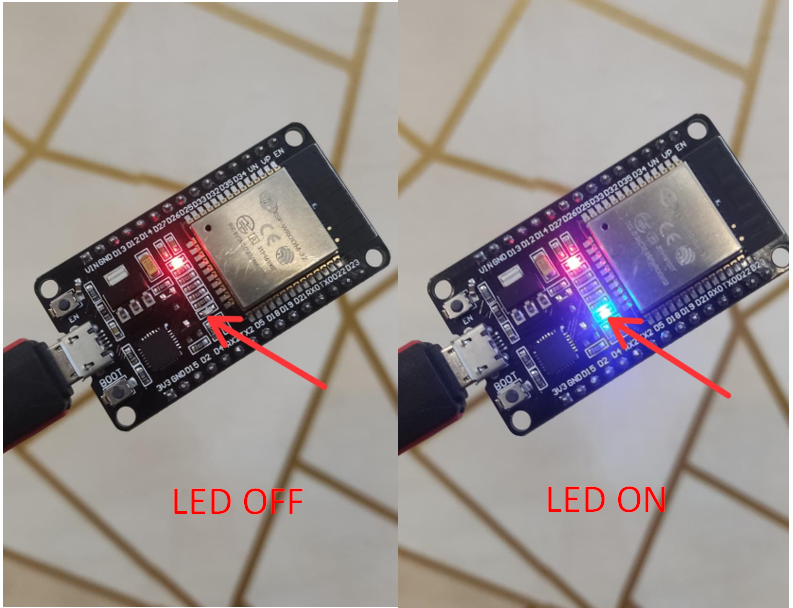
Output
A built in LED will start blinking which is connected at pin 2 of ESP32 board.
To stop the program click Stop.
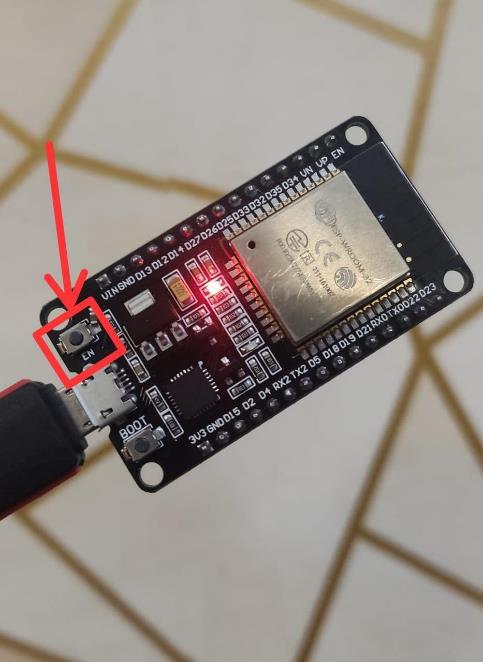
If you want to restart the compiled code press the Enable (EN) button on the ESP32 board.
If the program restarted the output similar to shown below can be seen on shell/terminal.
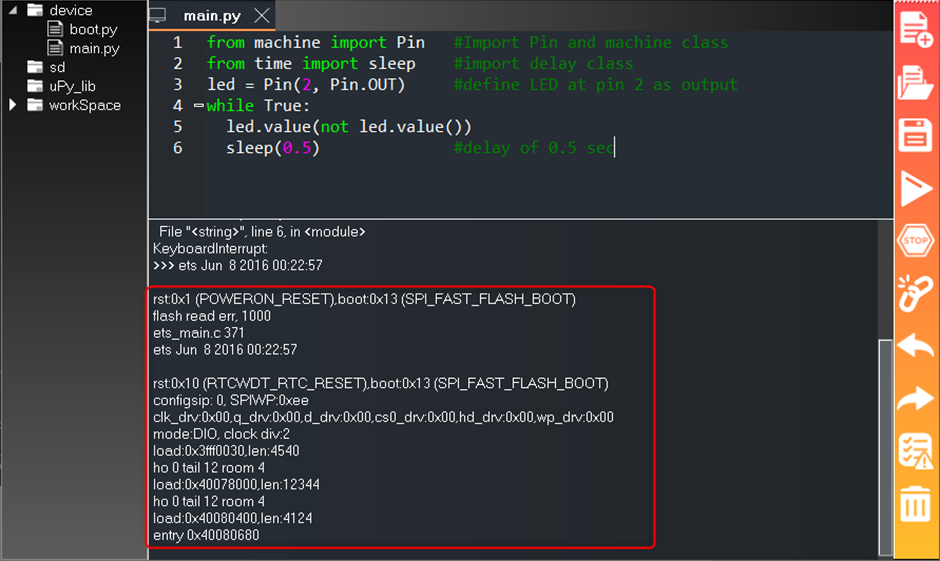
We have successfully installed uPyCraft IDE in macOS and uploaded our first program after flashing ESP32 with MicroPython firmware.
Important Note: After installing MicroPython firmware in ESP32 board one can also program ESP32 by just uploading the code using the Arduino IDE, but if you want to use MicroPython again with ESP32 we need to flash MicroPython firmware again into ESP32 board because the Arduino IDE replaces the MicroPython firmware with its own firmware.
Conclusion
uPyCraft IDE can program ESP32 boards using MicroPython. This article assists you to download and setup uPyCraft IDE on Mac with MicroPython. For writing MicroPython code in Mac the Python 3 programming language must be installed inside the PC. Next a ESP32 firmware is required to be flashed inside the ESP32 board.