“Tailwind CSS” is a well-known dynamic framework that is used to style the front end of websites using the built-in or custom CSS classes as per user requirements. It can be installed in various ways such as with the help of “Play CDN”, “CLI (Command Line Interface)” and as a “PostCSS” plugin. The “PostCSS” allows the users to integrate the “Tailwind CSS” with the build tools such as Rollup, webpack, Parcel, and Vite rather than the built-in CLI tools.
This article elaborates on the installation of Tailwind CSS as a “PostCSS” plugin.
How to Install Tailwind as a PostCSS Plugin?
To install “Tailwind” as a “PostCSS plugin”, the “postcss.config.js” configuration file is required that can be created using the “npx(node package executor)” command.
Let’s follow the given steps to create this file and then install the Tailwind CSS as a “PostCSS plugin”.
Step 1: Install Tailwind CSS With Dependencies
Firstly, open the folder in the code editor and run the following command in the “New Terminal (Ctrl+Shift+`)” to install Tailwind CSS with its dependencies “postcss (provides plugins)” and “autoprefixer (parse CSS and add vendor prefixes)” in it:
The output shows that the Tailwind CSS and its dependencies are installed successfully.
Step 2: Create Configuration Files
Now, run the given command to create the “tailwind.config.js” and the “postcss.config.js” configuration files. These files are useful to customize the CSS and interact with the project by specifying the template paths:
In the above command, the “init” creates the “tailwind.config.js” file whereas the “-p” generates the “postcss.config.js” file:
As seen, both configuration files are created successfully.
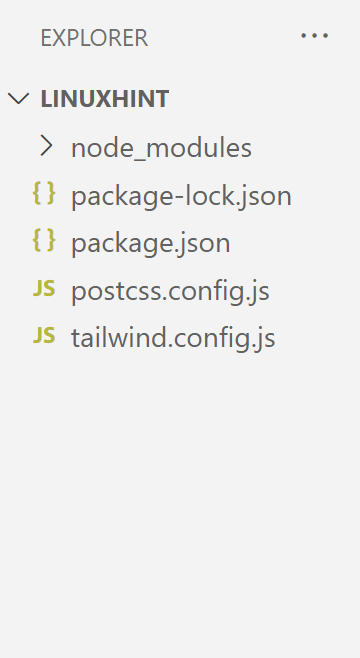
File Structure
The file structure now looks like this:
Step 3: Add Tailwind to PostCSS Configuration File
Add the “tailwindcss” and the “autoprefixer” in the “PostCSS” configuration if it does not come by default during the creation of the file, as follows:
Save (Ctrl+S) the file.
Step 4: Configure Template Path
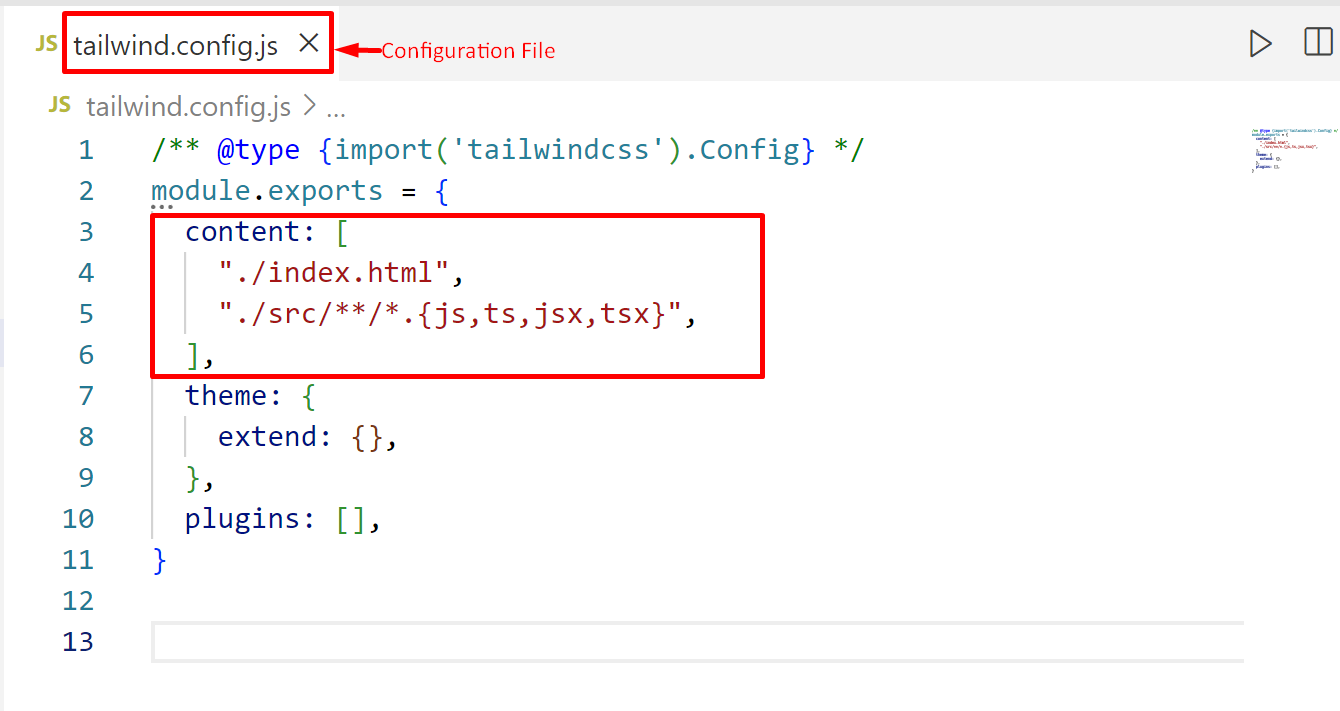
Now, configure the template paths in the “content” section of the “tailwind.config.js” file to generate the CSS for it like this:
"./index.html",
"./src/**/*.{js,ts,jsx,tsx}",
],
In the above command:
- The “index.html” specifies the path of the HTML template present in the current directory.
- The “src” denotes the main directory where all of the files having “{js.ts,jsx,tsx}” extensions are placed:
Save and close the file.
Step 5: Add Tailwind Directives
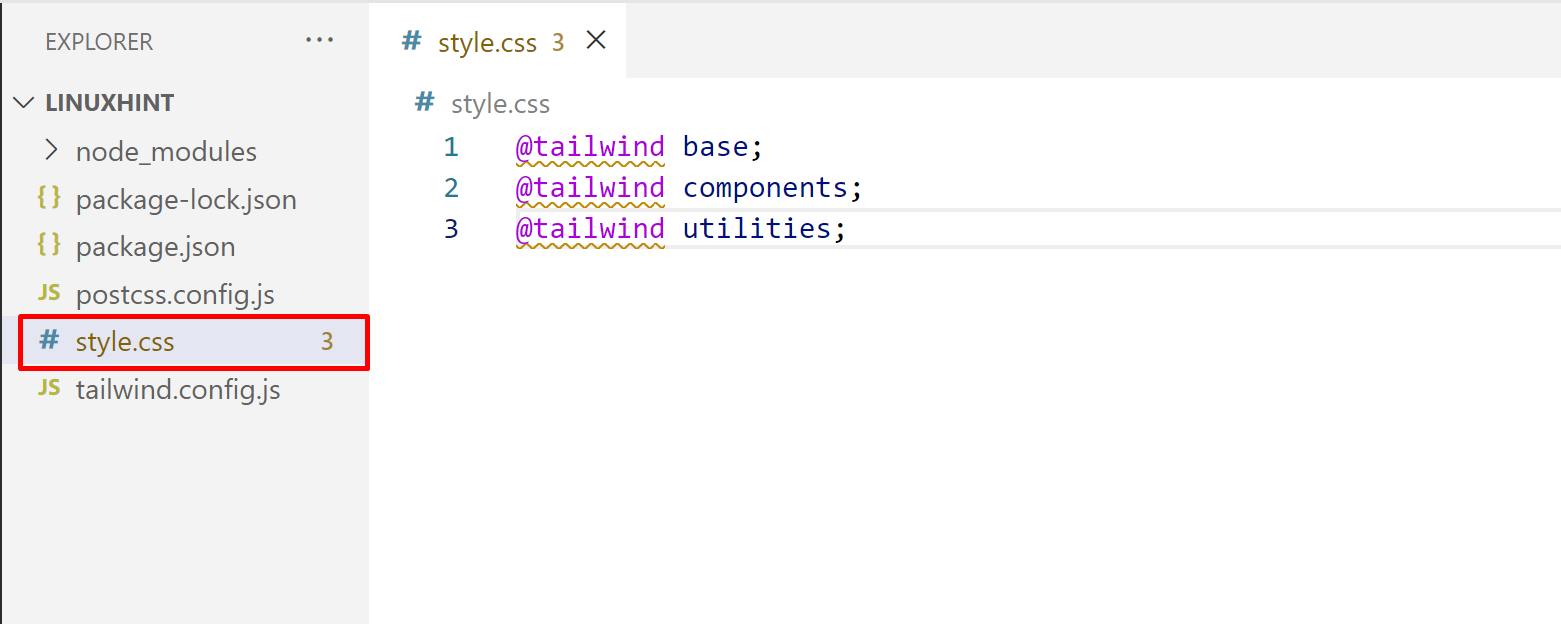
Next, create a main CSS file i.e., “/style.css” and add the built-in tailwind directives in it for base style elements, JavaScript components, and the utility classes, respectively:
@tailwind components;
@tailwind utilities;
Step 6: Build the CSS
Start the Tailwind “CLI build process” by running the following command that scans all the specified template files and builds up the CSS in this way:
Step 7: Write the Code and Run It
Now, write a simple HTML code in the “index.html” file and also apply the tailwind CSS on it, as follows:
<link href="/dist/output.css" rel="stylesheet">
</head>
<body>
<h2 class="text-center font-bold text-white bg-orange-500">Welcome to Linuxhint!</h2><br>
<h3 class="text-center font-bold text-green-700">Tutorial:Install Tailwind as a PostCSS plugin.</h3><br>
<p class="text-center text-pink-600">Tailwind CSS is a well-known CSS framework that helps in setting the pre-defined CSS classes to style your HTML elements.</p>
</body>
In the above code lines:
- First, link the generated CSS file in the header section with the help of the “<link>” tag.
- Next, the “body” section first applies the Tailwind classes “Text Align”, “Font Weight”, “Text Color”, and the “Background Color” on the “<h2>” and “<h3>” elements, respectively.
- Lastly, the “<p>” element only applies the “Text Align”, and the “Text Color” Tailwind class.
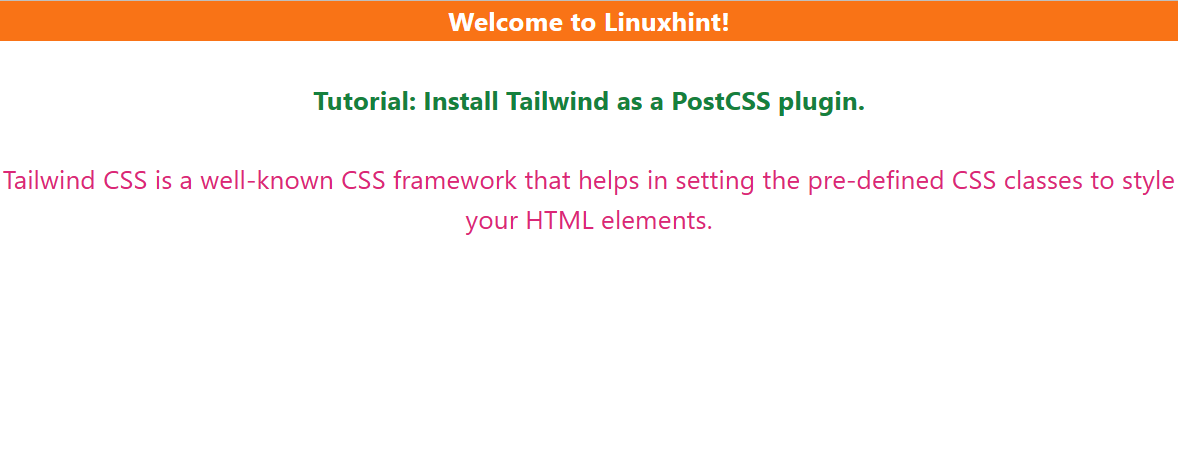
Output
The output shows the customized HTML content.
Conclusion
“Tailwind CSS” can be installed as a “PostCSS plugin” by first creating the “postcss.config.js” file using the “npx” command and then specifying the “tailwindcss” and “autoprefixer” in it as a plugin. After that, start the build process and run the code. This guide explained to install Tailwind as a “PostCSS plugin”.


