
Developers use this powerful high-level scripting language worldwide for applications like penetration testing, web scraping, web development, etc. Most Linux distributions have Python already installed in their default packages but sometimes it may not. Today’s article will show how to install Python3 on Pop!_OS.
How to Install Python 3 on Pop!_OS 22.04
Here, we will discuss three methods to install Python3 on Pop!_OS. But before that, we will check whether Python is available in the default package manager.
Use the command listed below to check if the installation of Python is present in your system.
![]()
If you already have Python installed in your system, your output will be something like the image above after running the above command. You will get the following output if you still need to install Python in your system.
![]()
Install Python Using APT Manager
The apt manager is the default package manager from which you can download Python from the official repository. Installing any software on an Ubuntu-based OS is easy with this method.
Open the terminal and update your system by running the command below.
Download and install the latest Python version on Pop!_OS using the following command:
This will successfully install Python and you can use the python -version to verify the installation.
Install Python Using PPAs
A PPA is a personal package repository specifically designed for Ubuntu users. You can easily install the latest version of Python through custom PPAs but it depends on the third-party hosting software updates. Follow the few steps so you can easily install Python.
By default, users cannot add PPAs, so first, run the command below to install the prerequisite to adding the custom PPAs.

The command above adds and manages the PPAs on Pop!_OS.
Using the command below, you can now install the PPAs.
sudo add-apt-repository ppa:deadsnakes/ppa -y (for the default branch)
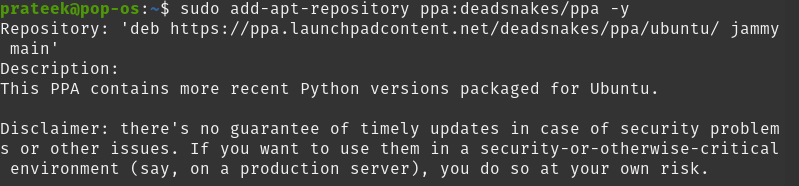
Here we are going to install the default branch of PPA.
Nightly branch is ideal for python3 but the default branch will be preferable if you are using multiple versions of python.
Update your system using the below apt command.
After installing the repository successfully, it is time to install Python 3 on Pop!_OS through the following command:
Thus, Python is successfully installed on your system. Use the command listed below to verify.
![]()
The Deadsnakes PPAs database contains almost every version of Python, so you can also install any older version of Python on your system.
For this, run the following apt command in the terminal and mention the version of Python that you want to install on your system.
sudo apt install python3.9
sudo apt install python3.6
You can also install Python for different functions using the following commands:
| Installation Command | Functions |
| sudo apt install python3.11-tk | The tkinter standard library module. |
| sudo apt install python3.11-gdbm | The dbm.gnu standard library module. |
| sudo apt install python3.11-lib2to3 | The lib2to3 standard library module and the 2to3.11 utility. |
| sudo apt install python3.11-distutils | The distutils standard library module. |
| sudo apt install python3.11-venv | The venv standard library module. |
| sudo apt install python3.11-dev | The development headers for building C extensions. |
Install Python Using Source Code
Users who require specific advanced builds from the source’s git repository can choose this method to install Python directly from the official website of Python. Follow the instructions below to install python on Pop!_OS directly from the source.
To build python 3 on your Pop!_OS, first, you need to install dependencies. Run the command below to install dependencies on your machine.

This will install all the necessary libraries for building Python from its source. You can now use the official FTP server to download the latest version of the Python source code or the following wget command to add it:

Since the file archive is small, it takes little time to download. Once the archive has finished downloading, extract it using the following command:
It performs optimizations and tests before installing Python and is necessary because doing so increases the execution speed of your code by up to 10%. You have to switch to the source directory through the command below:
Run the configuration script using the following command:
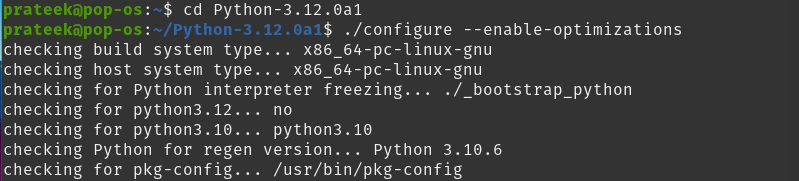
-enable-optimizations executes a small subset of all the regression test cases with Python3 source. Still, at the same time, it takes extra time to complete as it does a run-through checklist to ensure that all dependencies are in place for installation.
You can begin the build process by using the make command. We have 1 core in our system, so we run the following make command:
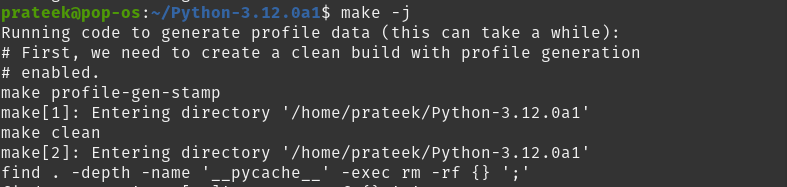
The -j option specifies how many cores are in the system to speed up the build process. If you have powerful servers, you can set it higher. Its default value is 1.
You can find the cores in the system by the following command.
![]()
Since we did not specify the number of cores in the make command, it was set to 1 by default, which is the number of cores in our system as verified by the command above.
You can install Python on Pop!_OS by running the following command:

We have used ‘altinstall’ instead of ‘install’ because it builds a specific version of python without overwriting the default version. You can use multiple versions of Python this way.
Use the command listed below to check for the installed version of Python.

The above command also tells you the current build number of Python.
Conclusion
We discussed three ways of installing Python 3 on Pop!_OS (by the apt manager, by deadsnakes/ppa, and by source code). You can install Python on your Ubuntu system using the above methods. First, we installed Python 3 through the apt manager, which installs the default package of Python present in the apt manager. In the second method, we installed Python 3.11 with the help of deadsnakes/ppa (third-party hosting).
In the third and final method, we downloaded python3 directly from its official website and installed its current version, Python3.12. Through this method, you can install the latest release of Python in the system but cannot update quickly like the apt manager and need to recompile for any changes.