
Topic of Contents:
Linux systems make it relatively easy for users to manage the memory and create manual partitions. Usually, there are a few reasons why people would choose to create manual partitions themselves: separating the user data from the system files which makes it easy to update the system without losing personal information, creating manual dual-boot with other operating systems (such as Windows), allocating customized disk space which benefits the users who have specific requirements to manage various types of data such as database, multimedia files, or virtual machines. Also, by creating separate partitions for the different file systems such as swap, root, or boot, each partition can be optimized for its usage and we can improve the overall performance of the Linux system.
Overall, manual partitioning allows the Linux users to have greater control over their operating system and can help them optimize its performance specific to their needs. However, it is a complex process and can cause quite a bit of damage to your disk space without following appropriate instructions. In this tutorial, we will provide a general guideline on how to create manual partitions in Pop!_OS and how you can tailor the allocation process to your very own needs.
Common Partitions in Linux Systems
Before we start, it is worthwhile emphasizing that there is no one-size-fits-all answer to what and how many partitions should one use since a number of factors including Linux distribution, the hardware configuration, and the intended usage of Linux system all come into play. However, some common partitions for a Linux installation can include the following:
- /: This partition is the primary (root) partition that contains all the Linux system files. The /home partition is also included in the root partition in many Linux distributions known as a “single partition” setup.
- /boot: This partition contains the bootloader which is required to boot the system.
- /swap: This partition can be used as virtual memory when the system runs out of physical memory.
There are also a few other partitions such as /home (to store the user data and personal files), /var (to store the variable data and system logs), /data (similar to /home), or /tmp (to store the temporary files) that are commonly seen in user-defined Linux partitions.
In this article, we will only focus on the previously mentioned four partitions but you are always welcome to add any other partition that you personally deem useful. Another important note is to remember to thoroughly back up all your data before making any changes to the disk space. Otherwise, the following process might tamper your data and it would be hard to fully recover them all.
Use GParted in Pop!_OS to Edit the Partitions
GParted is a partition editor utility that’s available in the Pop!_OS operating system. It includes a graphical user interface (GUI) that allows the users to manage the partitions on their hard drives by creating, deleting, resizing, or moving the partitions as well as changing the file system type and format. It supports various file systems including ext2, ext3, ext4, NTFS, FAT16, FAT32, and more.
GParted can either be installed from the Pop!_OS application store or it can be installed through the terminal command: sudo apt-get install gparted.
In this article, we will use GParted to effectively manage the manual disk partitions in Pop!_OS.
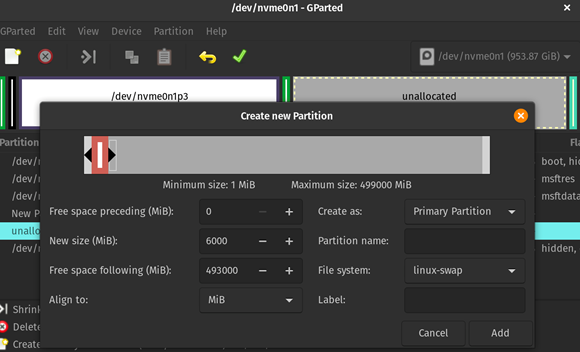
Swap Partition
A swap partition is optional and allows the systems to continue to function even when it runs out of physical memory which prevents crashes and other performance issues. However, it’s important to note that heavily relying on the swap partition might also have certain implications such as system slowdowns. Therefore, it’s generally recommended to have enough physical memory to meet the needs of the system rather than relying on the swap partition.
The recommended swap size is double the RAM size. But for modern computers, especially those with large RAMS (up to 128 GB), this is not applicable anymore. For example, the RAM of the example computer is 32GB, and 6GB of swap is enough.
The file system of swap is “linux-swap”.
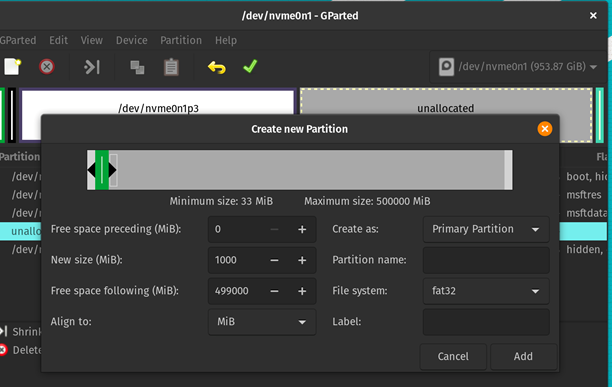
Boot Partition
The boot partition in Linux systems contains the files that are necessary for the system to boot up. These files include the bootloader and the kernel.
Its size is usually small like 100 MB and is usually located at the beginning of the hard drive. It is formatted with a filesystem such as ext4, and it is mounted at the /boot directory in the root filesystem. If your disk has more than enough space, we can even go with 1GB just to be safe. But usually, 512 MB is more than enough.
The file system of /boot is “fat32”.
Root Partition
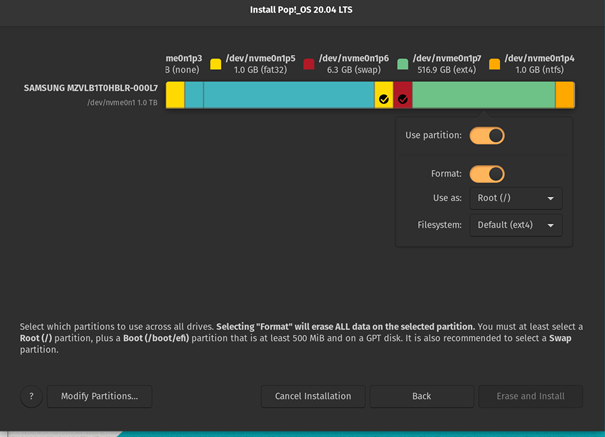
The root partition (usually denoted as “/”) contains the root file system and is the base of the Linux file system hierarchy. It contains all of the files that are necessary for the operating system to function including configuration files, libraries, and executables, as well as the user home directories and logs. This is known as a “single partition” setup which means that the root partition contains the entire file system, making is easy to manage the system.
However, a single partition set up might also make it harder to manage the user data since it has a tendency to experience full system corruption when one partition goes wrong. Therefore, the users sometimes prefer having a separate partition for /home to store all the user data. In this article, we use a single partition setup but you are more than welcome to create your own /home partition.
The root partition is usually the largest partition in a Linux system. Therefore, we can directly allocate the rest of the disk space for the /root.
The file system of /(root) is “ext4”.

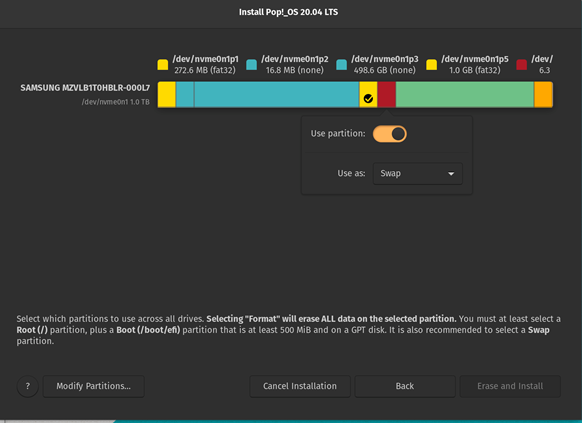
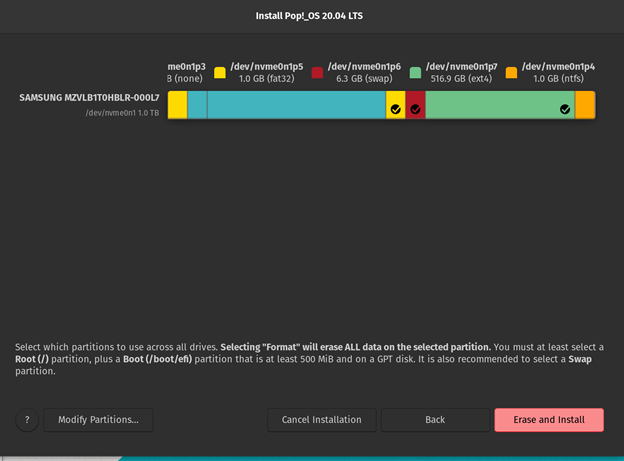
Erase and Install
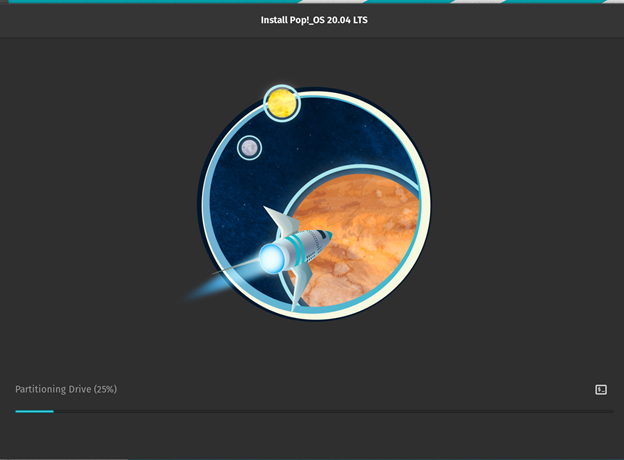
After making sure that every partition is correct, we can click the red “Erase and Install” button. Once the device partitioning is done, we can restart the device.
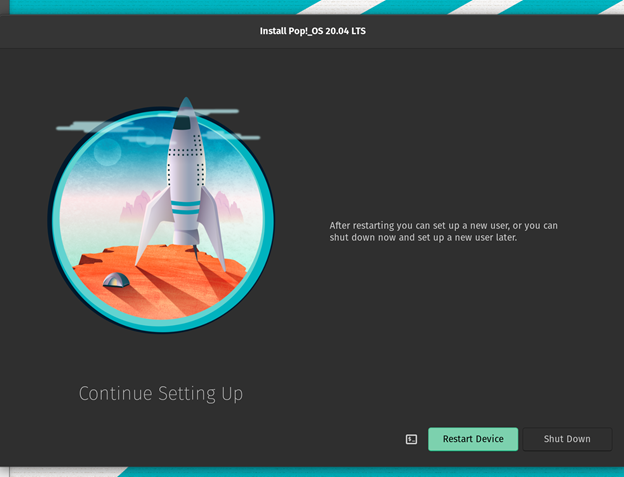
Now, the manual partition of Pop!_OS is complete.
Conclusion
In this article, we introduced the common partitions and their file format in Linux systems and showed you how to create the manual partitions in Pop!_OS. We also showed you how to customize each partition so that they are specific to your needs.