
OpenVAS or Open Vulnerability Assessment System is a Pen-testing framework whose collection of tools allow you to scan and test systems for known vulnerabilities. OpenVAS uses a database containing a collection of known exploits and vulnerabilities.
OpenVAS consists of:
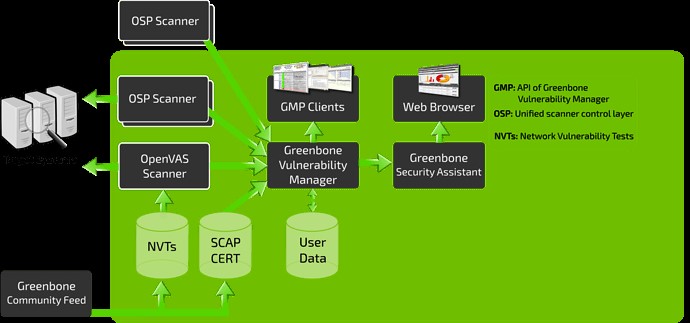
- A database comprised of results and configurations
- A Scanner that runs various Network Vulnerability Tests
- A Collection of Network Vulnerability tests
- A Greenbone Security Assistant, a web interface that allows you to run and manage scans in the browser
In this tutorial, we will cover how to install and configure the OpenVAS tool on Kali Linux.
Installing OpenVAS
Before installing OpenVAS, the first thing we need to do is ensure your system is up to date.
NOTE: Skip this step if you have an updated system:
sudo apt-get dist-upgrade
Once you have your system up to date, we can install OpenVAS:
Having installed OpenVAS successfully, you will have access to the setup script. Launch it to configure OpenVAS for first-time use:
NOTE: Depending on your system configuration, you may need to install an SQLite database.
Remember to note down the password generated during the setup process as you will require it to log in to the Greenbone Security Assistant web interface.
Starting and Stopping OpenVAS
If you have OpenVAS configured properly, you can run it by executing the command:
This command should launch the OpenVAS service and open the browser. You can manually navigate to the web interface using the default listening ports.
This command should launch the services listening on port 9390 and 9392
Troubleshooting Errors
Installing OpenVAS on older versions of Kali and other Debian flavors may result in some errors. Here’re some possible ways of fixing possible errors:
Install PostgreSQL or SQLite3 database
sudo service postgresql start
sudo apt-get install sqlite3
sudo service sqlite3 start
Next, use gvm commands:
sudo gvm-setup
sudo gvm-feed-update
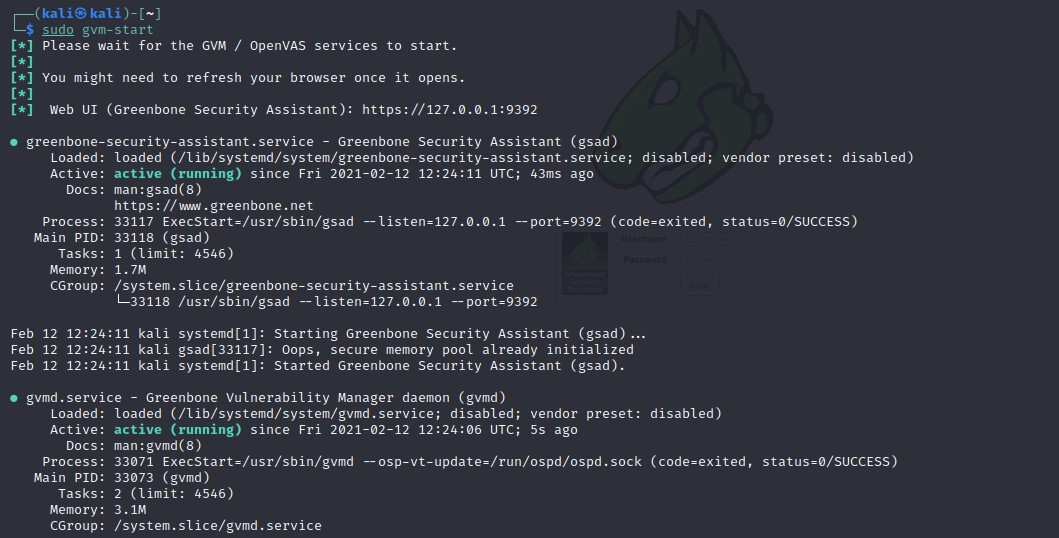
sudo gvm-start
NOTE: Depending on the version you have installed, you may need to use the gvm (Greenbone Vulnerability Manager) command other than OpenVAS.
Accessing OpenVAS Web UI
Using the Greenbone Security Assistant features, you can access the OpenVAS web UI from your local machine. You will need to have OpenVAS running to access the interface.
Open your browser and navigate to http://localhost:9392
Use the username as admin and the password generated in the setup process.
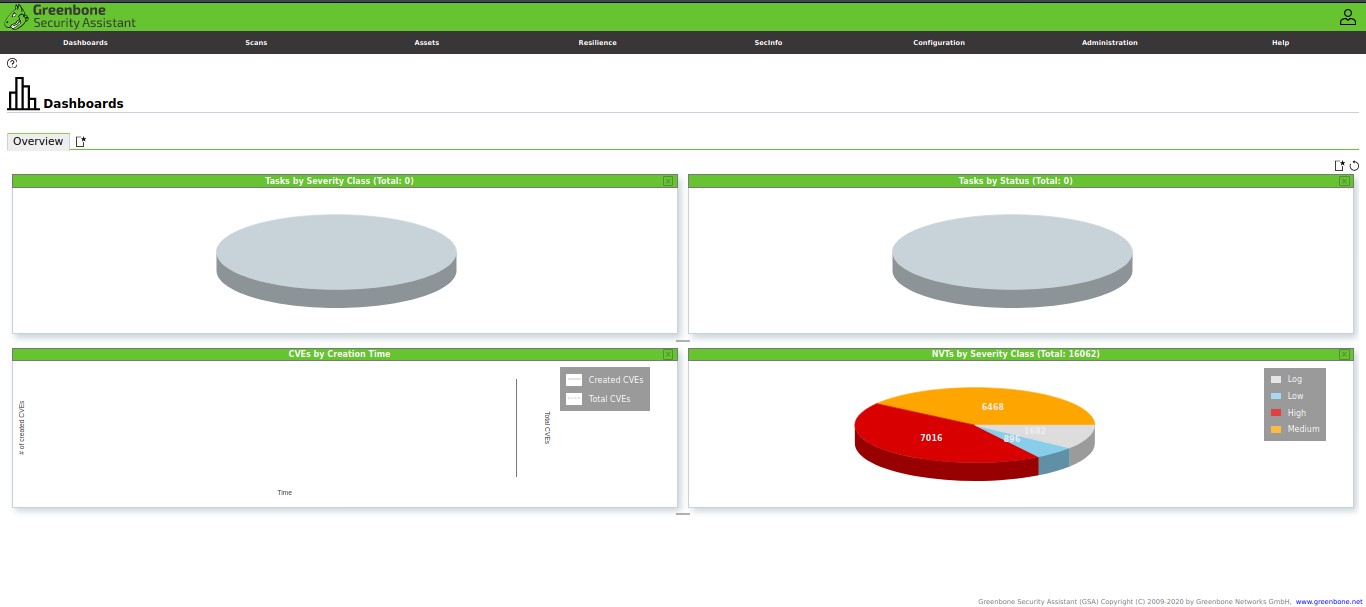
Once you log in, you should have access to OpenVAS web UI, which you can configure to suit your needs.
Add Target
The first step to using the Security Assistant is to add targets. Navigate to the configuration menu and select targets.
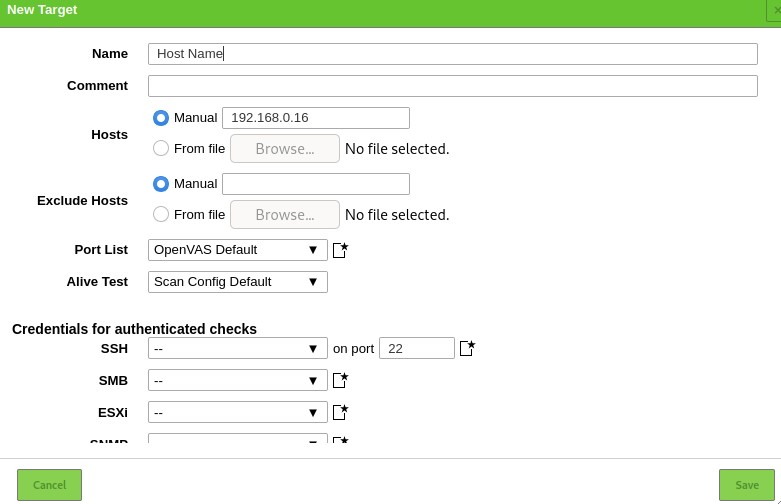
On the top left corner, select a blue icon to start adding targets. Doing that will launch a dialogue window that allows you to add information about the target, such as:
- Target Name
- The IP address
Once you add all the relevant information about the target, you should see it listed in the targets section.
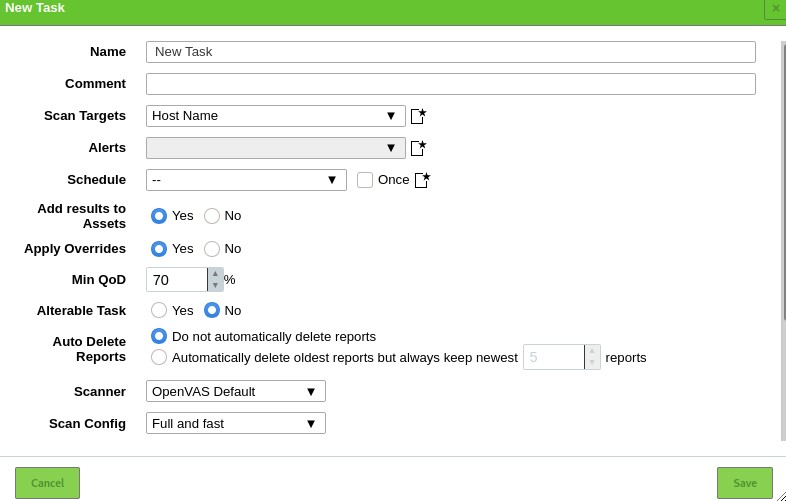
Creating a Scan Task
Let us now proceed to create a scan task. A task in OpenVAS defines the target(s) you want to be scanned and the required scanning parameters. For the sake of simplicity, we will use the default scan options.
Navigate to Scans sections and select Tasks in the dropdown menu. Click on the icon on the left-hand side to create a new task.
That will launch a window allowing you to provide all relevant information for a scanning task.
- Task name
- Scan target
- Schedule
Use the default settings and click on Create.
To run a task, click on the Play icon on the bottom left of the task list.

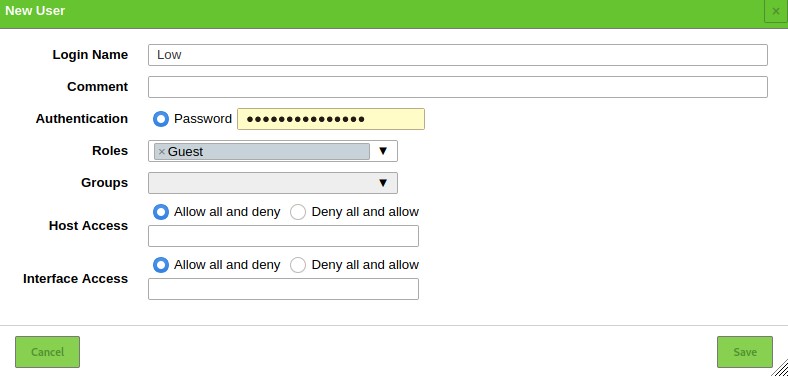
Adding Users
OpenVAS allows you to add various users and assign various roles to them. To add a user or role, navigate to the administration section and click on users. Select the add new icon and add the user information:
Conclusion
OpenVAS is a powerful tool that brings the power of cybersecurity research into your hands. You can use it to monitor devices in your network and websites on remote servers.