Docker Compose is a tool that defines and runs multiple containers in Docker applications; using Docker Compose, you can easily create a single file called compose file that describes all of your application’s services. A compose file is a YAML file that defines the services that make up your application and each service in a compose file defines a container image, the ports that the container should expose, and the environment variables that should be passed to the container.
If you are considering installing Docker Compose on your Mac system, read this guide.
How to Install Docker Compose on Terminal Mac
You can install Docker Compose on Mac:
1: Install Docker Compose on Terminal Mac Using Homebrew Package Manager
Homebrew is an effective package manager that makes it simple to install Docker Compose on Mac. This package manager is widely used by Mac users for installing the latest version of the application on their system right from the terminal.
To install Docker Compose on Mac from Terminal Mac using the Homebrew package manager, follow the below-given steps:
Step 1: Install the Homebrew package manager on Mac from here.
Step 2: Run the following command to use the Homebrew package manager to install Docker Compose latest version on Mac.
Step 3: Once the Homebrew finishes the Docker compose installation, you can verify the installation by running the following command.
2: Install Docker Compose on Terminal Mac from Source File
You can also download the latest version of the Docker compose file from the GitHub website and run it on your system to install it. Follow the below-given steps if you want to install Docker Compose on Mac from this method.
Step 1: Install the wget command on Mac from the Homebrew package manager using the following command.
Step 2: Now download the Docker compose latest version source file from GitHub Docker compose release page through the following command.
Step 3: Ensure the file is executable and if it’s not you can run the following command.
Step 4: Rename the file docker-compose-darwin-x86_64 to docker-compose only from the following command.
Step 5: Move the docker-compose file to /usr/local/bin location from the following command.
Step 6: Once the executable file is successfully moved towards the /usr/local/bin location, you can run the following command to verify and complete the installation of Docker compose on your Mac system.
3: Install Docker Compose on Terminal Mac Using Mac Ports
Mac Ports is a package manager built for Mac users that simplifies the installation and management of open-source software. You can install and use this package manager to quickly install Docker Compose on your Mac system. The following steps will need to be followed to quickly install Docker Compose on Mac using Mac Ports:
Step 1: First, install Mac Ports on your Mac system by downloading the .dmg file according to your system from here.
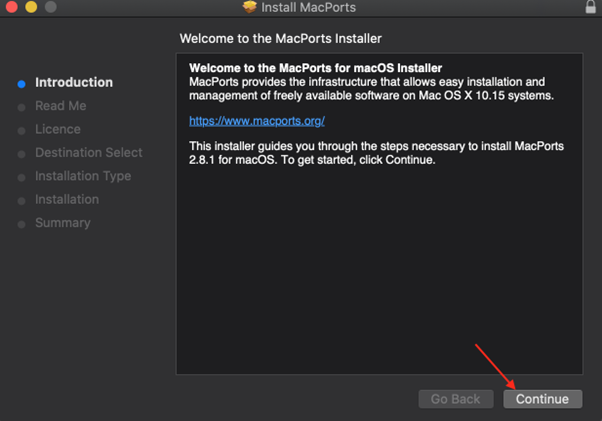
Step 2: Run the .dmg file and follow the onscreen instructions to install Mac Ports on Mac.
Step 3: After finishing the Mac Ports installation, open the Terminal on your Mac and run the following command.
This will install the Docker compose on your Mac system.
Step 4: Add Y and press enter to continue the Docker compose installation on Mac.
Step 5: To verify the Docker compose successful installation on Mac through Mac Ports, you can run the following command.
Conclusion
Docker compose installation on a Mac terminal can be done through the Homebrew package manager, or downloading the latest version Docker compose source file from GitHub and moving it towards the /usr/local/bin location. These two methods will install the latest version of Docker Compose on Mac. You can also install Mac Ports on your system and install the older version of Docker Compose on Mac. This guide has provided all these methods in detail, allowing you to choose the method that best suits your needs.


