
What is Tomcat?
Apache Tomcat, or simply Tomcat, is a web server and servlet container used to serve applications written in the Java programming language. Tomcat is free and open-source as an application of the Java Servlet and JavaServer Pages technologies.
Apache Tomcat is maintained and updated by the Apache Software Foundation. As of writing this tutorial, the latest version of the Tomcat server is version 10.
NOTE: If you want to run applications written in Java version 8 and higher, ensure you install at least version 9 of Apache Tomcat.
Requirements
Before installing Apache Tomcat on Windows, we need to ensure we have the Java Development Kit (JDK) or Java Runtime Environment (JRE) installed.
In this article, we shall use the Amazon Corretto package to install JDK on Windows.
Amazon Corretto is a free, open-source, multiplatform OpenJDK implementation. It comes with security and performance enhancements for both development and production use.
Launch your browser and navigate to the Corretto download page.
https://aws.amazon.com/corretto/
Depending on the version of Apache Tomcat you wish to install, select your Corretto version correctly.
Use the image below to determine your required Java Version.

Since we are installing the latest version of Tomcat that supports Java 11 and higher, we need to choose Corretto 11 or 16.
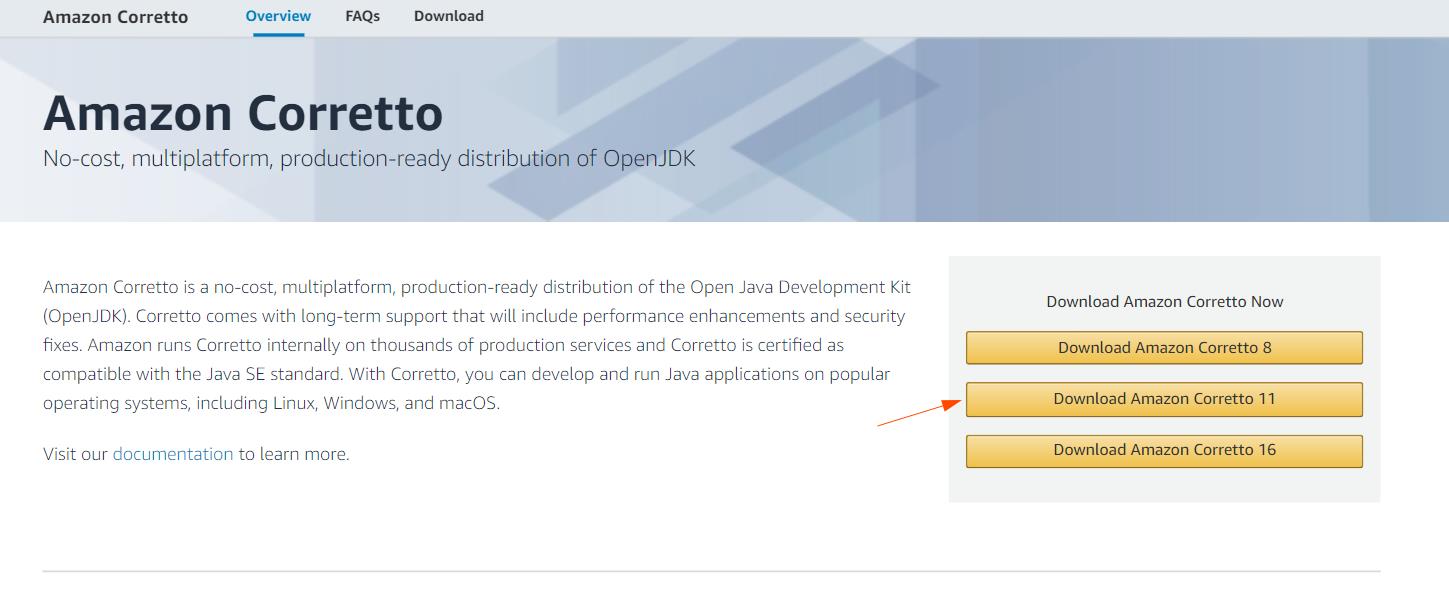
Select “Download Amazon Corretto 11” to download the Corretto version 11.
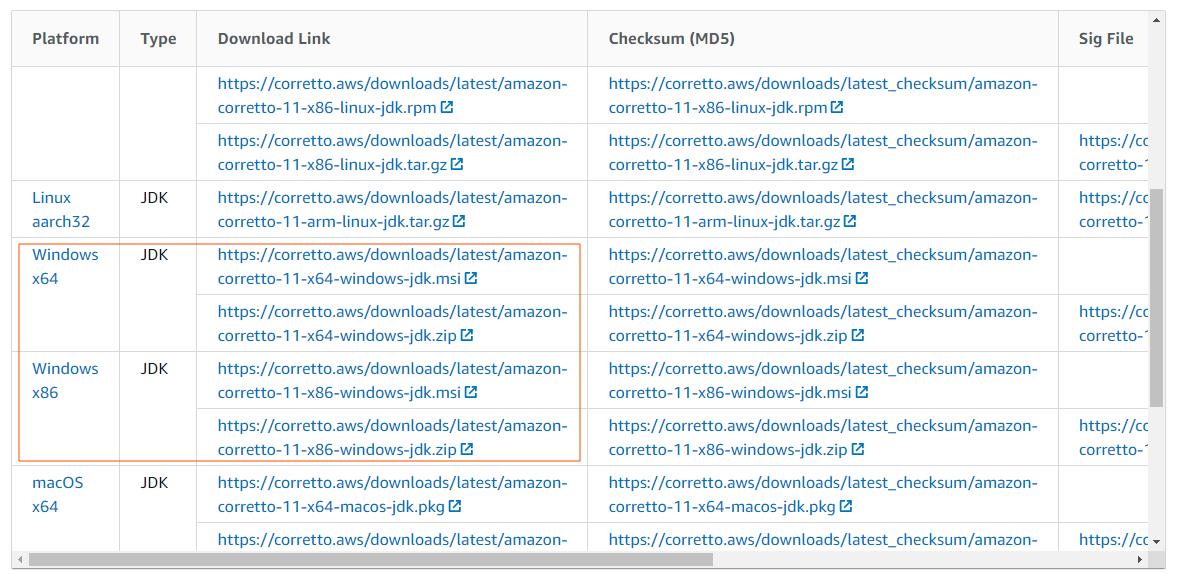
Once on the download page, select the MSI installer version for your system.
Upon completion, launch the installer to begin the JDK installation process.

Finally, select Corretto and Setup Environment to install and click Next.

Once the installation process completes, launch the command prompt and enter the command below:
The above command should print information about the installed Java version. Here is an example output:
OpenJDK Runtime Environment Corretto-11.0.12.7.1 (build 11.0.12+7-LTS)
OpenJDK 64-Bit Server VM Corretto-11.0.12.7.1 (build 11.0.12+7-LTS, mixed mode)
You have successfully installed Java JDK on your Windows system.
Installing Apache Tomcat 10
Now that we have the requirements met, we can begin installing the Tomcat server. In this article, we shall use the installer package.
Step 1
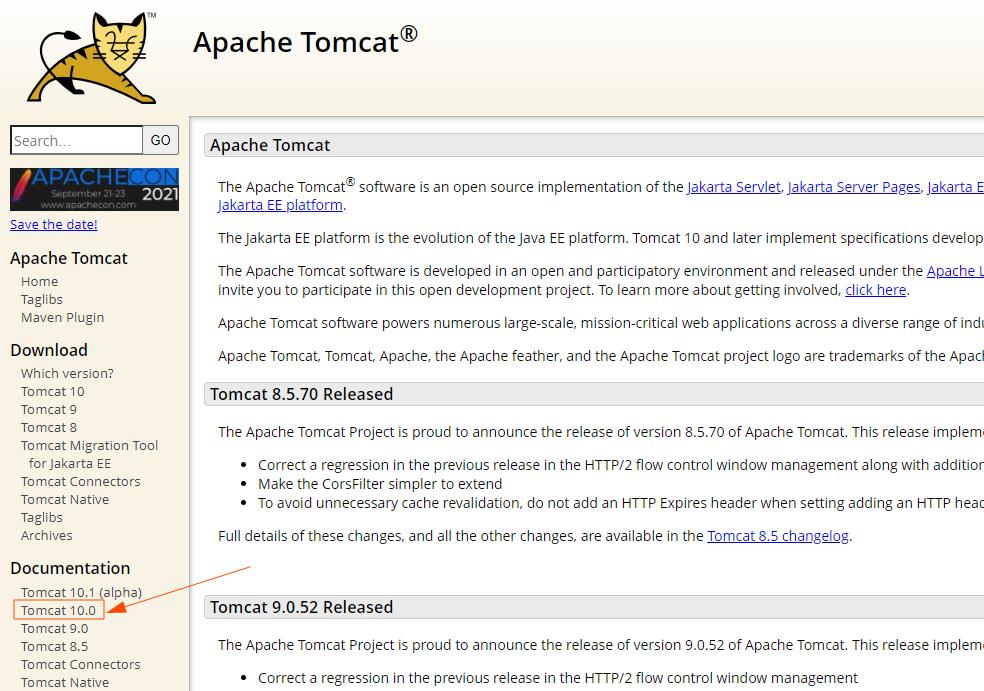
Launch your browser and navigate to the Tomcat download page.
On the left menu, select the desired version. (We will be using version 10).
Navigate the web page and select the 32-bit/64-bit Windows Service installer package.

Step 2
Once the download is complete, launch the installer package to begin the installation process.

Step 3
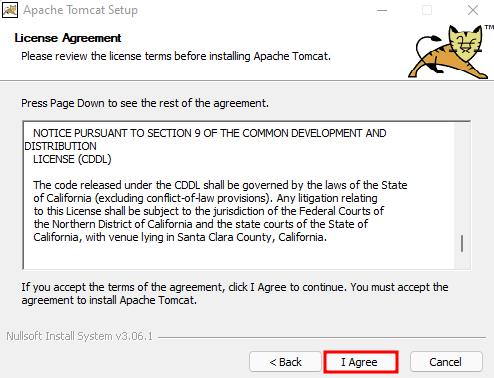
Click Next to proceed with the installer instruction. Read and Agree to the License.
Step 4
In the installation components windows, select the dropdown menu and select full. This will install the Tomcat server, start menu items, examples, admin interface, and the documentation tools.
If you do not need all of these components, unselect them.

Step 5
In the next window, we need to set up the configuration settings for the Tomcat server.
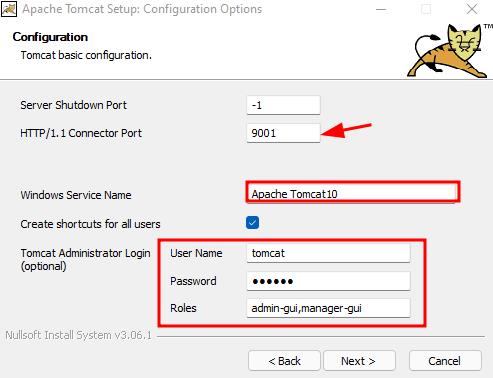
Set up the port on which you want Tomcat to run. In this example, we set the port as 9001. Feel free to customize this to any port you see fit.
Next, enter the name for the Tomcat service. You can leave the default.
Finally, set the Tomcat administration credentials such as username and password.
Step 6
In the next step, select the path to the Java Virtual Machine. Since we have the JDK path in the environment variables, this should be auto fill automatically.

In the next step, choose the install location and click install.
Step 7
Once the installation completes, uncheck “Show Readme” and click Finish to launch the Apache Tomcat immediately after the installation.

Verify Service is Working
To ensure the Apache Tomcat service is running, run the Windows cmd as an administrator.
Enter the command as:
The command should list the started services. Ensure Tomcat is in the list as:

If the service is not running, start it using the command:
Replace the “Apache_Tomcat10” with the name of the service you created during the installation process.
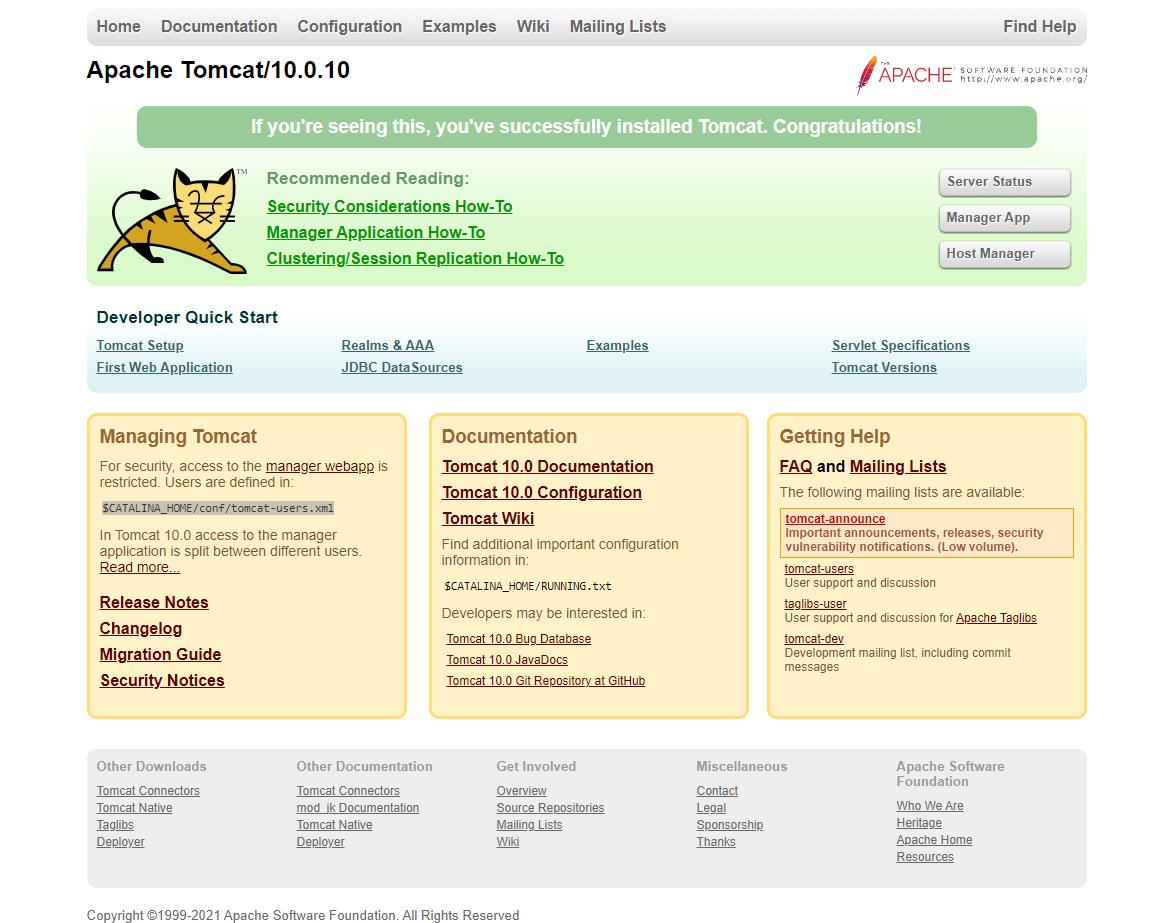
Once the service is up and running, launch the browser and navigate to the Tomcat service.
This should display the Apache Tomcat default page.
Conclusion
This tutorial taught you how to install and set up Java Development Kit and Apache Tomcat webserver. To learn more about working with Apache Tomcat, check out our other tutorials on the topic.
Thank you for reading