
Disclaimer: The tweak explained below changes how your Linux system handles SSD power management. I have been using this method for a long time and have not faced any problems. However, I cannot be held responsible if something goes wrong with your SSD drive after using this tweak. You are advised to use your own discretion while following these instructions.
Understanding SSD Power Management in Linux
Most Linux distributions use Linux Kernel’s “Advanced Power Management (APM)” API to handle configuration, optimize performance, and ensure stability of storage devices. These devices are assigned an APM value between 1 and 255 to control their power management thresholds. A value of 254 indicates best performance, while a value of 1 indicates better power management. Assigning a value of 255 will disable APM altogether. By default, SSDs are assigned an APM of 254 when the system is running on external power. In battery mode, the APM level is set to 128, reducing the read and write speeds of SSDs. This article explains how to increase SSD APM levels to 254 when your Linux laptop is running on battery mode.
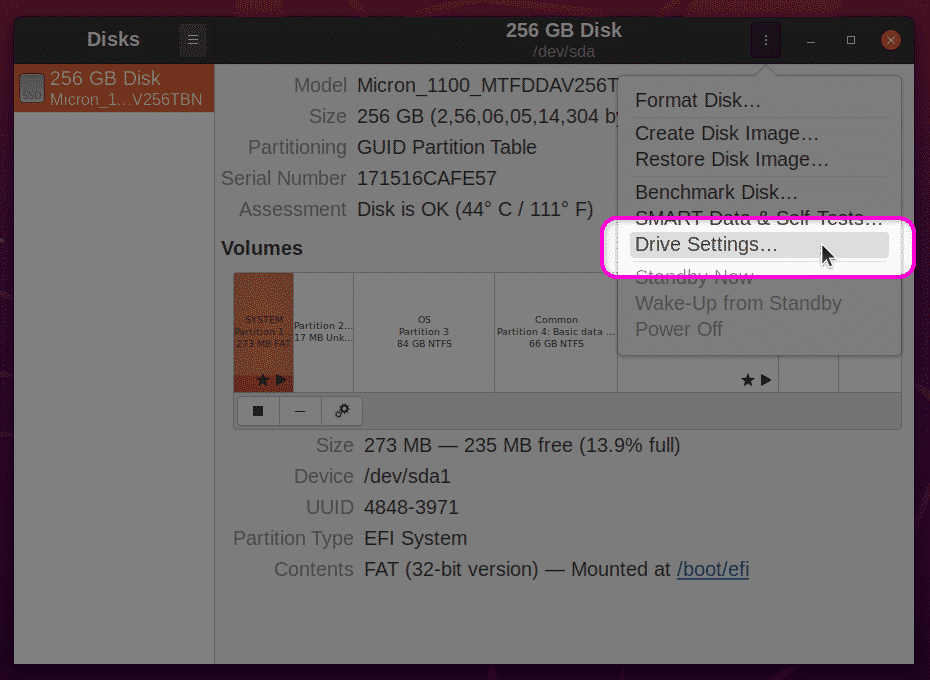
Using GNOME Disks
To change the SSD APM level on any GNOME-based Linux distribution, launch the “GNOME Disks” app from the application launcher. Make sure that your laptop is on battery mode. Highlight your SSD drive entry in the sidebar and click on the three-dot menu in the top-right corner to launch the disk management menu. Click the “Drive Settings…” option to launch the configuration window.
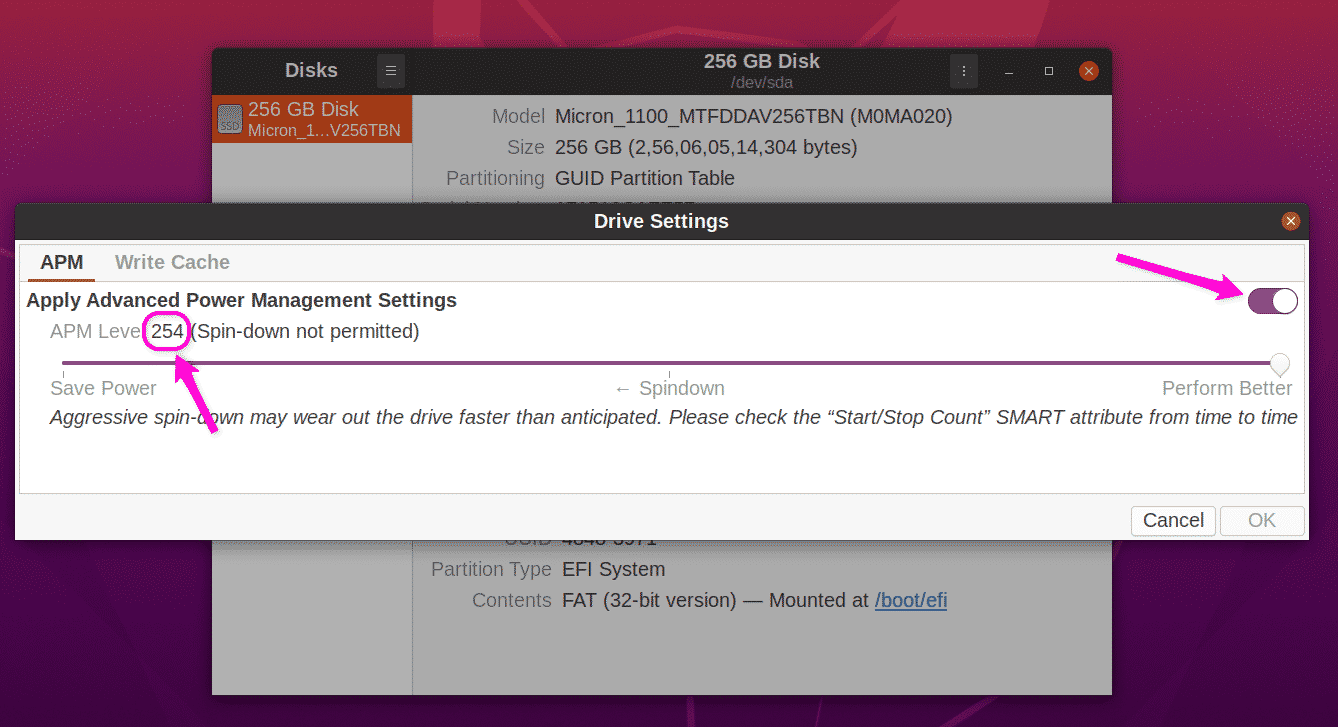
On the next screen, make sure that “Apply Advanced Power Management Settings” is toggled on. Use the slider to increase the APM to 254. Click the “OK” button to apply the settings. You may be prompted to enter the user password.
After applying these settings, reboot your system for the changes to take effect. You should now have increased SSD read and write speed on battery mode. For reference, here are the read speeds of my SATA SSD, showing the positive performance impact of increasing the APM level.
SSD performance at APM of 128 on battery mode:

SSD performance at APM of 254 on battery mode:

The performance improvement is substantial. You can compare these read speeds with vendor-advertised speeds to assess the quality of the SSDs installed in your system.
Using hdparm
If you prefer the command line, you can use the “hdparm” configuration utility to handle SSD power management. To begin, identify your SSD “UUID” by running any one of the commands below:
$ blkid
You should receive an output like this. Make note of the “UUID” value.
PARTUUID="42cbf56f-15c5-41b7-9a2b-36d5034c1fce"
Make sure that your laptop is disconnected from external power and then run the command below to check the current APM level (replace the UUID in the command with the UUID of your own SSD).
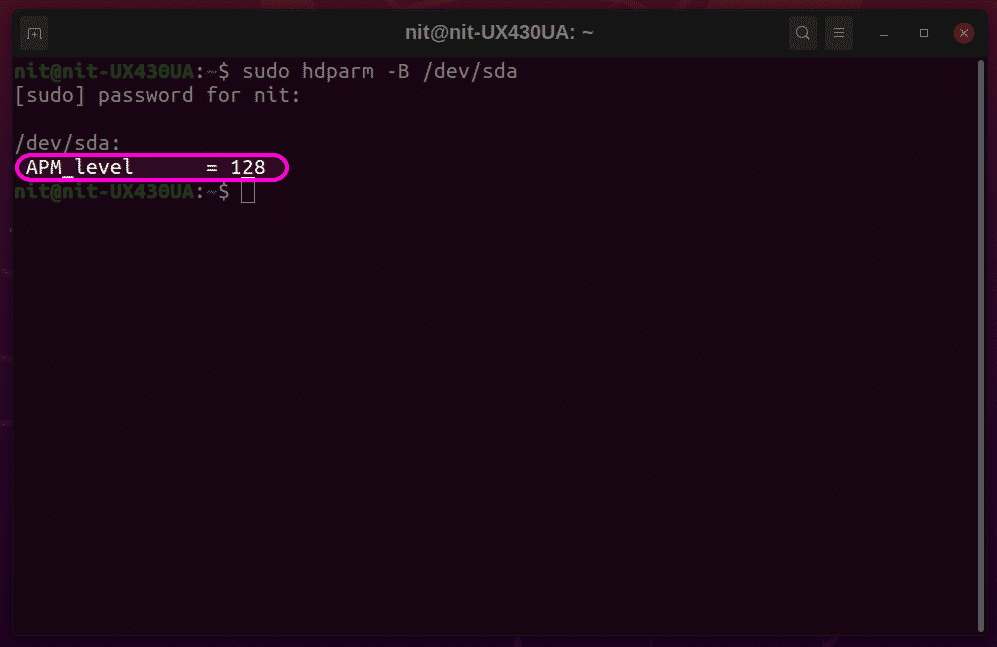
The screenshot above uses a different identifier for the SSD, but the end result is the same. To increase the APM level to 254, run the command in the following format (replacing the UUID with that of your device):
The above command will change the APM for the current session only. To make this change persistent across reboots, a little more work is required. To make the new APM level permanent, you must first locate the ‘hdparm’ executable binary and its ‘udev’ rules file. The following two commands will help you find these files:
$ which hdparm
Observe the output of these two commands to locate the correct paths of the files. The output may differ from distribution to distribution. Typically, the hdparm executable binary will be located in one of the ‘bin’ folders, and the rules file will be located in one of the ‘udev’ folders. For reference, in Ubuntu 20.04, the hdparm binary is located at ‘/usr/sbin/hdparm’ and the rules files is located at ‘/usr/lib/udev/rules.d/85-hdparm.rules.’
Now, open the udev rules file in a text editor by running the command below (replace ‘nano’ with the command for your favorite text editor):
If the hdparm rules file does not exist, you can create a new rules file in any of the udev folders located in your system.
Now, place the following code at the end of the file, carefully replacing the binary path and UUID of your own SSD drive. This is a reference code used for the SSD in my Linux laptop, so do not put the exact same code in the udev rules file in your system.
/dev/disk/by-uuid/a1bb9815-6c80-419c-bade-c2aeeef606e2"
Save the rules file and reboot your system for the changes to take effect. Your SSD should now have an APM of 254 in battery mode.
Conclusion
Changing SSD APM values can improve read and write speeds, as well as the overall system performance of your Linux laptop. However, aggressive APM levels can lead to faster degradation of storage devices. Use this guide with caution and only change APM levels if performance is extremely important to you.