While deploying applications, it is vital to scan the health of a Docker container to refrain from the bottlenecks in the application development procedures. This can be done utilizing the “HEALTHCHECK” cmdlet which also assesses the accessibility of a container.
This write-up covers the following aspects:
What are Docker Health Checks?
A Docker health check/scan corresponds to indicating the accessibility of a container’s workload. Also, it is utilized to analyze the health of any resource to judge if that resource is operating.
Parameters of Health Check
The following are the parameters associated with the “HEALTHCHECK” command:
-
- Interval (DURATION is 30 sec by default).
- Timeout (DURATION is 30 sec by default).
- Start-period (DURATION is 0 sec by default).
- Retries are set to N (default is 3).
The above parameters are stated in detail below:
-
- The “Interval” parameter refers to the interval of seconds.
- The “Timeout” parameter manages the time Docker health checks wait for an exit code to be retrieved.
- The “Start-period” parameter analyzes how long the container needs to bootstrap.
- The failures at the Docker health check before a container is declared as unhealthy are handled by the “Retries” parameter.
How to Implement/Apply a Health Check for a Docker Container?
To apply a health check for a Docker container, apply the following steps:
Step 1: Launch/Run a Container From busybox Image
First of all, launch a container from the busybox image via the following cmdlet:
Step 2: Check the Container’s Status
Now, analyze if the container is being executed using the below-given cmdlet:
Step 3: Retrieve the IP Address of the busybox Container
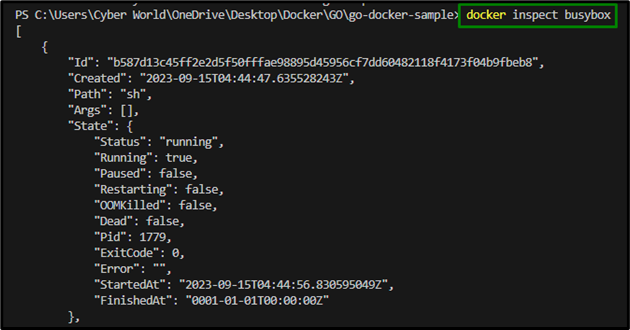
Now, fetch the IP address of this container by inspecting it using the below-given cmdlet:
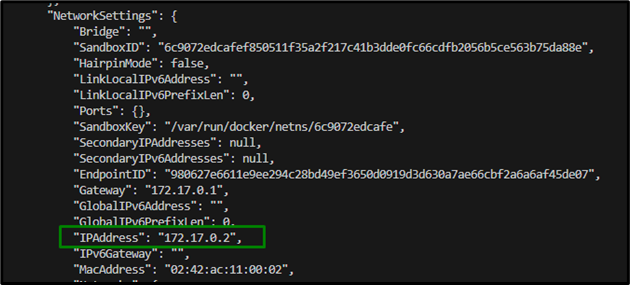
Scroll, down and in the “NetworkSettings”, the “IPAddress” can be located, as follows:
Step 4: Create a Dockerfile
Now, create a Dockerfile comprising the following code:
HEALTHCHECK --interval=5s CMD ping -c 1 172.17.0.2
In this Dockerfile code, the health checks will be applied based on the specified interval i.e., 5 seconds accordingly.
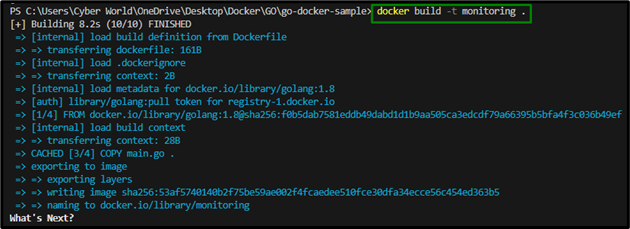
Step 5: Build the Container
After that, build the container using the below-stated command:
Also, list the images via the following cmdlet:
Here, it can be seen that the “busybox” image is evident.
Step 6: Launch the Container From a Monitoring Image
Now, launch the container from a monitoring image using the below-stated cmdlet:
After that, analyze the executing containers:
Step 7: Implement a Health Check
Here, applies a health check by specifying the health interval i.e., 5 seconds:
Step 8: Clean Up
Lastly, clean up the container via the following applied cmdlets individually:
Now, verify if the target image is untagged or not using the below-stated cmdlet:
As analyzed, the image is untagged appropriately.
The last procedure in cleaning up the image involves removing its id via the below command:
What are the Different Ways to Use Docker Health Check Cmdlet?
The Docker “HEALTHCHECK” cmdlet can be used in the following different ways:
-
- Analyzing if the container is healthy.
- Utilizing Dockerfile.
- With “-interval” , “-retries”, and “-timeout” Flags.
How to Apply a Health Check With Docker Compose?
Docker Compose enables the developer to handle various containers of Docker applications. A compose file lets the programmer define the required services and then configure them as per the requirements. Also, the Docker Compose file can be utilized to define the health check instead of the Dockerfile. Following is a demonstration of using health check for the Docker Compose file:
mywebapp:
# ...
env_file:
- ".env"
healthcheck:
test: "${DOCKER_HEALTHCHECK_TEST:-curl localhost:8000/healthy}"
interval: "60s"
timeout: "3s"
start_period: "5s"
retries: 3
Conclusion
To apply a health check for a Docker container, run a container from busybox image, analyze the container’s status, fetch its IP address, create Dockerfile, build container, launch the container from the monitoring image, apply a health check and lastly clean up the image.


