This article will illustrate how to use Docker Engine plugins.
How to Use Docker Engine Plugins?
The Docker Engine plugins can be used in different ways, such as:
- Install Docker Plugin
- List Docker Plugin
- Inspect Docker Plugin
- Create Volume Using Plugin
- Enable and Disable Plugin
- Remove Docker Plugin
Install Docker Plugin
To install a Docker plugin, first, choose a particular plugin on Docker Hub and copy its “pull” command. Then, execute the “docker plugin install <plugin-name>” command in the terminal to install it. The step-by-step procedure to install the Docker plugin is mentioned below:
Step 1: Search for Plugins
On Docker Hub, navigate to the “Explore” page, and choose the “Plugins” option:
Upon doing so, you will see all the available plugins. Then, select the desired plugin. For instance, select the “vieux/sshfs” plugin.
Step 2: Copy the “pull” Command
After choosing the desired Plugin, it will open up. Copy its below highlighted “pull” command:
Step 3: Install Plugin
Now, run the copied command in the Windows terminal to install the selected plugin:
The above output indicates that the “vieux/sshfs” plugin has been installed successfully.
List Docker Plugin
To list the available plugins in the local repository, type out the provided command:
According to the above image, there is only one plugin installed i.e., “vieux/sshfs”.
Inspect Docker Plugin
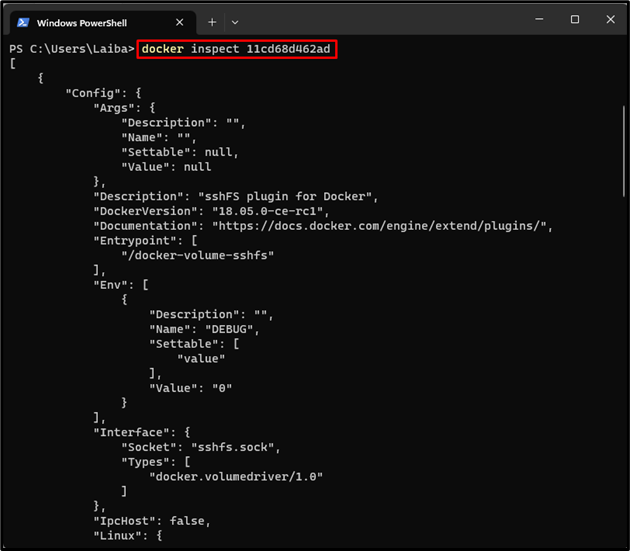
Users can inspect the particular plugin using the “docker inspect <plugin-name/ID> command:
The above-listed command has displayed detailed information including status, associated containers and volumes, etc., about a plugin with ID “11cd68d462ad”.
Create Volume Using Plugin
Run the “docker volume create -d <plugin-name> –name <volume-name> -o sshcmd=user@<host>:<path>” command to create a new volume using the particular plugin:
Here:
- The “-d” option is used to specify the volume driver to use. In our case, it is the “vieux/sshfs” plugin.
- “–name” is utilized to specify the volume name. For instance, specify the “sshfsVol” volume name.
- “-o [email protected]:/remote” specifies the SSH command to connect to the remote host and mount the file system:
Verify the created volume using the provided command:
The above-highlighted part shows the newly created volume i.e., “sshfsVol” along with the plugin name.
Enable and Disable Plugin
In this section, users can enable and disable the Docker plugin and can verify the status by following the below process:
Enable Docker Plugin
To enable the Docker plugin, utilize the “docker plugin enable <plugin-name/ID>” command:
Then, view its status using the provided command:
In the above screenshot, the status of the desired plugin is “true” which indicates that it has been enabled successfully.
Disable Docker Plugin
To disable the Docker plugin, use the “docker plugin disable <plugin-name/ID>” command:
Then, use the following command to ensure whether the plugin has been disabled:
The status of the plugin is “false” which means it has been disabled successfully.
Remove Docker Plugin
To remove the specific plugin, utilize the “docker plugin rm” command along with the plugin’s name or ID:
Next, verify whether the plugin has been removed or not by listing all plugins:
In the above image, no plugin can be seen which indicates that the desired plugin has been deleted successfully.
Conclusion
The Docker Engine plugins can be used in different ways, such as installing a particular plugin, listing all plugins, and inspecting a specific plugin. Moreover, users can create a volume using any plugin, enable or disable plugins, and remove Docker plugins. This article has illustrated the usage of Docker Engine plugins with practical implementation.


