This write-up will demonstrate the method of using “box-content” in Tailwind.
How to Use “box-content” in Tailwind?
To use the “box-content” in Tailwind, it is required to add the “box-content” class to the particular element in the HTML program and define the height, width, padding, and border.
Check out the below-provided steps for a practical demonstration:
Step 1: Use the “box-content” Class in HTML Program
In an HTML program, use the box-content class, and specify the height and width. For instance, we have defined the “box-content” with the following height, width, padding, border, and background color:
Here:
- The “box-content” sets the “box-sizing” property to the element and ensures that it excludes padding from the total size.
- “h-36” sets the height of the element to 36px.
- “w-36” sets the width of the element to 36px.
- “p-4” applies the equal padding of the element to 4px on all sides (top, right, bottom, left).
- “border-4” sets the border width of the element to 4px.
- “bg-yellow-400” sets the yellow color to the background of the element.
This creates a box with a width and height of 36 pixels, a padding of 4 pixels, and a border of 4 pixels. The total size of the box will be 44px × 44px and the internal content area will be 36px × 36px.
Step 2: Verification
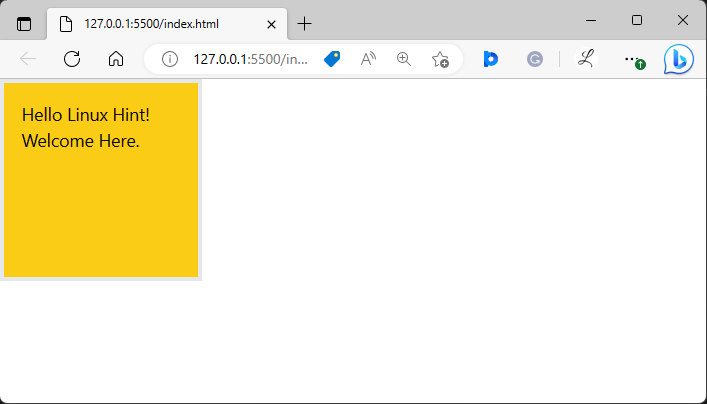
Ensure that the “box-content” class has been applied successfully by viewing the HTML web page:
The above web page has displayed the box according to which it was styled i.e., “box-content”.
Conclusion
To use “box-content” in Tailwind, make an HTML program, add the “box-content” class to the particular element, and specify the height, width, padding, and border in it. For verification, run the HTML program and view the web page. This write-up has demonstrated the method of using “box-content” in Tailwind.

