Text-to-image generation is one of the milestones of Artificial Intelligence and is a celebrated achievement of mankind. Stable Diffusion is an open-source application and can be installed and executed on your local machines. The dimensions of Stable Diffusion are growing over a considerable range. One more powerful tool introduced by Stable Diffusion for generating customized images is “Dreambooth”.
This article demonstrates a step-by-step guide by supporting the below-mentioned content:
What is Dreambooth?
Researchers and scientists at Google Research and Boston University have developed a model which is based on the Deep Learning mechanism and is widely used to fine-tune existing text-to-image models. This model can develop personalized outputs after training on a few images.
How to Run Dreambooth on the Local System?
Dreambooth can easily be installed on your local machines. For this purpose, first need to install stable diffusion on the system. To learn more about the Stable Diffusion installation, refer to this article “How to install Stable Diffusion on Windows?”.
Dreambooth is a built-in feature of Stable Diffusion. Here is a step-by-step guide to running Dreambooth on your machines:
Step 1: Locate the Stable Diffusion Directory
To update the Stable Diffusion Web UI, open the “Stable Diffusion” directory where you have previously installed it:
Step 2: Cloned Repository of Stable Diffusion
We have cloned the stable diffusion repository from Git. For this, open the cloned repository to update the Web UI:
Step 3: Choose the “Webui-user” Batch File
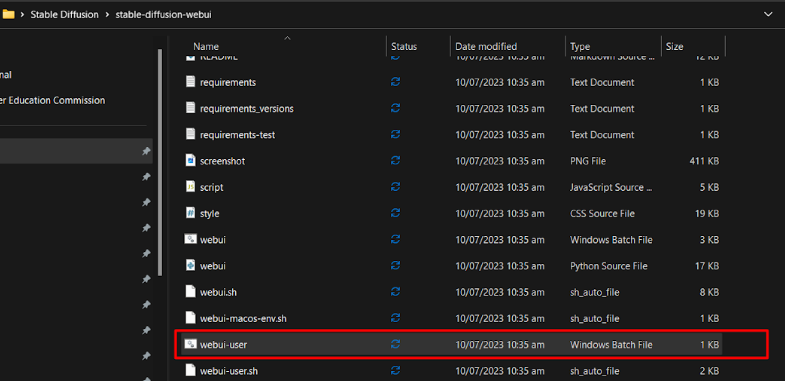
Scroll down the directory and you will find a file named “webui-user” batch file:
Step 4: Run the Batch File
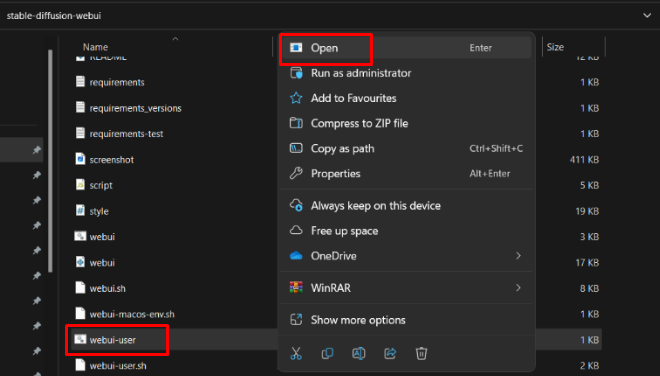
Click on this “webui-user” batch file that you have edited and saved. Choose the “Open” option by pressing the right button of the mouse to run the file:
Step 5: Choose the “Extensions” Section
Click on the “Extensions” section:
Step 6: Choose the “Available” Tab
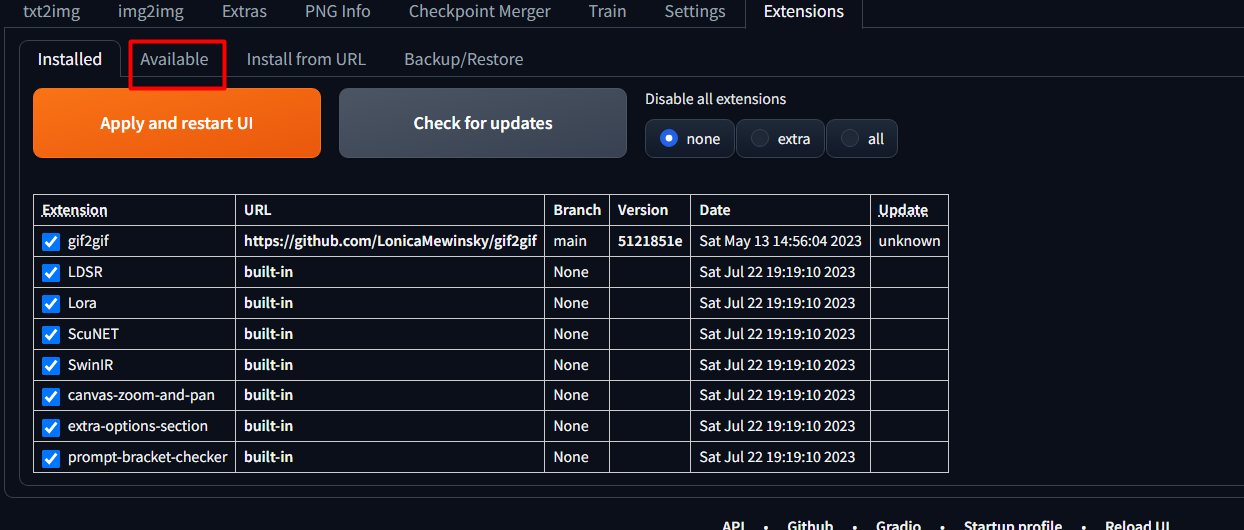
From the “Extensions” section, click on the “Available” tab as seen below:
Step 7: Hit the “Load from” Button
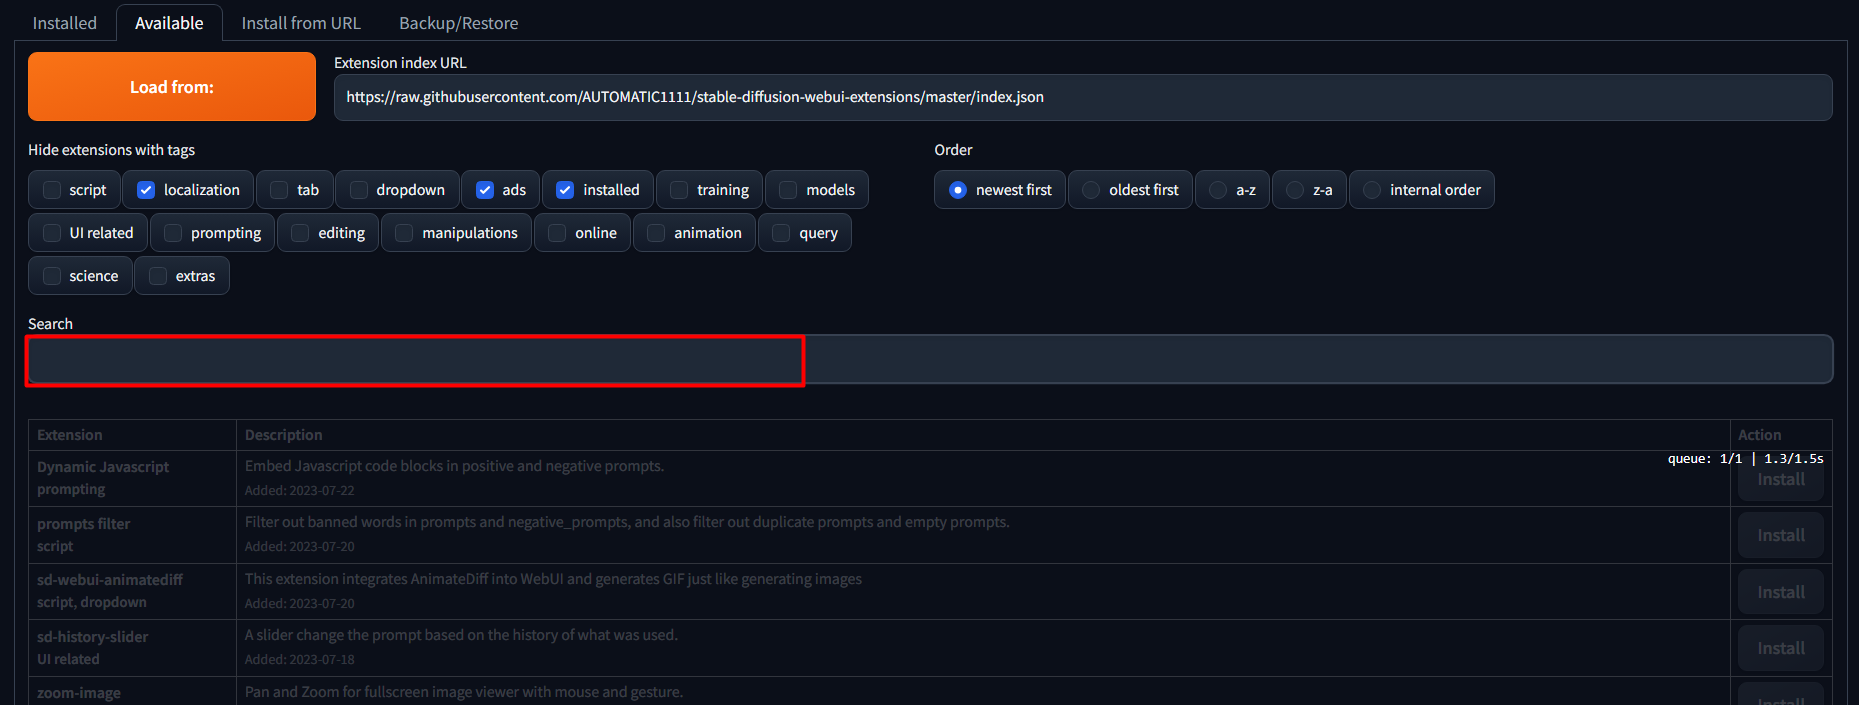
When clicked on the “Available” section, an interface like the below-attached image below will appear. Click on the “Load from” button to load all the extensions present in the URL of the GitHub repository of Stable Diffusion:
Step 8: Search for the Extension
In the search bar, write “Dreambooth” to install this extension on your systems:
Step 9: Hit the “Install” Button
The search displays the following result. Click on the “Install” button of the Dreambooth extension. This installs the extension of Stable Diffusion:
Step 10: Choose the “Installed” Tab
From the various options in the “Extensions” section, click on the “Installed” tab:
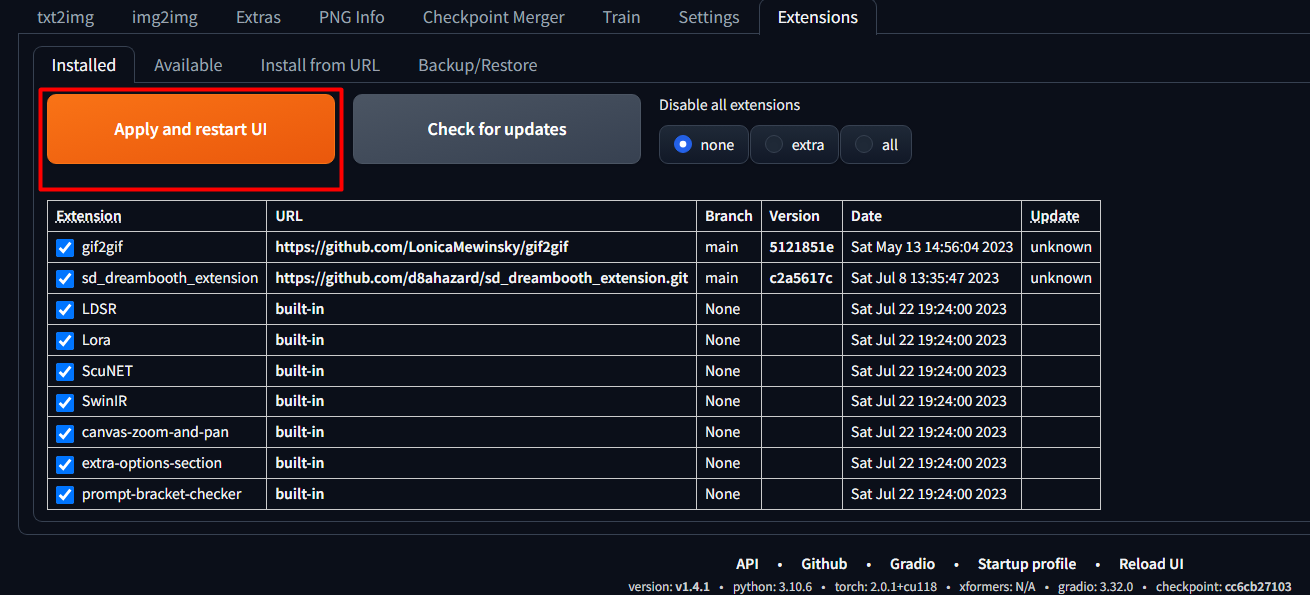
Step 11: Restart UI
From the “Installed” tab, there will be an option that says, “Apply and restart UI”. Click on this button to restart the UI:
After restarting the UI, the Dreambooth option will now be available. It indicates that the extension has been successfully installed:
That is all from the guide to running Dreambooth with Stable Diffusion.
Conclusion
Dreambooth is an extension provided by Stable Diffusion that can be easily installed on local machines. For this, click on the “Available” tab from the “Extensions” section and add the Dreambooth extension. Stable Diffusion provides this feature as a built-in ability. However, if this extension is not readily available to you. This article provides a step-by-step method to run Dreambooth with Stable Diffusion locally.


