This article demonstrates the right alignment of a div with practical examples using CSS.
- How to Right Align a Div Using CSS?
- Using the “float” Property
- Using the “right” Property
- Using Flex Layout
- Using Grid Layout
How to Right Align a Div Using CSS?
The developer can right align each div element or image in a way that makes the website more appealing. Due to their high flexibility, div elements can be utilized in several ways on the web page such as defining page sections, creating columns, and wrapping sets of related content.
Follow the below methods to right-align the div:
Method 1: Using the “float” Property
In the HTML file, create a div and assign it a class of “align-to-right”. This class and div are used throughout this article.
Now, select that div class “align-to-right” and assign the CSS properties. These properties are utilized for better visualization:
float: right;
padding: 10px;
background-color: hotpink;
}
In the above code, the “float” property is set to the right. It floats or moves the div in the right direction on the webpage. The padding and background-color properties are set to “10px” and “hotpink” respectively.
After compiling the above code snippet, the webpage looks like this:

The above output confirms that the div moves in the right direction.
Method 2: Using the “right” Property
In the CSS, select the div class and set the “right” property to 0. It ensures that the distance of the selected div from the right side is equal to zero. Then, set the “position” property to “absolute” to make the div position fixed. In the end, apply some styling properties for better visualization:
{
right: 0;
position: absolute;
padding: 10px;
background-color: mediumpurple;
}
After executing the code webpage looks like this:

The output shows that the div is now right-aligned.
Method 3: Using Flex Layout
Flex is the most efficient method, and it maintains the layout during resizing of the window. The div can be right-aligned using CSS “Flex Layout” properties. The Flex layout contains many properties for different purposes.
In the HTML file create a parent div and inside it creates two sibling divs. Also, assign each div a unique class:
Now inside the “<style>” tag add the following CSS properties:
display: flex;
justify-content: space-between;
}
.right-aligned {
align-self: flex-end;
padding: 10px;
background-color: mediumpurple;
}
In the above code,
- Assign “flex” and “space-between” values to the “display” and “justify-content” properties, respectively. These properties make the div a flex and put equal spacing between the child divs.
- The “align-self” property is set to “flex-end”, which causes it to align to the right side of the container.
After executing the above code webpage looks like this:
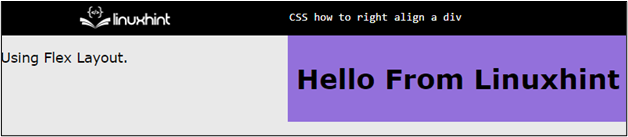
The output shows that the div is right aligned using the flex layout.
Method 4: Using Grid Layout
The grid layout can also be utilized to right-align the div. The HTML code structure remains the same:
display: grid;
grid-template-columns: repeat(2, 1fr);
}
.right-aligned {
grid-column-start: 2;
padding: 10px;
background-color: teal;
}
The description of the code is given below:
- First, select the parent div class “.align-to-right” and set its “display” property to “grid”.
- Then, create two columns with equal size using “grid-template-columns” set to “repeat(2, 1fr)”.
- In the end, select the child div class “.right-aligned” and set the “grid-column-start” property to 2. This property starts the element from the second column i.e., from the right side.
After executing the above code, the webpage looks like this:

The output illustrates that the div is now right aligned using the “grid” layout properties.
Conclusion
To align the div in the right direction, use “float”, “right”, “flex layout”, and “grid layout” properties. The “float” property sets to the right by assigning the value “0px”. For the “flex” property, set the display to flex and use the “align-self” property to “flex-end”. Using the grid property, make two equal size columns and make the child div start from the second column.