How to Make a Banner Image?
To make a banner image HTML and CSS operate together. HTML makes the structure of the banner and CSS makes that structure responsive by applying several styling properties.
Follow the below steps to make a banner image with the help of an example:
Step 1: Create a Structure of Banner
Create a parent div element and enter dummy data inside it to the specific website. After that add some Call-to-Action elements like “buttons”. Inside the “<a>” tag provides a link to be opened as a value of the “href” attribute. In the end, assign each element with a “class” or “id” to apply styles to them in upcoming steps:
<h1 class="banner-heading">Linuxhint is the place of heaven where you can find the answers for your queries related to programming languages.
</h1> <br>
<h3 class="banner-heading">Click on below button to be a part of our community.
</h3>
<br>
<a href="https://linuxhint.com/" target="blank"id="banner-link">Linuxhint</a>
</div>
After compiling the above script, the webpage as below:
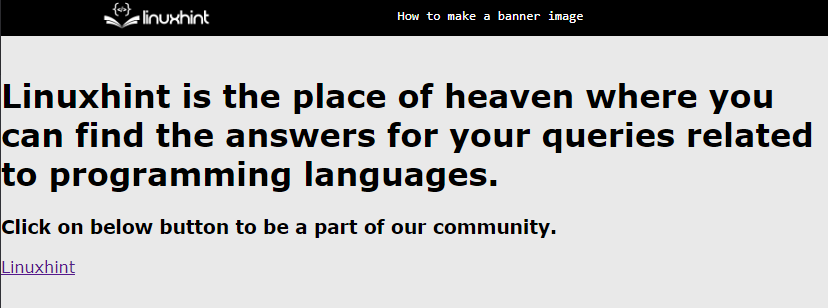
The figure represents that the data is placed on the webpage.
Step 2: Styling of Banner
Start styling with text elements and setting a background for the banner. First, set the background to “midnightblue” and makes height “auto” to arrange the height according to screen size. Then, add “padding” of 100px to bring the element to the center which helps to enhance readability:
background: midnightblue;
height: auto;
padding: 100px
}
.banner-heading {
color: white;
font-family: Arial;
text-align: center;
}
After that, select the “banner-heading” class and apply styles in it, which will affect the text. Set “white” color and align the text at the “center” position.
After compiling the script, the output as below:
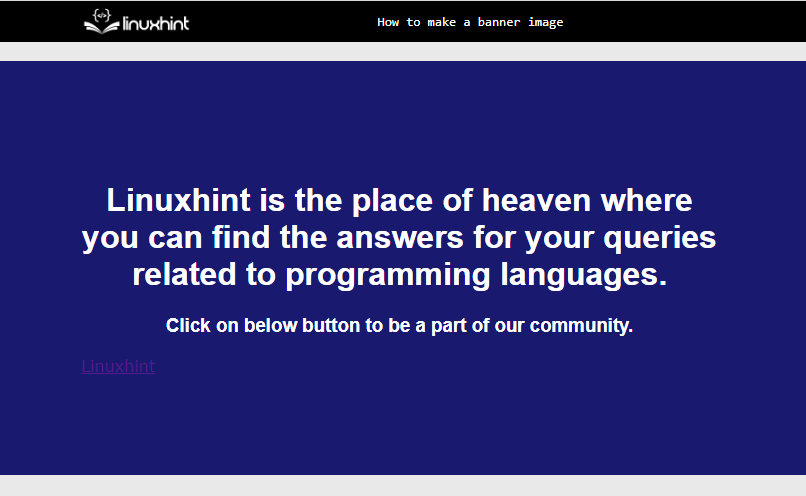
The figure represents that the banner has been styled.
Step 3: Style the Call-to-Action Button
Select the button id and set its width, color, and text alignment. After that, apply padding of 20px along with the top and bottom margin to zero. This makes our button appear in the center and adds some space between the text and the border:
display: block;
text-align: center;
width: 150px;
margin: 0px auto;
padding: 20px;
color: white;
border: 1px solid #fff;
text-decoration: none;
border-radius: 10px;
}
Use the “text-decoration” property to remove custom styling for the link. Then add “border” and “border-radius” properties to make the boundary of the button more visible.
After compiling the script, the output as below:
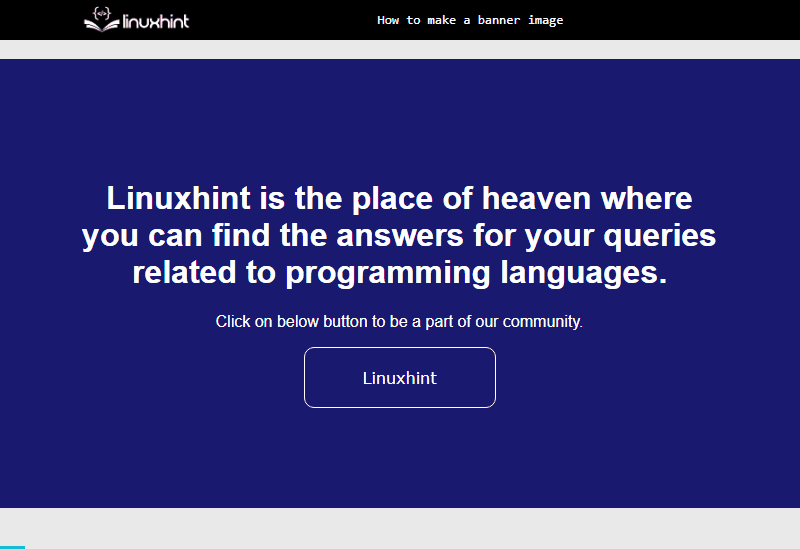
The figure represents that the call-to-action button is functional, and the banner has been created.
Conclusion
To make a banner image, build the structure with the help of HTML tags, and call-to-action buttons. After that, use different CSS properties to style the banner according to the requirements. Styling plays the most essential role in creating good or bad banners so deal with care. This article has successfully demonstrated how to make a banner image.