Docker is a popular development platform introduced in March 2013. It is a widely used open-source tool for developing and deploying DevOps applications. Dockers are based on the containerization concept. This platform builds and runs Docker-based apps using containers, images, and repositories.
This post will demonstrate:
Prerequisite: Enable and Install WSL on Windows
WSL stands for “Windows Subsystem for Linux”. By enabling the WSL on Windows, developers can process the Windows and Linux Docker containers on the Docker desktop.
To enable WSL and the Virtual platform, go through the below-provided instructions.
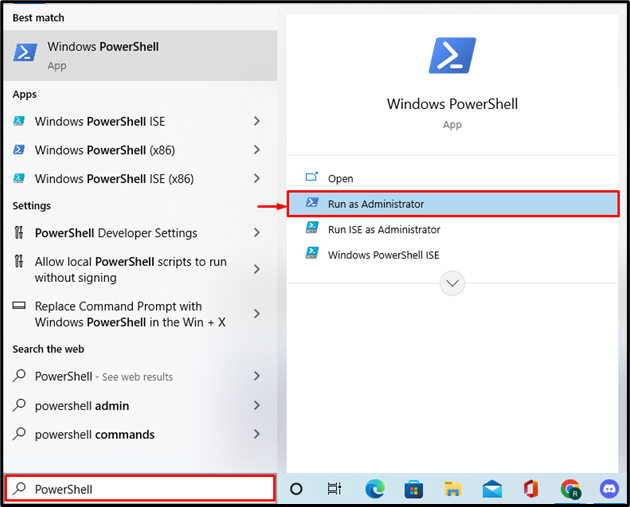
Step 1: Open Windows PowerShell
First, from the Start menu, search for “PowerShell” and run this app as administrator:
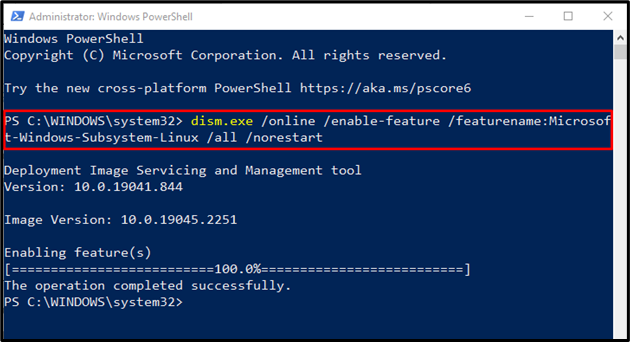
Step 2: Enable WSL
Next, execute the below-mentioned command to enable the WSL on Windows:
The output indicates that we have successfully enabled the WSL on Windows:
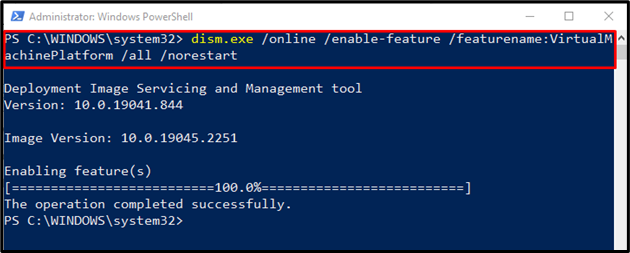
Step 3: Enable Virtual Machine
To enable Virtual Machine platforms on Windows, run the same command as in the previous step, but change the feature name to “VirtualMachineplatform”, as follows:
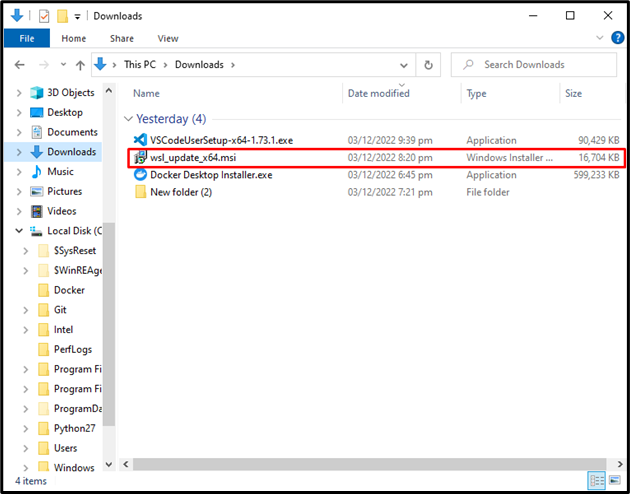
Step 4: Download WSL Update Package
Now, click on the attached link, download and install the WSL package update installer:
Complete the wizard as demonstrated below:

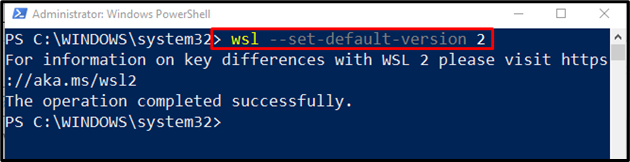
Step 5: Set Default WSL version
Next, set the WSL default version 2 using the given command:
How to Install Docker Desktop on Windows?
Docker Desktop for Windows enables the development environment for creating, delivering, and executing containerized applications. To install Docker Desktop on Windows, look at the procedure below.
Step 1: Download Docker Desktop on Windows
Go to the Docker official website and click the “Download Docker Desktop” button to get the Docker installer:

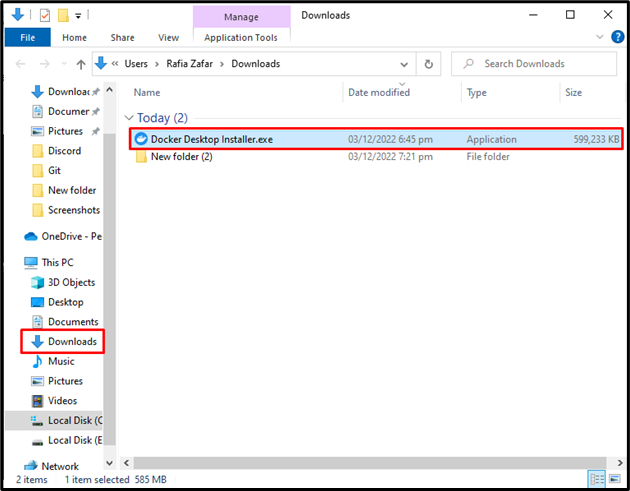
Step 2: Run Docker Installer
Then, navigate to the “Downloads” directory and launch the Docker installer:
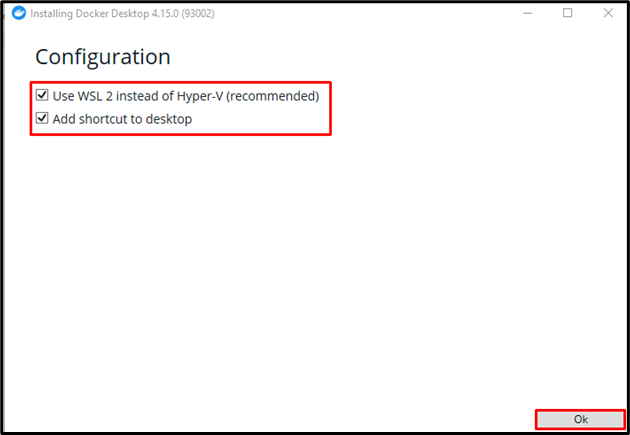
Step 3: Install Docker
Enable the WSL and add the Docker shortcut to Desktop by marking highlighted checkboxes. After that, press the “Ok” button to start the Docker installation:
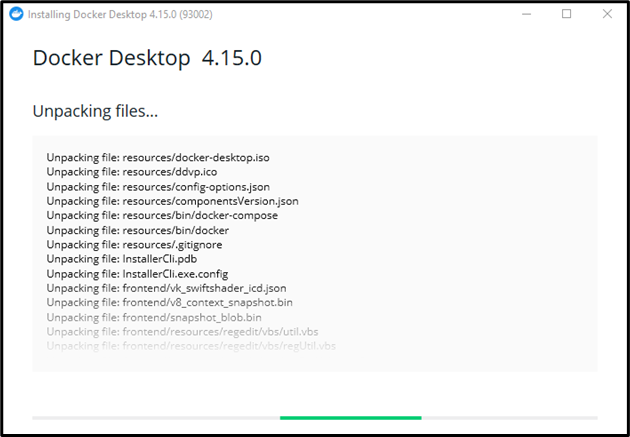
As a result, the ongoing process will start unpacking the required files and dependencies:
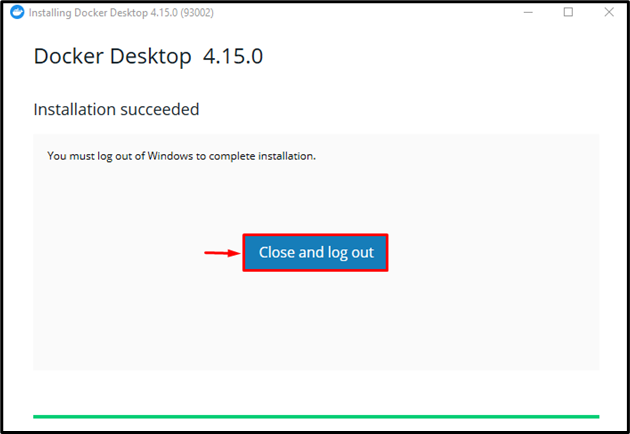
Now, click on the “Close and log out” button to finish the installation. After that, restart your system:
The “Docker Subscription Service Agreement” window will show on the screen. Accept all terms and conditions and start using the Docker Desktop on Windows:

We have provided the easiest method for installing the Docker desktop on Windows.
Conclusion
To install Docker on Windows, first, enable the WSL (Windows Subsystem for Linux) and the Virtual platform. Then, go to Docker’s official website and download and run the Docker installer. Restart your PC after installing Docker, accept all terms and conditions, and begin using Docker Desktop. This post discussed installing the Docker desktop in Windows.