To deploy a node js app, I’d need a local computer that I have physical access to or a VPS(Virtual Private Server) which is a private server space with fixed resources such as RAM, Disk etc. like your computer has but this is hosted somewhere far from you with almost 24/7 uptime. Just to be clear, this VPS is technically a computer which you access remotely and it’s part of a bigger data center. The good part about this computer is that you don’t have to manage its power or hardware yourself and you can increase resources as per your need at any point in time. Anyway, enough basic talk. I know you are technical and you know all that but I wrote those lines for someone who’s here for the first time and don’t know anything about it.
So I needed to find a good VPS to deploy my node js application. After exploring many options, I found Scalahosting and they offer SPanel which is one of the best server management tools I have used so far, and the reason I say that is because much of your hosting layer is managed by them through SPanel. Having said that, this doesn’t mean you don’t have access to the core Linux environment that we all love so much. You still have access over SSH and can manage all sorts of access logs, PM2 logs, application directories and many more things via command line.
How I Deployed a Node.js App Step-By-Step
1- I Created an Isolated Hosting Account for NodeJS App
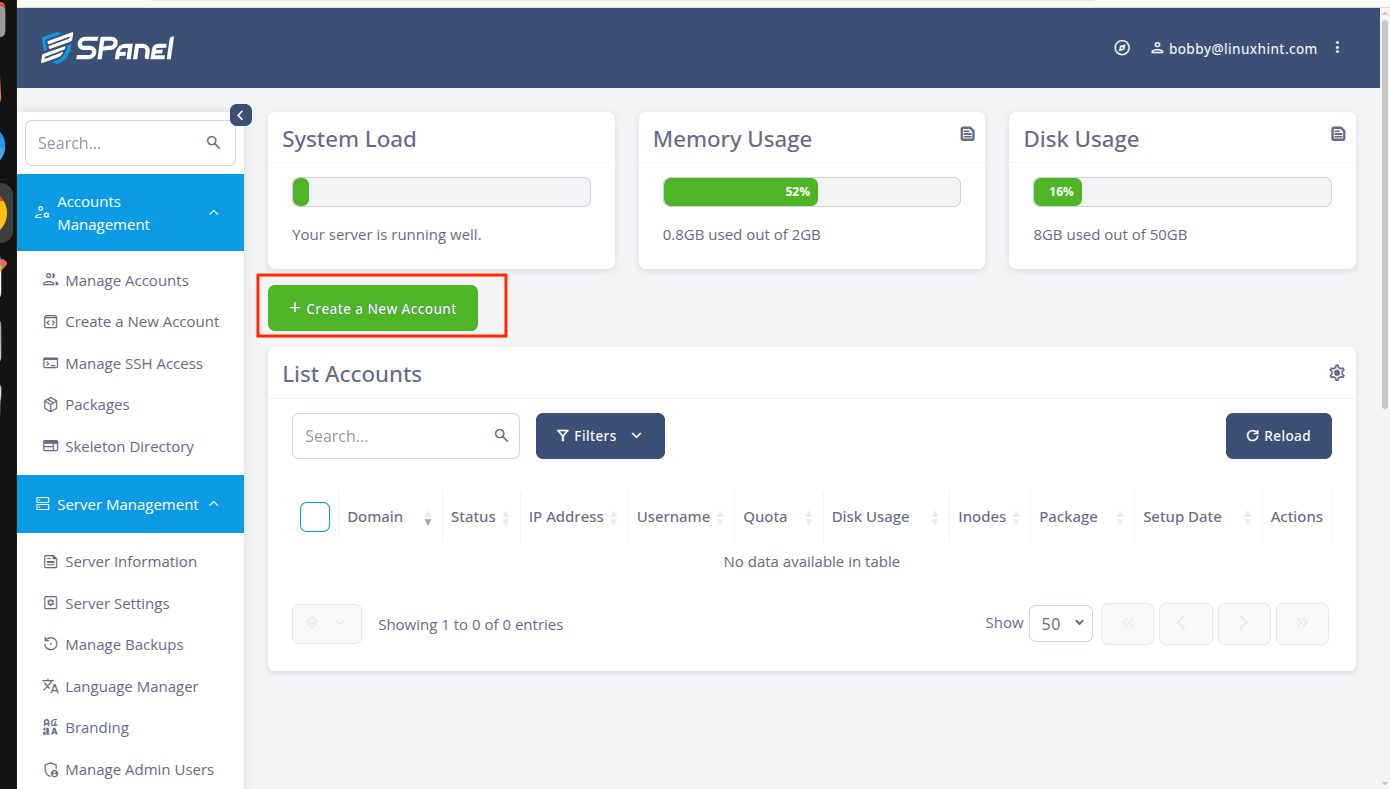
After getting my VPS access, I created a separate hosting account for my node js app. I logged in and Clicked on Create New Account.
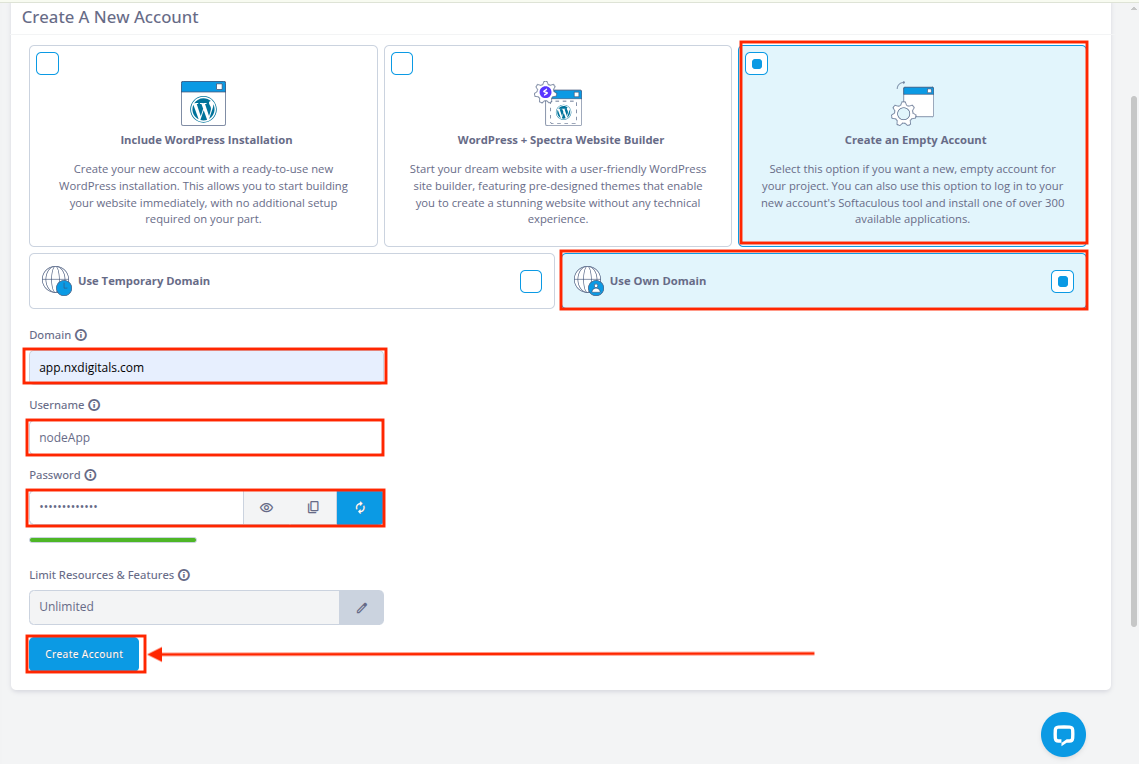
Then I selected Create an Empty Account and then selected Use Own Domain and filled in the details on the form.
I am using a subdomain but you can use a domain if you want to. I’ll also enter the username and password that is auto-generated. I recommend refreshing 2-3 times and selecting a new generated password. You can select and limit the resource usage as per your need, I’d keep it to Unlimited.
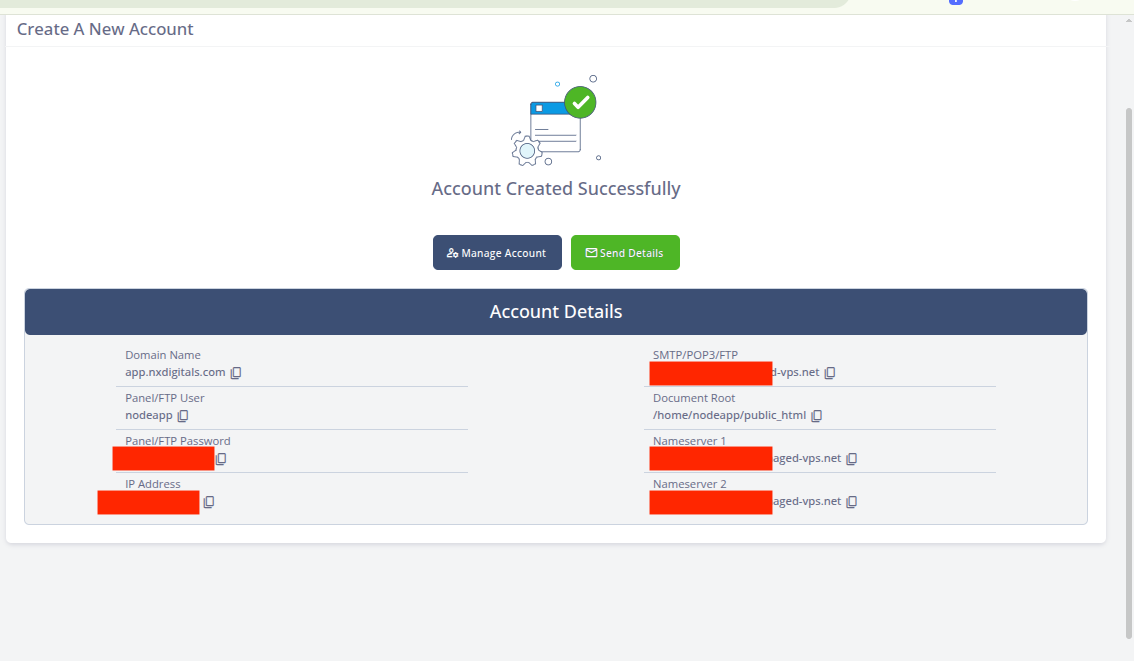
I saw this screen once my account was created successfully. This contains my credentials such as password and IP address etc. I noted them down!
Note for You: After you have access to your VPS, you should create a separate account for your node js app for several reasons such as limiting damage if your app gets compromised(limiting blast radius), keeping a check on your app so you know how many resources it’s using, this will give you a separate Linux user and directories to manage your app etc. Anyway there is no reason to create a combined user or account for multiple apps, that’s a bad practice and you should avoid it at all cost.
2- I Configured DNS for NodeJS App
I noticed that SPanel automatically creates the DNS zone and adds records such as MX, TXT/SPF etc. but they are only useful if I delegate my domain to SPanel.
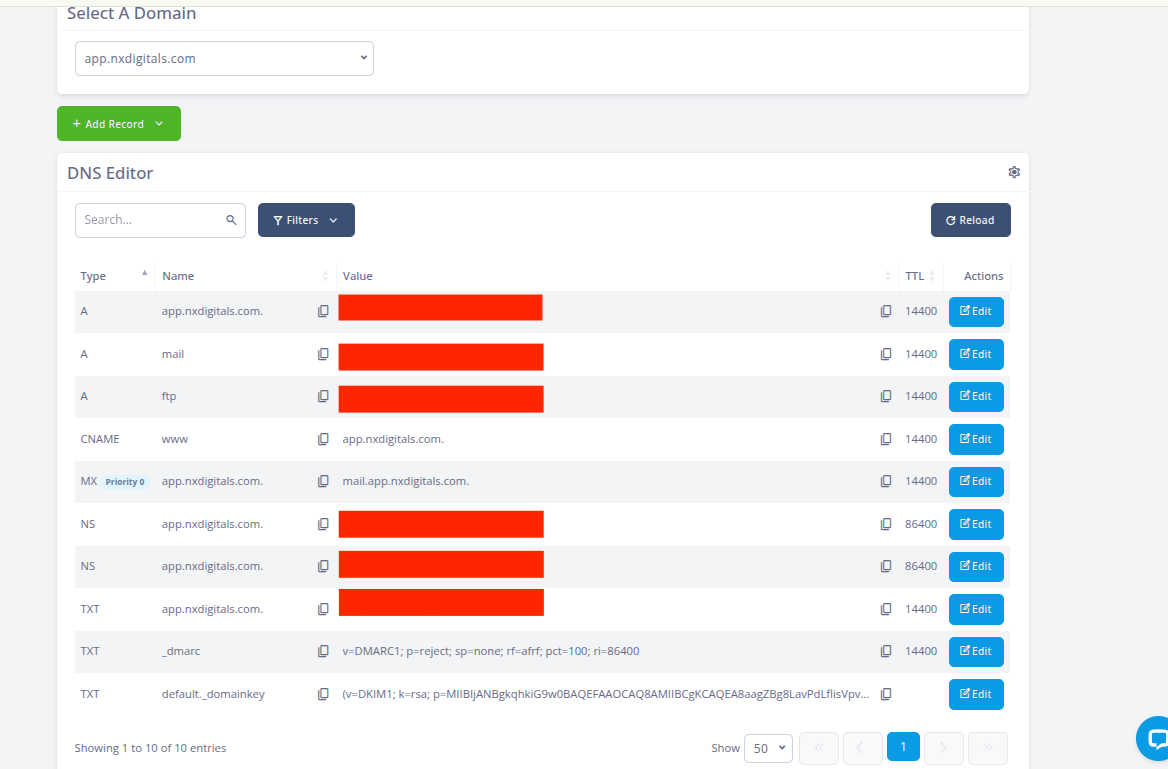
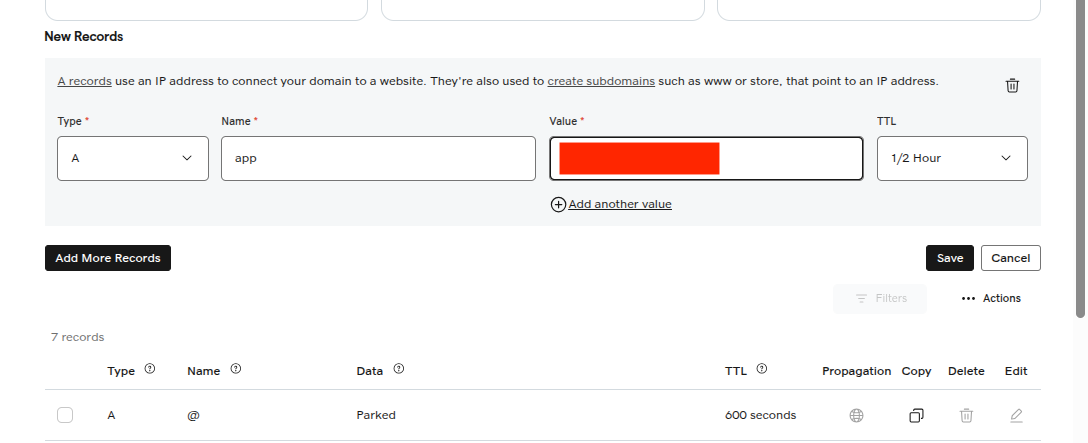
For this work, I didn’t delegate my domain and I have my domain with GoDaddy so that’s where I went and simply created an A record and added my VPS IP address in the value field with app as the name/host field value. This subdomain is now pointing to the VPS.
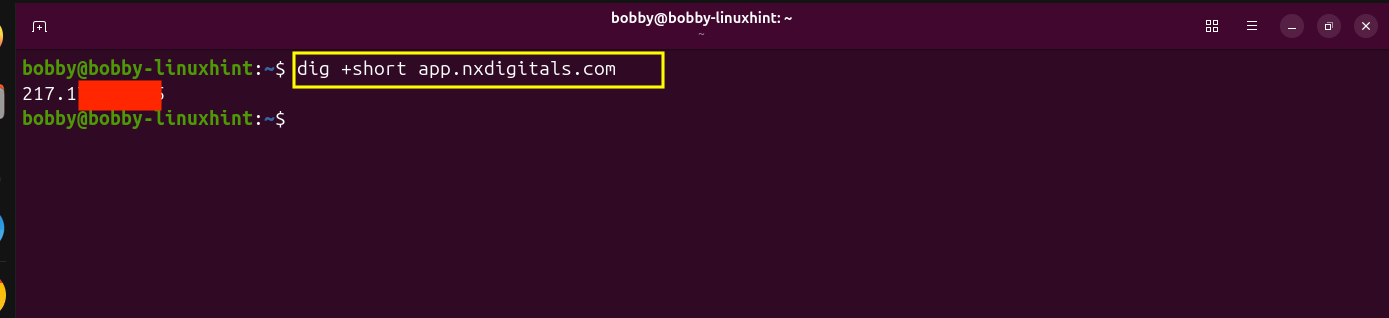
I can verify that with the dig command.
3- I Cloned the GitHub Repository
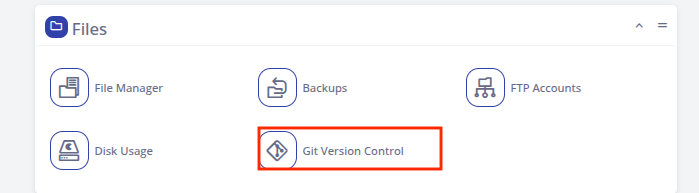
I went to the Git Version Control in the Files section:
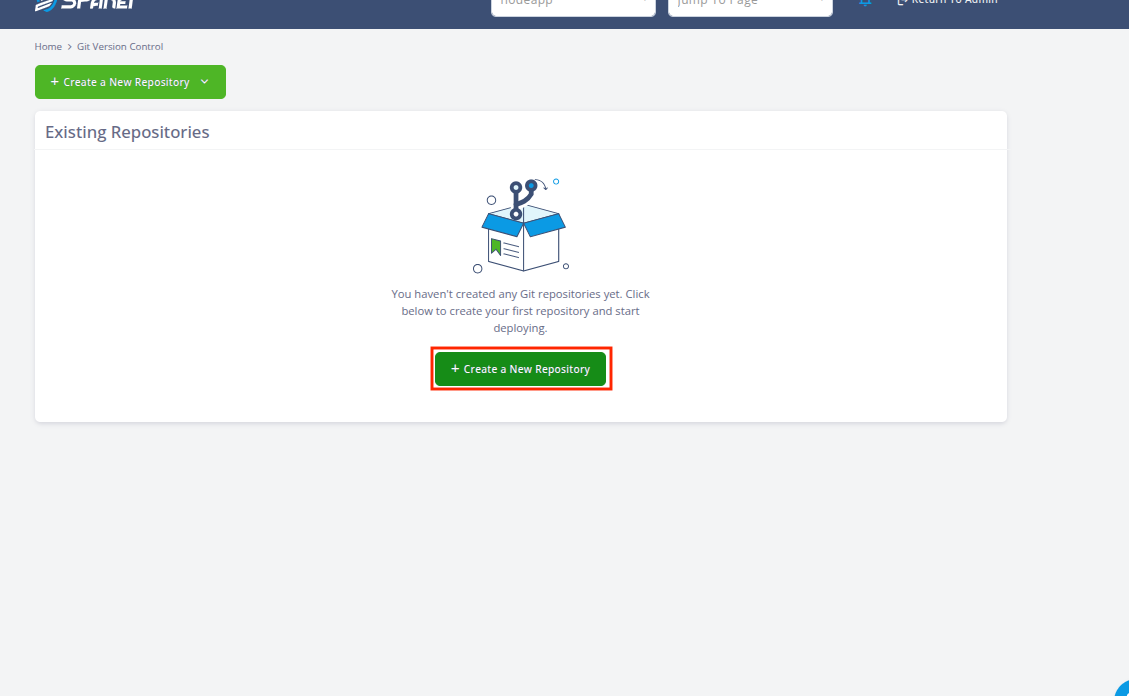
Then I clicked on Create a New Repository:
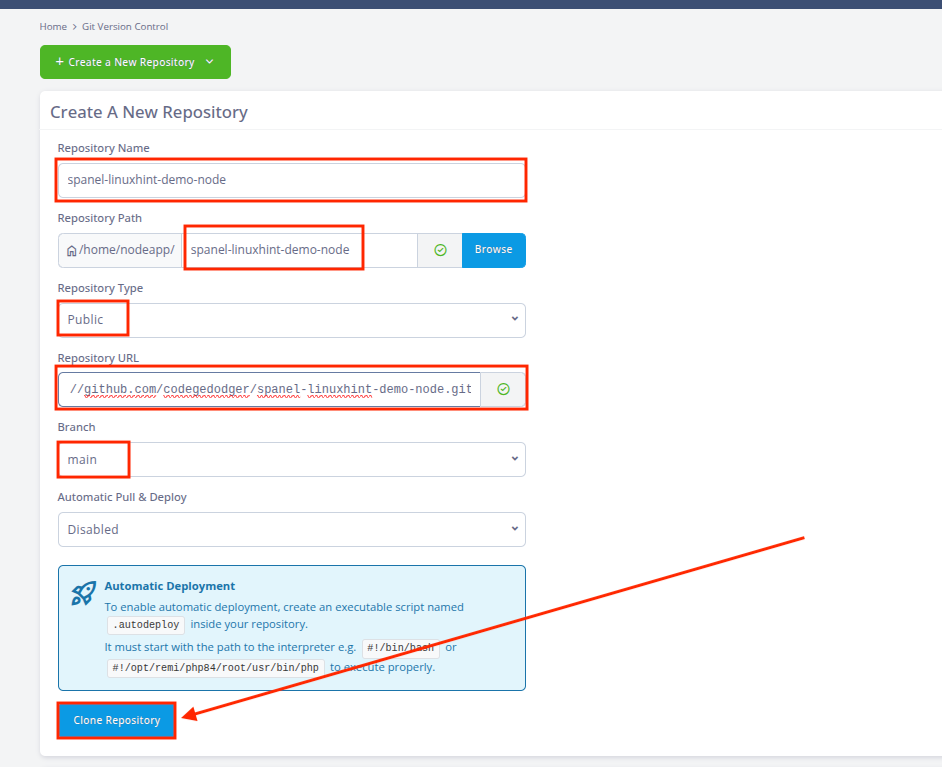
I set Repository Name to spanel-linuxhint-demo-node, then I specified the Repository Path as /home/nodeapp/spanel-linuxhint-demo-node, then selected Repository Type as Public, then I added the Repository URL as https://github.com/codegedodger/spanel-linuxhint-demo-node.git, and in your case this would be your repo url. I selected main as Branch and set Automatic Pull & Deploy to Disabled.
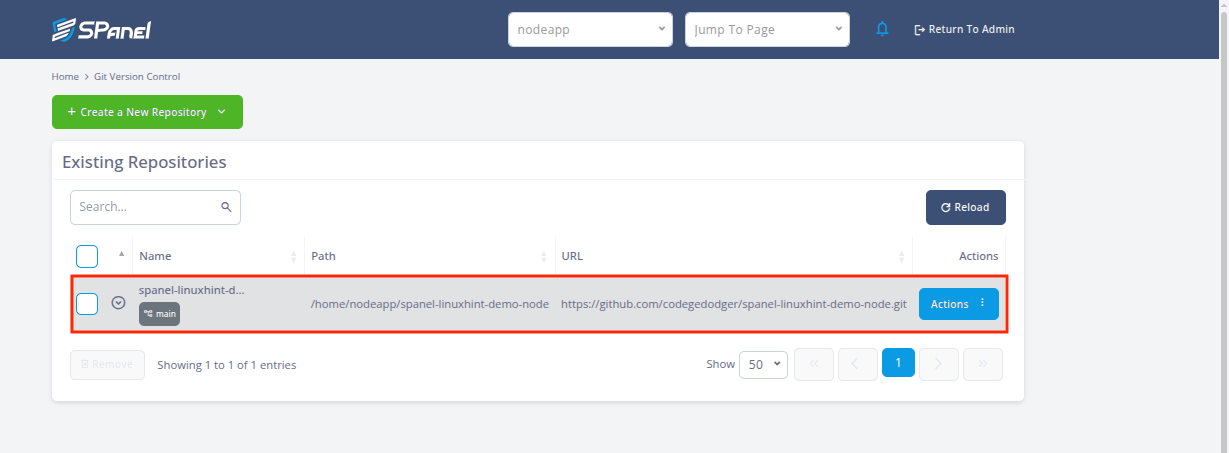
After clicking on Clone Repository, I got the success message which means repo has been cloned and I see the repo added in my Git Version Control section.
4- I Enabled SSH and Verified Repo Contents
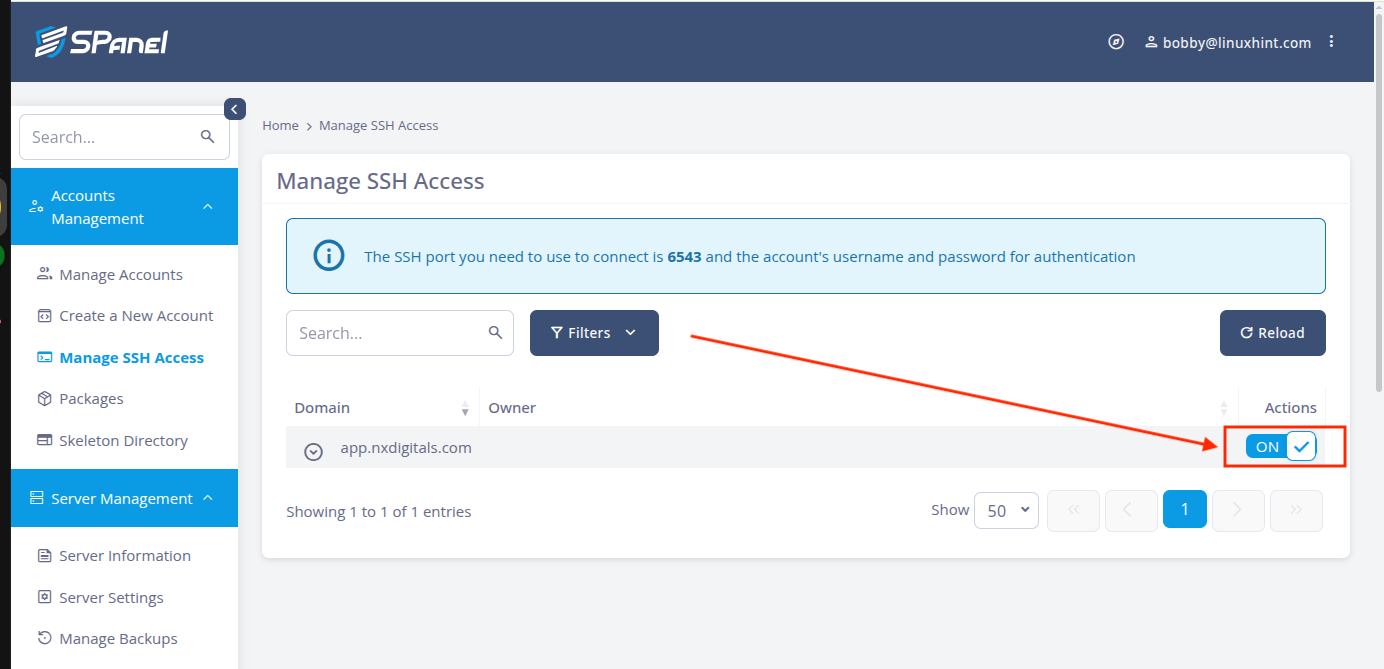
I went to the admin panel and enabled SSH. SPanel uses 6453 as default port which is pretty intuitive as it avoids the general port 22 which gets hammered by the automated attacks on the regular.
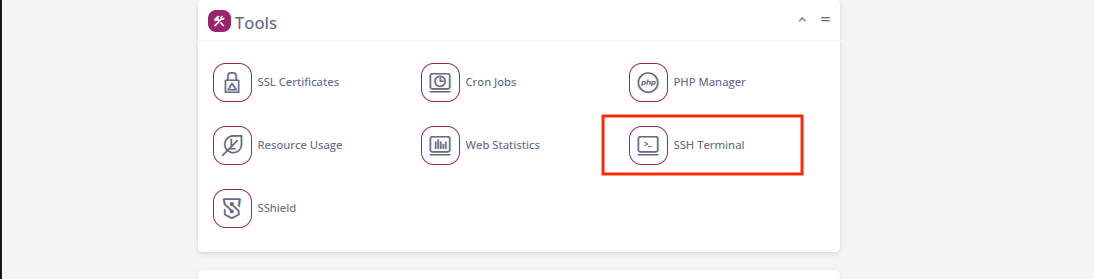
I went back to my hosting account and clicked on SSH Terminal:
Inside the terminal, I changed my current directory to my app directory:
Then I ran this command to see the repository’s contents and if everything was cloned:
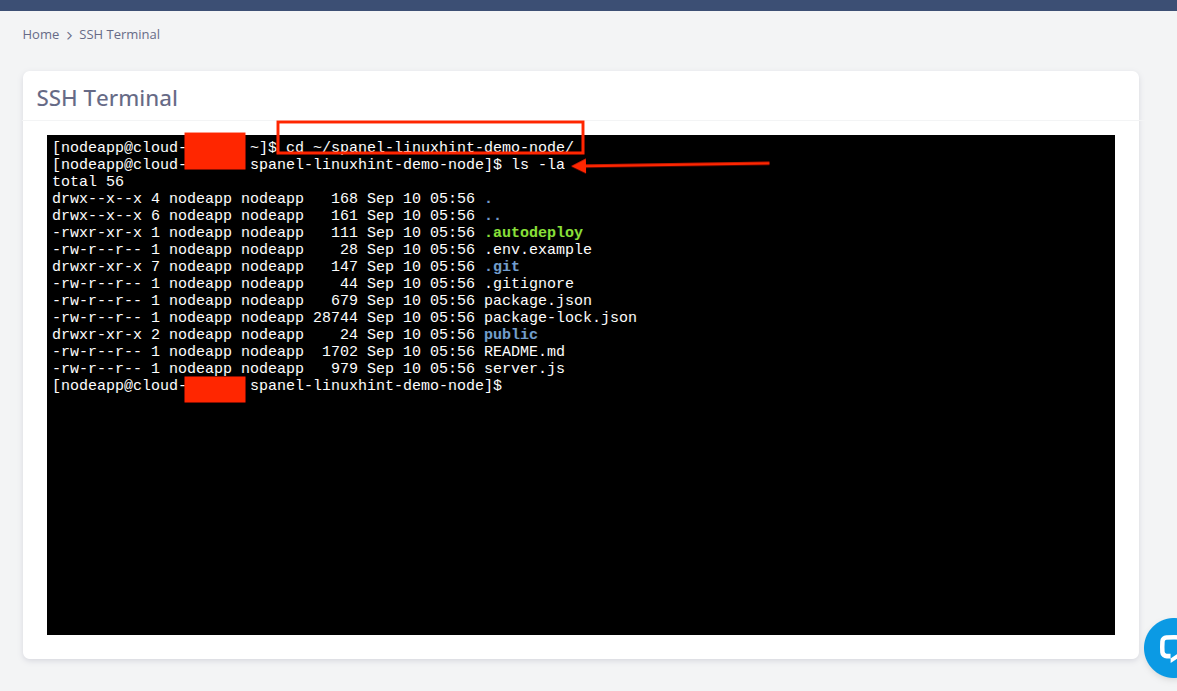
Everything needed was cloned perfectly, now I wanted to check file contents of package.json and .autodeploy, so for that I used cat command:
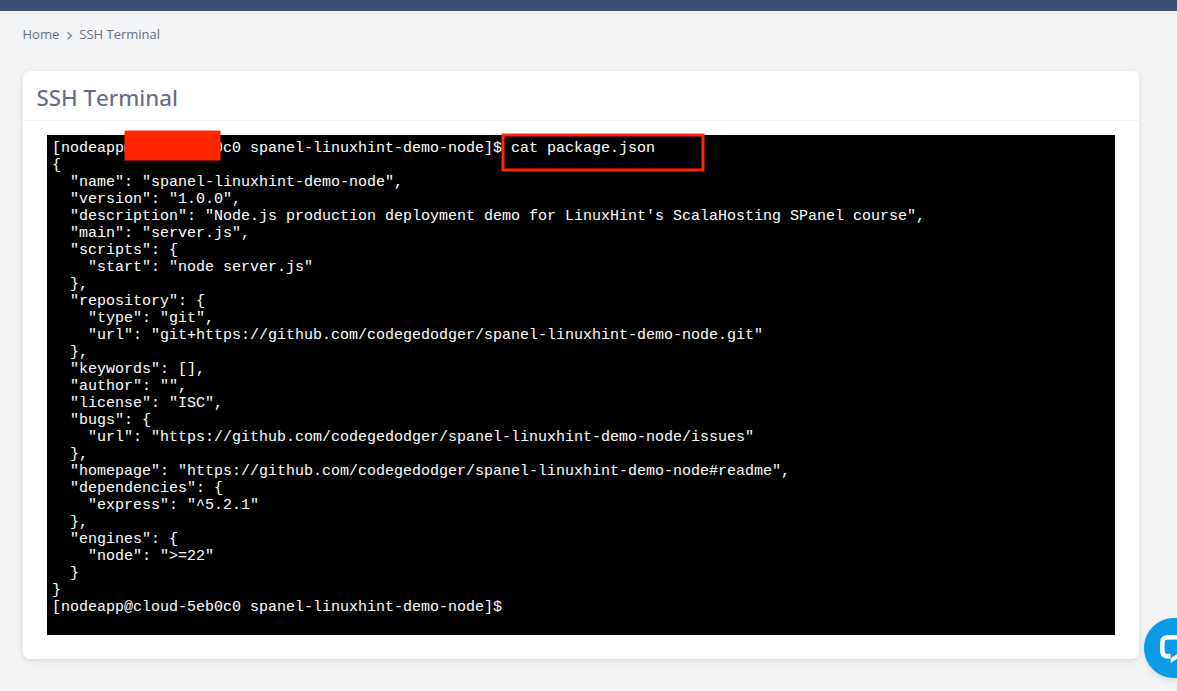
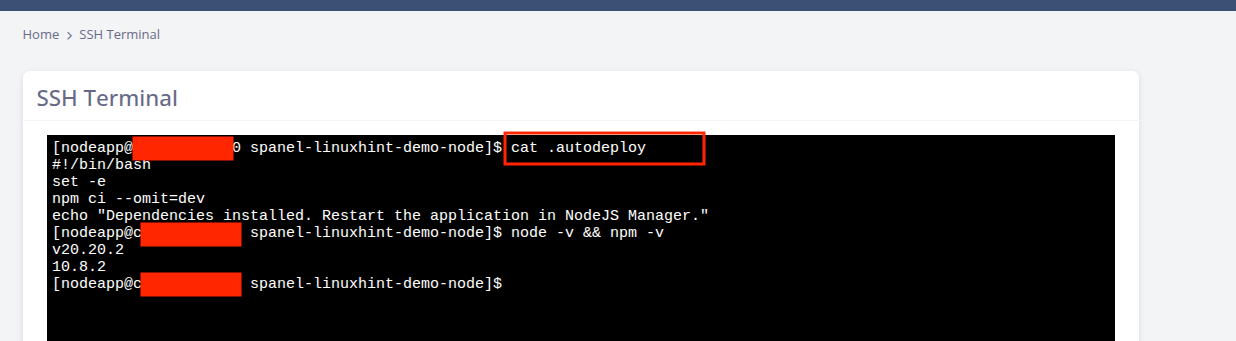
Note for You: You can also connect to your server via SSH from your local Linux machine as well. This all could be done from your own computer via Linux terminal if you don’t wanna do that via this browser based SSH terminal.
5- I Deployed the App with NodeJS Manager (Also Fixed Port Issue)
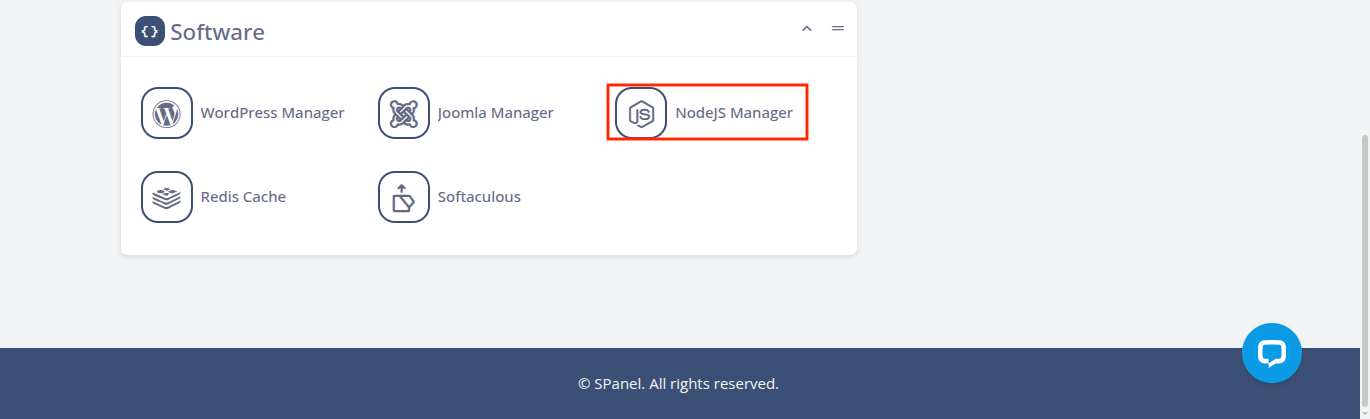
I went to NodeJS Manager to deploy my app:
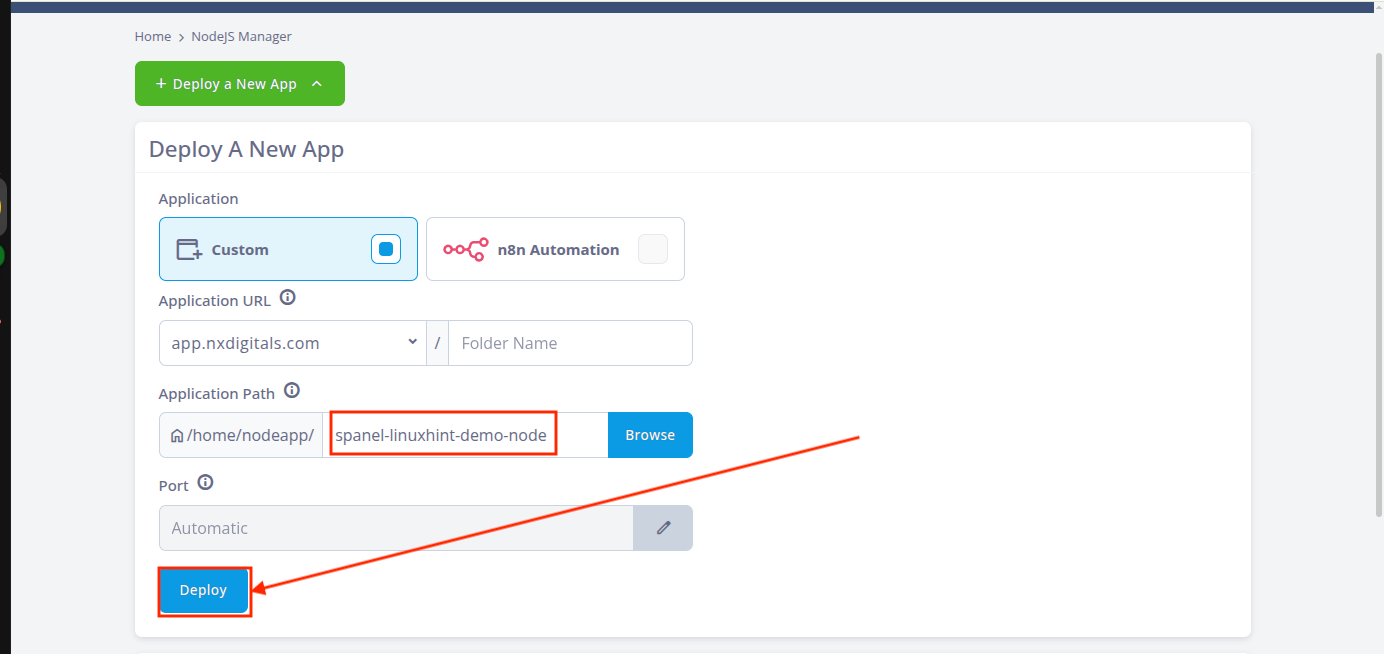
I left the application URL as it is, and I specified the application path which is the path where we cloned the git repo. I left the port selection to Automatic and clicked on Deploy.
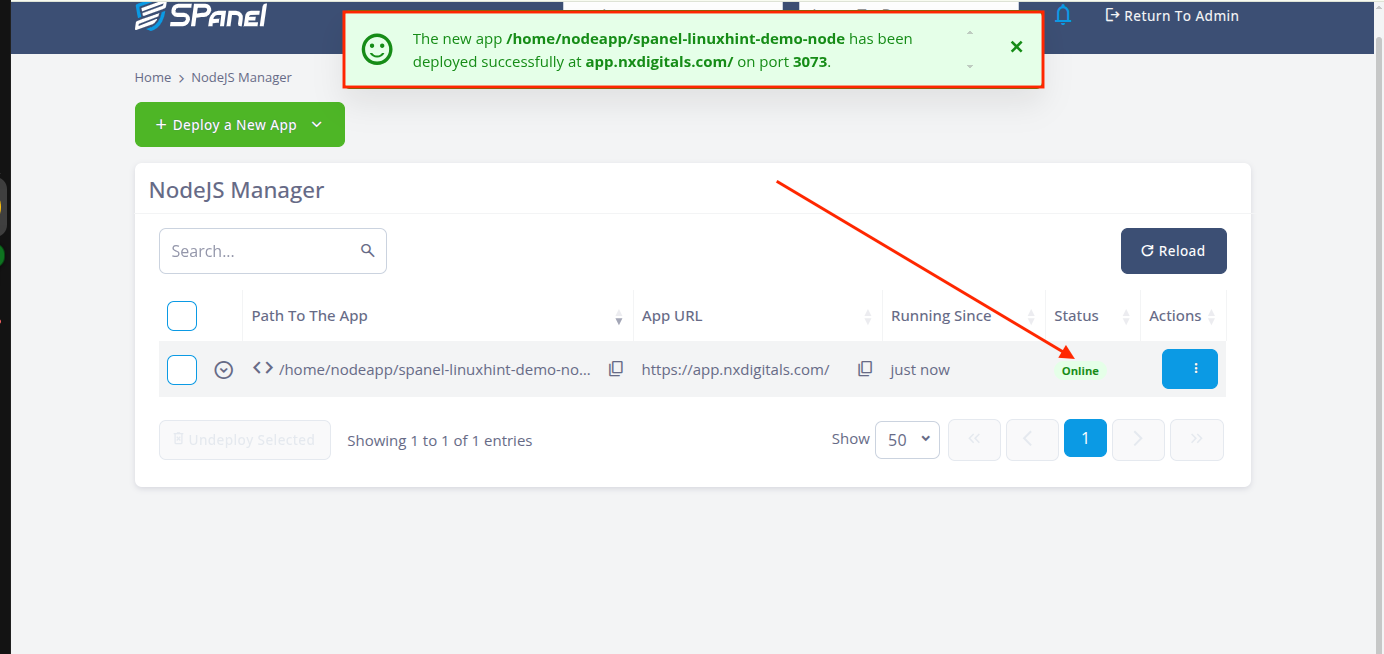
I got a success message saying that the app was deployed on port 3073.
I went to the app url and got this error:
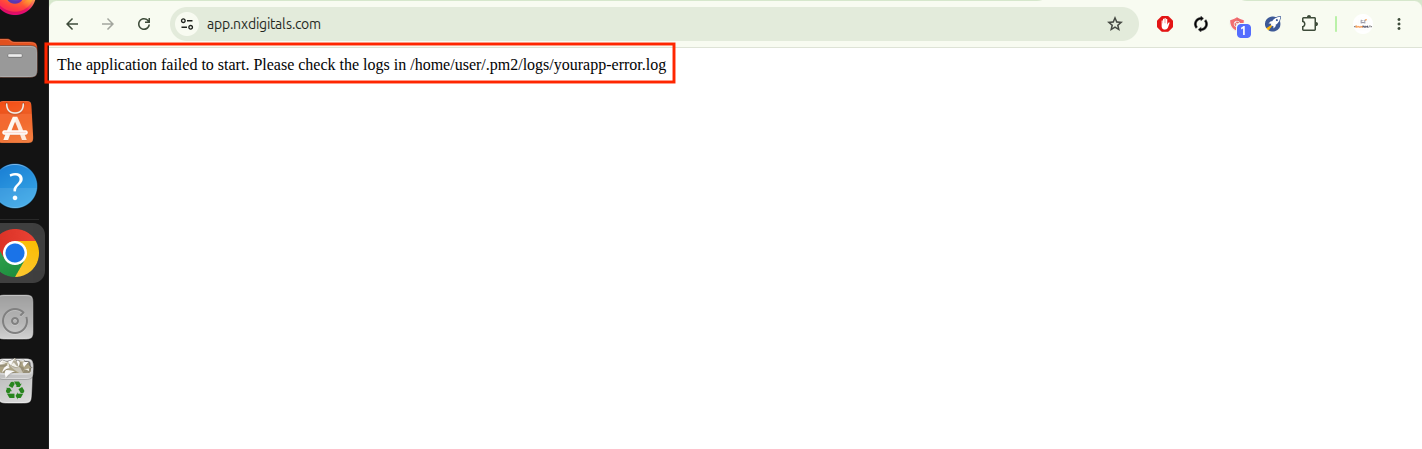
The reason this error arrived is because the port is the issue. NodeJS Manager automatically assigned port 3073 but my app listens to port 3100. While NodeJS Manager is listening to port 3073 internally. These both ports should match for it to work. So I went ahead and changed the port to 3100 in NodeJS Manager and clicked on Change.
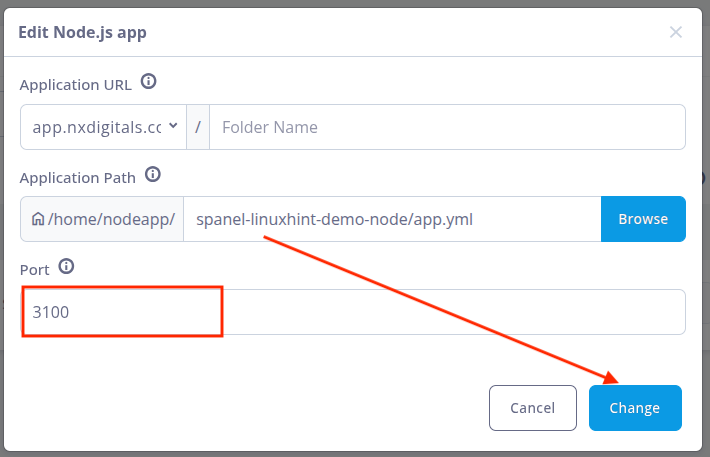
After this, when I went to my browser and entered the URL, my application UI loaded successfully:
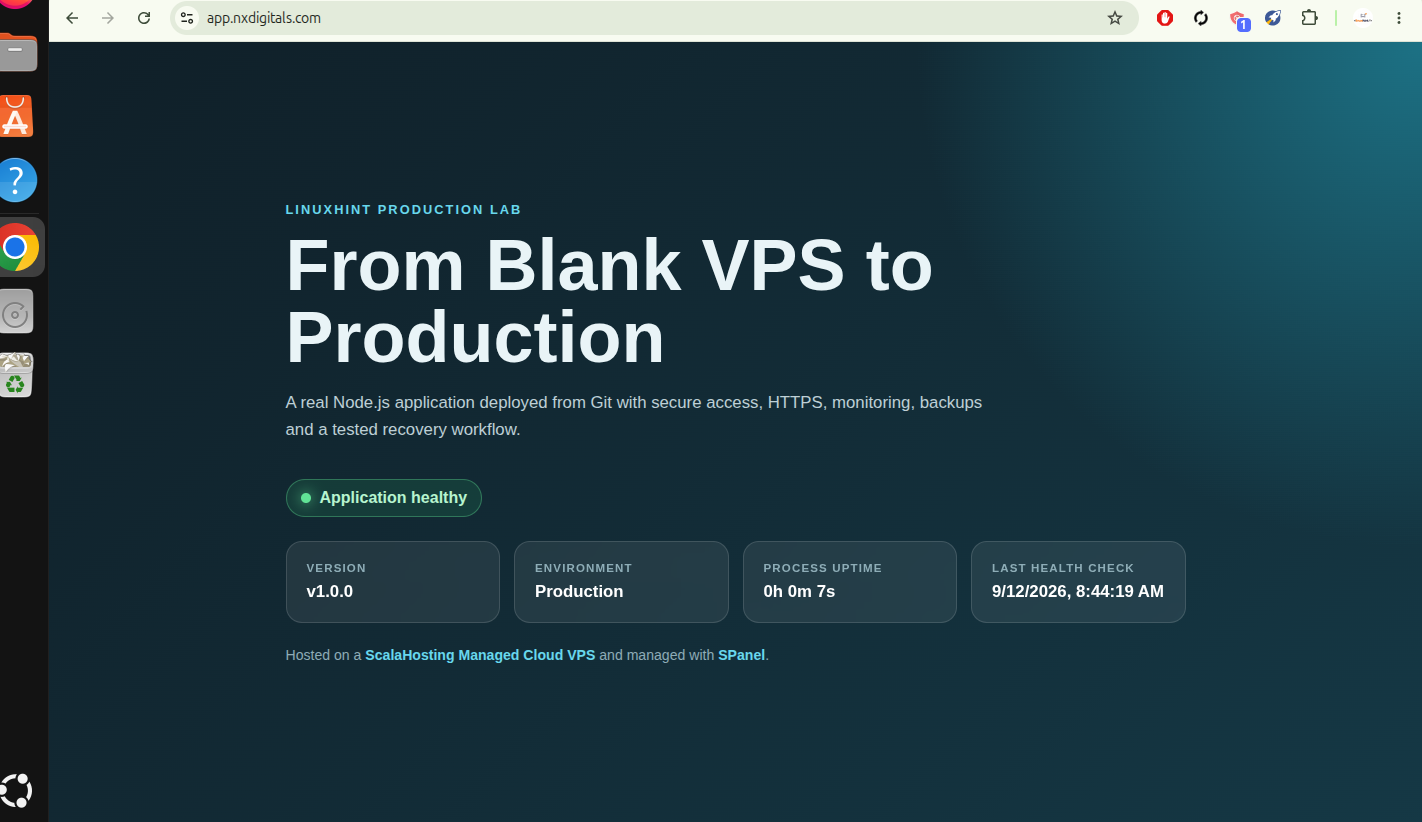
Application has been deployed.
6- I Verified the App with PM2
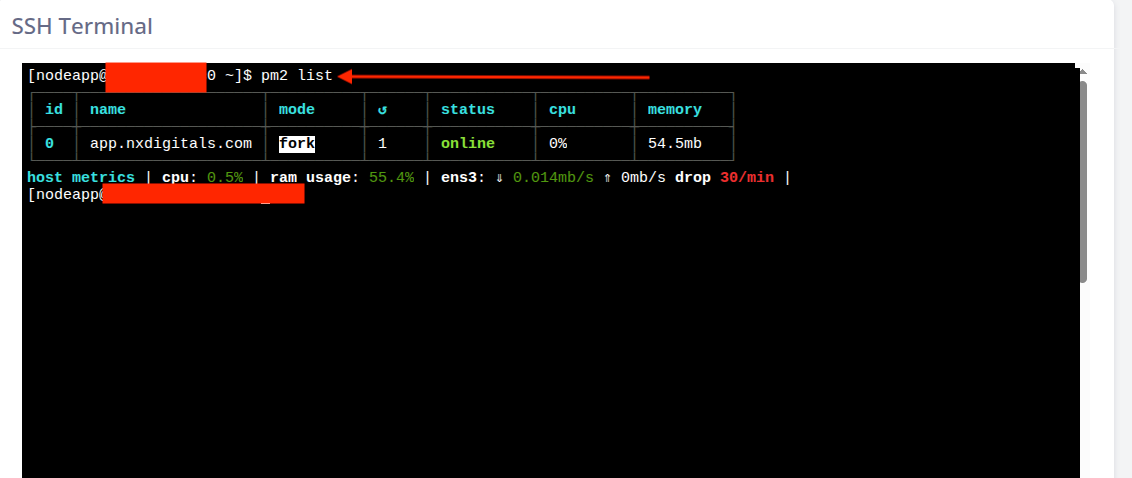
My app was loading in the browser but it could have been cache loading it up so I want to be sure if my app is actually running. For that we have PM2 which is a NodeJS process manager and it keeps the apps running and in case there are issues with my app, it will restart the app without me having to do anything.
I went to SSH Terminal and typed in:
My app was online and running perfectly:
7- I Checked the Application Health Endpoint
This is basically another method to verify the app. Same thing like even if the app is loading in the browser, could have been due to cache. So, this method can be used. I have created a tiny route within my app which will return machine readable json messages such as status, timestamp etc. using which then I can really know if the app is actually up and running.
I accessed the health end point and here is the message I saw:
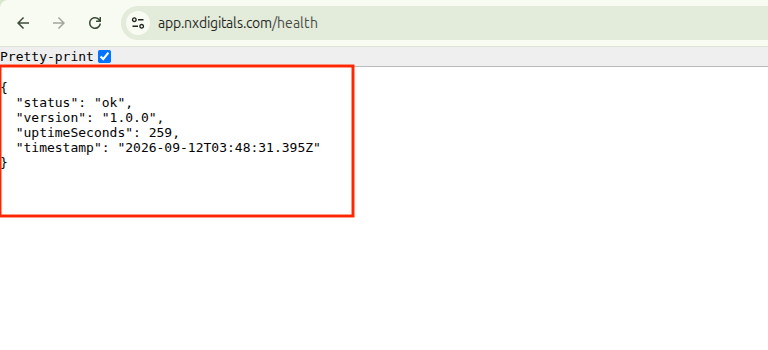
This perfectly explains that the status is ok and the app is up and running with an uptime of approximately 5 minutes.
8- I Verified SSL and Forced HTTP to HTTPS
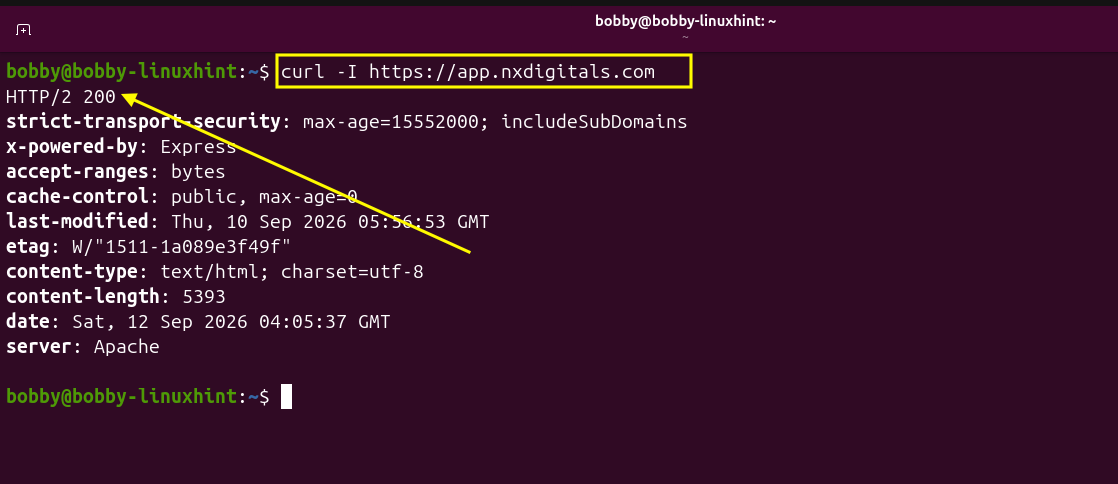
I wanted to verify that if SSL is working, for that matter I just sent a HEAD request using curl and upon that I got back the response from the server which was 200 OK which means that SSL is configured by the SPanel.
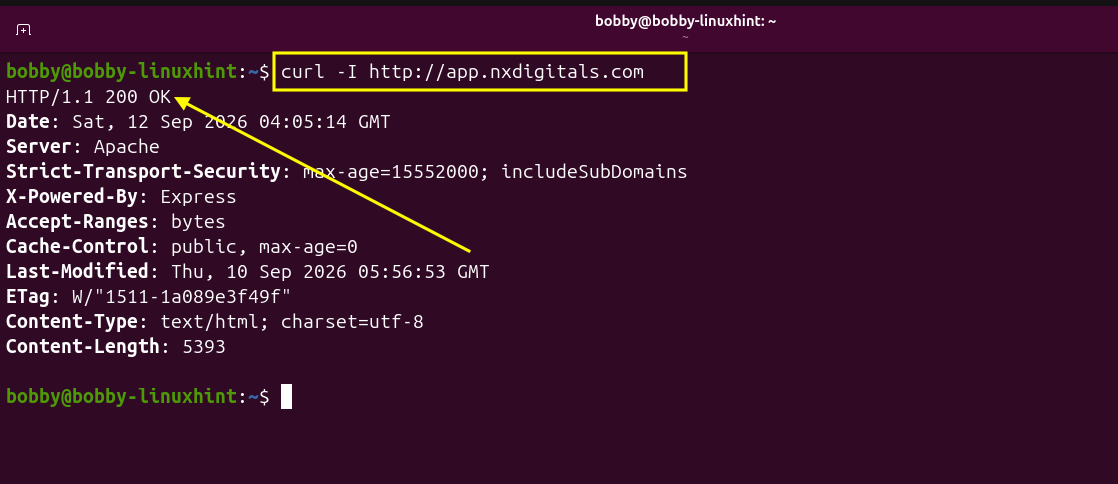
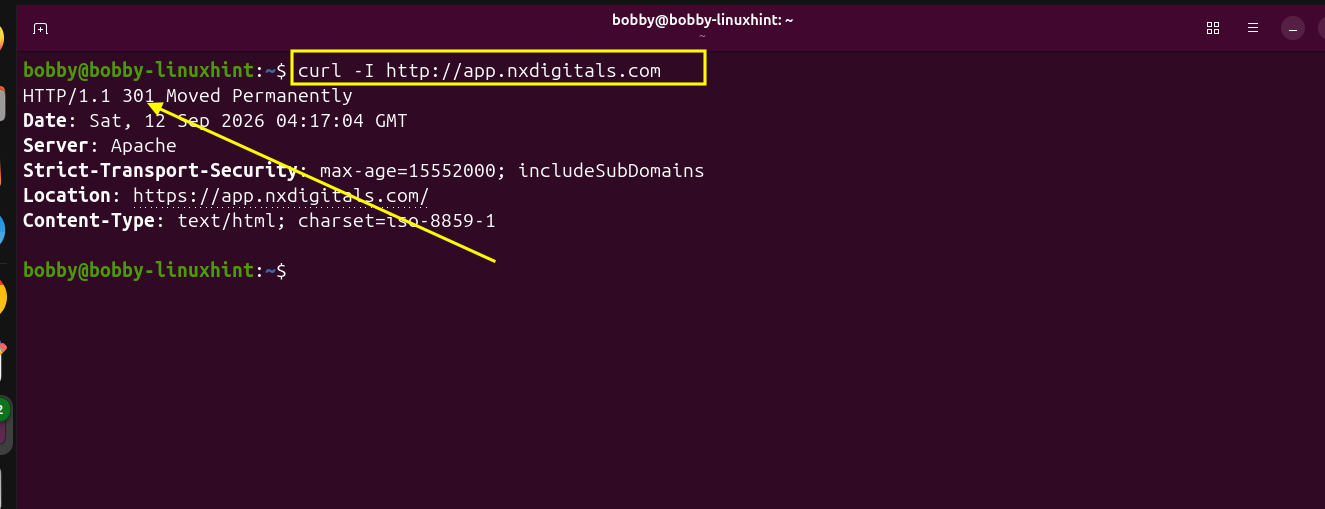
I wanted to check now what happens if I send a HEAD request to the url with http instead of https. I also got back a 200 OK response which means that SSL is enabled but not enforced.
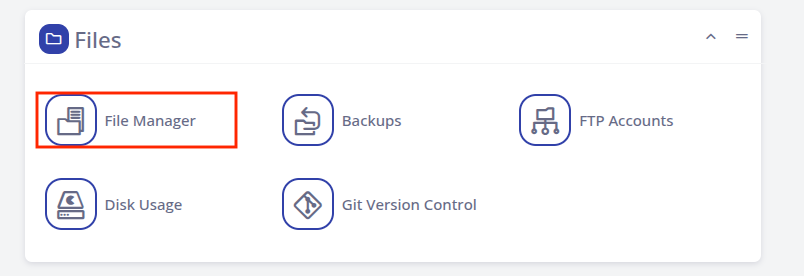
The perfect solution for this situation is to enforce http to https which essentially means that I’d have to introduce a permanent redirect from http to https. To do that, I went to File Manager first.
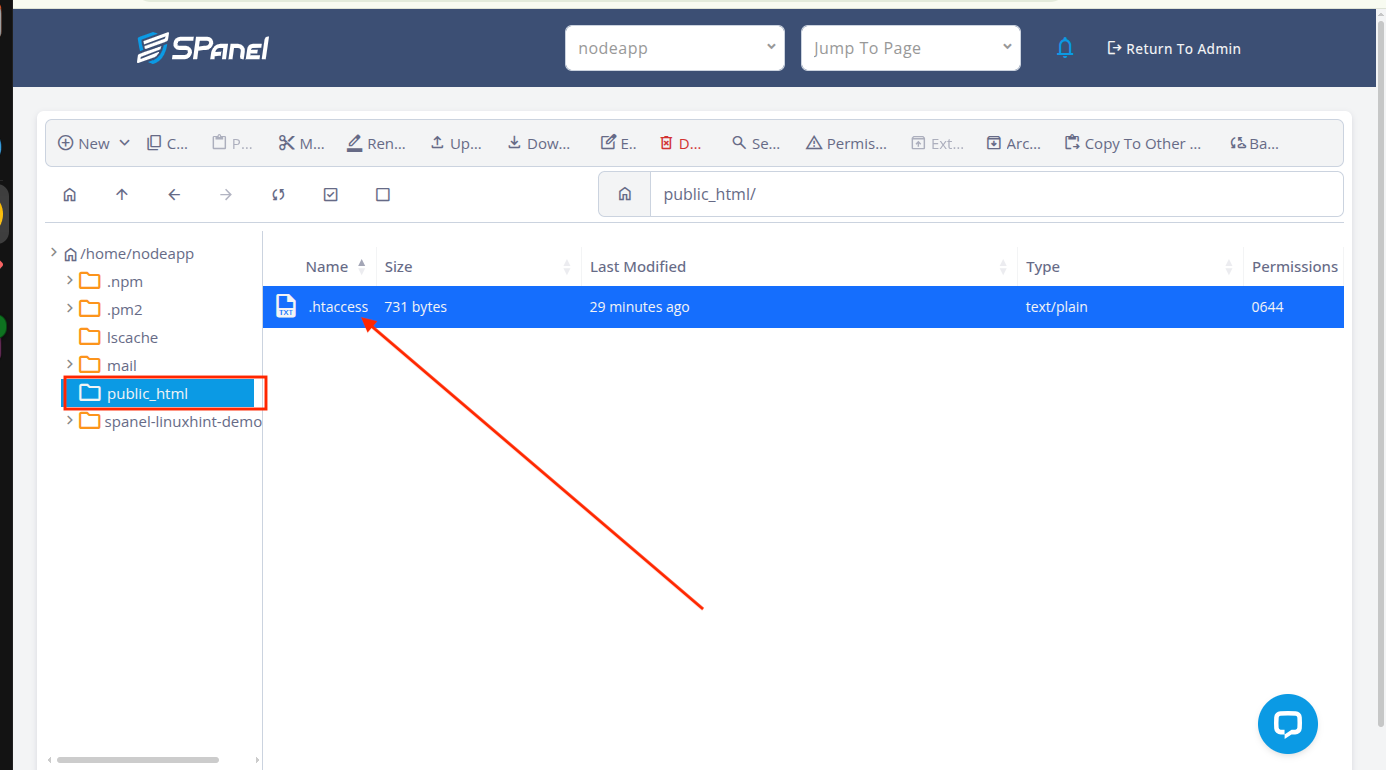
I went to public_html/.htaccess and reviewed what’s in there.
After reviewing I see a couple of things in there, there’s Let’s Encrypt validation for SSL and then there are reverse proxy rules by Apache. SSL validation needs to come first as that is non-negotiable and a simple validation, I don’t need to mix that up and make it complex. Apache proxy rules are responsible to direct the traffic that comes from the internet, to the NodeJS app and then that delivers the response through Apache to the users web browser and as a result application loads there. So, I added following lines after SSL validation but before the Apache reverse proxy rules:
RewriteCond %{HTTP:X-Forwarded-Proto} !=https
RewriteRule ^(.*)$ https://%{HTTP_HOST}%{REQUEST_URI} [R=301,L]
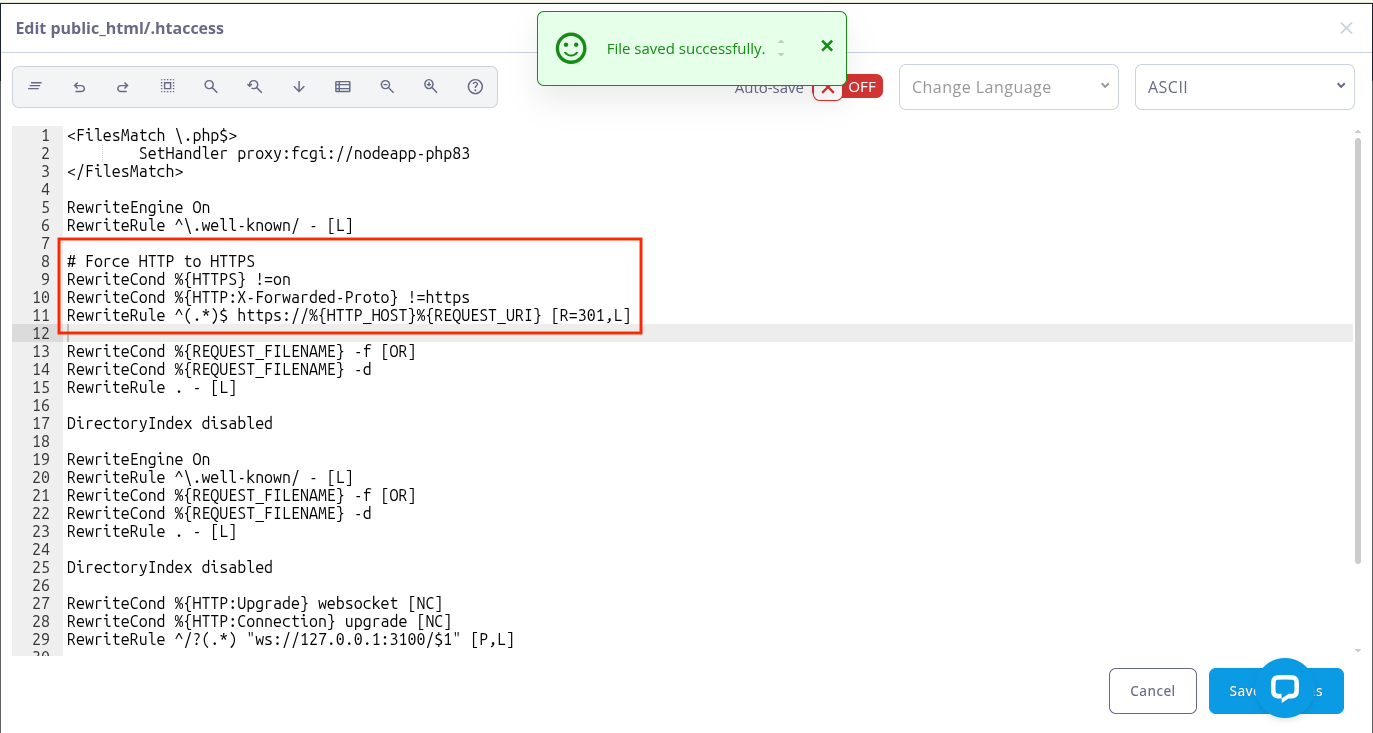
After saving it, I went back to my terminal and again made an http request and this time I got back a 301 response which means that now it’s been redirected to https permanently.
9- I Enabled Website Monitoring
I went to Website Monitoring in my SPanel account.
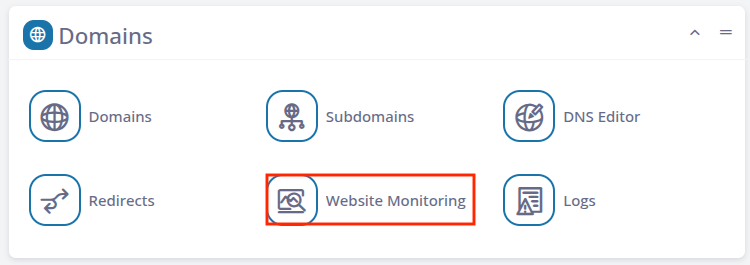
and noticed it was disabled so I had to enable it, for that I clicked on three dots below Actions and clicked on Edit:
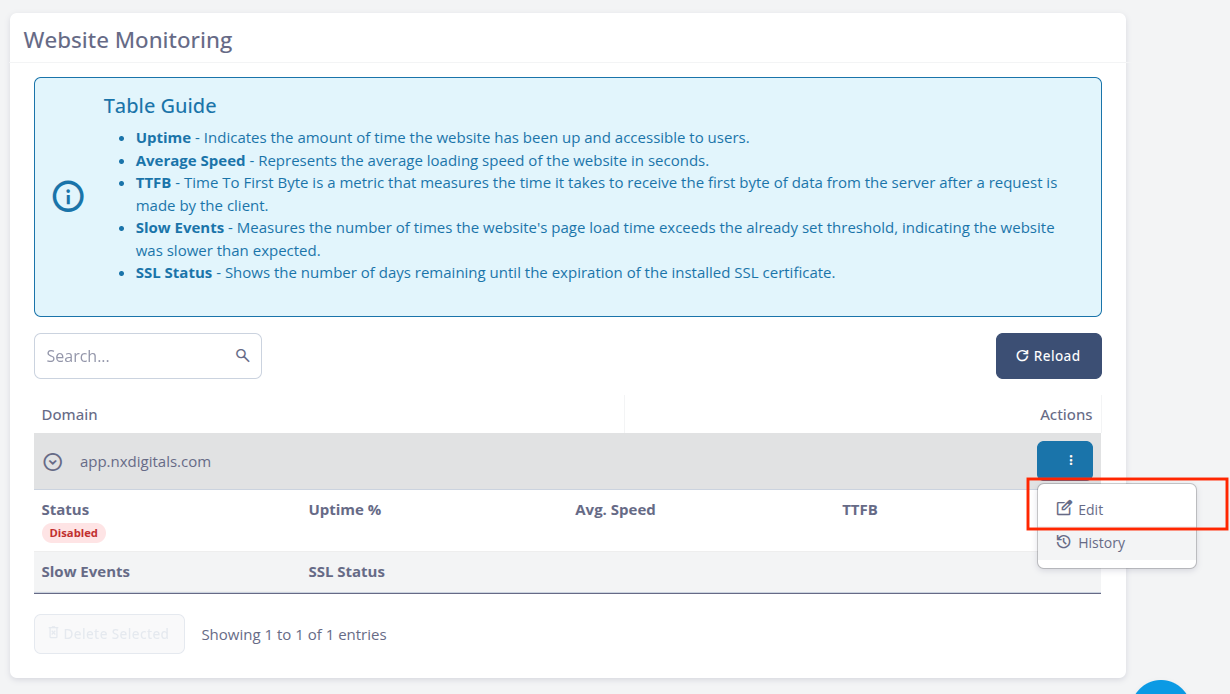
I turned on the option Enable Monitoring and it gave me fields to fill in. I entered my Contact E-mail and then set Check Interval to 5 minutes which means that every 5 minutes SPanel monitoring tools will check my website. 5 minutes is not too much and it’s not too little, I am not hammering the site every second, it kinda relaxes every 5 minutes and I am not checking after 2 hours which in case of a problem, the problem doesn’t sit for hours and I am notified within 5 minutes max. I turned Monitor Website Speed ON and then set the Speed Threshold to 3 seconds as my website was loading in 0.09 seconds so that’s like a 30 times threshold in comparison to the actual load speed. If after 3 seconds the website doesn’t load then clearly there is a problem and I’ll be notified via email. I turned Check SSL ON which means in case of a problem with SSL it’ll notify me. I also want SPanel to Monitor Website Health, so I turned that option ON. So, I need to give some text in Check Text, which means that the website is loading perfectly and that page is loaded on which there is a text that can be checked. So I picked up the text Application healthy. If this text is not there on the page, it means there is an issue with the app and I’d be notified. I clicked on Change/Save.
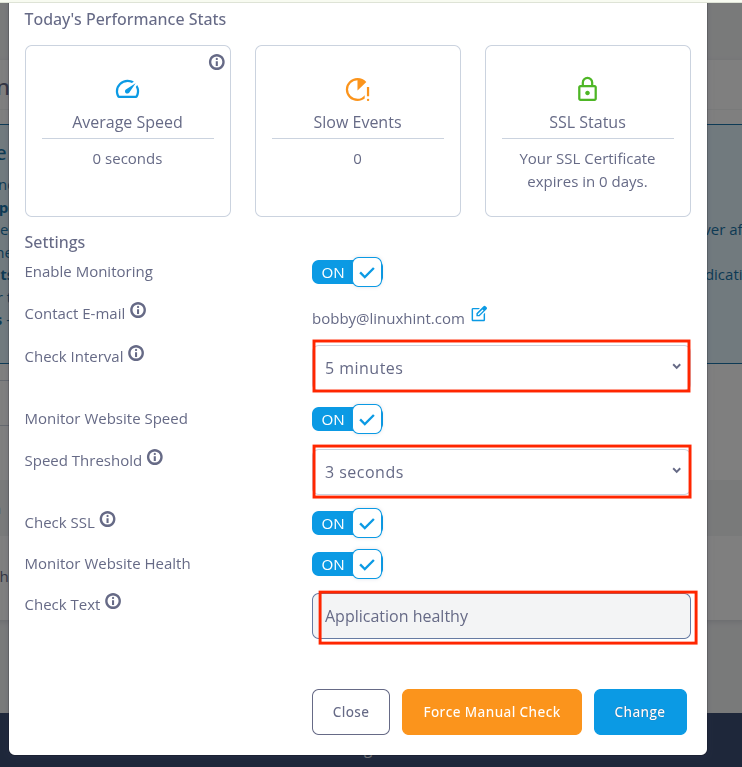
SPanel can monitor the app constantly without me having to utilize any external monitoring tool or service. I liked it! Monitoring has been enabled successfully.

10- I Inspected Some Logs
Since SPanel handles much of the hosting layer, I wanted to see if I can check some logs. So I went to Domains:
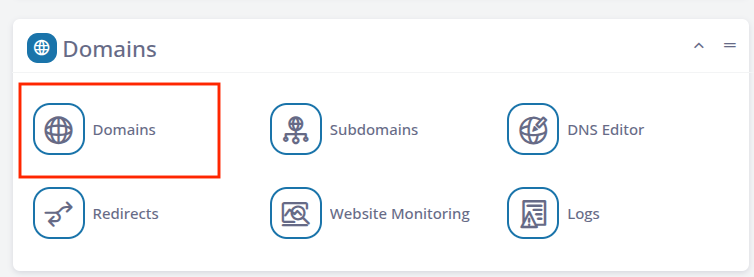
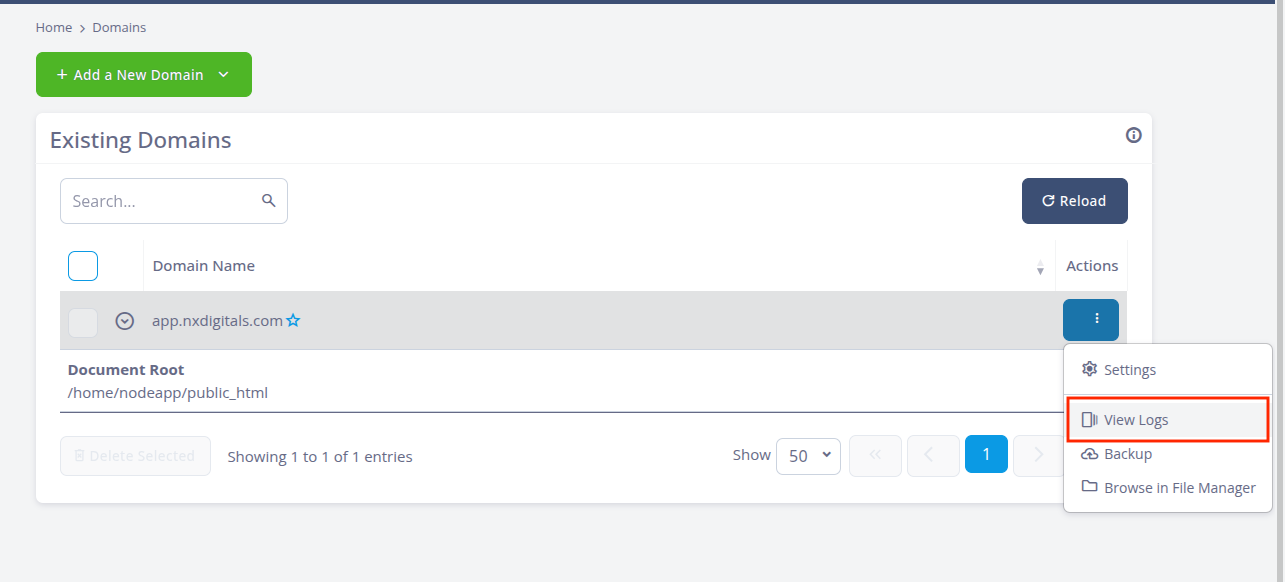
I clicked on three dots under Actions and clicked on View Logs.
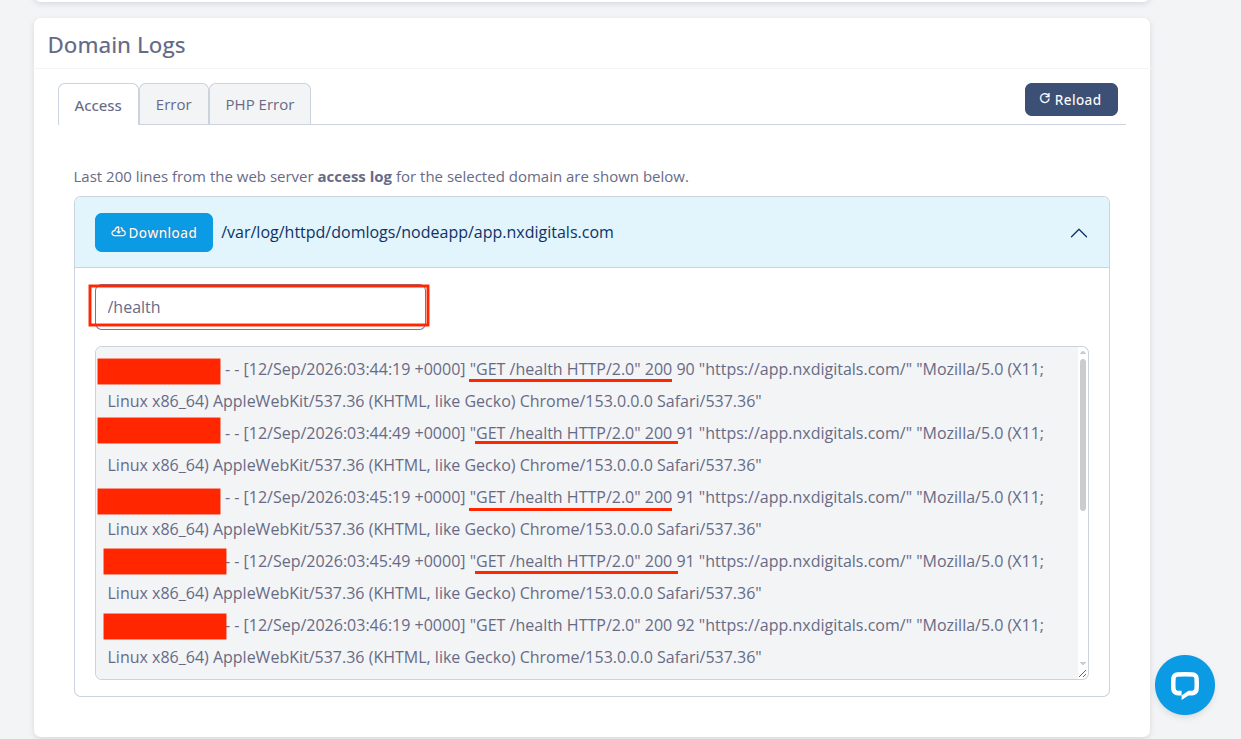
I have Access logs, Error logs and I can check them. So as a test, I searched for /health and I saw 200 OK responses which means everything worked perfectly. This is where I can come to identify any errors as well in case my app has issues in the future.
11- Check CPU, RAM and Running Processes
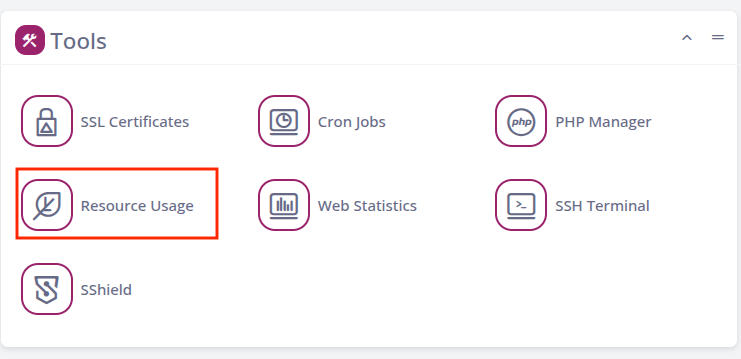
I want to check how many resources my app is using and is there a way I can observe the usage. SPanel offers this inside the hosting account, I went to the Tools section and clicked on Resource Usage.
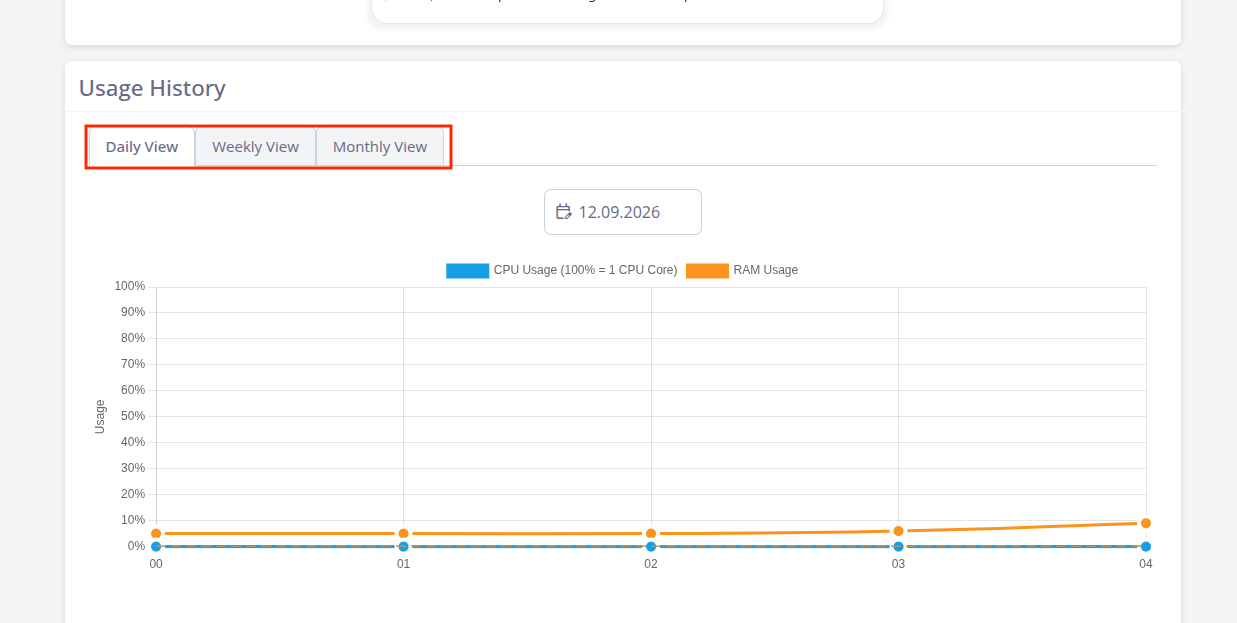
I can view my usage history such as daily views, weekly and monthly views. In case there is a spike in the usage of CPU or RAM then I can also investigate it here. Right now it shows negligible CPU usage and very little RAM usage but if in future more traffic arrives then I can come here to view CPU and RAM usage and if everything is okay.
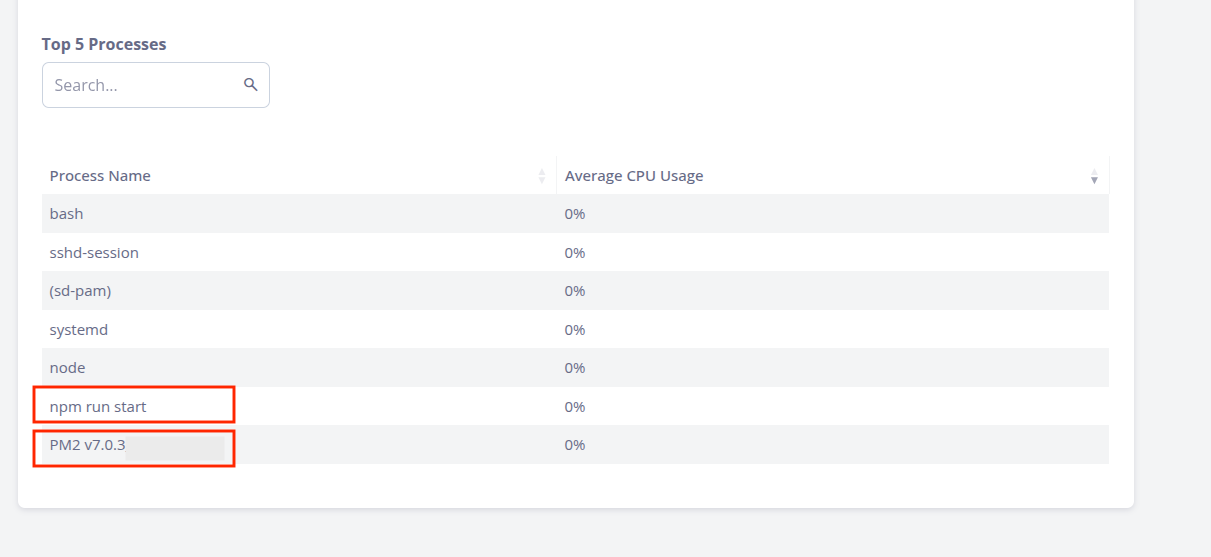
I can also view top processes here, as I know I have a node app running so it’s inevitable that I’d have npm and PM2 processes here.
12- Backup and Restore in SPanel
A backup is useful when you make an unintended change and want to go back to a point in time where you were satisfied with your app state. A backup is only worth it when you can actually restore it. When you start new, make sure you give SPanel enough time to create your daily backup before you make any change.
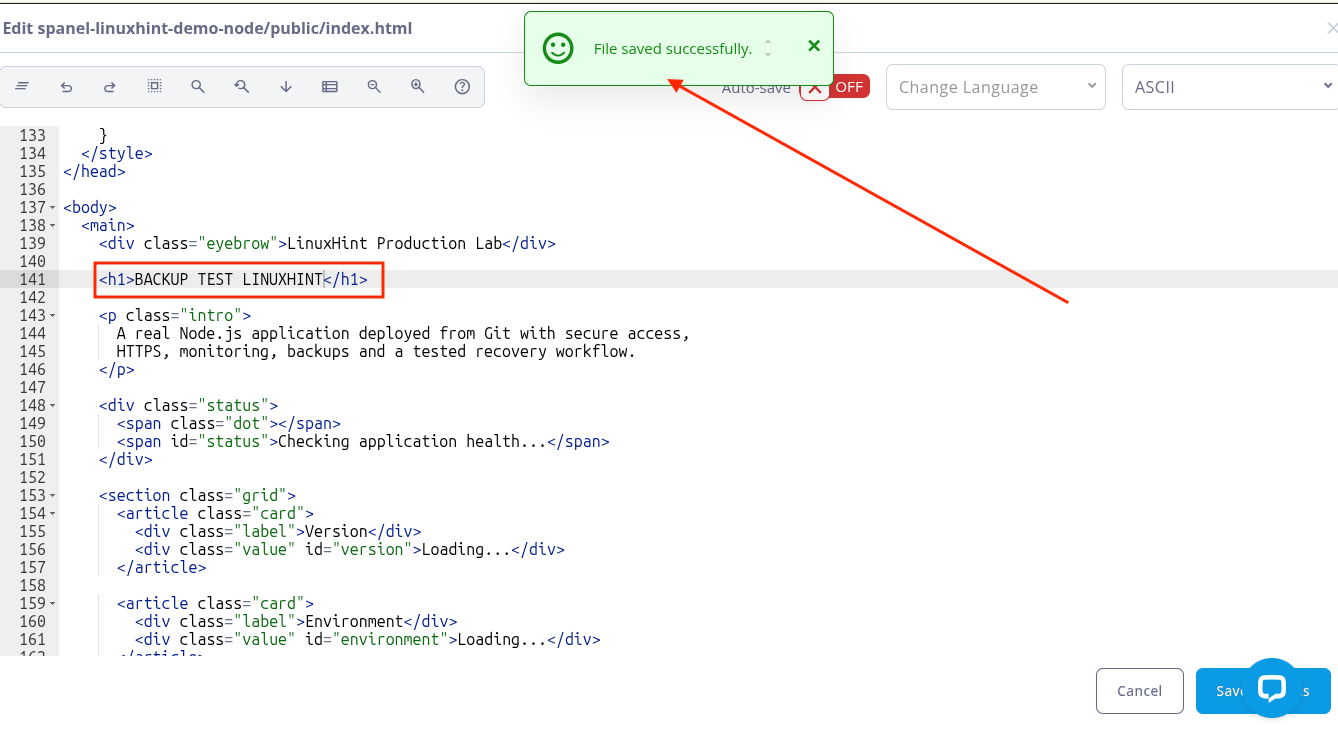
Anyway, I went to File Manager and then went to spanel-linuxhint-demo-node/public/index.html.
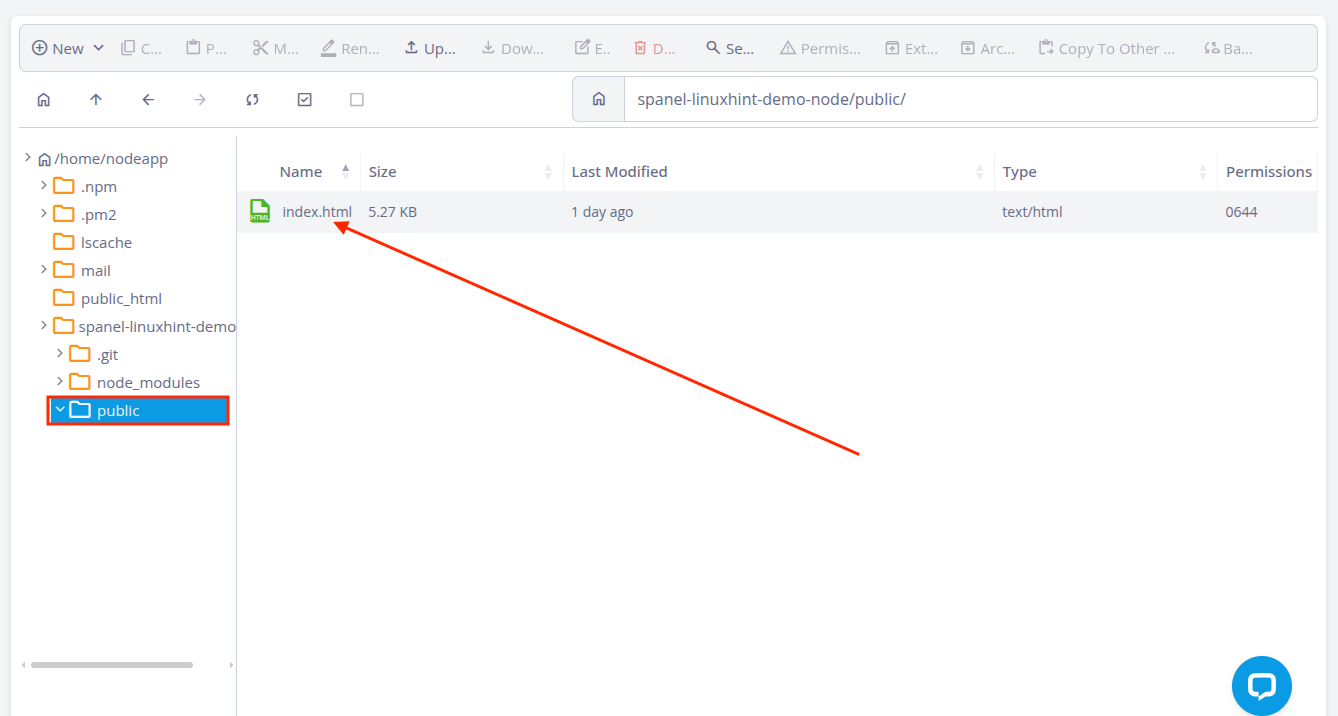
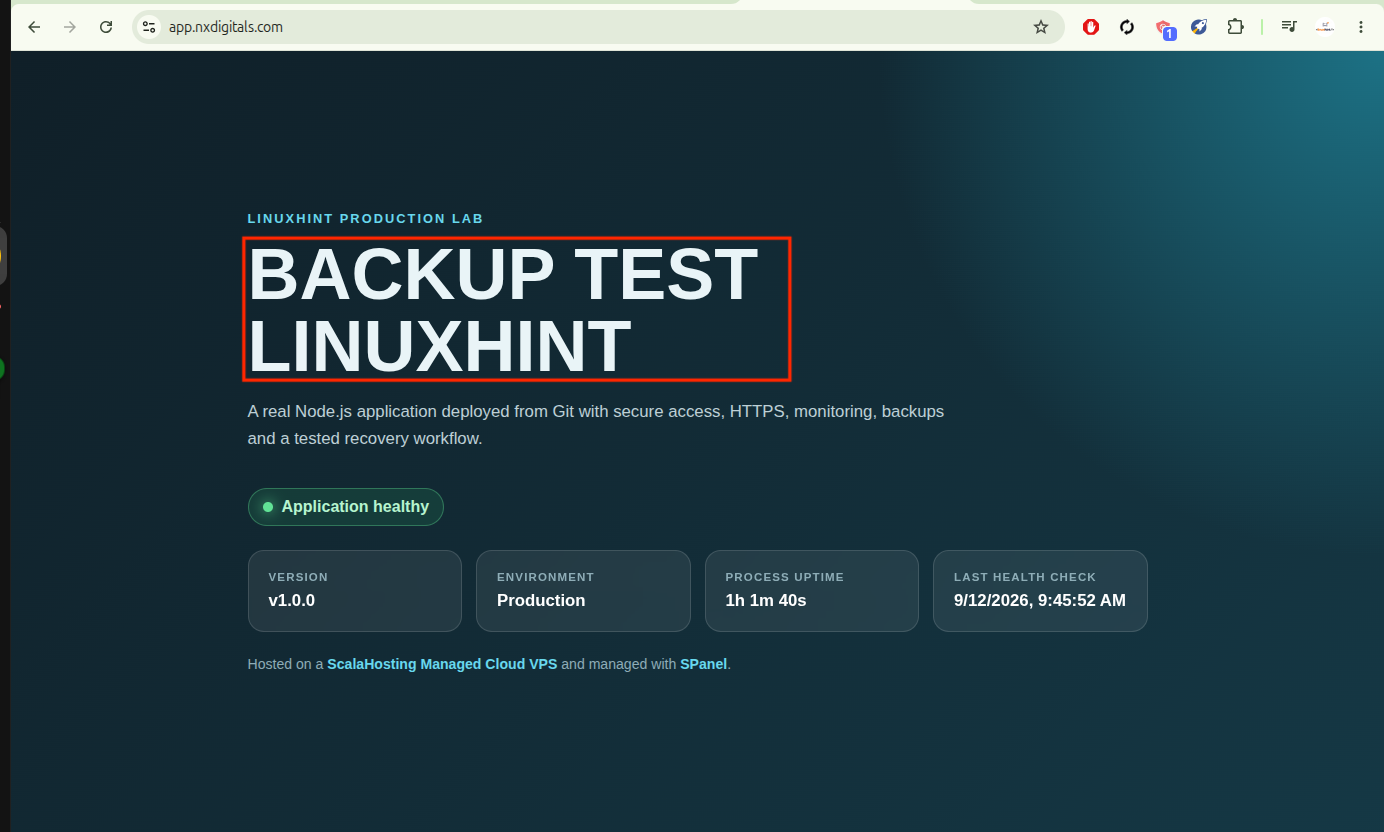
Then I made a visible change to H1 heading and changed it to BACKUP TEST LINUXHINT. I saved the index.html file.
Now lets say I didn’t want this change, I want the app just like the way it was before. I went to the Files section and from there clicked on Backups.
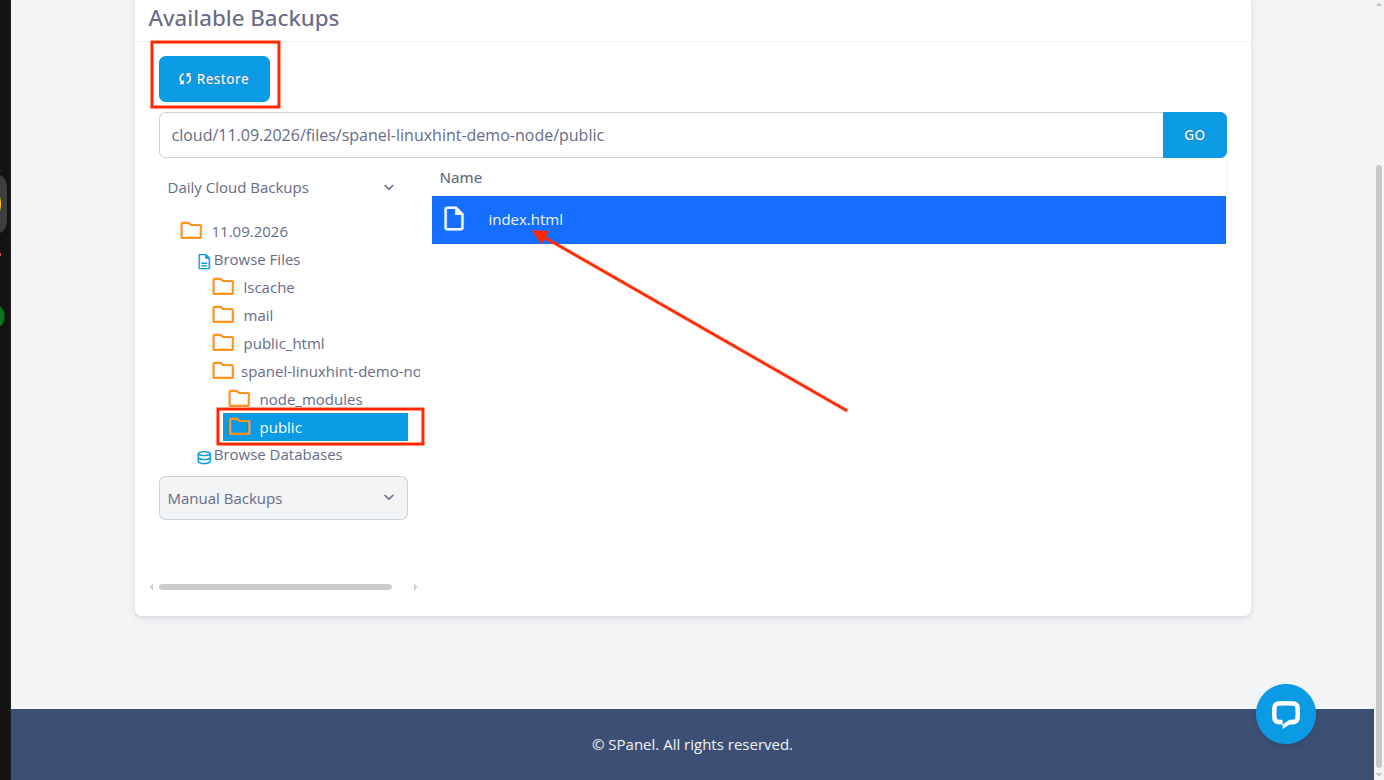
In the daily cloud backups, I selected the exact file index.html that I wanted to restore and then clicked on Restore.
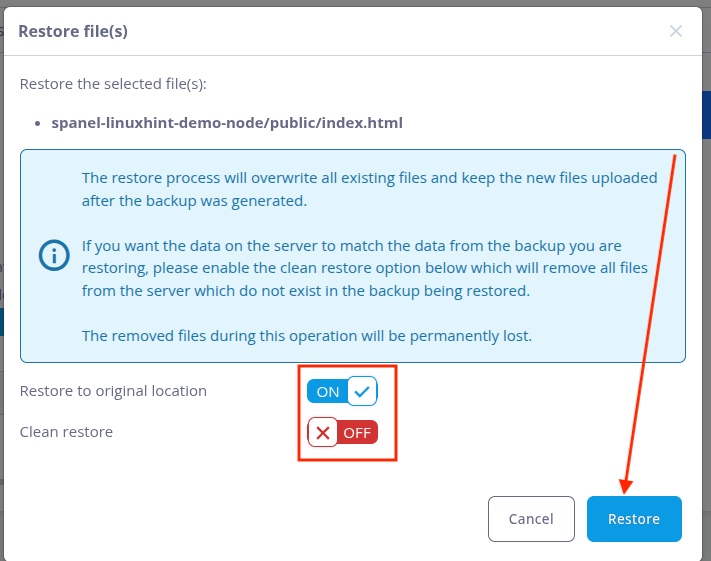
Here I turned ON the option Restore to original location. I kept the Clean restore option turned OFF as I only want that specific file to restore. It’s a test but in case you have made other changes in other files and you don’t want them to restore and you only want the selected file to restore, then keep Clean restore option turned OFF. I went and clicked on Restore.
I got this message where it told me that Data was restored successfully.

I went ahead and opened up my website and I could see that my backup has been restored successfully and changes have been reverted back and they are visible.
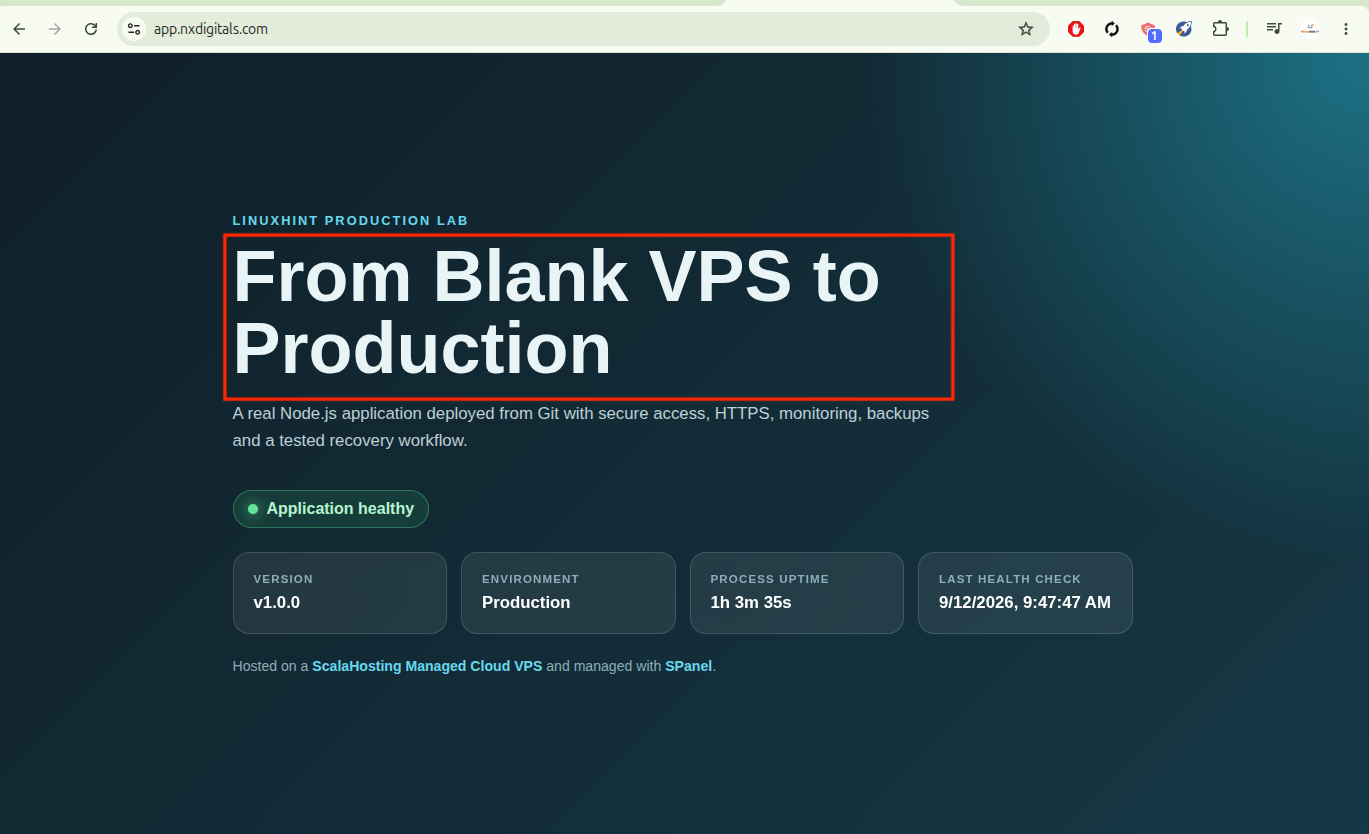
13- Final Health Verification
I just needed to do a final health check before I wrap this up, this is necessary because I wanted to be sure that after backup restore, my app is running fine. For that matter, I did a quick health check using my own Ubuntu’s terminal:

This was a success, health check passed which means my app is running okay.
Conclusion
We created an isolated hosting account, then configured DNS, then cloned and verified the repository, then deployed the node app, and then did a few checks and production hardening by enforcing http to https, setting up monitoring and testing backups restoration. I did a YouTube video explaining all of this in much detail. ScalaHosting’s SPanel was used in all of this and it handles much of our hosting layer without compromising on our Linux environment access which is pretty good for Linux enthusiasts like me.