A list box is an HTML form element that allows users to select one or multiple options from a predefined list. In other words, it shows a bunch of choices in a compact and organized manner. The developers utilize the list box on the web page to create a user-friendly section, use space efficiently, and provide a clear representation of available choices.
This article demonstrates the process of making an HTML list box.
How Do I Make an HTML List Box?
On a webpage, the list box provides the freedom to pick one or multiple options from a predefined list in a structured way. The list box can be utilized in the places like form submissions, to implement filtering or search features, in administrative or user settings sections.
Example 1: Selecting Multiple List Box Items
An example is considered to create a list box in which CSS properties are also applied for better representation. Visit the below code snippet:
<style>
.scrollable-list {
max-height: 200px;
overflow-y: auto;
border: 1px solid gray;
padding: 5px;
}
option{
padding:20px;
}
</style>
</head>
<body>
<div class="scrollable-list">
<select name="teamMembers" multiple>
<option value="option1">Option 1</option>
<option value="option2">Option 2</option>
<option value="option3">Option 3</option>
<option value="option4">Option 4</option>
<option value="option5">Option 5</option>
</select>
</div>
</body>
The explanation of the code snippet:
- First, create a “<style>” tag and Inside it selects the “scrollable-list” class.
- Next, provide the values of “200px”, “auto”, and “1px solid gray” to the CSS “max-height”, “overflow-y”, and “border” properties, respectively. These properties create a visual separation of the list box from other elements.
- Then, set the value of “20px” to the “padding” property and assign it to the HTML “option” element selector.
- After that, create a root HTML element and set the value of “scrollable-list” to its class attribute,
- Also, use the “<option>” tag to set the options or list items to the list box.
After the compilation, the display is shown below:
The output shows that the HTML list box has been displayed on the webpage.
Example 2: Selecting of Single Option And Managing the Number of Options
The developer can also restrict the number of options to be displayed at a time and with the help of scrolling the user can see the remaining options. Along with it, the list box can also be restricted to selecting one option at a time.
Now updating the above-stated code according to the new requirements, the code snippet looks like this:
<select name="shoppingCart" size="3">
<option value="cartItem"> Cart Item 1</option>
<option value="cartItem"> Cart Item 2</option>
<option value="cartItem"> Cart Item 3</option>
<option value="cartItem"> Cart Item 4</option>
<option value="cartItem"> Cart Item 5</option>
</select>
</div>
In the above code:
- First, the “multiple” is removed to accept only a single option at a time.
- Next, the value of “3” is provided to the “size” attribute to display only three options list and the remaining list items can be seen with the help of scrolling.
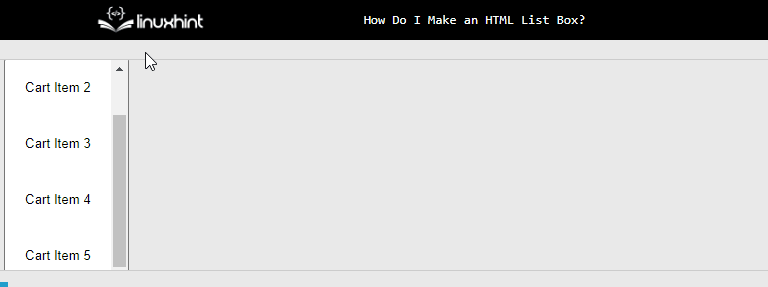
After the re-rendering, the webpage appears like this:
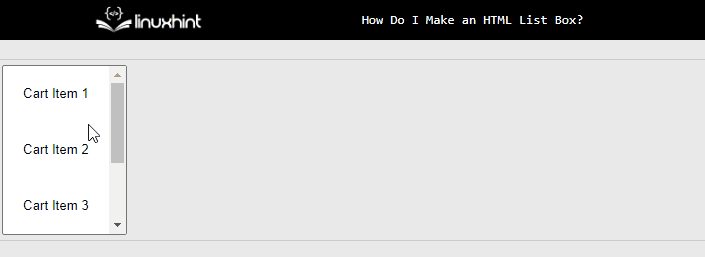
The GIF states that the size of the list box has been set to “3” and now only one item can be selected at a time.
Conclusion
The list box is an HTML form element that allows users to select one or multiple options from a predefined list. And to create a list box, the “<select>” tag is utilized along with the “name”, “multiple” and “size” attributes. The “multiple” attributes allow the user to select multiple options and the “size” attribute specifies the number of options to be displayed in the list at a time. This article has demonstrated the procedure for making an HTML list box.