This article demonstrates how to accept only image files having input type set to file:
How to Allow <input type=”file”> to Accept Only Image Files?
The “accept” attribute is utilized with the input tag that allows users to enter only allowed format type files. It is helpful when files are uploaded or accepted by the form. Follow the below-detailed steps:
Step 1: Create a Form
In HTML, create a form by making two“<input>” fields, and set their type to text. Then, create one more “<input>” field element and set file type. It allows the input field to get a file as input from the user:
<h1> Student Verification </h1>
<label for="stName"> Enter Name: </label>
<input type="text" name="stName" placeholder="Enter your name..."><br><br>
<label for="stDept"> Enter Department: </label>
<input type="text" name="stDept" placeholder="Enter your department..."><br><br>
<label for="stCard"> Upload your Student Card: </label>
<input type="file" name="stCard"><br><br>
<button onsubmit="#">submit</button>
</form>
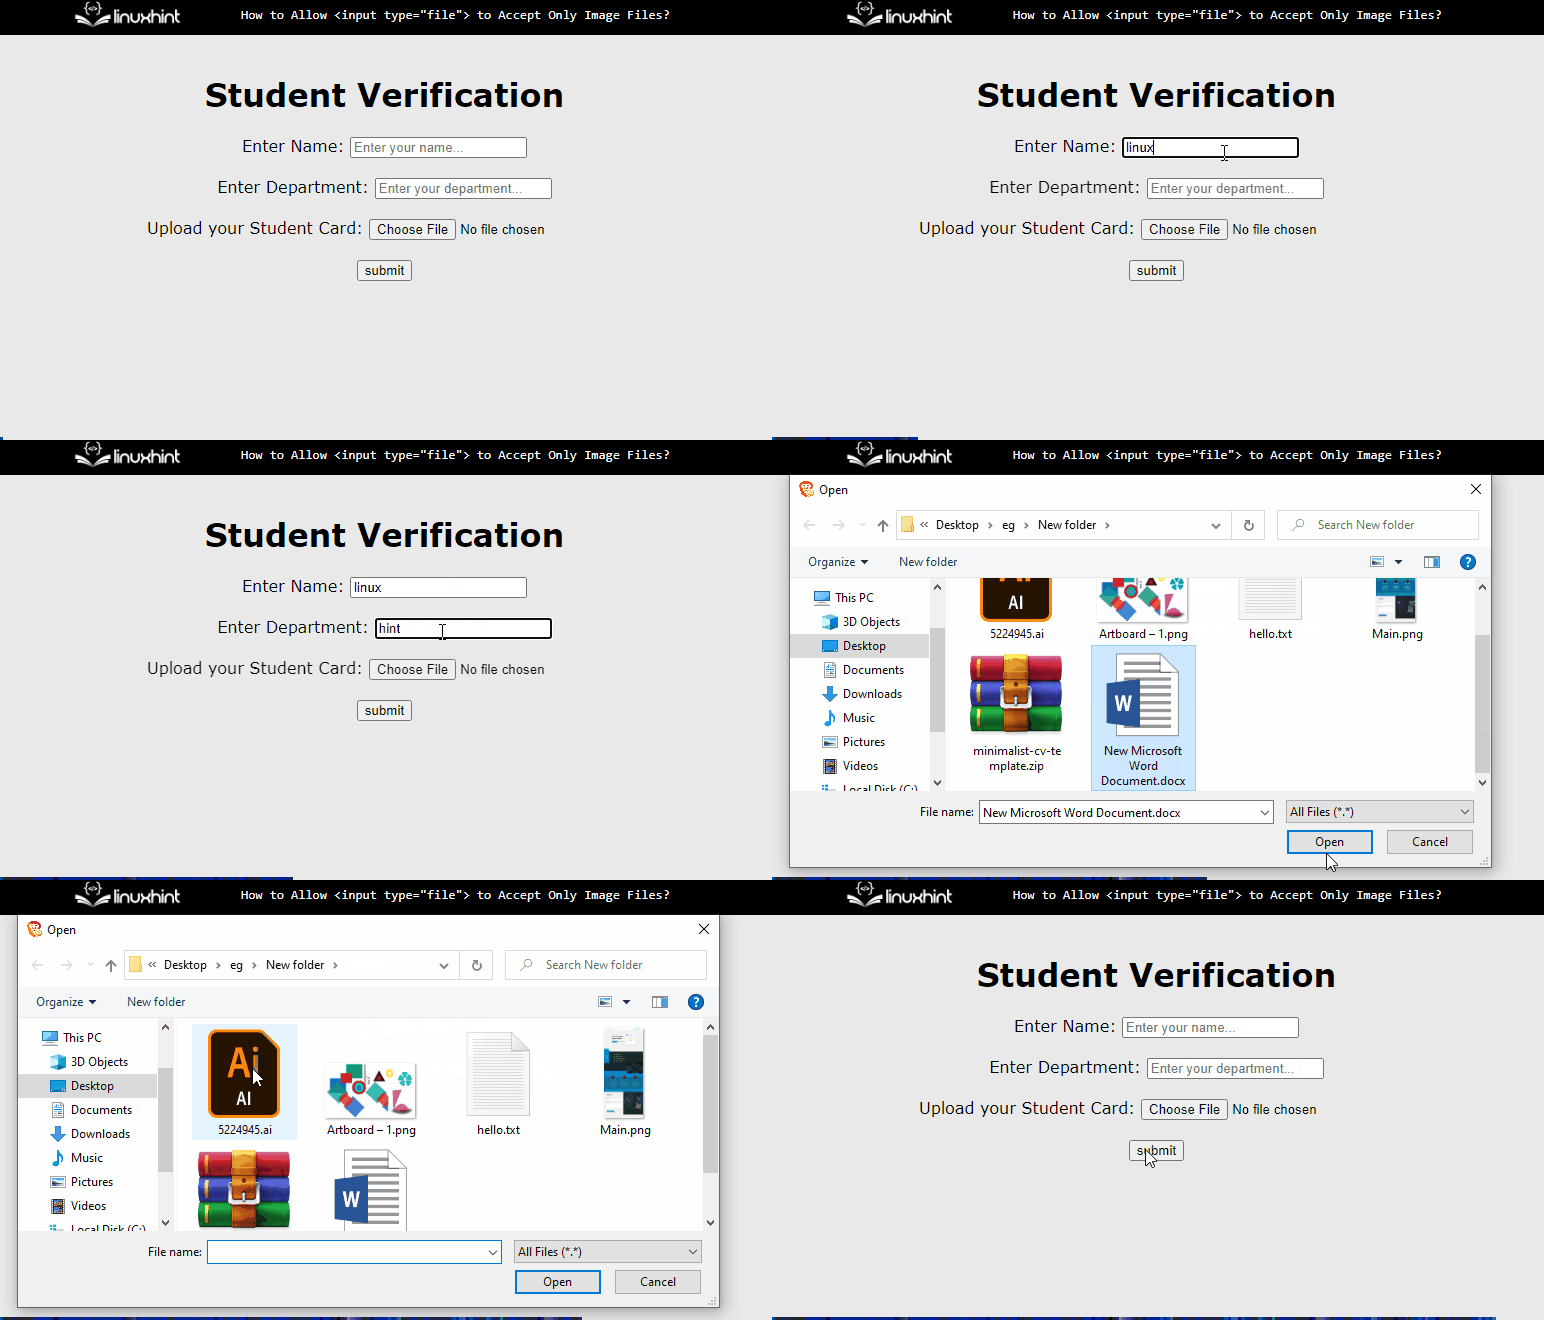
After executing the code, the webpage looks like this:
The output illustrates that the form is created and the file with any format is uploaded by default.
Step 2: Accept Only Image Files
To restrict the user from uploading only image files, use the “accept” attribute with the input field. For instance, the accept value is set to “image/*”. This allows the user to upload all types of image files it also includes a “gif” file in it:
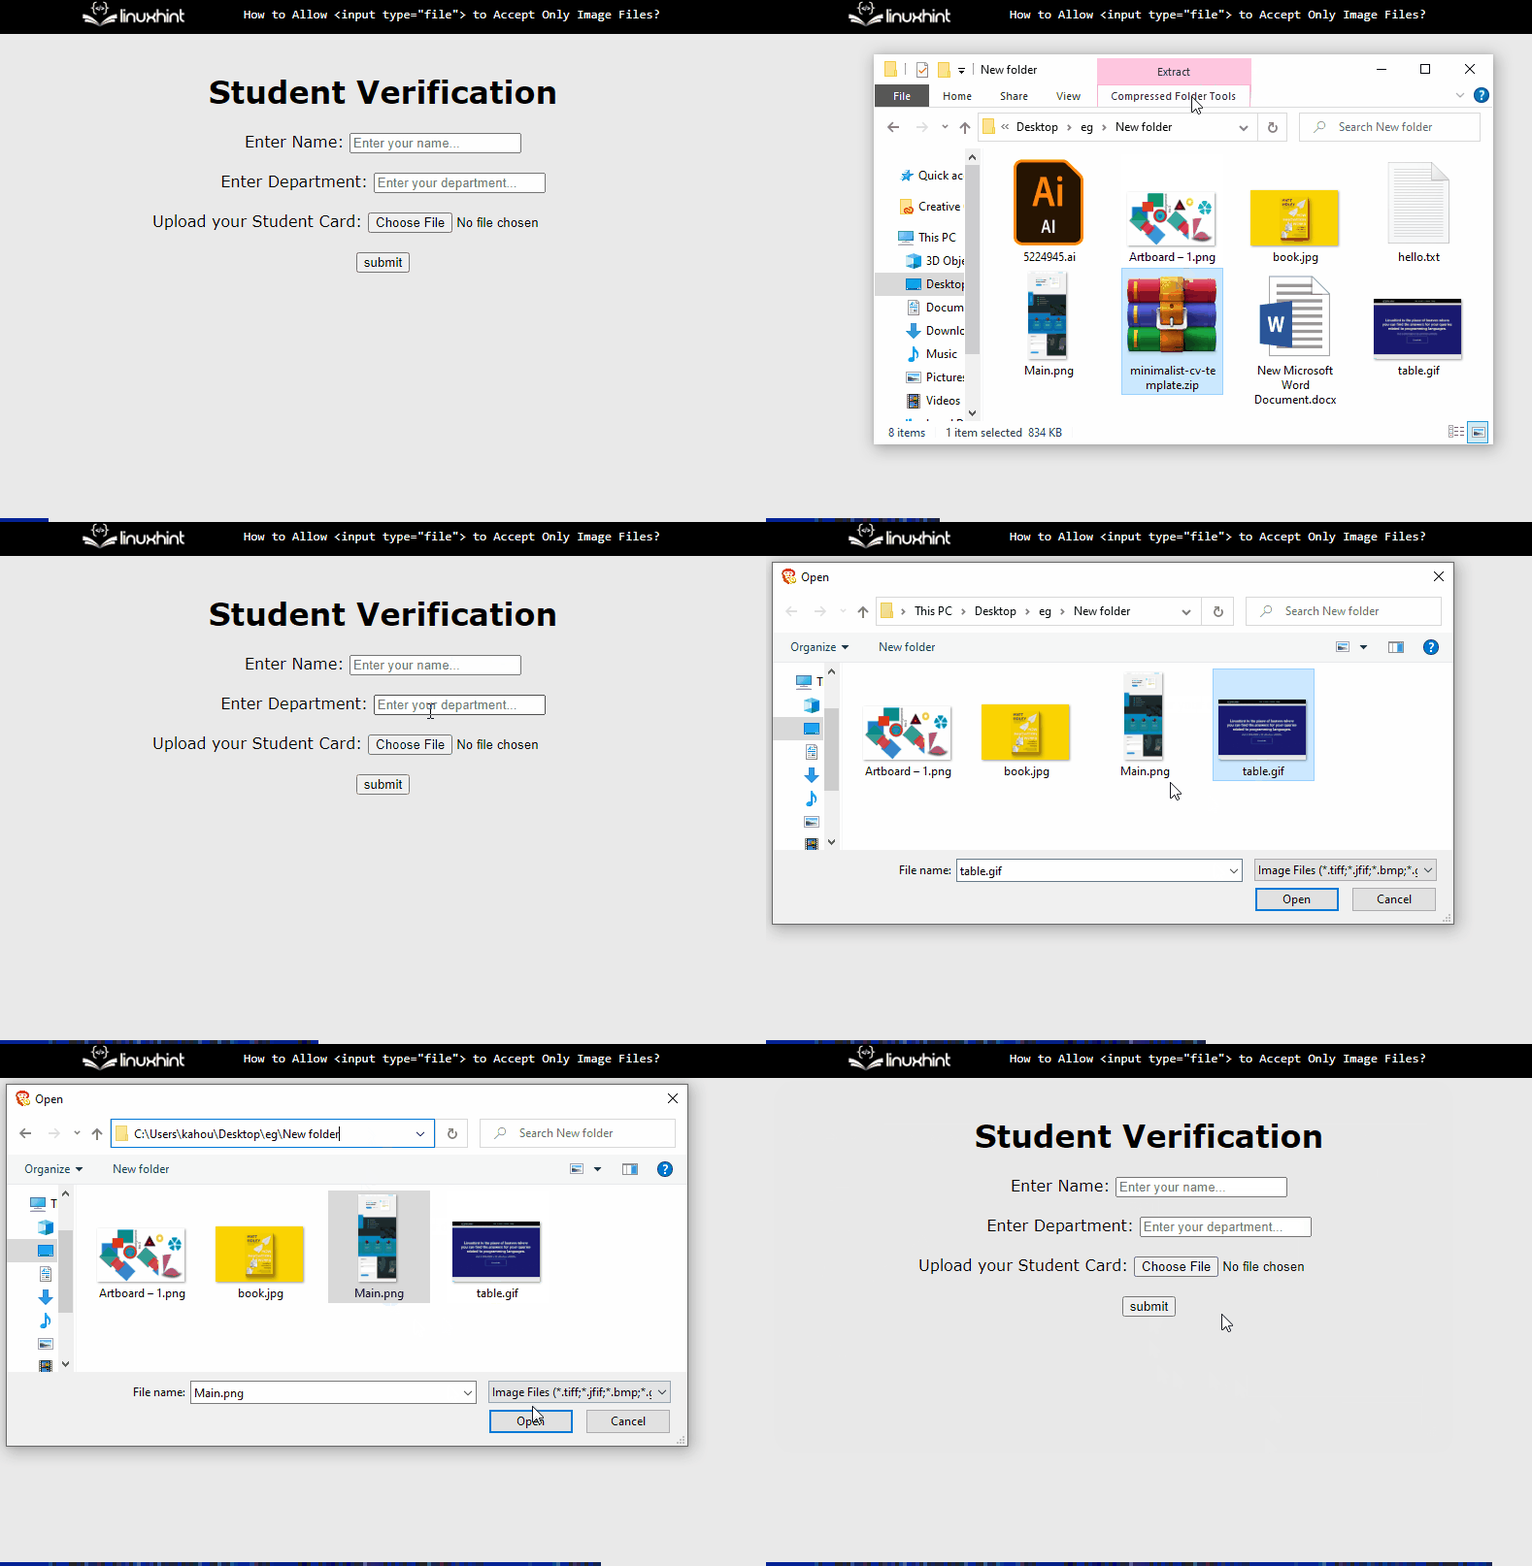
After executing the above code snippet, the output looks like this:
The output displays that only image files can be selected.
Step 3: Accept Only Image Files with Specific Format
In the above step, any image file can be uploaded, like gif, png, jpg, etc. But if the image is needed only in jpg or png format, assign a value to the “accept” attribute. The updated version of the previous code is as below:
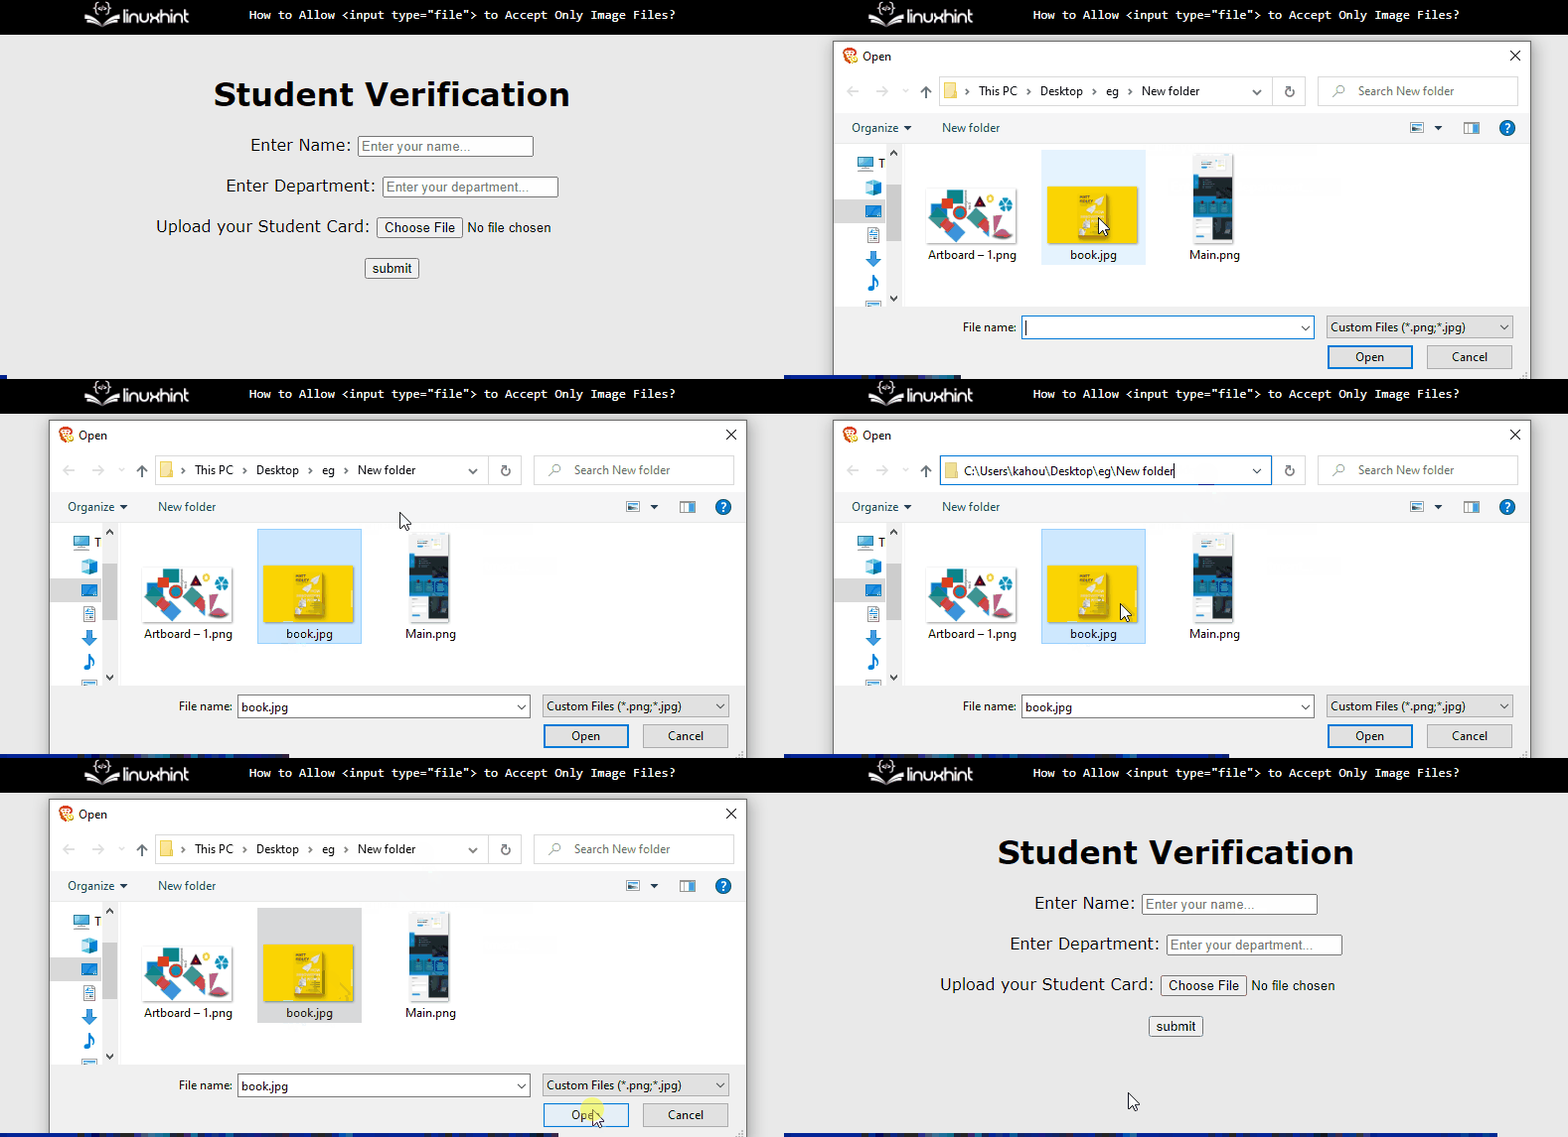
Now only “jpg” and “png” images are uploaded and other format files/images do not appear:
The above output confirms that only “jpg” and “png” are available for uploading only.
Step 4: Adding Multiple Image Files
To upload several images, the “multiple” attribute can be utilized. The updated version of the above code is:
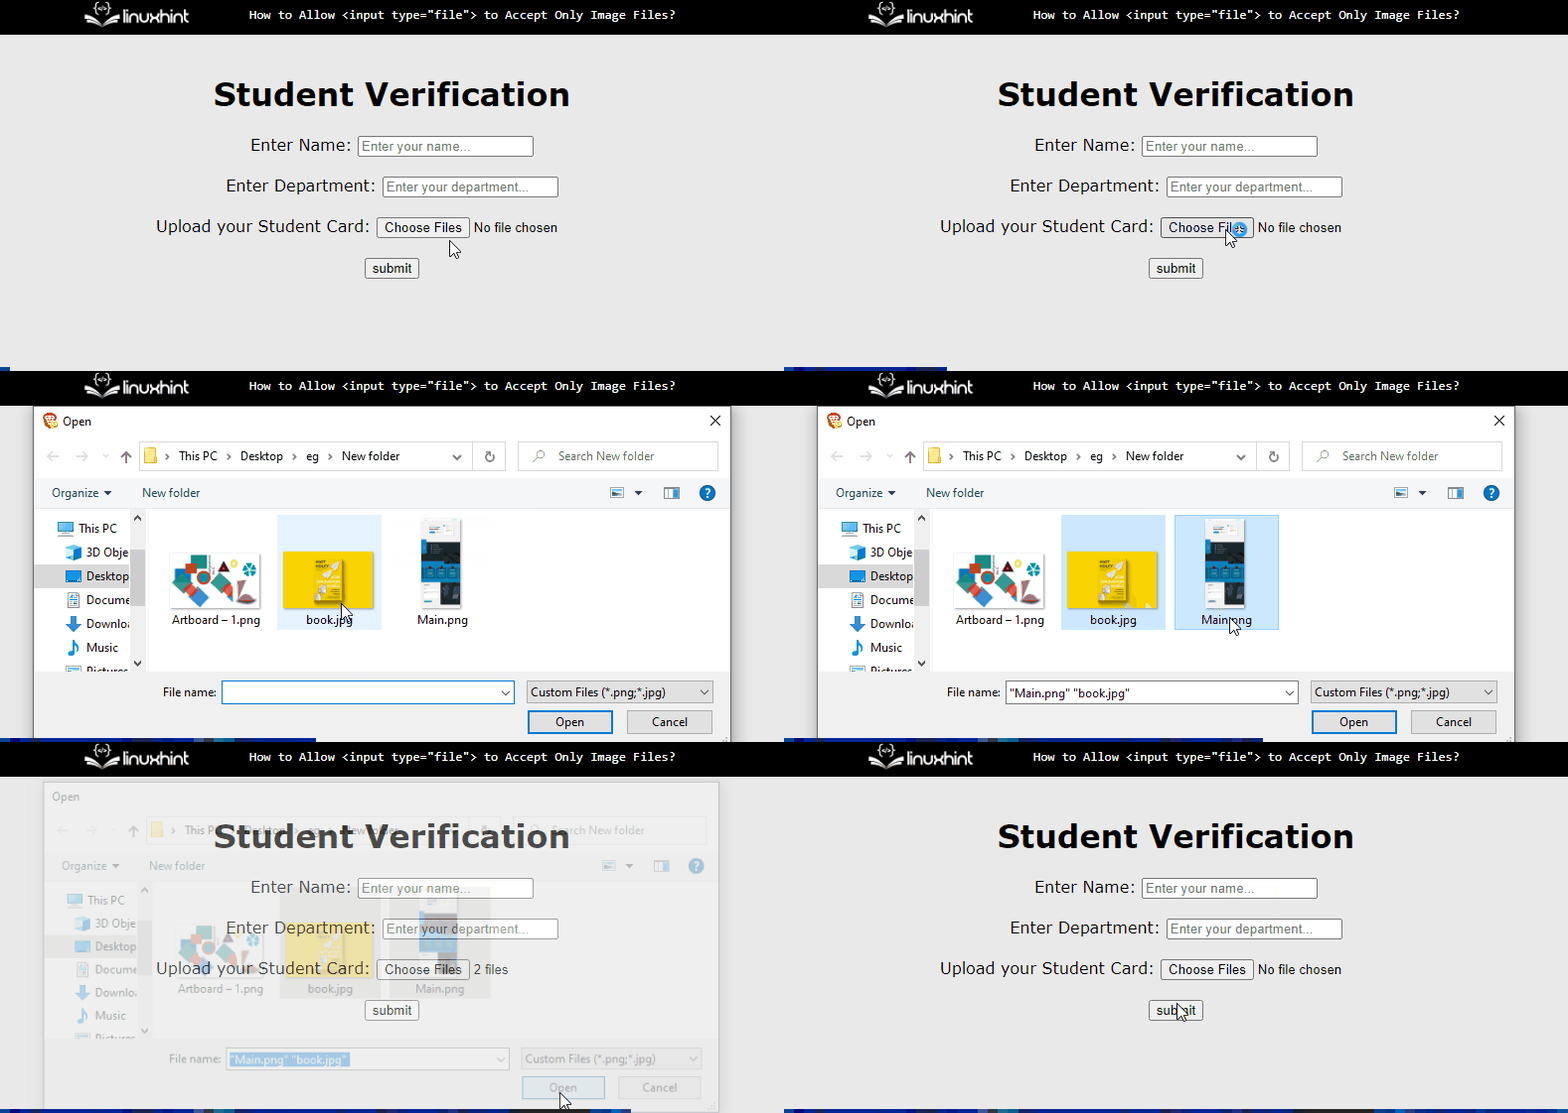
After compiling the code, the display looks like this:
The above output confirms that now multiple images can be uploaded at once.
Conclusion
To accept only image files from input having a “file” type, use the “accept” attribute. It applies restrictions on the type of data that can be uploaded. Users can set its value to “image/*” for all types of images or type the images format name like “.jpg” or “.png”. This article has successfully demonstrated how to allow the input field having type set to “file” to accept only the image file.


