Syntax of Group Selector:
{
// declaration list
}
Example # 1:
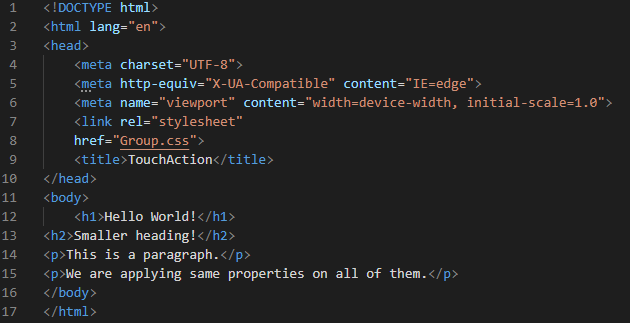
To demonstrate these given examples, Visual Studio Code is being used. We’ll open the new file and choose the “HTML” language, which will create an HTML file. Then, we begin doing it in the freshly created file. When we save the finished code, the “.html” file extension is automatically added to the file name. Once the basic HTML tags have appeared in this newly formed file by adding “!” marks and clicking “Enter,” we are starting by adding the headings “h1” and also “h2”. After these headings, we are putting two different paragraphs in the HTML code. Now, we are producing the CSS file after this and also linking both files for applying the CSS properties to the HTML elements.
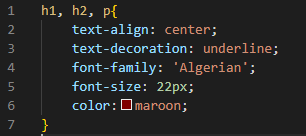
As we want to apply the same style to both the heading and also to the paragraph, we don’t need to put all these elements separately. We just follow the grouping selector and mention all the elements and separate them by putting a comma “,” between them as shown in the screenshot below. We mention all elements as “h1, h2, p”. Now, put curly braces and then utilize properties in these curly braces. When we add properties, then these properties will apply to all elements which we have mentioned. We use the “text-align” property of all of them and set them to “center” by utilizing this one property.
Then, we decorate all these by putting “underline” as the value of the “text-decoration” property. The “font-family” we are utilizing for all these elements is “Algerian”. We adjust the “font-size” to “22px”. Then, we have utilized the “color” property which we set to “maroon” to all headings as well as paragraphs.
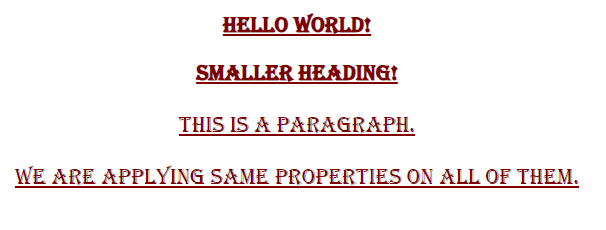
Here is the outcome of the above CSS code. You can see that the color, font-size, font-family, and all other properties which we have utilized above are applied to all headings and paragraphs because we use the grouping selector for all of them. All the styling for these elements is the same here as we have set in the CSS code.
Example # 2:
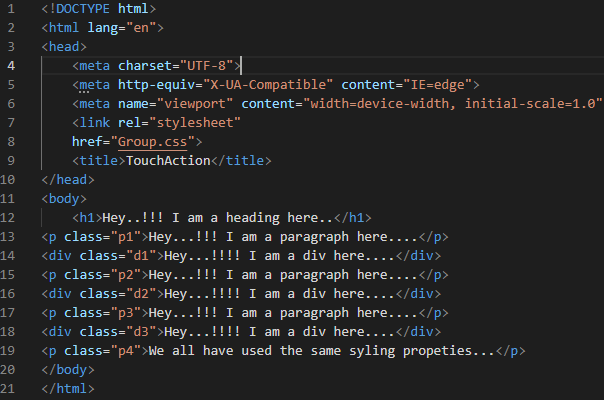
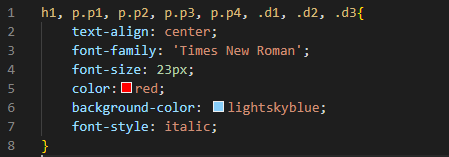
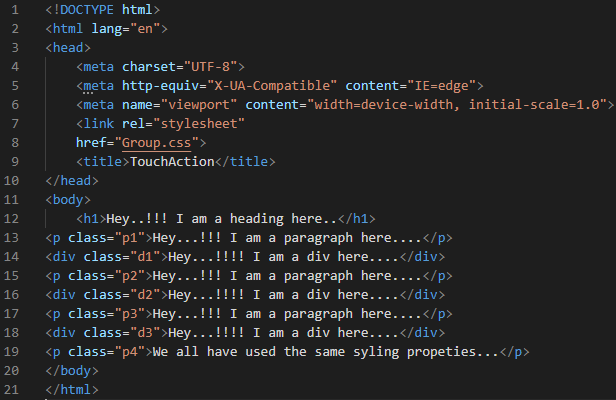
In this example, we are going to create multiple paragraphs with unique names and also multiple divs with different names. We have a heading here before all these paragraphs and divs. We will apply the grouping selector to all these in CSS code.
We are putting the names of all paragraph classes and div classes and also the heading. We are going to apply the same properties to all of them. All the properties which we are going to define here in the curly braces will apply to all these elements which we have mentioned. We are aligning all elements in the “center” with the help of the “text-align” property and use the “Times New Roman” as the value of the “font-family” property. Then, set the “font-size” to “23px” and the “color” for all is “red”. Now, we are applying some “background-color” as “light-sky-blue” and the “font-style” to “italic”. All these properties will be applied to all paragraphs, divs, and also to the heading.
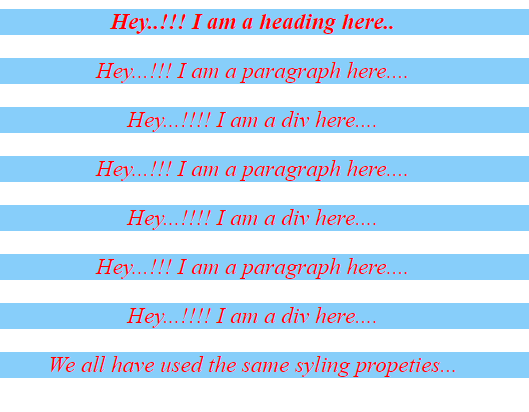
Here, in this result of the above code, all the divs, paragraphs, and also the heading appears in the same style. All the styling properties which are applied on all of them are the same. As we have used the grouping selector for doing this.
Example # 3:
Here, we are going to apply the same properties to paragraphs. All the paragraphs will appear the same. For the divs, we utilize the same properties, so all divs will render in the same style.
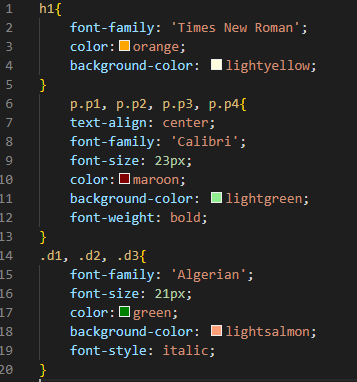
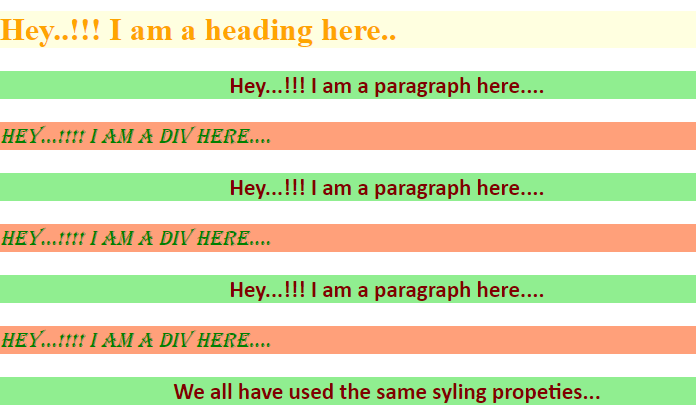
We utilize “Times New Roman” as the “font-family” of the “h1” and “orange” is selected here as its “color”. The “background-color” of this “h1” is set to “light-yellow”. Now, we place all the paragraph names and utilize some properties here. “Calibri” is specified as the value for the “font-family” property and “font-size” will be “23px”. Then, “maroon” for the “color”. Here, we’re putting a “background-color” of “light-green” and the value for the “font-weight” property is set to “bold”. Then, we have the “color” property and we set it to “green” and the “background-color” for all divs is “light-salmon”. We also “italic” them by setting this value in the “text-style” property.
Here, you see that all the paragraphs appear in the same style and all the divs appear in the same style as we have set these values in the CSS code.
Example # 4:
We have three different headings, a paragraph, a div, and also a span class. We will apply the same styling properties to all these in CSS.
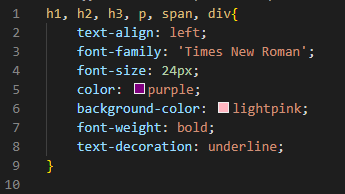
We put the names of all elements on which we want to apply the properties. You can see here how to put these names. We must put the comma between all elements’ names and then place the properties inside the curly braces. We utilize the “text-align” property to align “left” all components. The “Times New Roman” font family is set as the value for the “font-family” property. Then, choose “24px” for the “font-size” that will be applied to everyone, and “purple” is selected for the “color”. Here, we’re applying a “background-color” of “light-pink” and the “bold” keyword is selected as the value of the “font-weight” property. Also, we have used “underline” for the “text-decoration” property to make all of them more appealing.
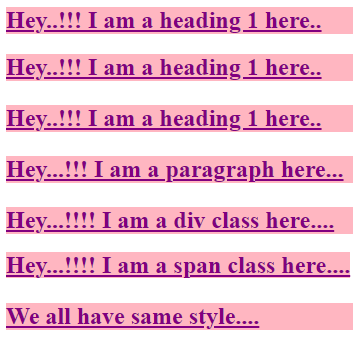
The result of the aforementioned CSS code is shown here. As you can see, all headings and paragraphs and also the span have the same color, font-size, font-family, and all other styles are the same because we used the grouping selector for all of them. The formatting for these items is the same here.
Conclusion
In this tutorial, we have explained that the grouping selector is defined as we can choose multiple components and styles collectively, separating them by a comma. In our codes, we have made use of this concept. In this tutorial, we also discussed how to use this grouping selector and how to set properties inside this. We also gave the results of all these codes. For your advantage, we have developed a full tutorial that includes the code, a thorough explanation, and the results.

