Method 1:
If many users share the system, some of them may wish to serve as administrators and manage the system as a whole. So that no direct effect on the system’s operation and easy sharing across users, the suitable users can be granted administrator privileges and others with non-root privileges. It will be tough for an attacker to break into the system if there is a root user. The usage of sudo and the disablement of the root account might mislead intruders because they would not know which account had admin privileges. Sudo policies can be created and deployed in a corporate network as well as Kali Linux distributions. Having a root password improves monitoring capabilities because it allows you to see what others users have been doing in the system and whether or not any intrusions are occurring.
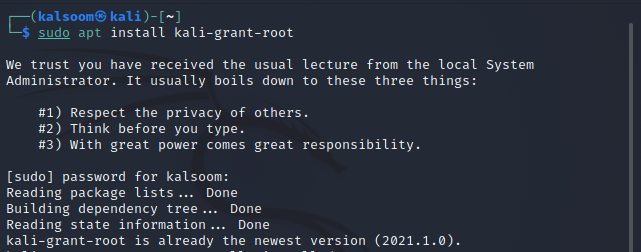
Step 1: To begin, download the kali-root-login package with the apt package manager.
Step 2: Next, use the following listed command to configure the program we have just downloaded.
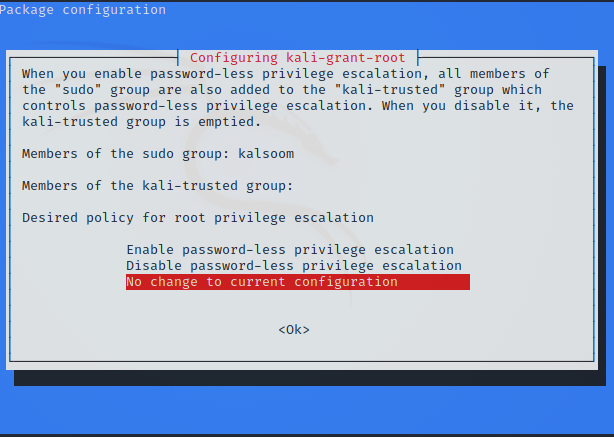
Step 3: Upon the execution of the above command, the following displayed screen will pop up.
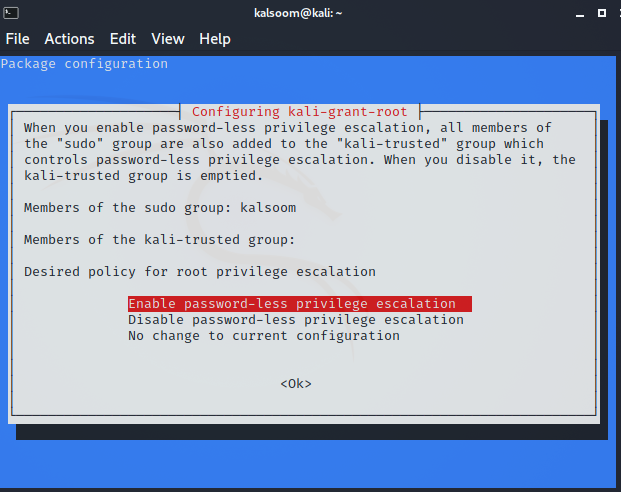
Step 4: Ensure that “enable password-less privilege escalation” is selected before clicking enter to proceed further.
Step 5: Upon section, the user will be added to the “kali-trusted” group, as you can verify from the attached screenshot.
Step 6: It’s as simple as that. You can even use the Sudo command to perform all subsequent commands as root, but you will never require a password. Try logging out and then in, then perform a command that typically requires root access to see whether it works.
Method 2
We connect as non-root users by default on Kali Linux 2021, and we must set the root password ourselves. We do not even know the root password in the first session, so we can’t log indirectly. Instead, we have to log in as a non-user, which is established when we install Kali Linux.
Step 1: To begin, you must first open the terminal and then use this command to determine the current login user.
You can check that the user name is kalsoom in our system.
Step 2: To change the standard user account to the root account, execute the following cited command into the terminal.
Step 3: You can now verify that you are in the root by using the appended command.
The output displays the user name as “root”.
Conclusion
In this tutorial, we learned how to grant root rights to a regular user in Kali Linux. You can use the instructions in this guide to prefix any command with sudo and never have to input a password again. When the Kali developers restricted root login in the latest releases, they must have anticipated that some users would be irritated; therefore, they provided numerous options for restoring capability. One word to the wise when using the root password: keep it safe in your control; otherwise, the system could be compromised. I hope the article will be instructive for you while working on Kali Linux. You can use either of these two methods to get access to root rights in your system.


