In this article, we will show you how to install VirtualBox Guest Additions and share folders between the host OS and the guest OS.
Prerequisites
- Host OS with VirtualBox installed
- Guest OS installed in the virtual machine
For this demonstration, we are using Windows10 as the host OS and Ubuntu 20.04 LTS as the guest OS. To enable sharing between guest and host OS, we will install VirtualBox Guest Additions on the guest OS and then share and mount a folder from the host OS to the guest OS. Let’s get started.
Install VirtualBox Guest Additions on the guest system
To enable file sharing between host and guest, you must install Guest Additions in the guest OS. To do so, the following steps must be taken:
1. Open VirtualBox in your host system and start a guest operating system.
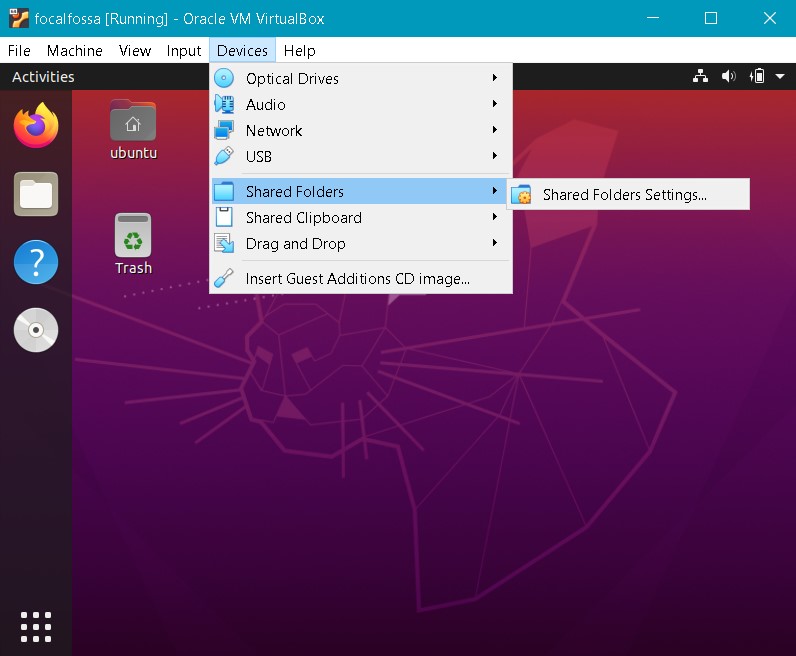
2. On the top menu bar of VirtualBox, click Devices, then select Insert Guest Additions CD image to insert a virtual CD inside the guest system.

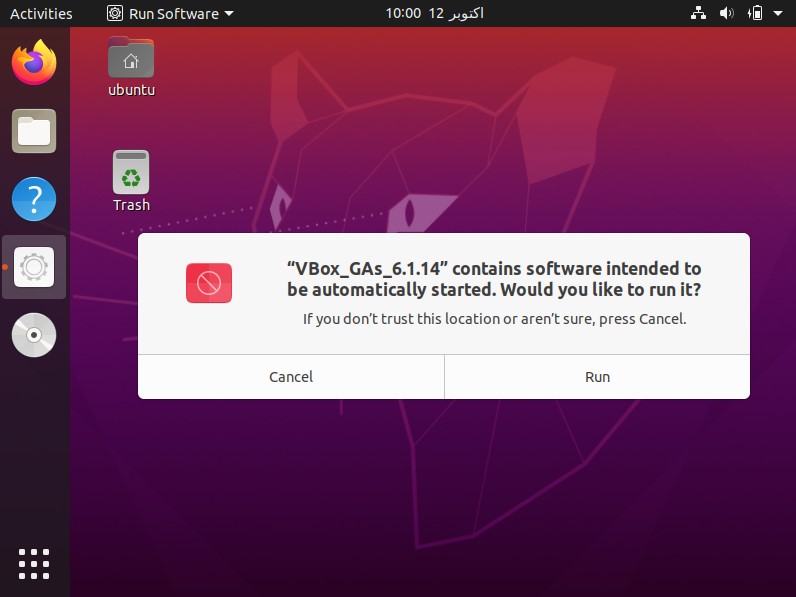
3. The following message will appear. Click Run to install Guest Additions on the guest machine.
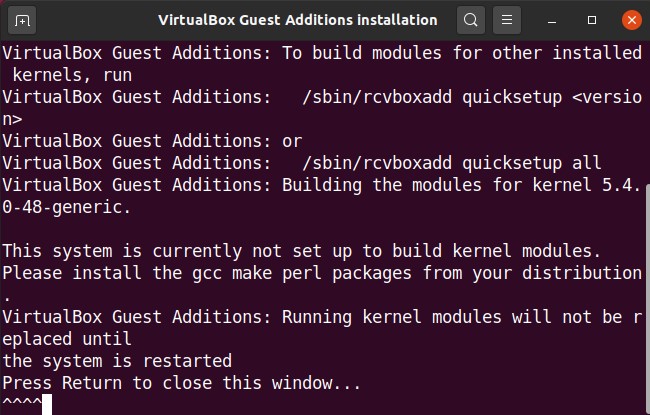
4. Installation will begin, and once completed, you will be asked to press Enter to close the window. Press Enter to finish the installation.
Once VirtualBox Guest Additions has been installed on the Guest OS, you can share folders between the host system and the guest system.
Share folders between host and guest
Now, we will share a folder between the host and guest systems. You can share multiple folders between the guest OS and the host OS. For folder sharing, either create a new folder or use an existing folder. Follow the steps below to share a file or folder between the host and guest systems.
1. From the top menu bar of VirtualBox, go to Shared Folders > Shared Folders Settings.
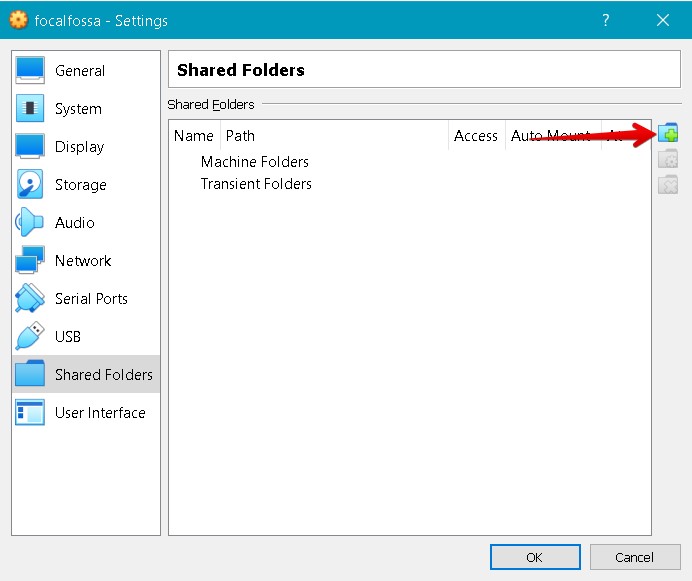
2. You will see the following settings window in your guest system. Click the + button to open the Add Share dialog box.
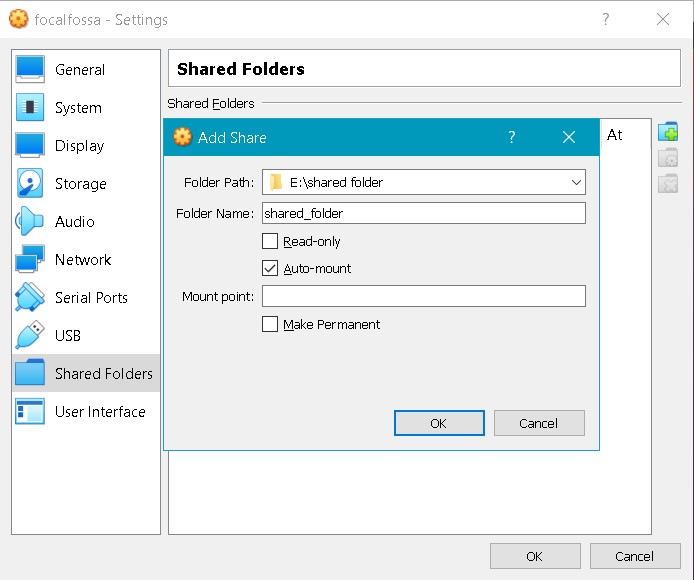
3. In the Add Share dialog box, select the shared folder using the Folder Path drop-down, and choose a folder from your host OS. Then, type a name for your shared folder, and check the Auto-mount box. The Auto-mount option will automatically mount the shared folder on the next boot.
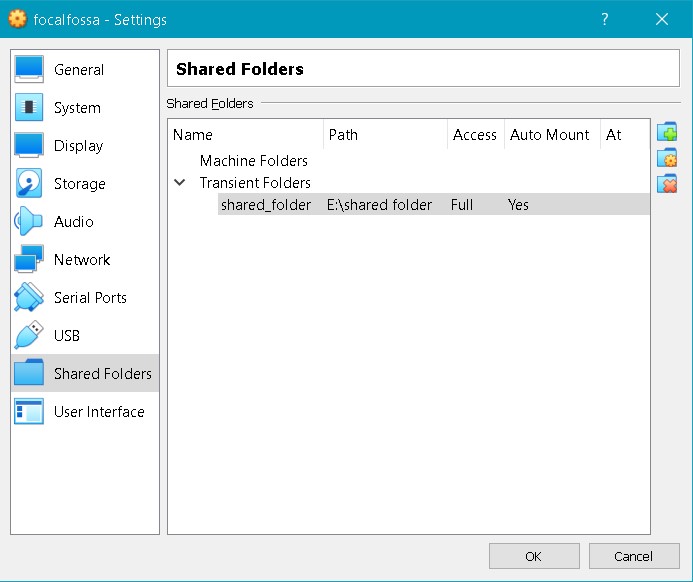
Now, click OK to close the Add Share dialog. You will now see the shared folder in the Settings window. Click OK to close the window.
4. By default, only root and members of vboxsf are allowed to access the shared folder. To assign permissions to your user account, issue the following command in the terminal, replacing with the actual username:
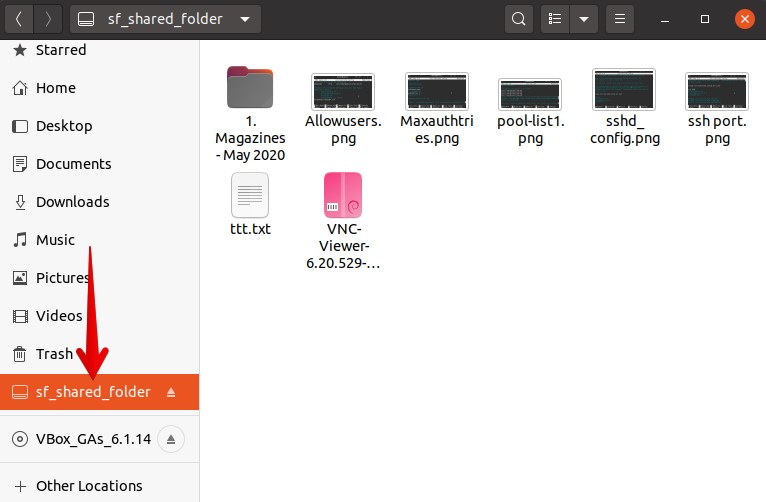
5. If you open File Manager or Explorer in your guest OS, then you will see the shared folder sf_shared_folder mounted there, where sf_shared_folder is the name of your shared folder.
The shared folder can also be accessed from the command line. Open the command line using Ctrl+Alt+T, and then navigate to /media directory using the following command in the terminal:
Here, if you run the cd command, you will see your shared folder listed under the /media directory.
Now, navigate to the shared folder using the cd command as follows:
Make sure to replace sf_shared_folder with the name of your shared folder.
In the shared folder, you can place any file you want to share with your host OS. Similarly, you can access any file shared by your host OS.
Conclusion
This article showed you how to set up folder sharing between a host system and a guest system in VirtualBox. You need to follow the above procedure for your guest machines only once. After that, the shared folder of the host will be automatically mounted in the guest OS on every boot for file sharing.

