Introduction to ESP32 WiFi
ESP32 comes with preinstalled WiFi modules which can be accessed using the WiFi.mode() function. ESP32 has three different modes in which we can use its WiFi.
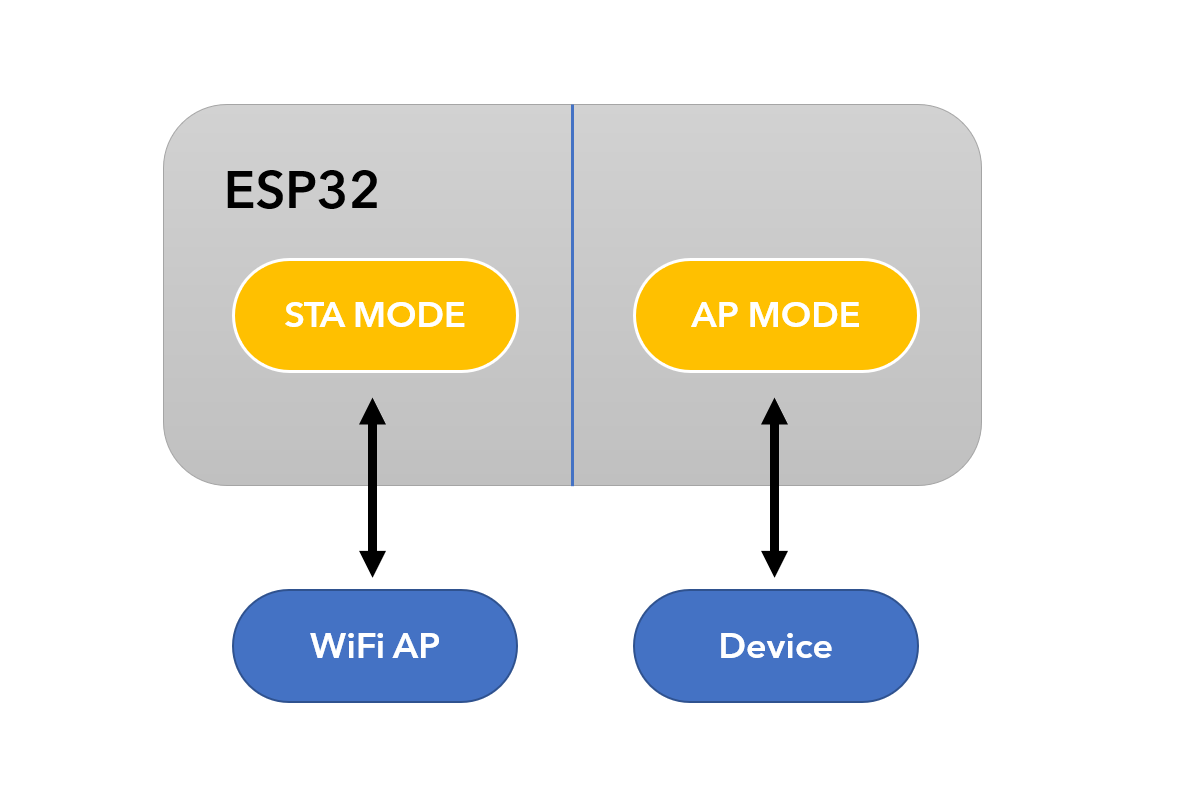
- Access Point Mode
- Station Mode
- Both Access Point and Station
The above two modes access point and station can be configured separately, or both combined. During access point mode ESP32 will broadcast its WiFi and other devices like routers, smartphones and PCs can connect to it. While during station mode we defined the SSID and password of the network to which ESP32 connects.
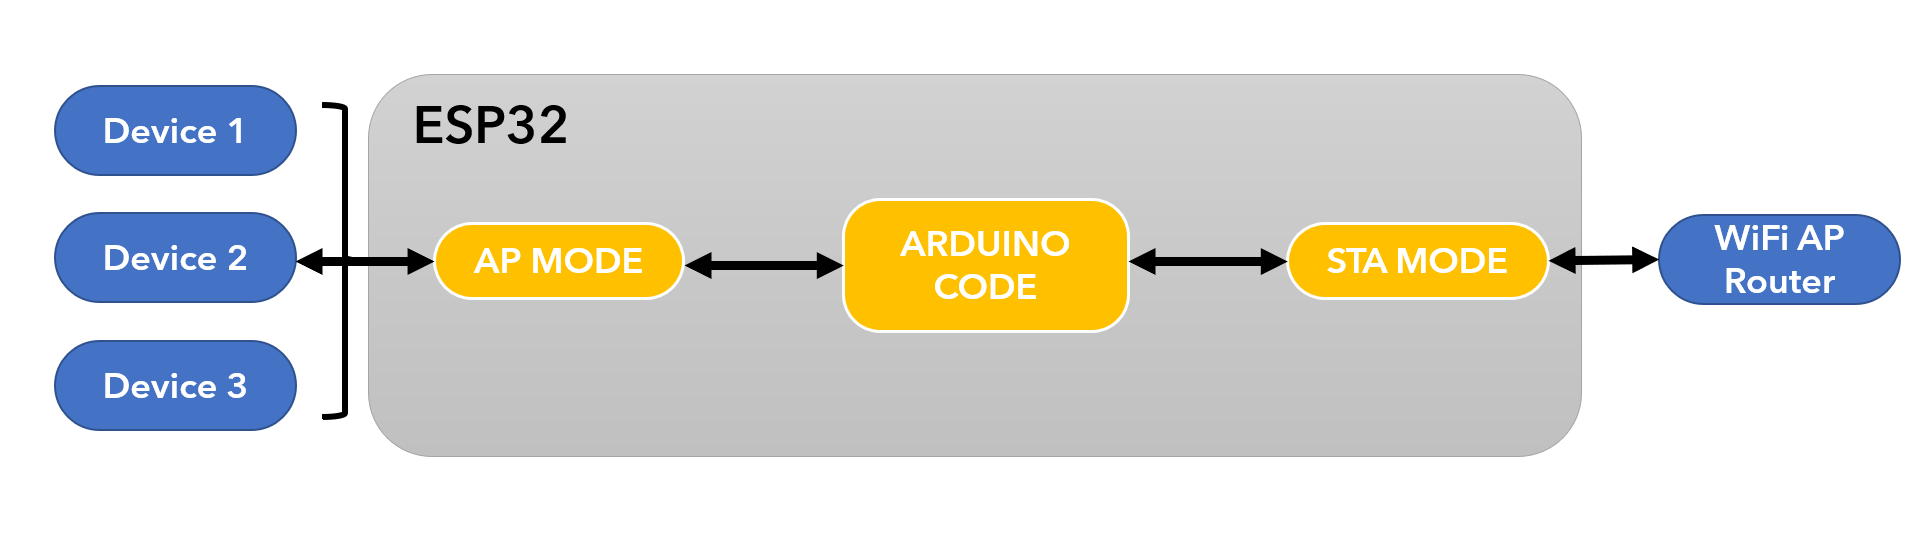
In the last mode ESP32 works dual way as an access point and station. Now we will write code on how to configure the ESP32 in both station and access point mode.
Use ESP32 Station and Access Point at the Same Time
It is possible to use ESP32 as both an Access point and as a station to connect it to the router. This mode is called WIFI_AP_STA.
ESP32 WiFi has a separate interface for each mode. And as both work separately so each interface has its own IP address.
To program ESP32 in dual mode WiFi code is very simple. We just have to use the WIFI_AP_STA function. This function allows us to connect both ESP32 with the router and also configure it as an access point.
Here is an example of ESP32 WiFi configuration in both station and AP mode.
Let’s write a code to use both modes together.
Code
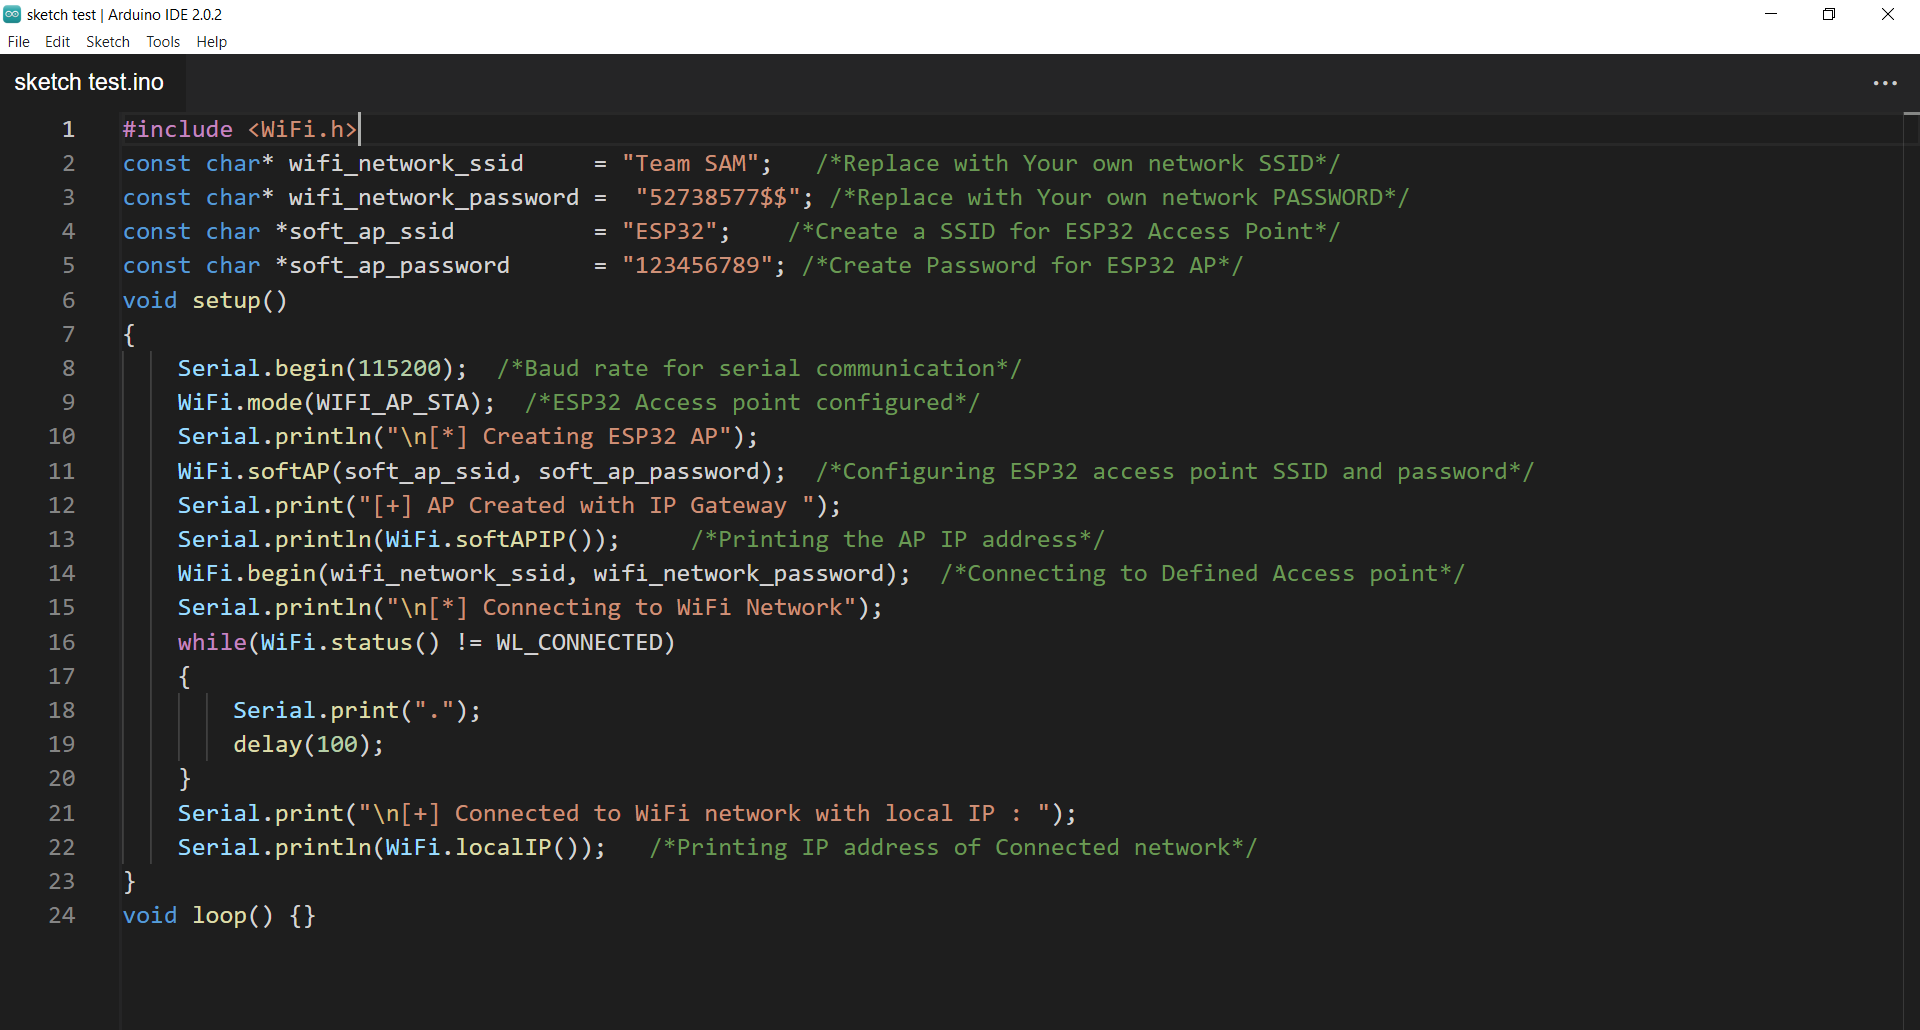
Open Arduino IDE editor. Write the code given below and upload it to the ESP32 board.
const char* wifi_network_ssid = "Team SAM"; /*Replace with Your own network SSID*/
const char* wifi_network_password = "52738577$$"; /*Replace with Your own network PASSWORD*/
const char *soft_ap_ssid = "ESP32"; /*Create a SSID for ESP32 Access Point*/
const char *soft_ap_password = "123456789"; /*Create Password for ESP32 AP*/
void setup()
{
Serial.begin(115200); /*Baud rate for serial communication*/
WiFi.mode(WIFI_AP_STA); /*ESP32 Access point configured*/
Serial.println("\n[*] Creating ESP32 AP");
WiFi.softAP(soft_ap_ssid, soft_ap_password); /*Configuring ESP32 access point SSID and password*/
Serial.print("[+] AP Created with IP Gateway ");
Serial.println(WiFi.softAPIP()); /*Printing the AP IP address*/
WiFi.begin(wifi_network_ssid, wifi_network_password); /*Connecting to Defined Access point*/
Serial.println("\n[*] Connecting to WiFi Network");
while(WiFi.status() != WL_CONNECTED)
{
Serial.print(".");
delay(100);
}
Serial.print("\n[+] Connected to WiFi network with local IP : ");
Serial.println(WiFi.localIP()); /*Printing IP address of Connected network*/
}
void loop() {}
Code started by defining the WiFi.h library is included which allows us to configure ESP32 WiFi. Next, we defined the SSID and password of the network which we want to connect.
After that ESP32 access point is created by defining the SSID and password for the AP. Using the defined credentials, we can access ESP32 WiFi.
After connecting ESP32 to a network such as a router the code will print the IP address given to it by the network using the DHCP (Dynamic host configuration protocol). Next it will print the IP address of ESP32 access point which can be used to access ESP32. Using this IP address, we can create web servers and control multiple devices.
Output
Once the code is uploaded ESP32 will connect to the Access point and will also create the access point. In the serial monitor we can see the IP address of both.

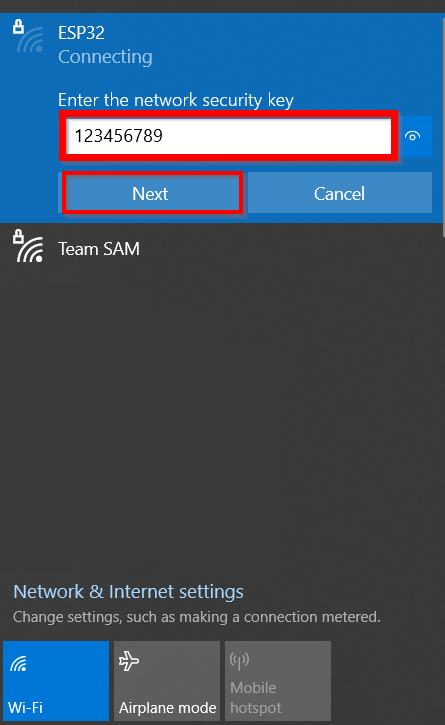
To connect the ESP32 access point open WiFi settings on the device and click Connect.
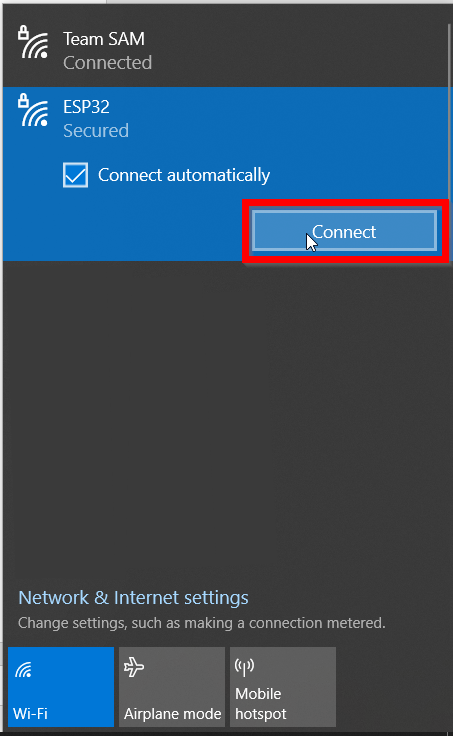
Write the password for the ESP32 access point. The one we defined inside the code.
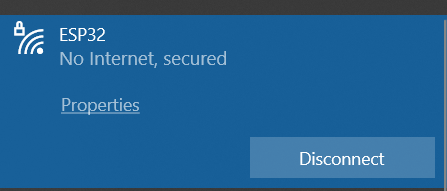
Now ESP32 WiFi is successfully connected.
Conclusion
ESP32 comes with WiFi support. Using the WiFi, we can increase the productivity of our IoT projects. Here we discussed ESP32 WiFi configuration in both modes. Using ESP32 WiFi connected in access point and station mode we can create a mesh network and interface multiple devices.