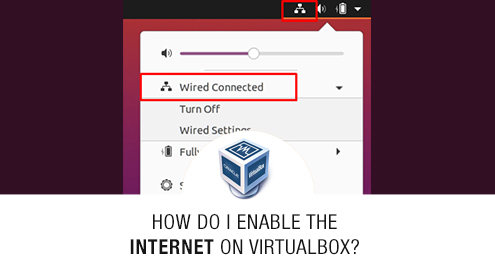
Step 1: Ensure the internet connection
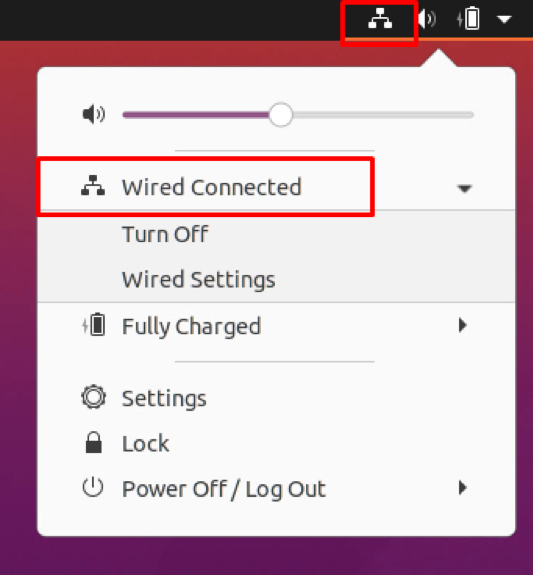
First, ensure that the wired network connection is already turned on by going to the network tab in the settings.
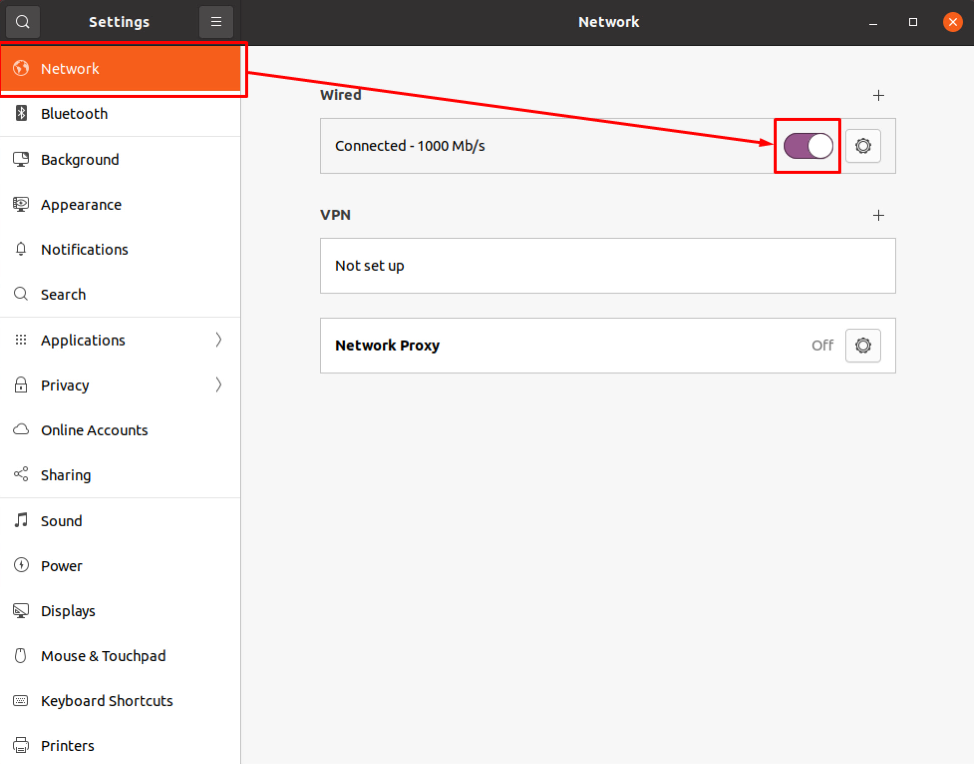
If the highlighted toggle button in the screenshot attached is OFF, then turn it ON and establish the internet connection.
Step 2: Turn OFF the Virtual Machine
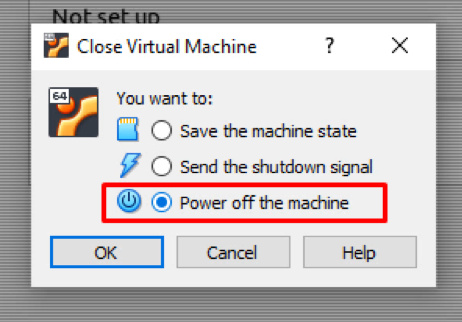
If you still do not have the internet connection established, you need to change the machine’s network adapter settings from the Virtual machine settings.
For changing the network settings and for the modifications to take effect, turn off the virtual machine.
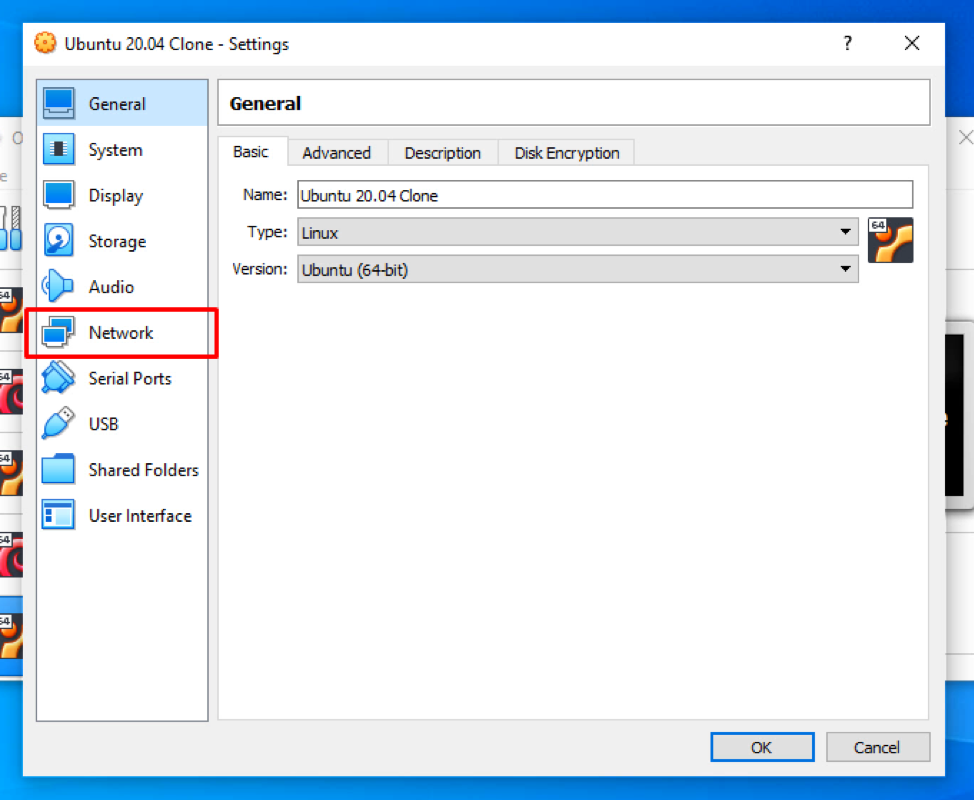
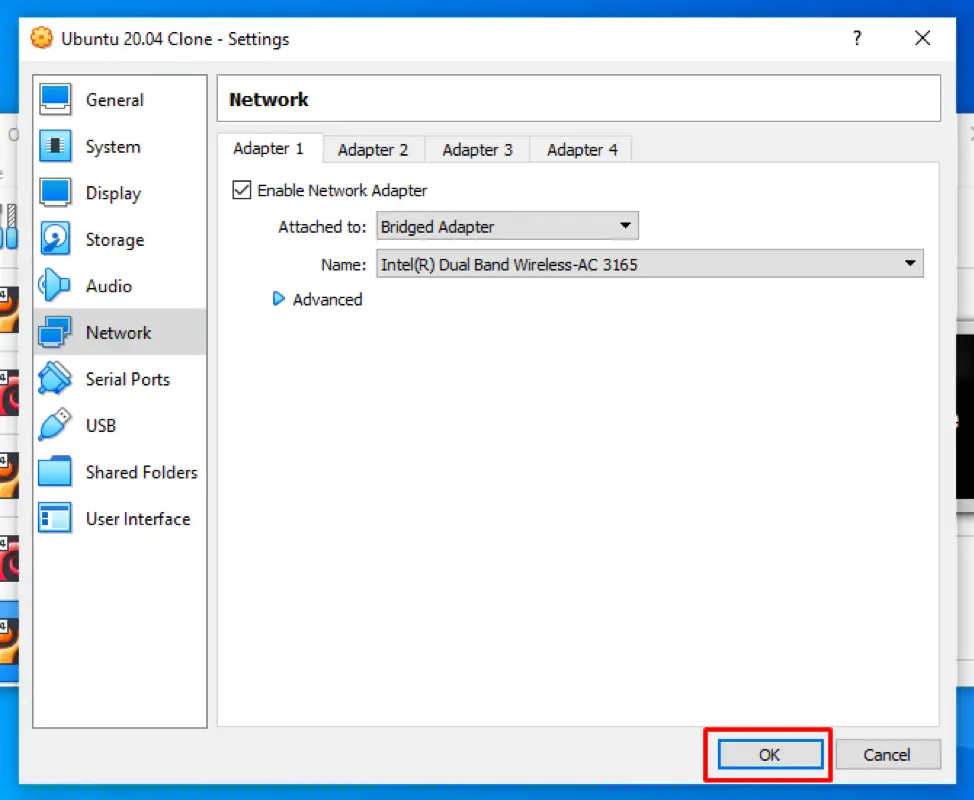
Step 3: Open network settings of Virtual Machine
After closing the Virtual Machine, open the virtual machine settings by right-clicking on the machine and selecting the settings option from the context menu.
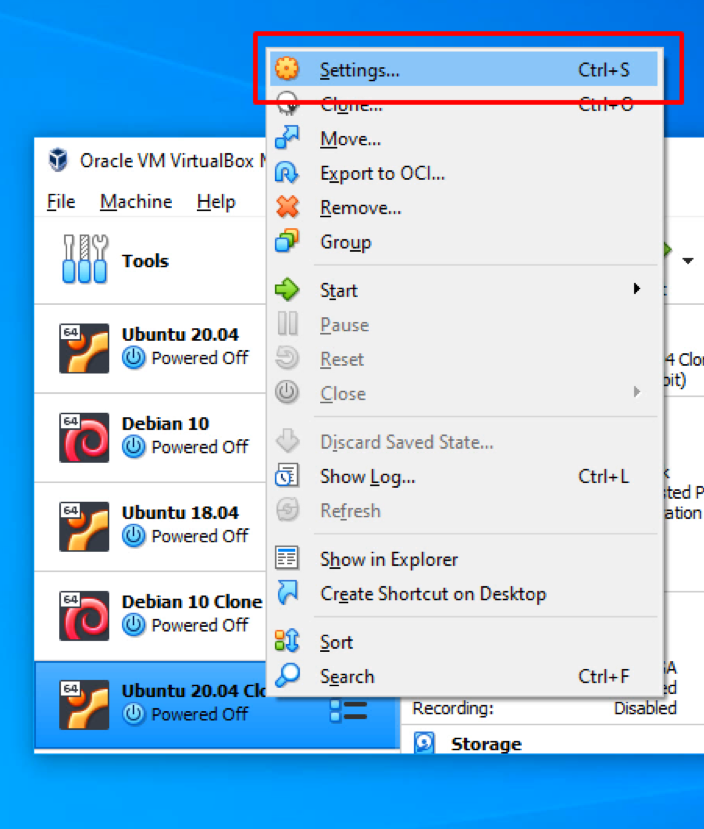
In the settings window that appeared, click on the Network tab from the left bar.
Step 4: Enable the Network Adapter
In the machine’s Network Adapter settings, click on the “Enable Network Adapter” to enable the network adapter and modify its settings.
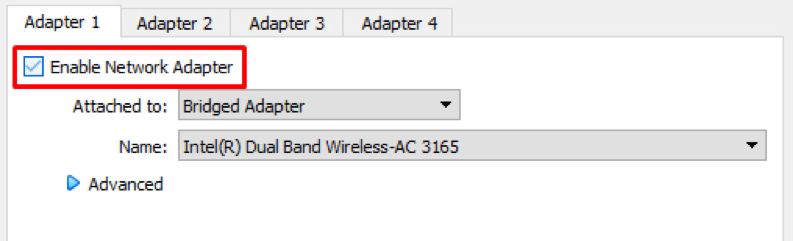
If it is unchecked, then definitely this was the reason behind the internet connection not working because there was no network adapter assigned to the Virtual machine by the VirtualBox.
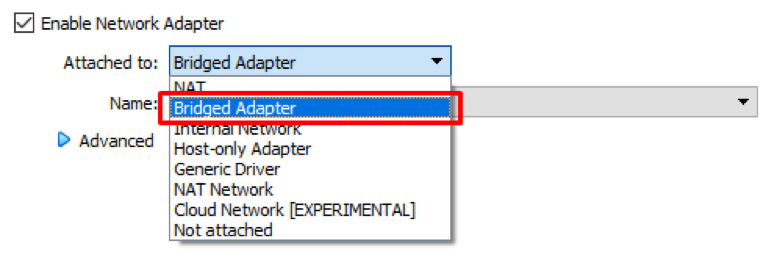
Step 5: Select the Network Device
After enabling the network adapter for the virtual machine, you can select the preferred method from the “attached to” dropdown menu to attach the virtual network adapter to your host OS network.

We will suggest selecting the Bridged Adapter because this way, the virtual machine will be connected to the network using the host OS Ethernet adapter.
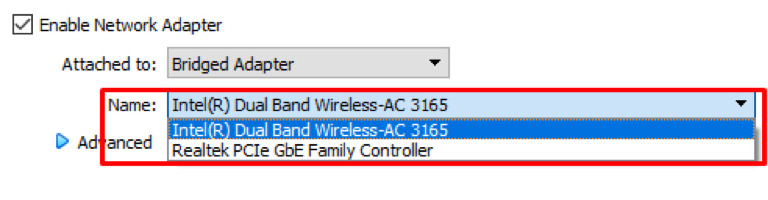
After selecting the appropriate method from the “Name” drop-down, select the right device that you want to choose.
Step 6: Save Settings and start the Virtual Machine
After configuring all the described settings, click on the OK button to save the settings.
And start the machine by double-clicking on the machine.
You will have the internet connection working perfectly fine on your virtual machine in the virtual box.
Conclusion
This post provides a step-by-step and easy-to-understand guide on how to enable the internet on VirtualBox. This post provides a step-by-step troubleshooting guide on configuring the network adapter settings of any machine in the VirtualBox. Using the method provided in this post, you can fix and enable any machine’s internet on VirtualBox.